Notes
In a business environment, you may have various programs, important appointments, and dates to remember. Due to your busy schedule, there may be a chance to forget the crucial details regarding your business programs. So, organizing all your activities in an efficient system is necessary for the smooth running of your business. The Notes module in Odoo will help you to record necessary information regarding your various business operations. It is an effective platform to create and manage notes which will help you to remember important dates and programs. You can keep notes about your business activities in this module for future programs.
You can digitally record information about future activities, new plans, appointments, important dates, and new ideas about your business in the Notes module in Odoo. By using this digital platform to record data, the Odoo ERP system will help you to reduce paper wastage. You can easily integrate with other major modules in Odoo without any difficulties. Let’s discuss all major features of the Notes module in detail in the following portions.
When we enter into the Notes module, we will be able to get the Kanban view of the already created notes in the module.

There are different default and customizable Filters and Group By options available to categorize the notes. You can add your notes in the Favorite category in this module for easy retrieval of data. You are also allowed to use the search bar to locate the data based on the content inside the note.
On the home page of the Notes module, you will get a view of different stages as default such as New, Meeting Minutes, Notes, and ToDo.

Using the Add a Column button, you can add a new stage for notes. You can add the Column Title in the given field. The + icon given on the top right side of each stage will help you to add new notes to the respective category.

By clicking on the + icon, you will get a new field under the respective category to add the Title of the note. The ‘Add’ button will save the new note and add it to the existing list. You can use the Edit button to edit the new note.
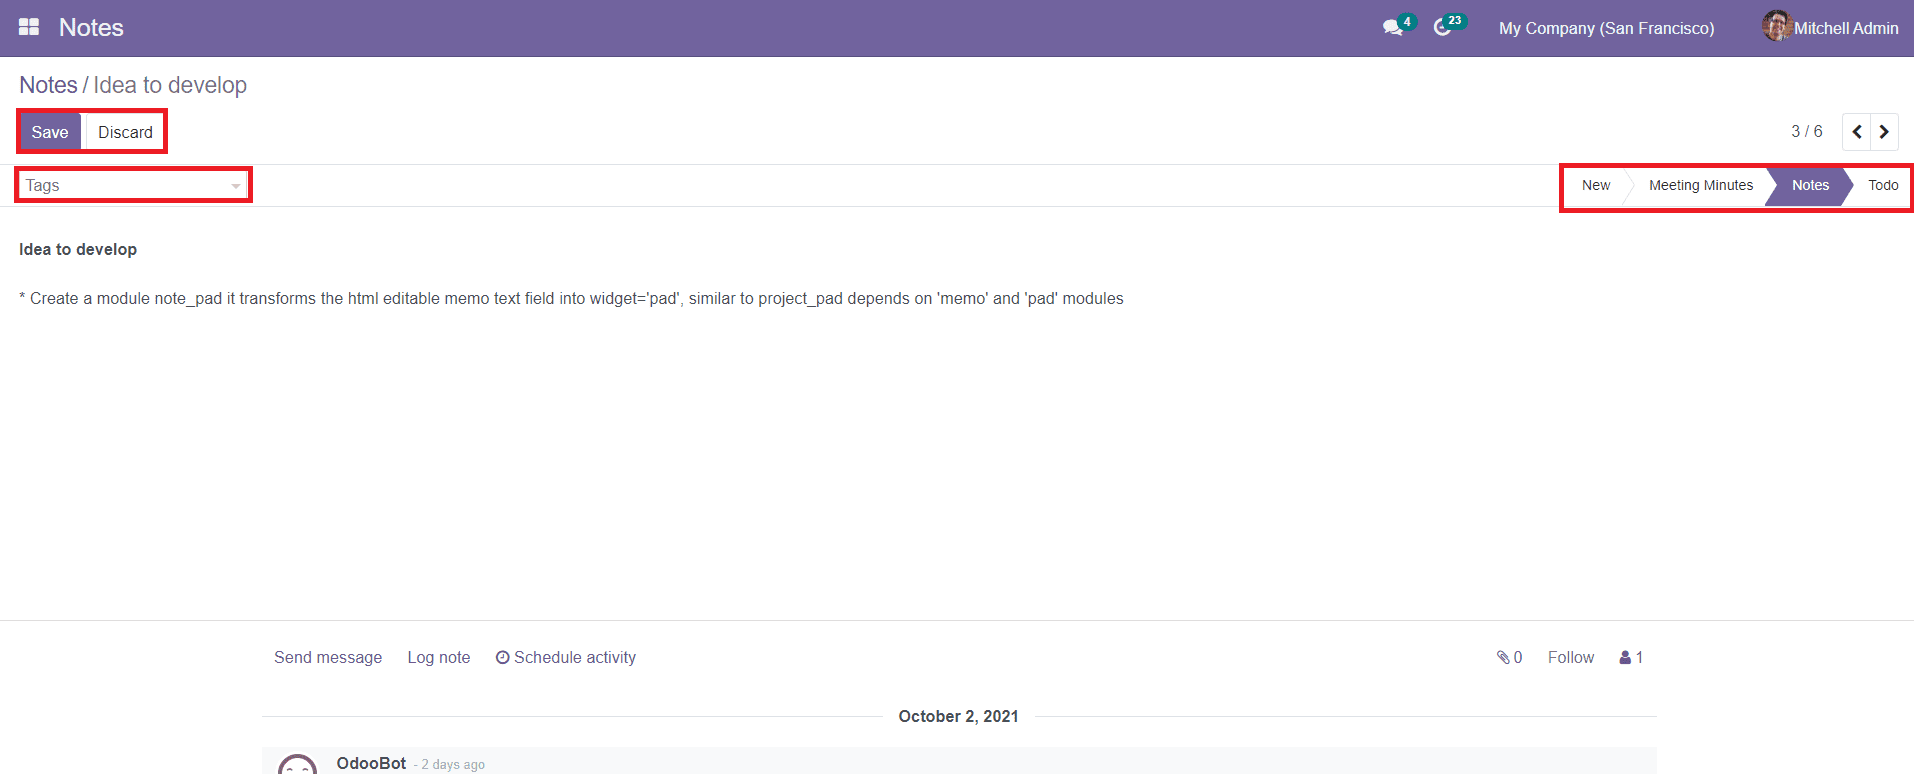
By selecting any of the notes from the home page of the module, you can edit the data inside each of the notes. You will get ‘Tags’ options to add tags to the notes. As you can see in the given screenshot, the screen will display different stages on the top right corner of the window. You can directly change the stages from this page itself as per your requirement.
You can also create a new note by clicking on the ‘Create’ button shown on the home page of the Odoo Notes module.

Like we said earlier, you can add notes, Tags, and change stages in this window. After adding the required information, you can click the ‘Save’ button.
The platform will allow you to use mainly two types of views, Kanban as well as List view. The List view of the notes can be seen as shown below.

The preview of the list will show the Note Summary, Active Status, Stage, Tags, and Next Activity.
You will be able to get three dots on the top right side of each note as shown below.

You can highlight your notes using various colors given on this platform to easily differentiate each note in the module.
The Notes module also enables you to schedule different activities from the home dashboard itself. Odoo will help you to schedule various activities like calls, emails, appointments, ToDo, reminders, and many more for each note created in this module using the clock icon given in the dashboard as shown below.

Clicking on the clock icon will direct you to a new page where you will get an option to schedule activities. The page will show different activities such as Email, Call, Meeting, To Do, Reminder, and Upload Document. Now, click the ‘Schedule Activity’ button to schedule a new program.
You have to select the corresponding note from the given pop-up window to schedule new activity for the note or else you can use the ‘Create’ button given in the window to create a new note.
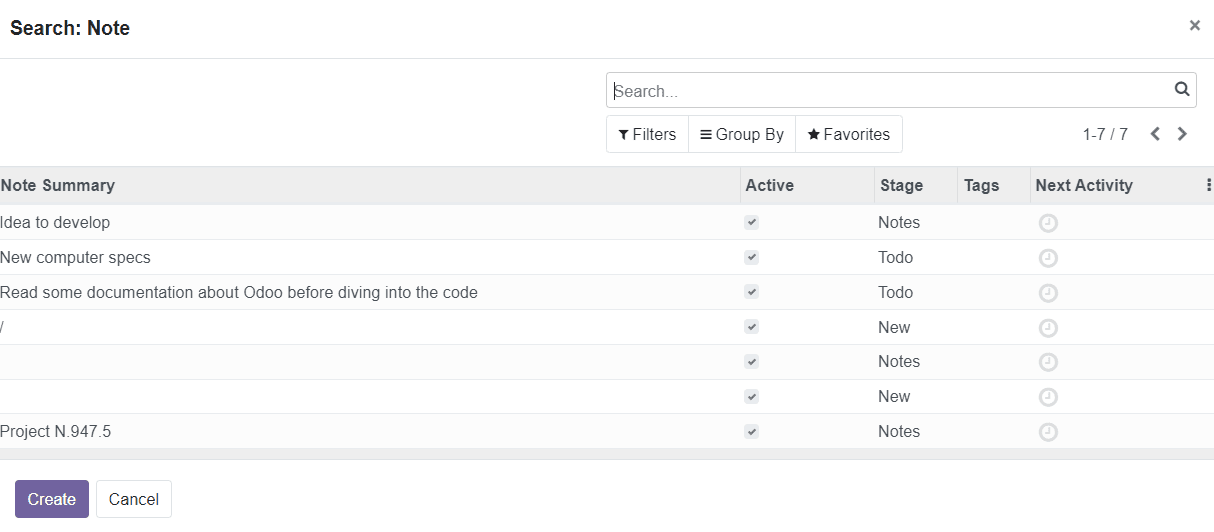
By selecting the corresponding note for scheduling activity, you will be able to get a new pop-up window as shown below.
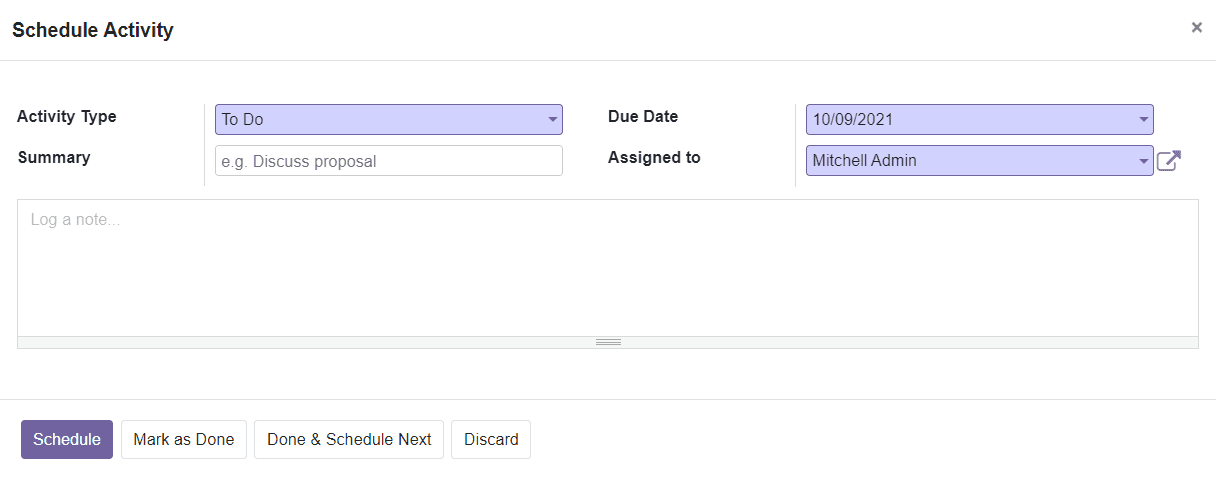
You can select the Activity type from the given drop-down menu. Add the Summary, Due Date, and Assigned to details in the given field. You will also get an additional field to add a description of the activity in the pop-up window. Finally, you can click the ‘Shedule’ button to schedule the mentioned activity.
If you want to schedule a meeting, then you will get an additional option ‘Open Calender’ to schedule a date.

Click the ‘Open Calender’ option. The Calendar view will display all scheduled meetings on the selected date. You can also manage attendees for the meeting in the calendar view.
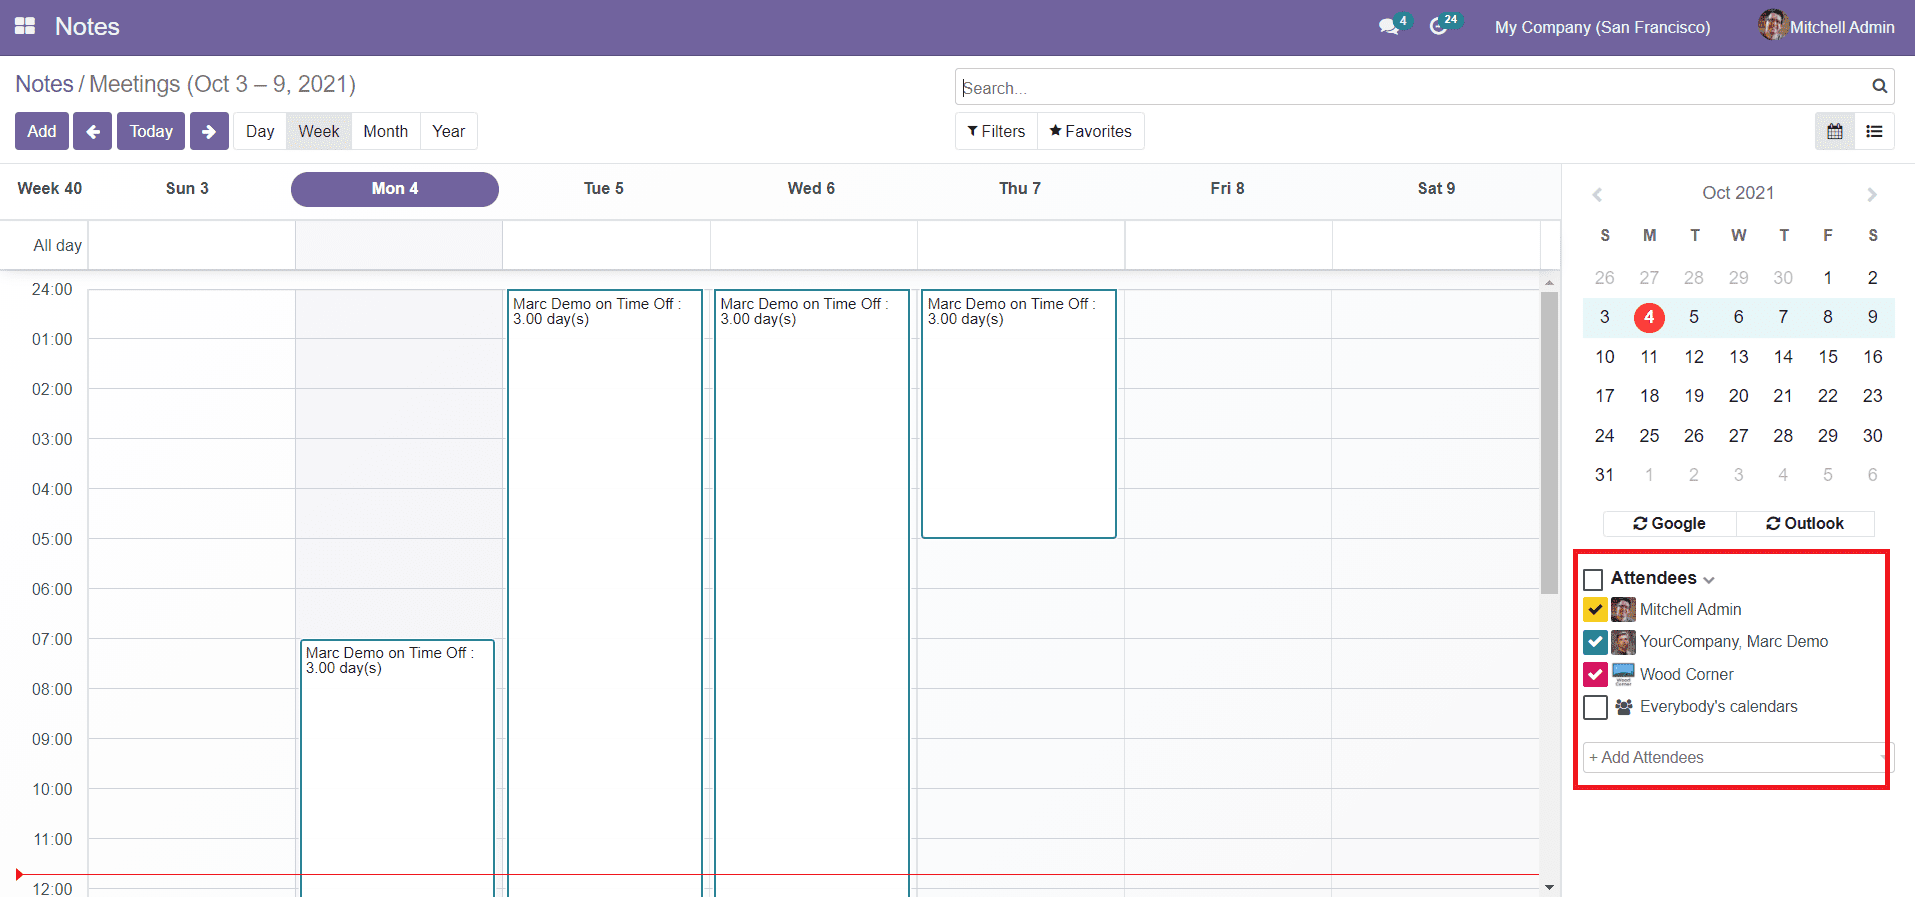
To schedule a meeting, click on the ‘Add’ button.
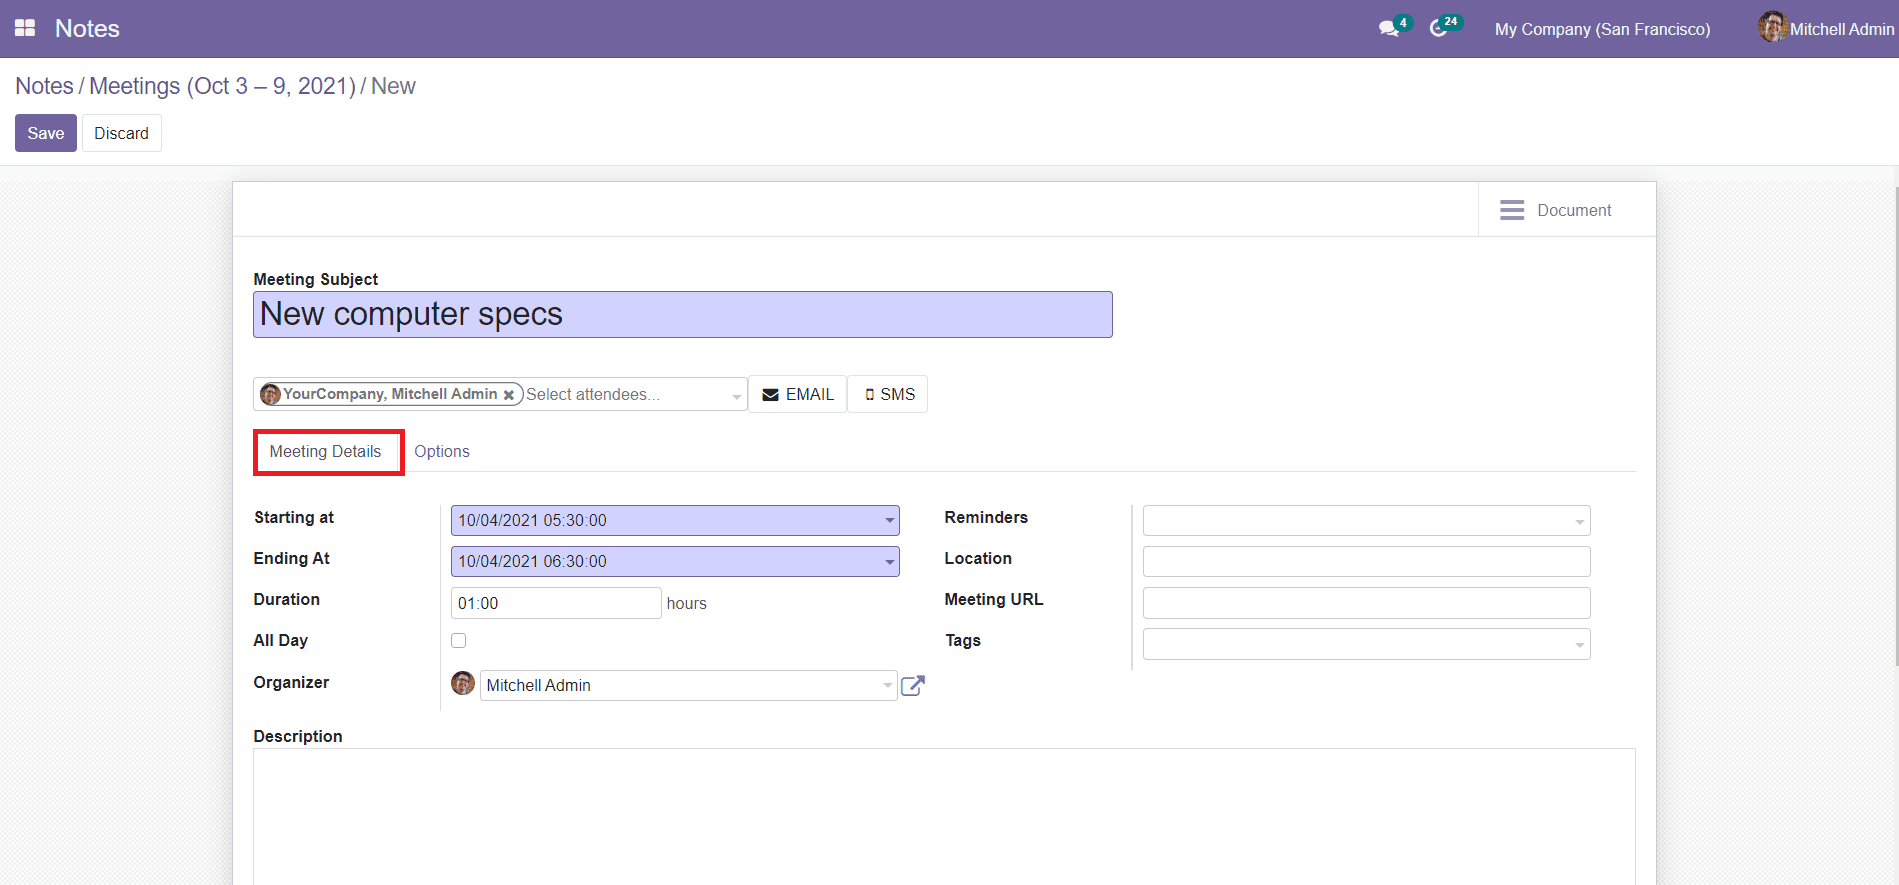
You will get a new page to add details about the meeting on the selected date. In the Meeting Details tab, you can add the Starting and Ending Date and Time, Duration, Organizer, Description, Reminders, Location, Meeting URL, and Tags. You will also get the All Day option to activate.
Under the Options menu, you can activate the Recurrent option.

You can set the Privacy as Public, Private, or Only Internal Users. In the Show as field, you can make the meeting Busy or Available as per your requirement.
Apart from the Calendar view, you can also view the meetings in the List view.

The list will show the Subject, Start Date, End Date, Attendees, Location, and Duration of the meeting. Using the ‘Create’ button, you can schedule a new meeting in the same window.
This is the overview of the Notes module in the Odoo 15 community edition. The simple but effective Notes module in Odoo will manage all your important notes and help you to create new notes in easy steps.