Mailing Lists
In the Odoo Email Marketing module, you can send mail to an individual or a group of people. In case you want to send the marketing mail to a group, you can create a mailing list in the Email Marketing module. You can configure the email address of the respective group under the Mailing List menu. You can create separate mailing lists for various events, promotions, and company advertisements easily from this menu.

The Mailing List option can be seen in the main menu bar of the Email Marketing module. This window will show all configured mailing lists for various purposes in the module. The Kanban view of this platform will show the number of contacts under each list in the preview. To get the contacts under a mailing list, you can click on the respective one.

The smart buttons on the screen will help you to get the details of the Recipients, Mailings to these contacts, rate of Bounce, Opt-Out, and Blacklist.
Using the ‘Create’ button, you can effortlessly configure a new mailing list in the module. By clicking on the Create button from the Kanban view, you will be able to get a pop-up window to mention the title of the mailing list.

You can make this list Public by activating the respective field. By doing so, the mailing list can be accessed by the recipient on the unsubscription page to allow him to update his subscription preferences. You can create contacts for the mailing list in the Mailing List Contacts option.
Mailing List Contacts
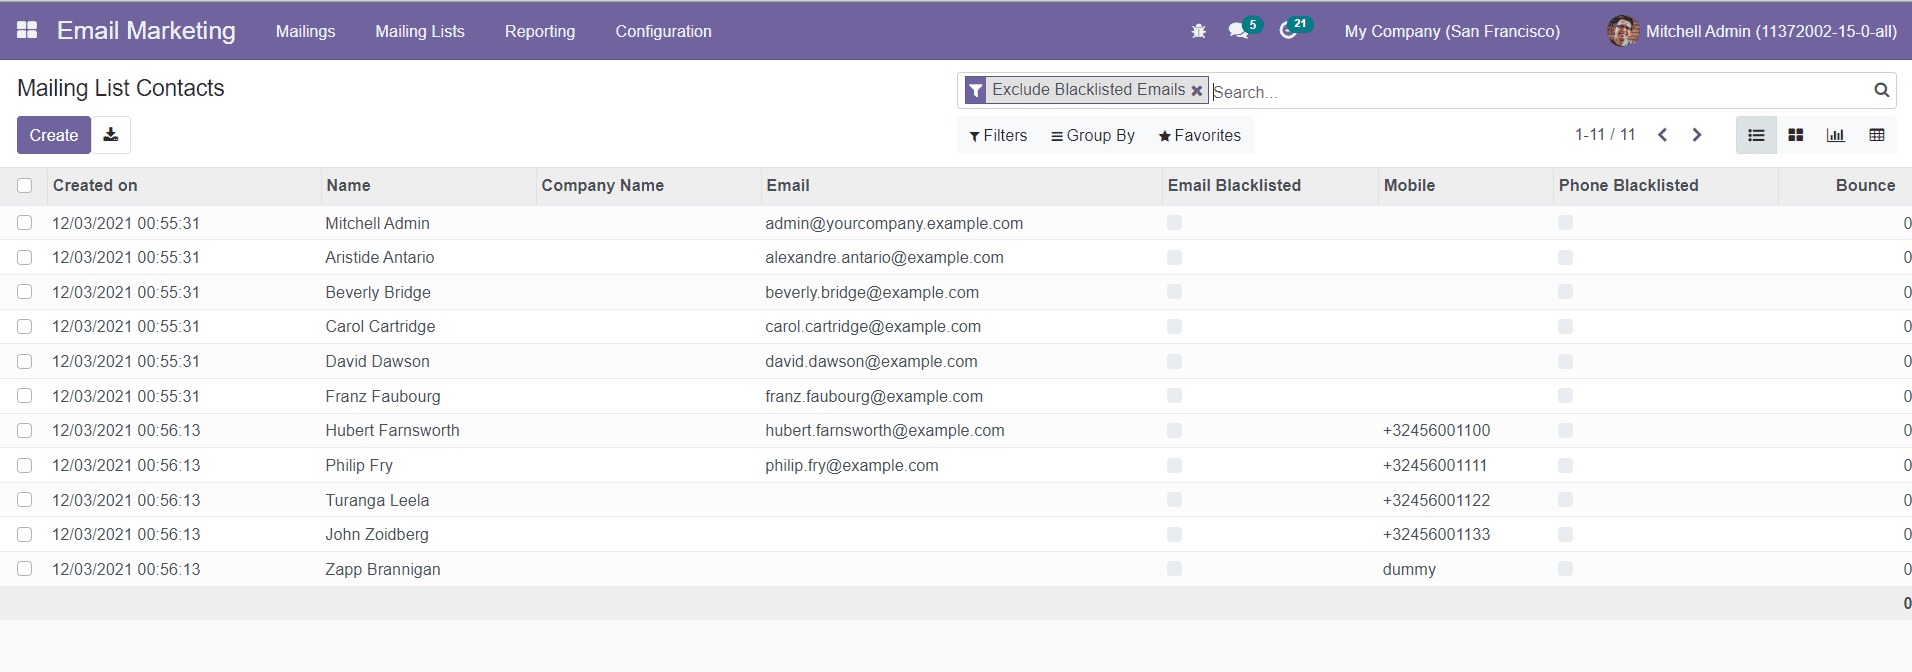
The Mailing List Contacts option in the Odoo Email Marketing module will help you to create contacts for the mailing list. When you open this menu, you will get the list of already configured contact lists for mailing.

The window can be altered into Kanban, Graphical, and Pivot views at your convenience. The preview of the list will show the Created Date, Name, Company Name, Email, Mobile, and the number of Bounced emails for this contact. The screen will also show whether the Email Blacklisted and Phone Blacklisted are activated or not. If the email address is on the blacklist, the contact won’t receive mass mailing anymore, from any list. Similarly, if the given phone number is on the blacklist, the contact won’t receive mass mailing SMS anymore, from any list.
Now, click on the ‘Create’ button to create a new contact.

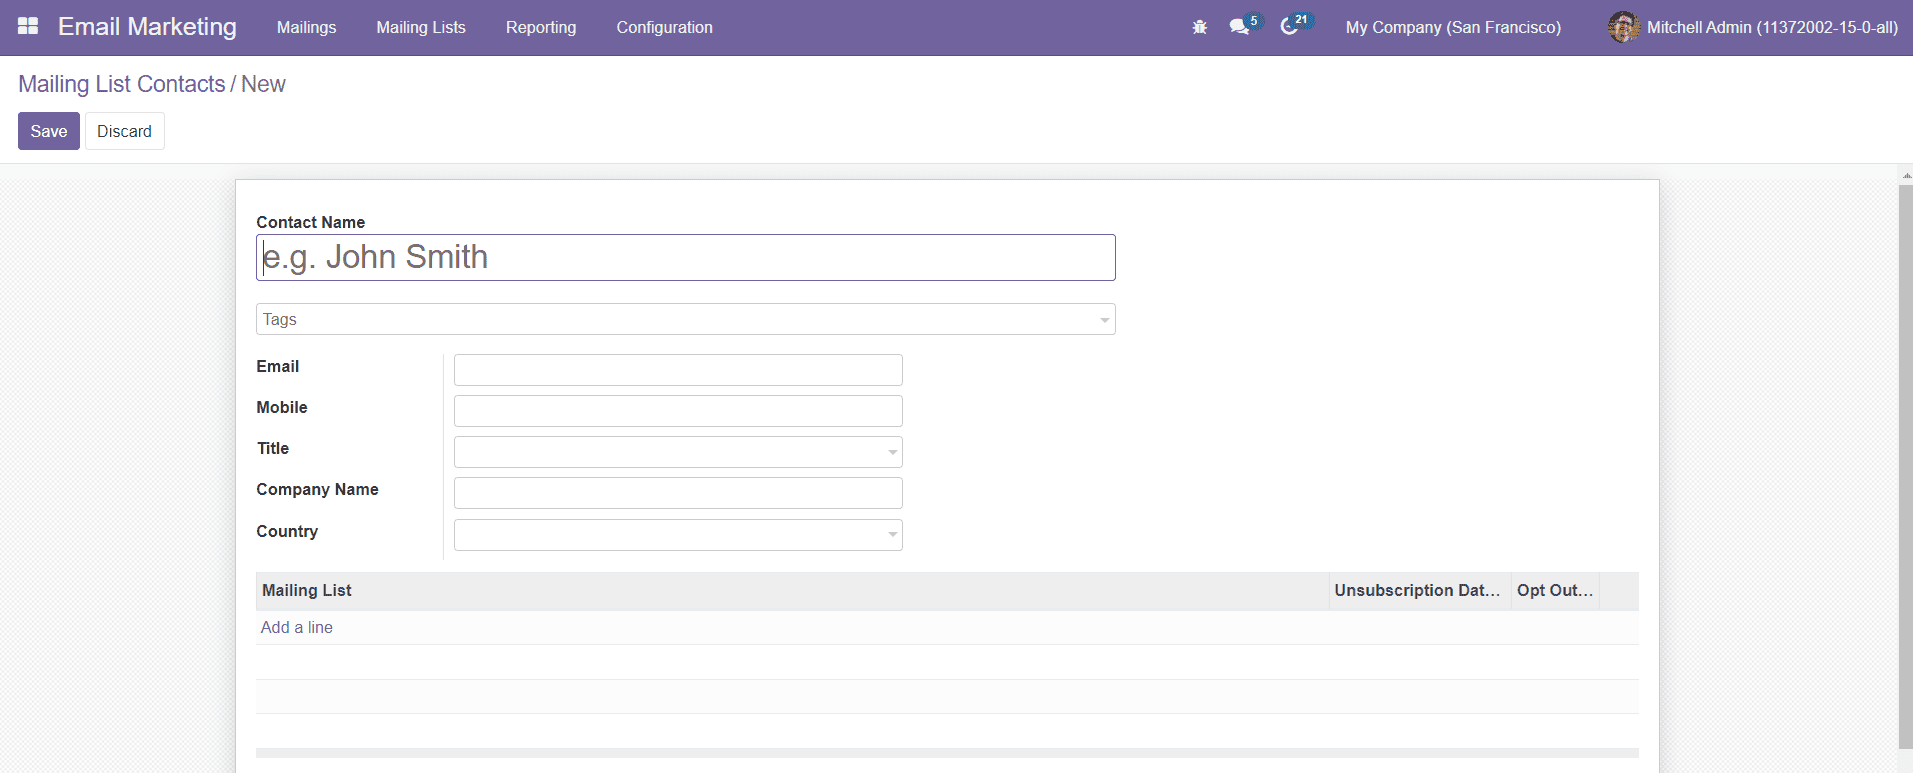
In the new contact creation window, you can mention the Contact Name, Tags, Email, Mobile, Title, Company Name, and Country. Using the ‘Add a Line’ option, you can add already configured Mailing Lists for this contact. By selecting a mailing list for the contact, the contact will automatically be added to that particular mailing list. You can see the Opt-Out option to activate on the screen. By activating this option, the contact has chosen not to receive emails anymore from this list. Finally, click the ‘Save’ Button to save the contact.