Courses
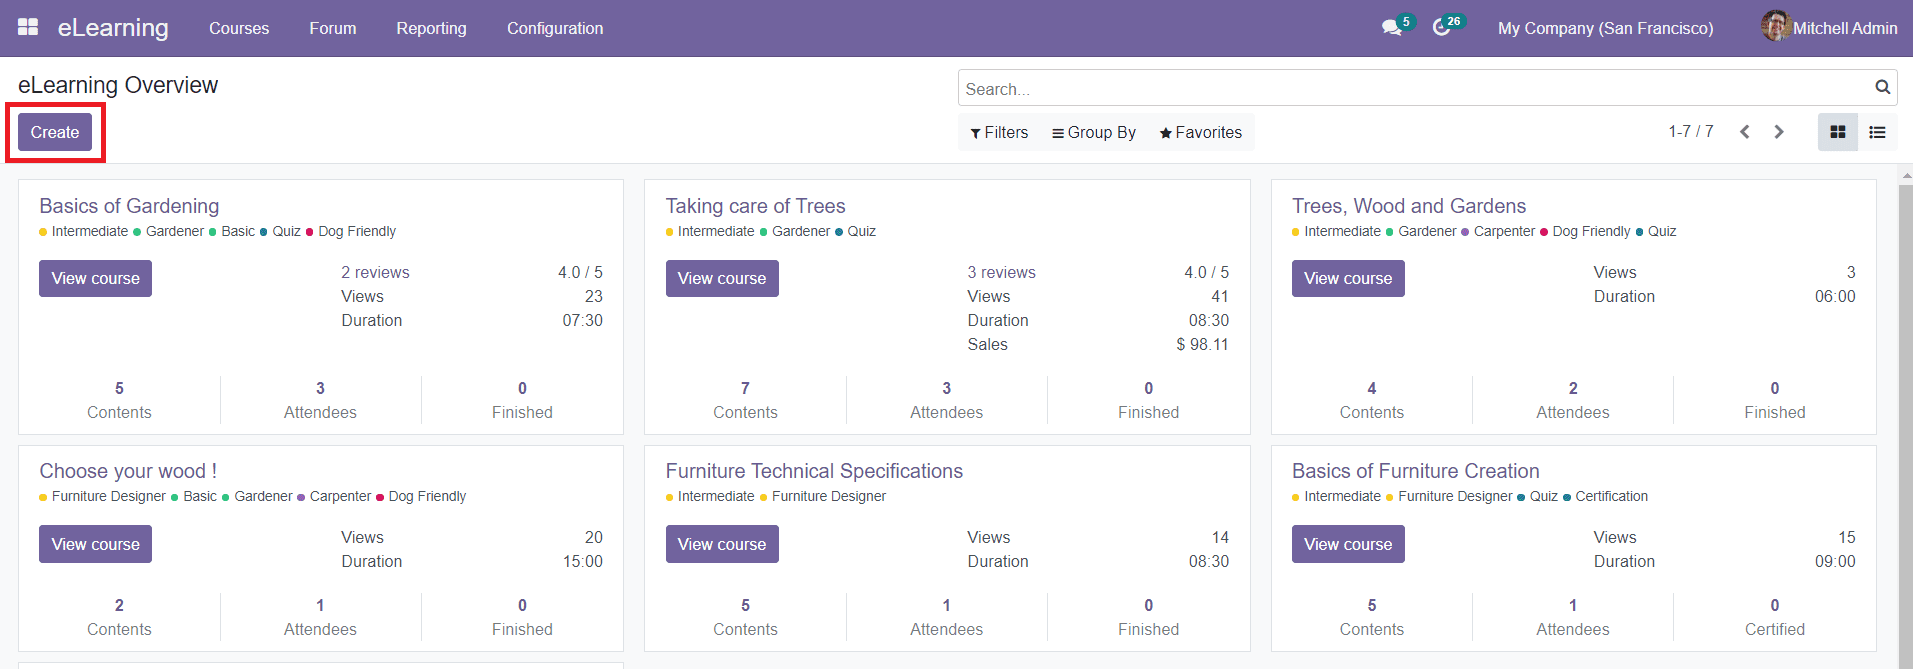
The Odoo eLearning module has enabled an easy platform to create new courses in simple steps. You will be able to find the ‘Create’ icon on the main dashboard of the eLearning Overview as given below.

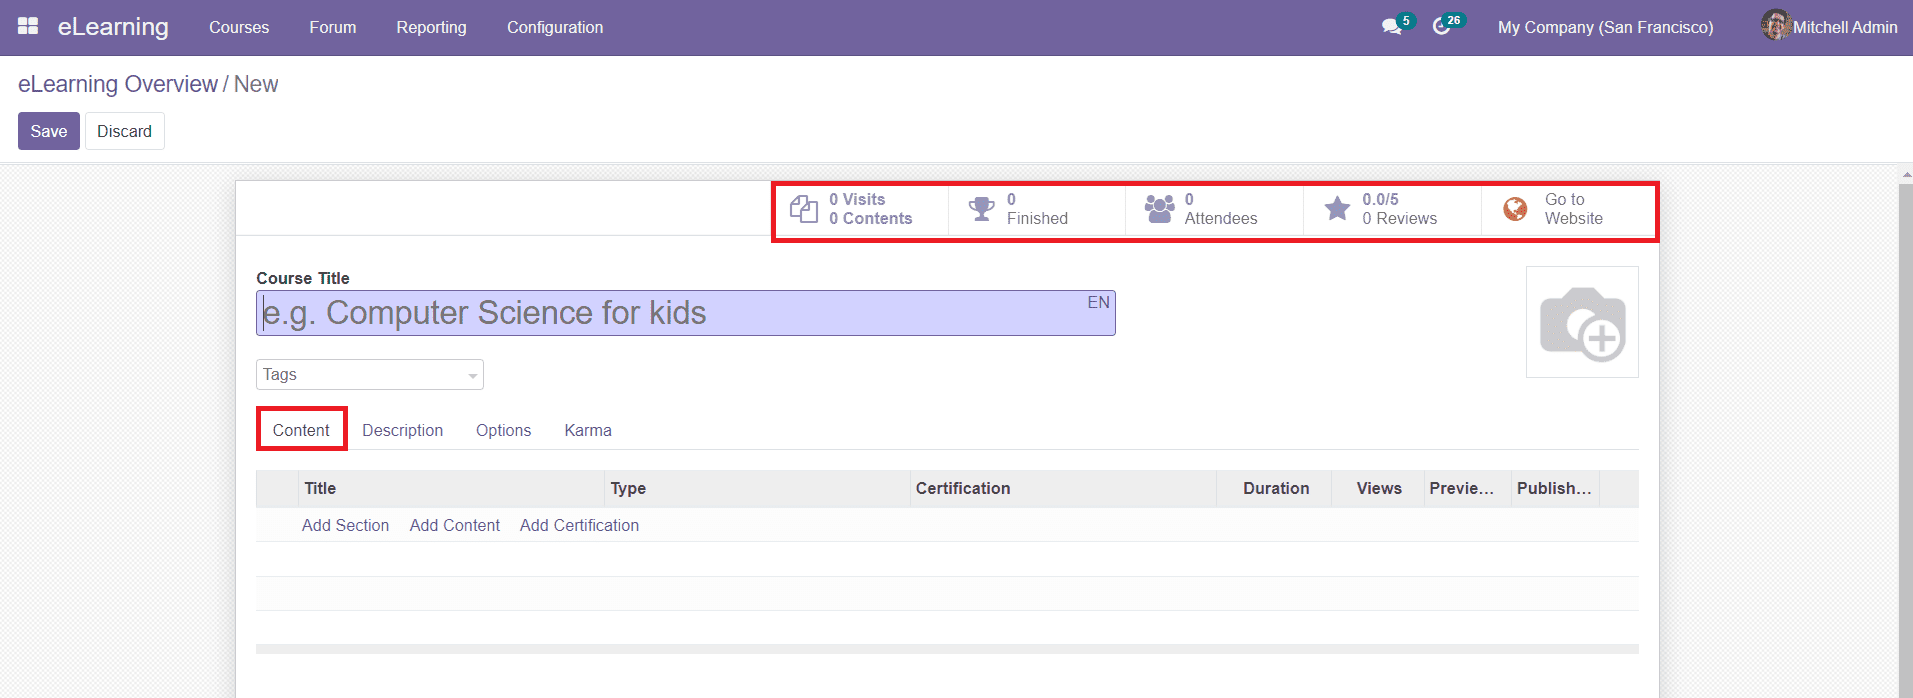
By clicking the ‘Create’ button you will be directed to a new window where you can give details about the new course. The window will show many advanced options such as Visits, Contents, Finished, Attendees, Reviews, and Go To Website as shown in the screenshot below.

To create a new course, first, you need to mention the Course Title in the specified field. You can add tags related to this particular course in the Tags field. You can also add a suitable image for the course in the window. In the Content tab, you are allowed to add Section, Content, and Certification for the course. We will discuss how to create new content and certification in the eLearning module in the coming sessions.
In the Description tab, you can add details and descriptions about the respective course.

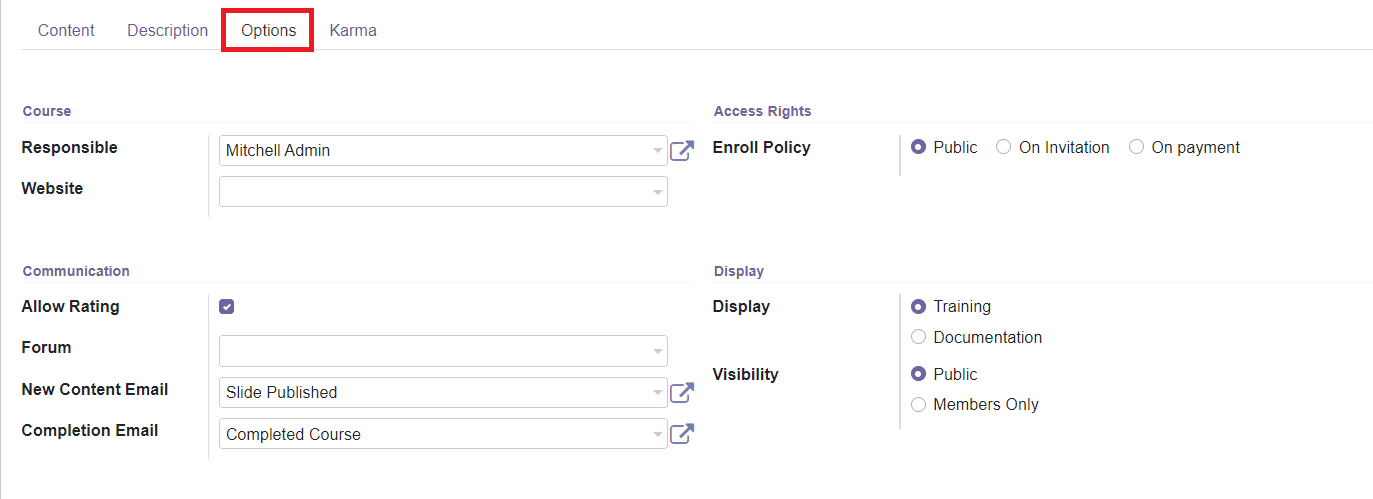
The Options tab includes various fields to define such as the Course, Communication, Access Right, and Display as shown below.

In the Course field, you can assign a person in the Responsible section who has the responsibilities of this particular course. You can mention the Website in the given field where you want to publish this course. In the Access Right field, you can set the Enroll Policy as Public, On Invitation, or On Payment.
In the Communication field, you can activate the Allow Rating field, which will enable the course members to review and rate the course. In the following fields, you can mention the Forum, New Content Email, and Completion Email. You can add a forum for this course to conduct discussions and post questions related to the course. If participants have any doubts regarding the course, they can post their doubts on the specified forum so other participants can answer if they know the answer. By specifying New Content Email, Odoo will email attendees once new content is published. Similarly, by defining the Completion Email, Odoo will email the attendees once they have finished the course. Under the Display field, you can set the Display as Training or Documentation. You are also allowed to set the Visibility of the course as Public or Members Only as per your demand.
In the Karma tab, you can define various Karma Points for the members of your course to encourage them to actively participate throughout the various stages of the course. The students will get Karma Points as a reward by doing the specified activities in the course such as asking questions, adding comments, rating content, and many more.

You can set the Rewards in the Review Course and Finish Course fields. In the Access Rights field, you can mention the Karma needed to add a review to the course in the Add Review option. The Add Comment and Vote fields can be used to define the Karma points needed to add a comment and like/dislike on a slide of the course respectively.
After adding all information required for the course, you can use the ‘Save’ button given in the window to save the new course in the eLearning module.
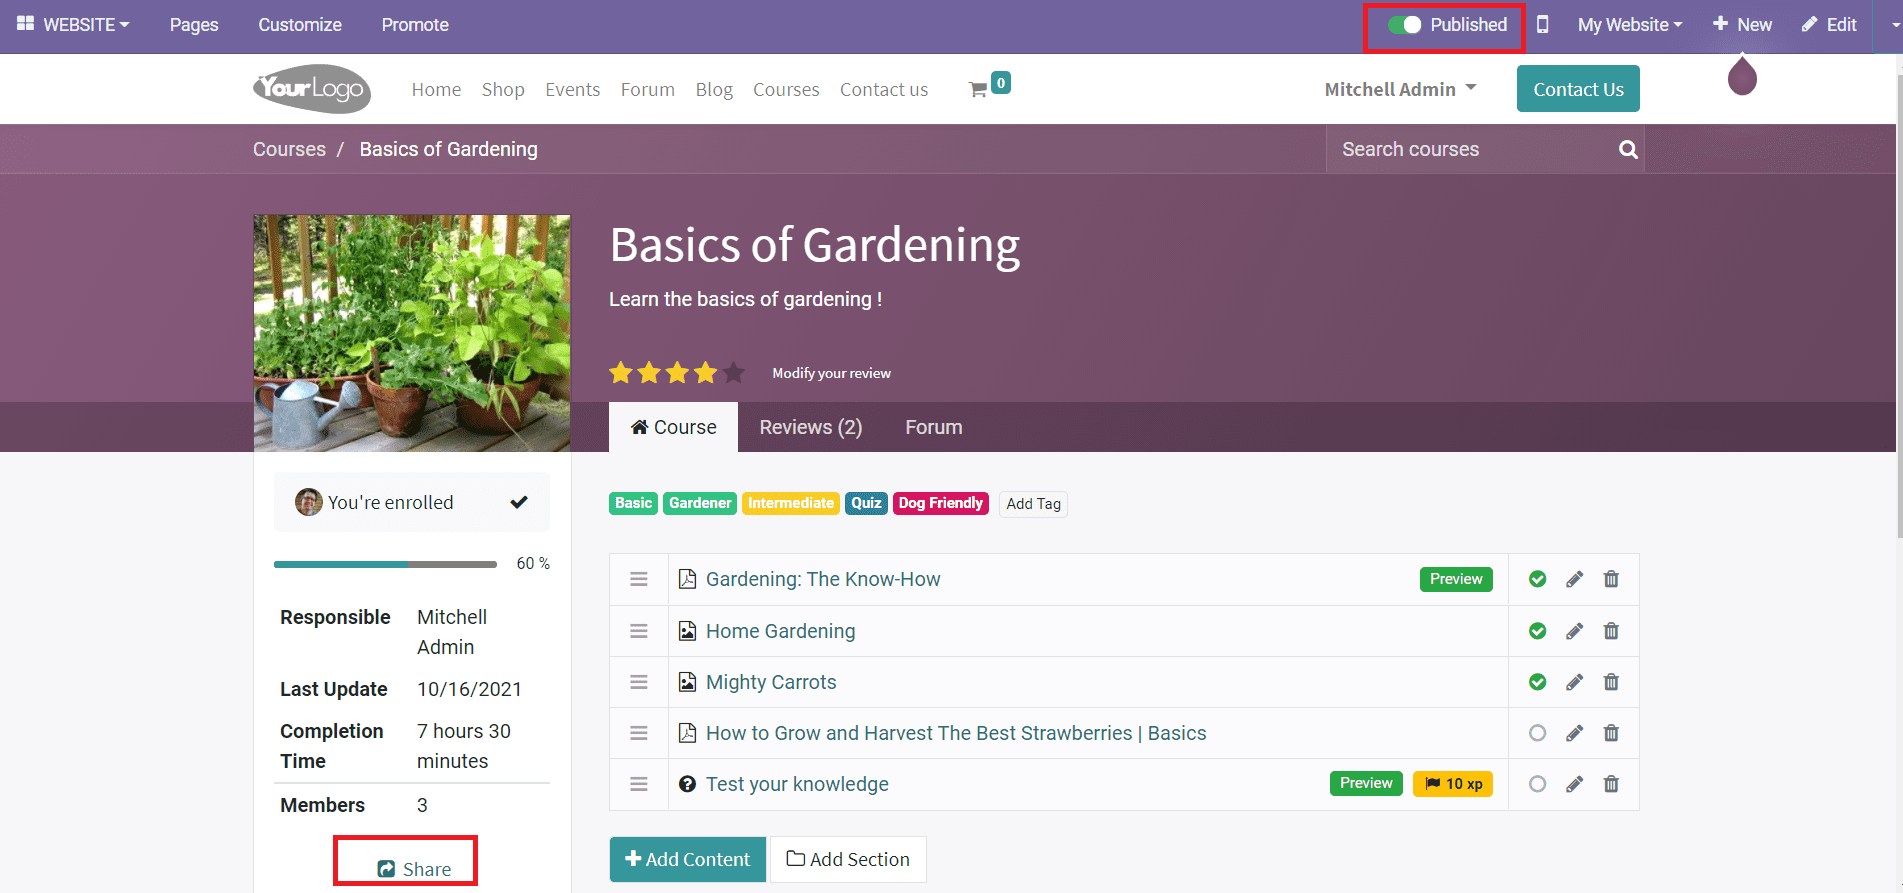
The Go To Website on the top right corner of the course description window will direct you to your website where you can publish your course by changing the status from ‘Unpublished’ to ‘Published’ as shown below.

The Share option given in this window can be used to share the course link on social networks. You will get the options to ‘Add Content’ and ‘Add Section’ on the Website view also.
Now, let’s look at the categorization of courses into different groups in the eLearning module.