Live Chat
The Odoo Live Chat module is designed to communicate directly with the customers who visit your website. Having a direct communication system will improve and strengthen the relationship between the company and customers. With the help of the Live Chat module, you can easily get new leads that can be later converted to opportunities. When a customer visits your website, a dialogue box or chat box will display on the bottom of your web page which will help the sales team of your company to initiate a conversation with the visitor. Using the Live Chat module, you can clarify the queries of customers and provide real-time support to them.
In this chapter, we will detail the Live Chat module in Odoo 15.
The main dashboard of the Live Chat module can be seen as shown in the image below.

This window will show all already created live chat channels in the module. You can create a new live chat channel from this window by clicking on the Create button. A new window will be displayed as shown below.
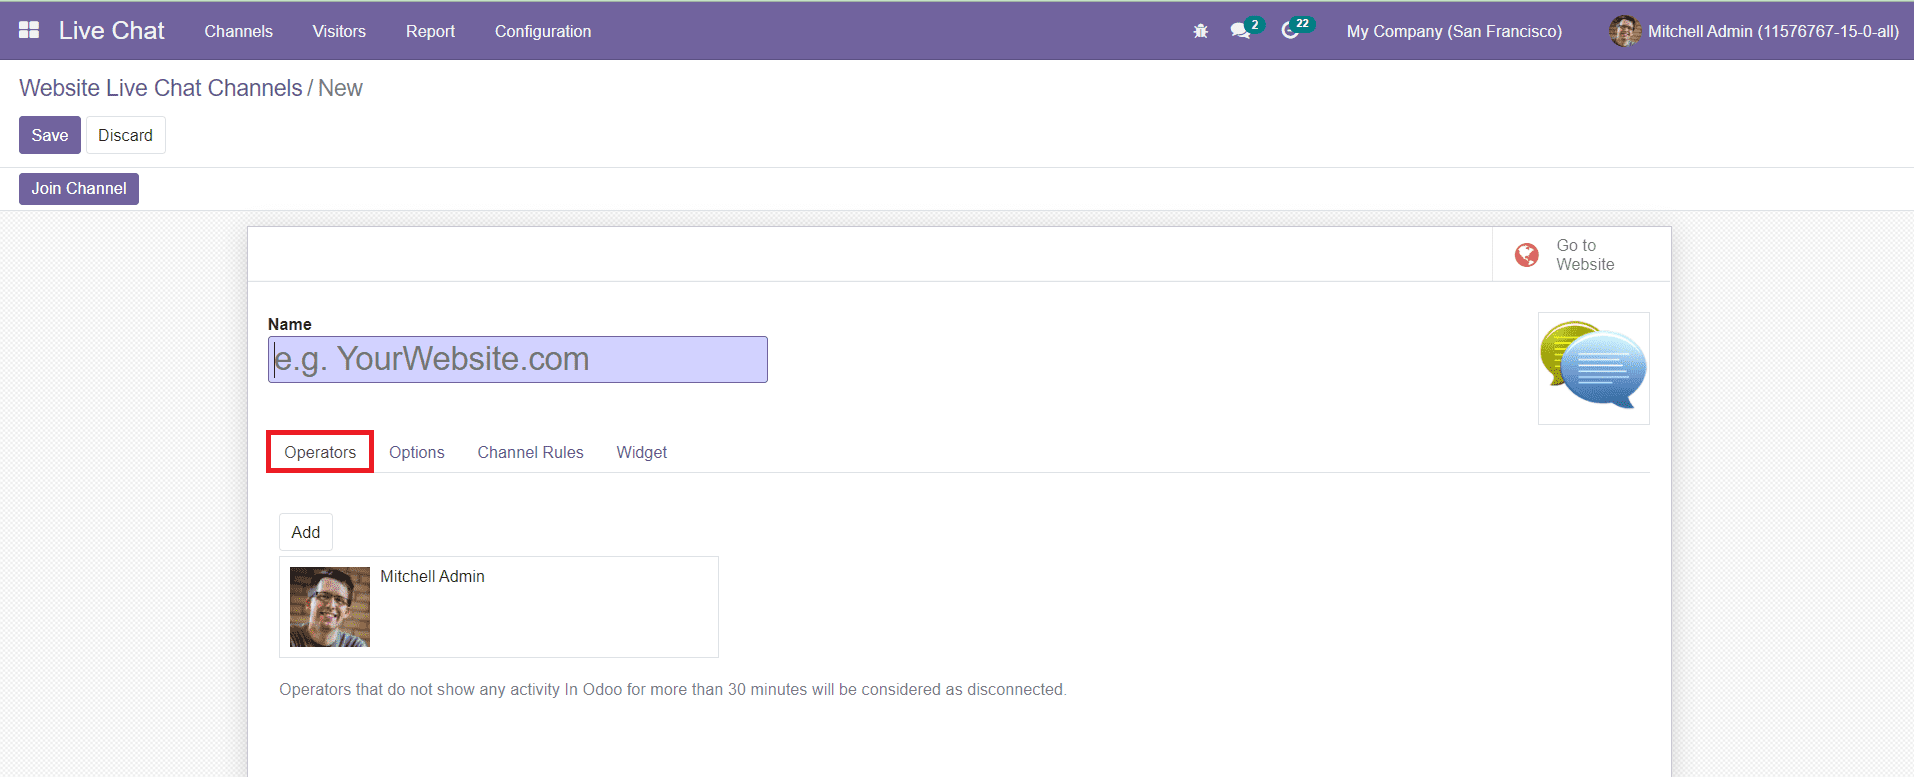
Mention the Name of the live chat channel in the given field. Now, you can add Operators to this live chat channel under the Operators tab. A pop-up window will appear to select an operator for the channel from the given list.
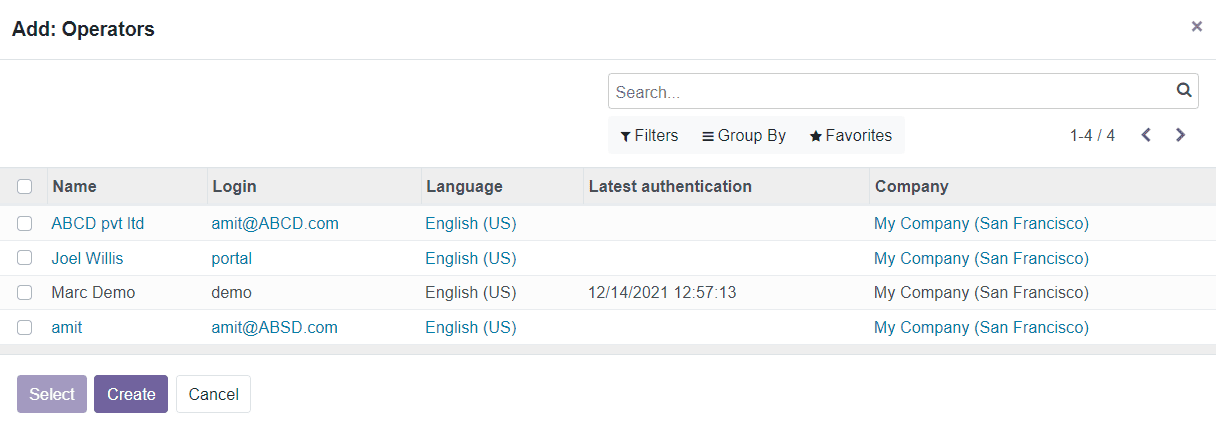
You are allowed to select one operator from this list or else you can click on the Create option to create a new operator.
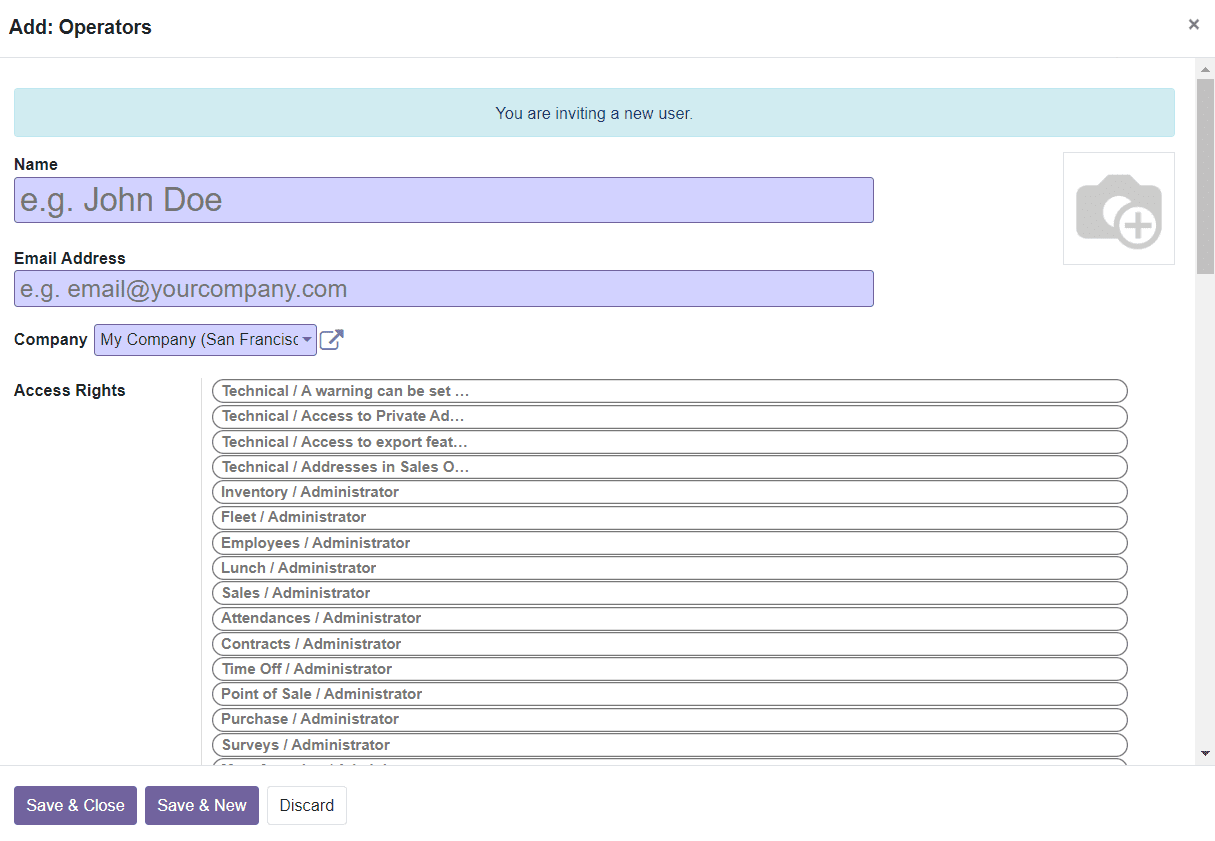
You will get a new window as shown above where you can mention the Name, Email Address, Company, various Access Rights, Phone, Mobile, and Default Warehouse of the new operator. Click the Save & Close button to save the new operator.
Now, under the Options tab in the new live chat channel creation window, you can set options to design Livechat Button and Livechat Window.

In the Text of the Button field, you can set default text which will be displayed on the live chat support button. You can use the LiveChat Button Color option to set the default background color of the live chat button. The Welcome Message field can be used to set an automated welcome message that your visitor will see when they initiate a new conversation. In the Chat Input Placeholder field, you can specify the text that prompts the user to initiate the chat. The default background color of the channel header can be defined in the Channel Header Color field.
You can define various rules for the live chat under the Channel Rules tab. By defining channel rules, you can restrict the chat to selected countries only. If the sales team of your company is not familiar with the language of the website visitor, the chat box can be kept hidden for the visitor from that particular country.

Using the Add a Line option, you can apply an action for the specified URL and per country.

The Action can be set as Display the Button, Auto popup, or Hide the Button.
Display the Button: Displays the chat button on the pages.
Auto Popup: Displays the button and automatically opens the conversation panel.
Hide the Button: Hide the chat button on the pages.
The URL Regex can be used to mention regular expressions specifying the web pages this rule will be applied to. In the Country field, you can specify the countries where the rules will be applied. To identify the country of the visitor, GeoIP must be installed on your server. Otherwise, the countries of the rule will not be taken into account. After completing all fields, you can save the new live chat channel by clicking on the Save button.
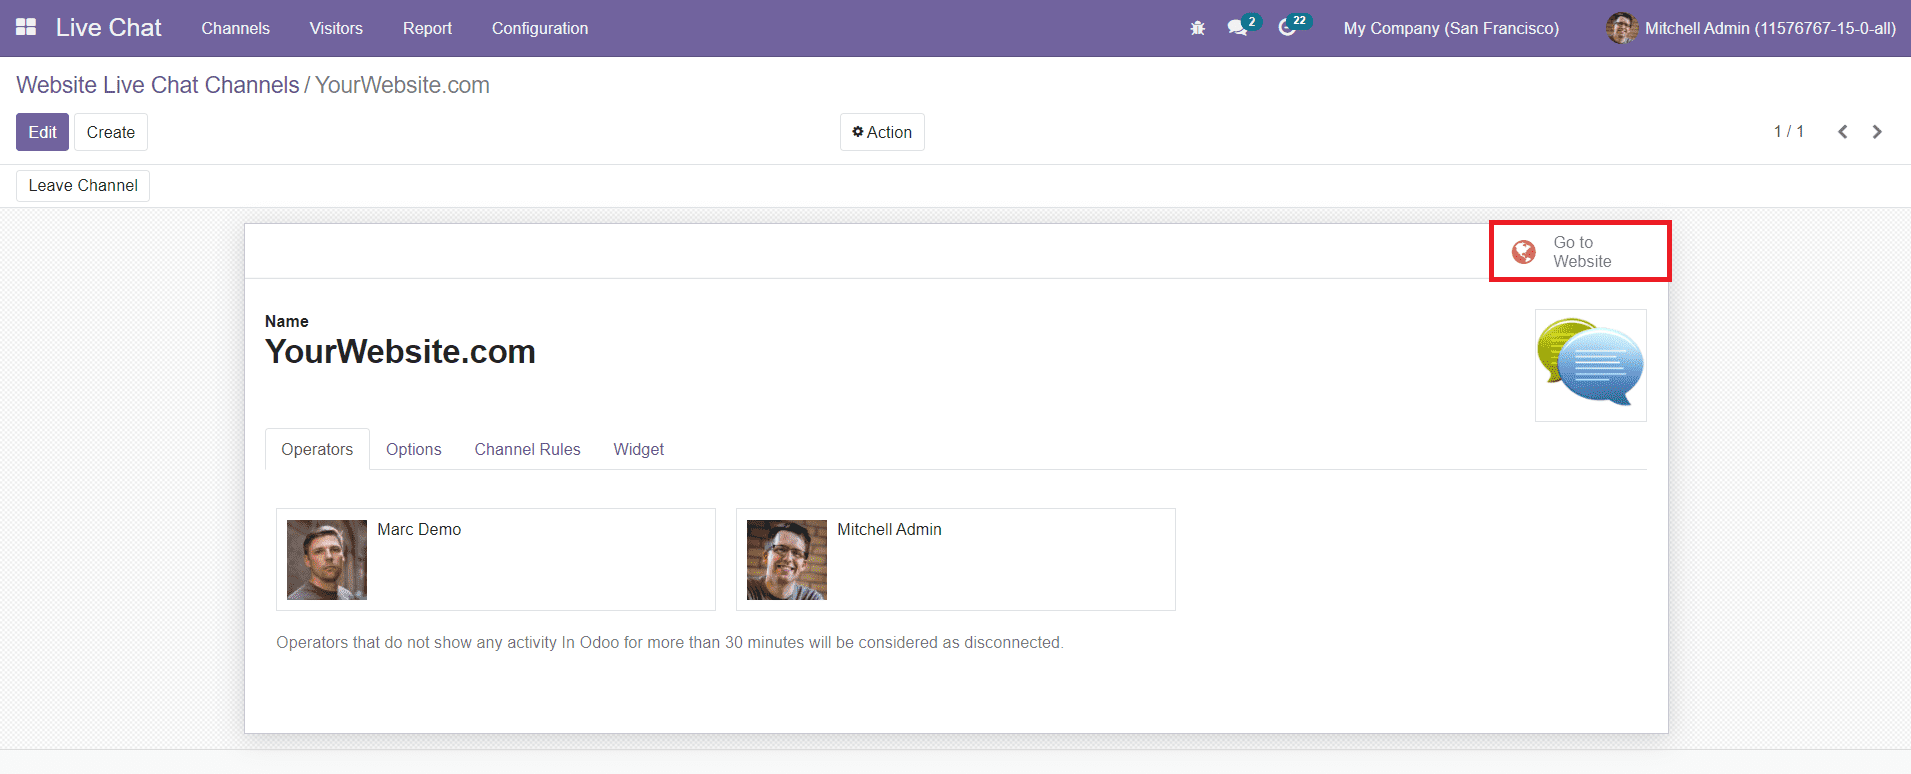
To use this channel to communicate with the visitors, first, you need to publish it on the website. For this, you can click on the ‘Go to Website’ option.
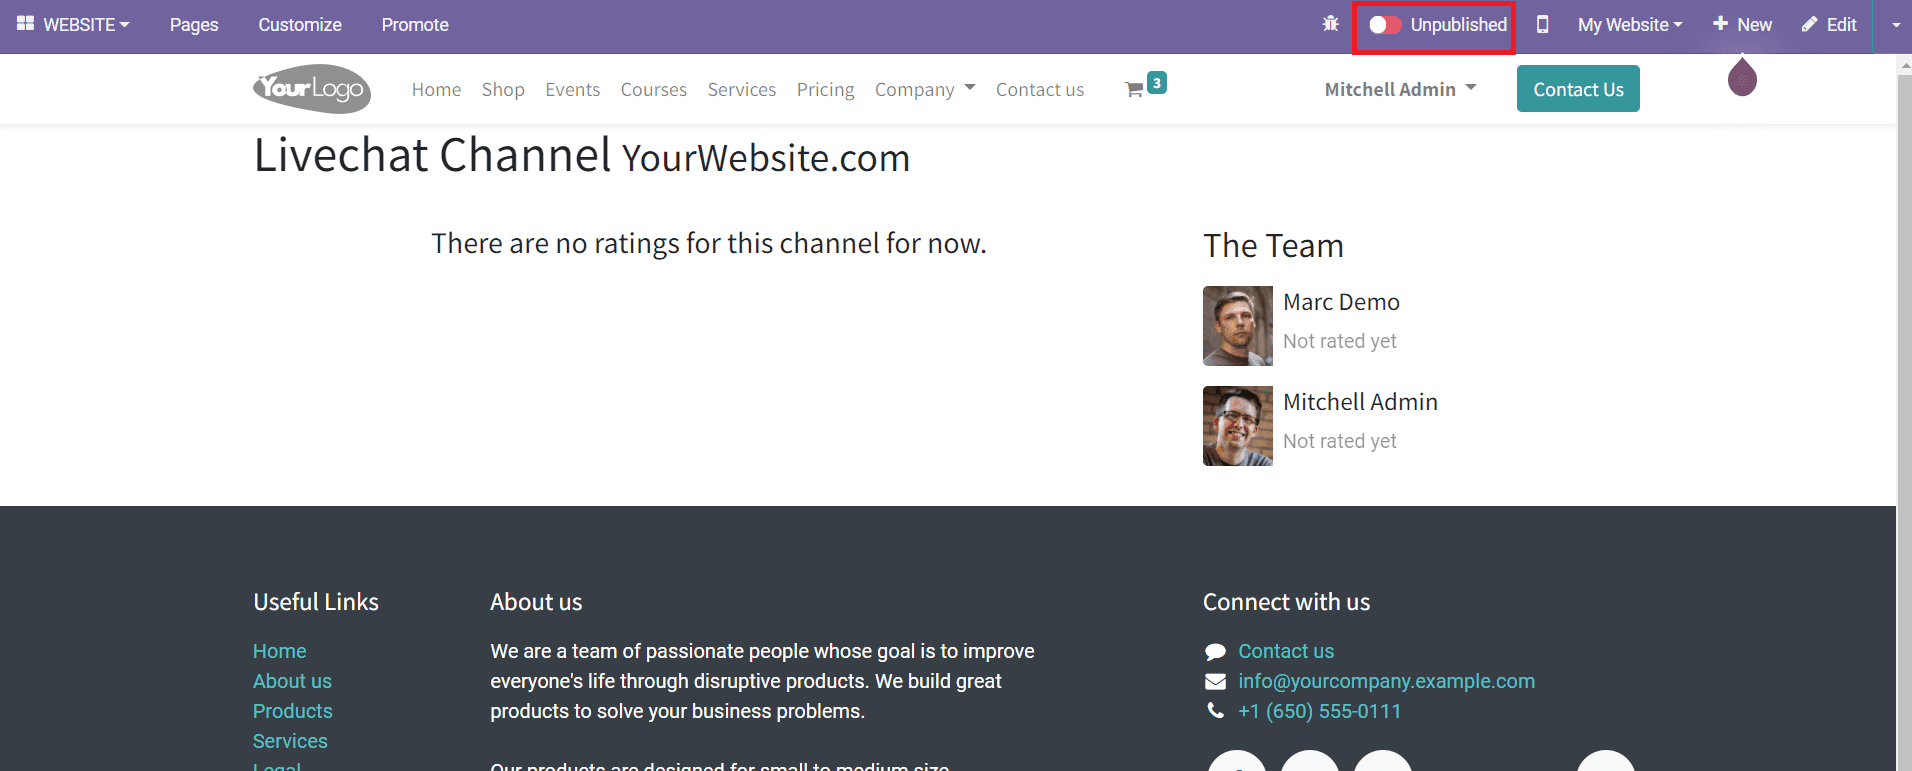
Change the Unpublished status to Publish in order to publish the live chat channel on your website. Now, you can start the live chat. The Live Chat is linked with the Discuss module in Odoo. So, the conversations will be displayed in the Discuss module as direct messages.