Journals
In the Odoo ERP system, you can record all your financial documents concerned with your various business operations and transactions as journal entries. We can define a journal as the record of all transactions within an organization in order by date. Odoo will help you to create various journals in the Invoicing module. You will be able to create sales journals for customer invoices, sales refund journals for customer credit notes, purchase journal entries for vendor invoices, purchase refund journals for vendor credits notes, and many more in the Invoicing module.
You will get access to the Journals platform from the Configuration menu of the Odoo Invoicing module. When you enter the Journals platform, you can see the list of all journals created in the Odoo invoicing module as shown in the screenshot below.

You can also view the data in Kanban view. The list will display the Journal Name, Type, Journal Groups, Short Code, Default Account, Active status, and Company name. You can select a particular journal to get a detailed view of the data inside the respective journal entry and use the ‘Edit’ button to make changes in the available journal.
The advanced sorting options such as the Filters and Group By options can be used to categorize and locate particular journals. You will get default and customizable options for the sorting processes. Additionally, Odoo will let you add journals to your Favorites list which will help you to ease the searching process.
To create a new Journal, you can click on the ‘Create’ button and you will be able to get a new window to add details about the journal as shown below.
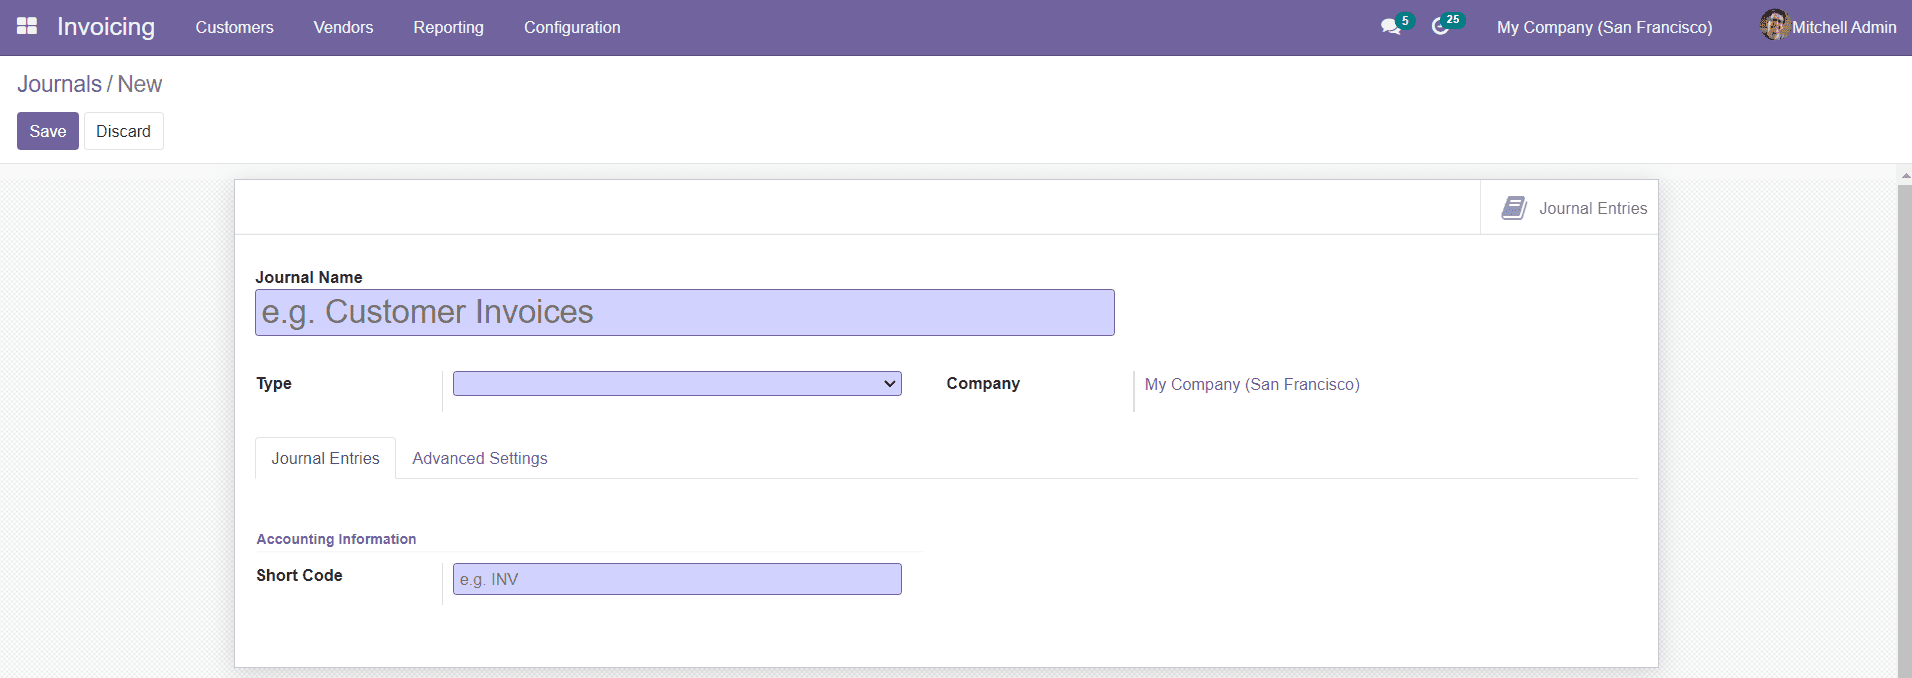
Add the Journal Name and Company in the respective fields. In the Odoo Invoicing module, you can create mainly five types of journals: Sales, Purchase, Cash, Bank, and Miscellaneous. The tabs in the Journal description will change in accordance with the type you have selected
Sales
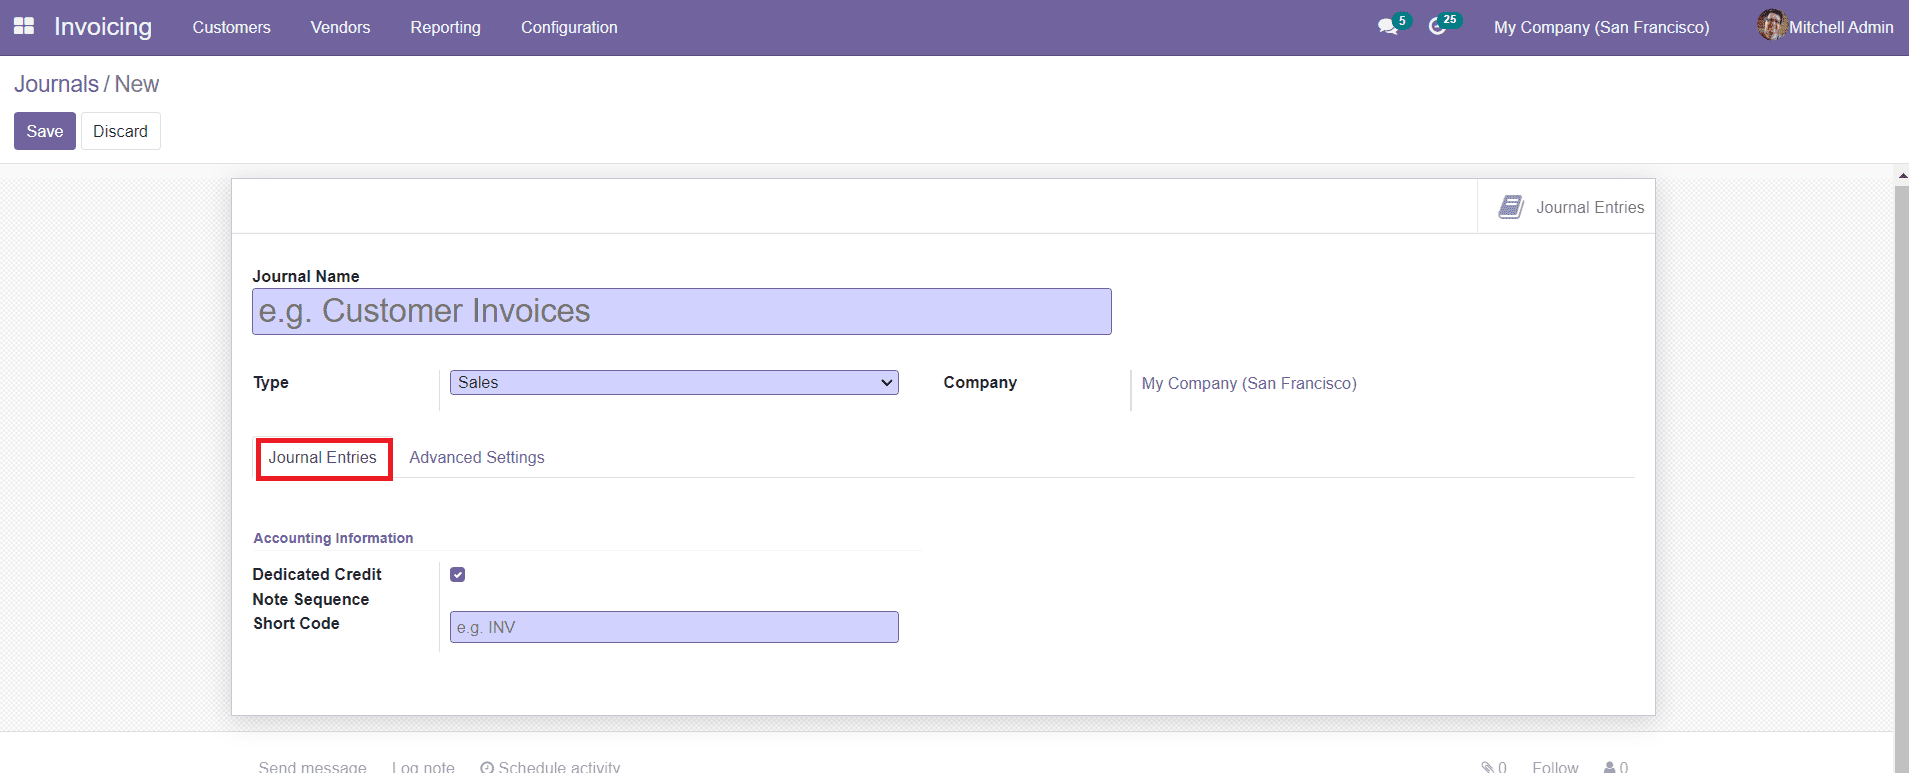
You can select the Sales as the Journal Type to create customer invoices journals. For this type of journal, under the Journal Entries tab, you can activate the Dedicated Credit Note Sequence field and add a Shortcode used to display.
The Advanced Setting field can be used to define the Control-Access, Electronic Data Interchange, Follow Customer Payment, Create Invoices Upon Emails, and Payment Communications.
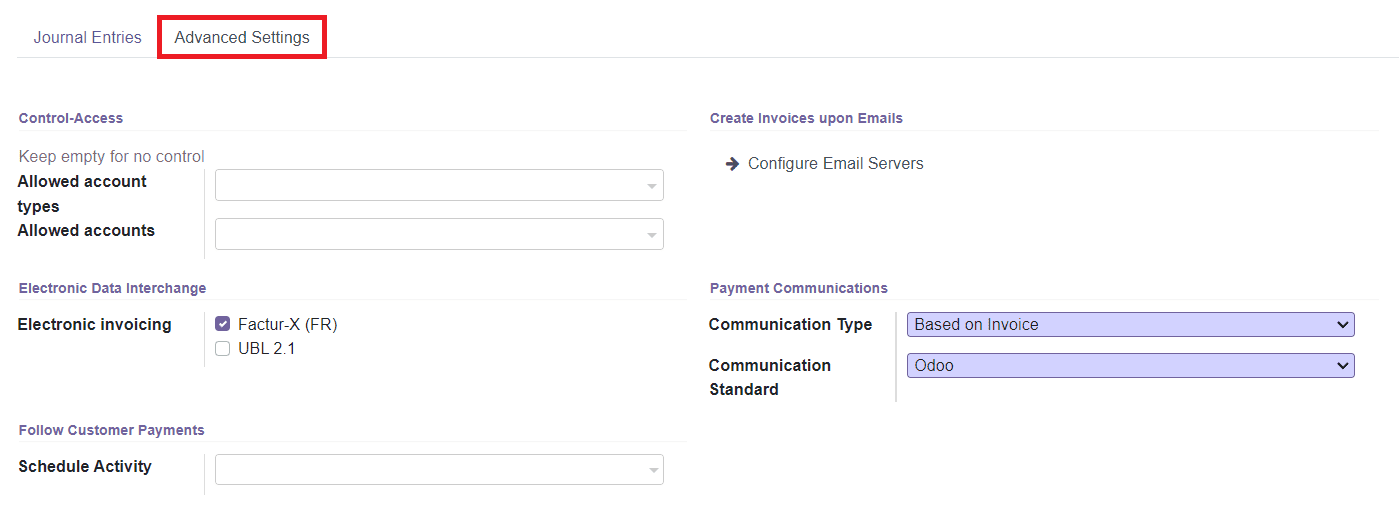
In the Control-Access field, you can keep it empty for no control, or else you can add Allowed Account Types and Allowed Accounts in the given spaces. You can activate the Electronic Invoicing field to send XML/EDI invoices. In the Follow Customer Payment field, you can schedule an activity and it will be automatically scheduled on the payment due date to improve the collection process.
Additionally, you can configure Email servers to create Invoices and Emails in the Odoo Invoicing module. In the Payment Communication field, you can specify the Communication Type and Communication Standard. Click the ‘Save’ button to save the Customer Invoice Journal.
Purchase
You can select the Purchase in the Type field to create vendor bills journals.
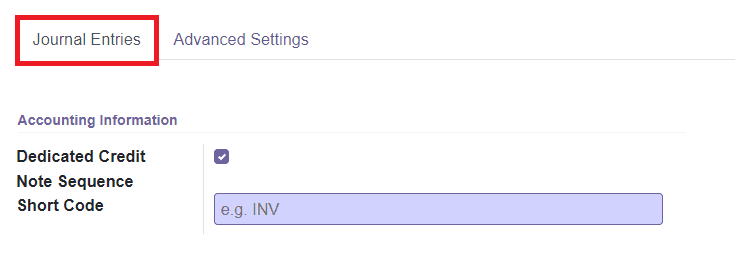
Under the Journal Entries tab, you can activate the Dedicated Credit Note Sequence field and add Short Code in the Accounting Information.

In the Advanced Settings tab, you can specify the Allowed Account Types and Allowed Accounts in the Control-Access field. You can also configure email servers to create invoices upon Emails.
Cash and Bank
You can use the Cash or Bank for journals that are used in customer or vendor payments. While selecting the Cash or Bank as the Type of Journal, you will get two additional tabs to complete: Incoming payment and Outgoing Payment.
If you have selected Cash, then you will get the Journal Entries tab as shown below.
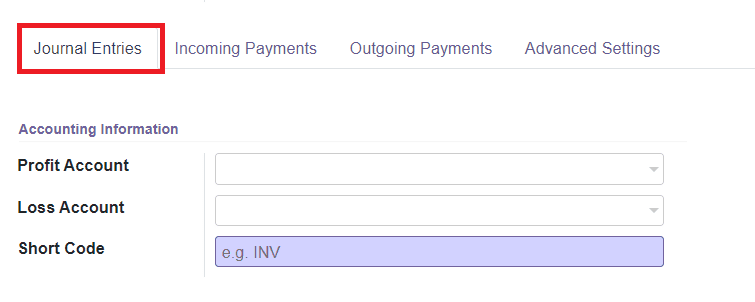
In the Journal Entries tab, you can add Accounting Information about the Profit Account, Loss Account, and Short Code. Profit Account and Loss Account are used to register a profit or loss when the ending balance of a cash register differs from what the system computes respectively. Short Code is a shorter name used for display. The journal entries of this journal will also be named using this prefix by default.
If you have selected the Bank option, then you have to mention the Bank Account Number under the Journal Entries tab.

The remaining tabs will be the same for both cash and bank options.

Under the Incoming Payment tab and Outgoing Payment tab, you can add payment Methods using the ‘Add a Line’ option.

Journal Groups
Odoo will allow you to define different types of journal groups for categorizing the journal entries configured in Odoo the Odoo Invoicing module. You will get access to the Journal Groups window from the Configuration menu of the Invoicing module. You will get the list of all available journal groups created in this platform and you can easily create a new journal group by clicking the ‘Create’ button given in the window.
When you select the ‘Create’ button, you will get an additional line below the existing journal group list. You can add details to the given fields as shown below.

Mention the Journal Group, Excluded Journals, and Company name in the specified fields. Click the ‘Save’ button to save the newly created Journal Group.
Now, let’s discuss the configuration of currencies in the Invoicing module.