Customer Invoices
In the Odoo Invoicing module, you will get a user-friendly platform to manage all customer invoices under the ‘Customers’ menu. This Invoices field in the module will keep a record of all invoices created and configured in this module. As you can see in the image below, you can manage all customer invoices on this platform. The preview of the invoices list will show the Number, Customer, Invoice Date, Due Date, Next Activity, Tax Excluded, Total, Payment Status, and Status of the Invoices. You can change the view into Kanban view also as per your convenience.

The Filters and Group By options in the window can be used to locate and categorize invoices based on the default and customizable options available in the Odoo Invoicing module. In this platform, you can create a new customer invoice by clicking the Create button, or else you can upload the invoice document easily by selecting the Upload button given in the window.
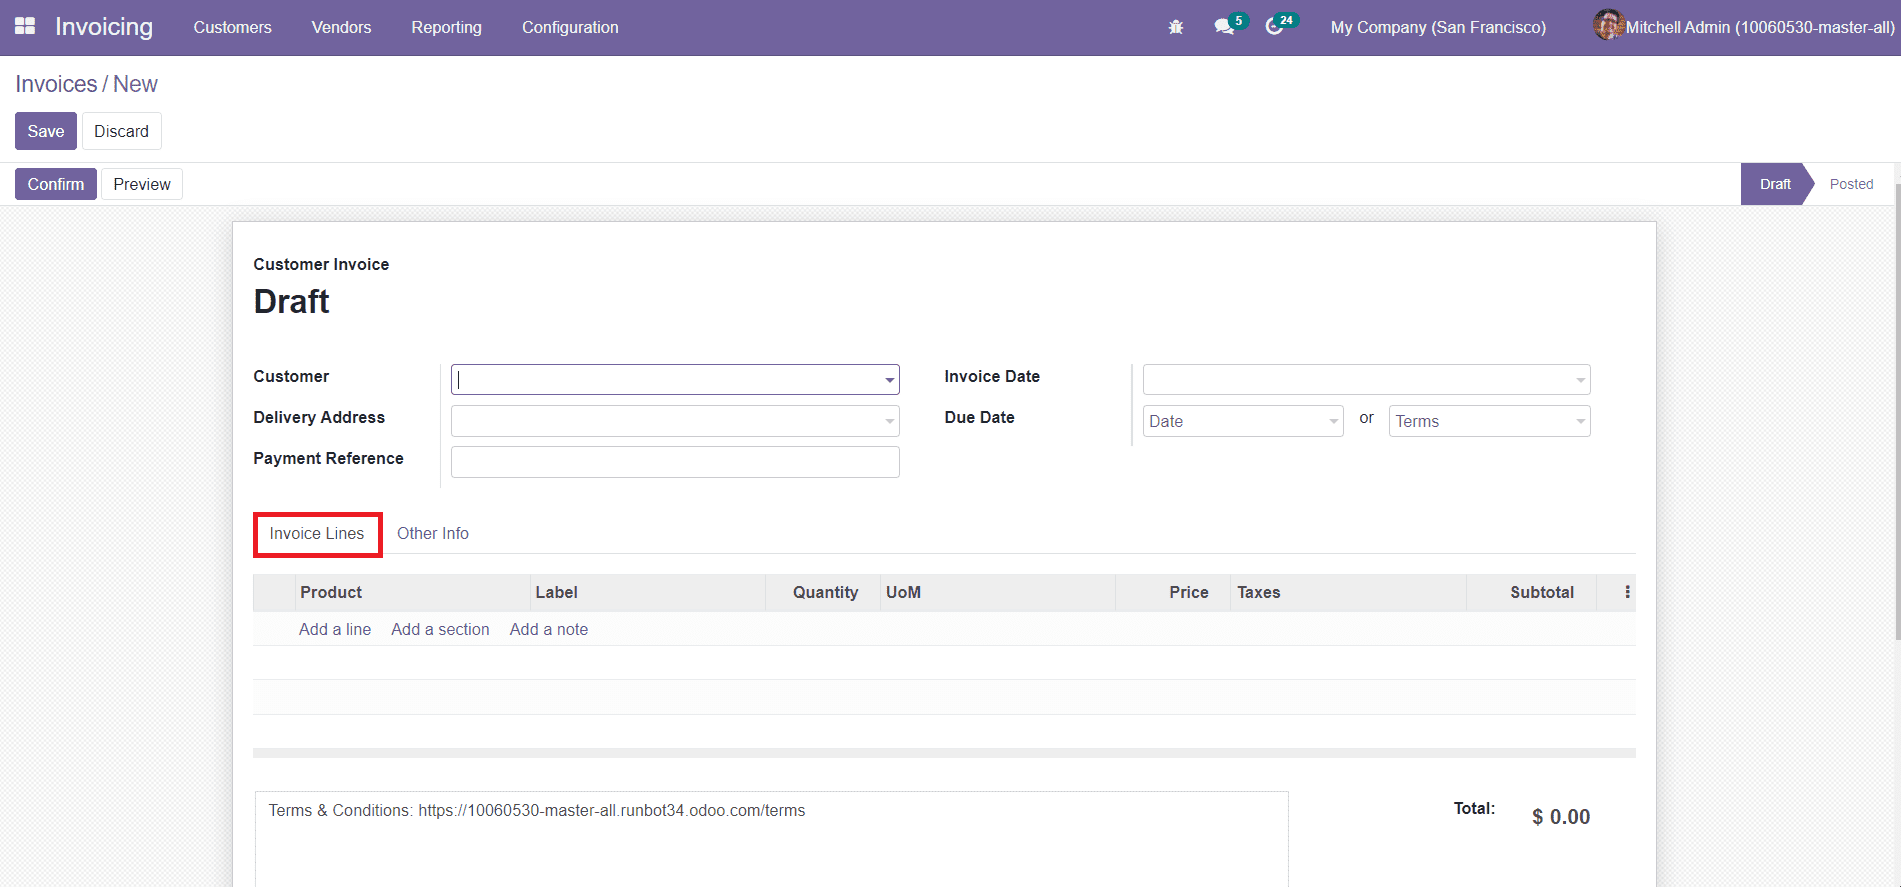
By clicking the ‘Create’ button, you will be directed to a new page as shown below where you can add details regarding the new customer invoice.

You can create a draft form of the customer invoice in this field. You can add details about the Customer, Delivery Address, Payment Reference, and Invoice Date in the given fields. The Due Date or Term will define the date or term by which the customers have to pay the invoices.
Under the Invoice Lines, you can add products to the customer invoice by clicking on the ‘Add a Line’ option. You can select the products from the given list and specify the quantity of the product in the given field. The Label, UoM, Price, Taxes, and Subtotal fields will be automatically filled with the respective data in accordance with the products you have selected.

Additionally, Odoo will enable you to add sections and notes by clicking on the ‘Add a Section’ and ‘Add a Note’ options respectively.
Once you activate the full accounting feature in the Odoo Invoicing module, you will get the Journal Items tab in the customer invoice creation window.

You can specify the accounts to which this customer invoice details will be added using the Add a Line option.
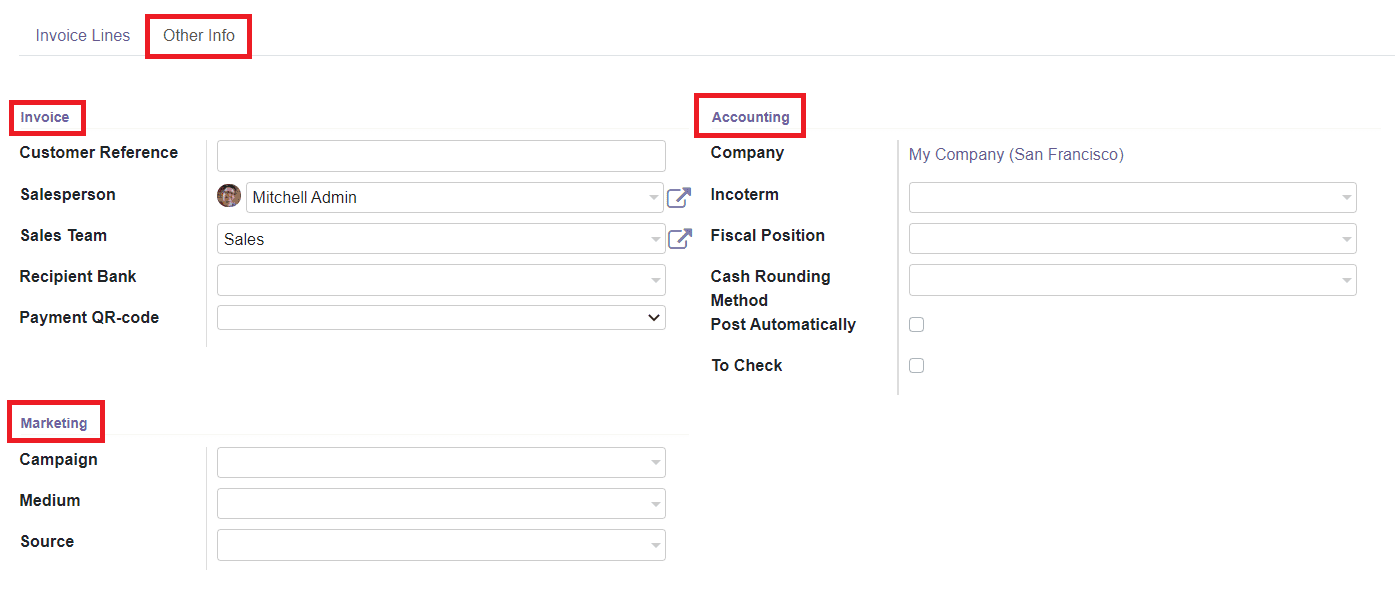
The Invoice, Marketing, and Accounting aspects of the customer invoice can be specified under the Other Information tab in the invoice description.

You can define the Customer Reference, Salesperson, Sales Team, Recipient Bank, and Payment QR-Code in the Invoice tab. You can assign Campaign, Medium, and Source in the Marketing field. For the Accounting aspects of the customer invoice, you can add Company, Incoterm, Fiscal Position, and Cash Rounding Method in the specified fields. International Commercial Terms are a series of predefined commercial terms used in international transactions. Fiscal Positions are used to adapt taxes and accounts for particular customers or sales orders/invoices.
You can also find additional options to enable such as the Post Automatically and To Check options. By activating the Post Automatically option, this entry will be automatically posted at the specified accounting date. Activating the ‘To Check’ field means that the user is not sure of all the information given in the entry and it needs to be checked again.
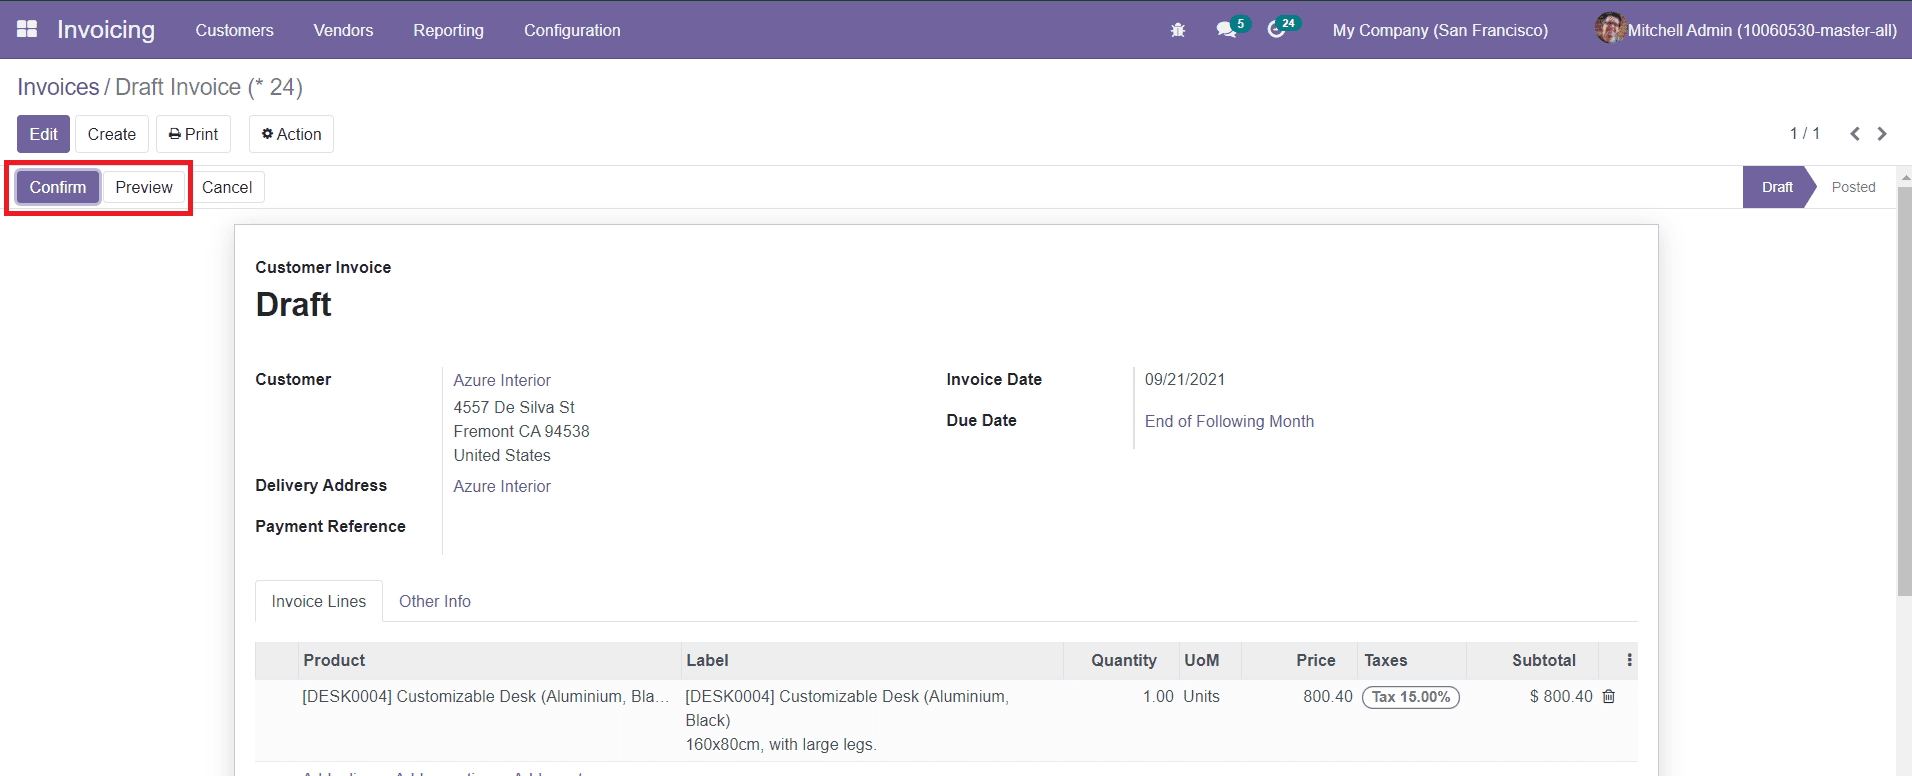
By clicking the Save button, you will get a draft form of the customer invoice.

You can click the Confirm button to confirm the invoice and use the Preview button to get a preview of the invoice on the company website.