Location
Using the Location menu in the Inventory module, Odoo will help you to describe the location of products in the warehouse. You can find this option under the Configuration menu after activating it from the Settings of the Inventory module.

As you can see in the screenshot given above, the window will display all location details created in the Inventory module. You will get a preview of the Location, Location Type, Storage Category, and Company name from this platform. You can use the ‘Create’ button to configure a new location for the stocks in warehouses.

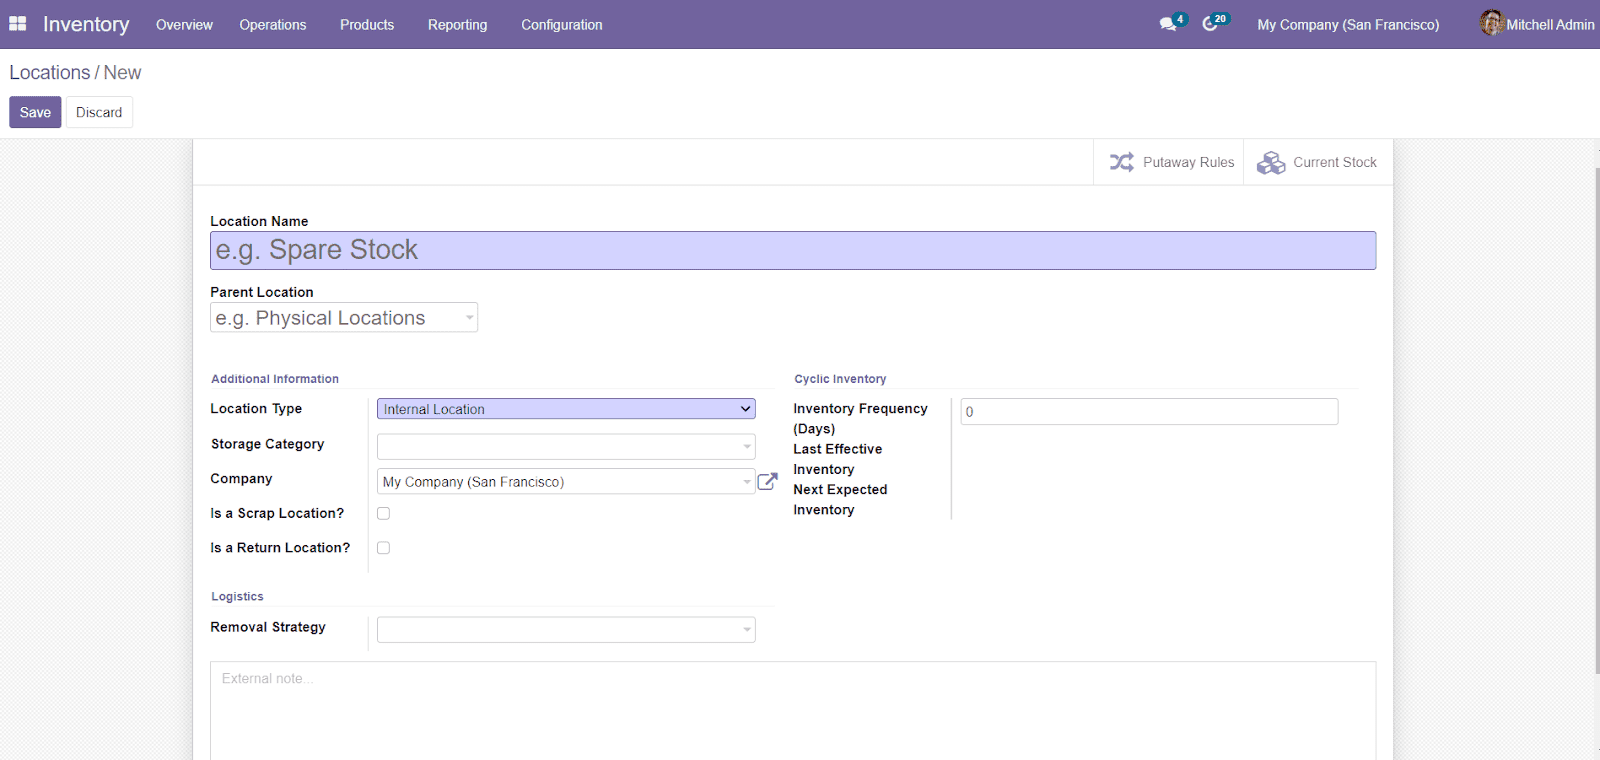
While clicking on the ‘Create’ button, a new window will appear to add details about the location. You can add the name of the location along with the Parent Location in the specified field. Under the Additional Information tab, you can specify the Location Type, Storage Category, and Company. The Types of Location includes,
- Vendor Location: Vendor Location is the virtual location representing the source location for the products coming from your vendors.
- View: Virtual location used to create hierarchical structures for your warehouses, aggregating its child locations, which cannot directly contain products.
- Internal Locations: It is the physical location inside your own warehouses.
- Customer Location: Virtual location represents the destination location for products sent to your customers.
- Inventory Loss: Virtual location serving as counterpart for inventory operations used to correct stock levels (physical inventories).
- Production: Virtual counterpart locations for production operations. This location consumes the components and produces finished products.
- Transit Location: Counterpart location that should be used in intercompany or inter warehouse operations.
You can also define whether the location is a Scarp Location or Return Location. In the Logistics tab, you can select the Removal Strategy from the drop-down menu. It defines the default method used for suggesting the exact location (shelf) where to take the product from, which lot, etc. for this location.

As you can see in the screenshot above, the drop-down menu will show four different methods
- First In First Out (FIFO)- In this method, the first in products will be considered to first out. It means that the old stocks will be considered for selling than the latest stock before the expiry date.
- Last In First Out (LIFO)- In this method, the latest stock will be sold first.
- Closest Location- This method can be used to send the product from the closest location.
- First Expiry First Out (FEFO)- This method is based on the expiration date of each product. You can sell the perishable product first using this strategy.
You can find the Cyclic Inventory tab with various options in the window. This can be defined when the next inventory count has been scheduled for the products in that location. Mention the Inventory Frequency in the Cyclic Inventory field, When different than 0, the inventory count date for products stored at this particular location will be automatically set at the defined frequency. The Last Effective Inventory will show the date of the last inventory at this location. The Next Expected Inventory will show the date for the next planned inventory based on the cyclic schedule.
There is also an additional field available in the window to add an external note regarding the location and save the data by clicking the ‘Save’ button.