Recruitment
Recruitment is considered as the first step of the actions of the human resources management system. In Odoo, you can find a separate module to manage all recruitment procedures inside a company. Using this platform you can identify vacant job positions in your organization, post job openings, invite applicants, and manage the hiring process. The recruitment procedures for any job position should be carried out with utmost care and attention because only skillful and suitable candidates can help your organization to grow. Choosing the right candidate can be easily done with the help of the Odoo Recruitment module.
The dashboard of the Recruitment module will display all vacant Job Positions in your company. You can also create a new Job Opening using the ‘Create’ button. The published Job Positions will show the number of applicants who applied for this job and the number of vacancies available for this job. You can use the Filters and Group By options to locate a particular Job Position from the dashboard.
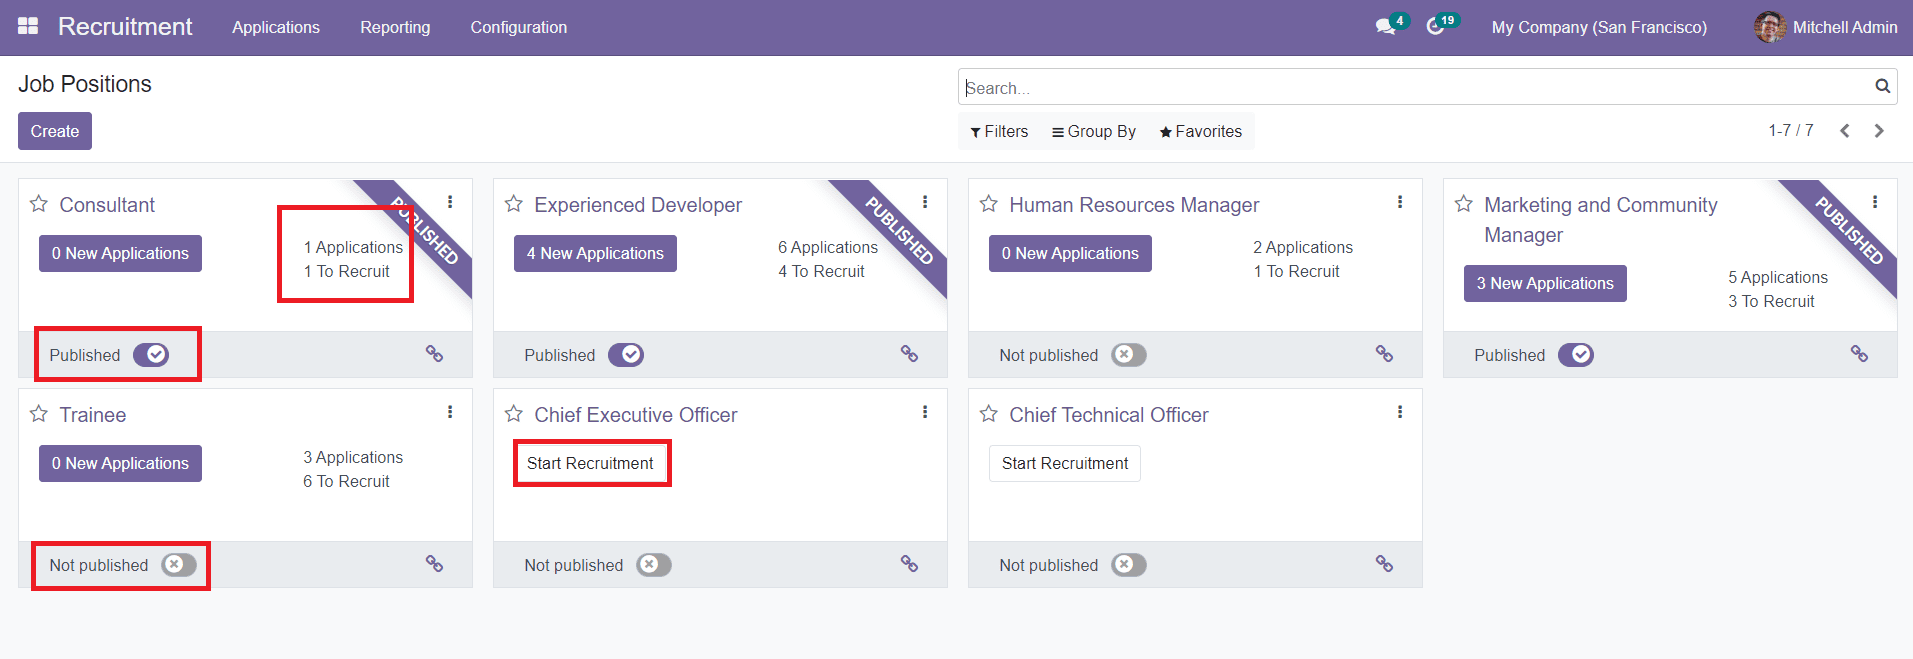
As you can see in the image, you can find the ‘New Application’ option on each published Job Position which will show you the list of all applicants for this particular vacancy.

You can find different stages for the applicants to complete the recruitment process on this platform. You can create new stages for the applications simply by clicking on the ‘Add a Column’ option. You will get a new field to mention the title of the column.
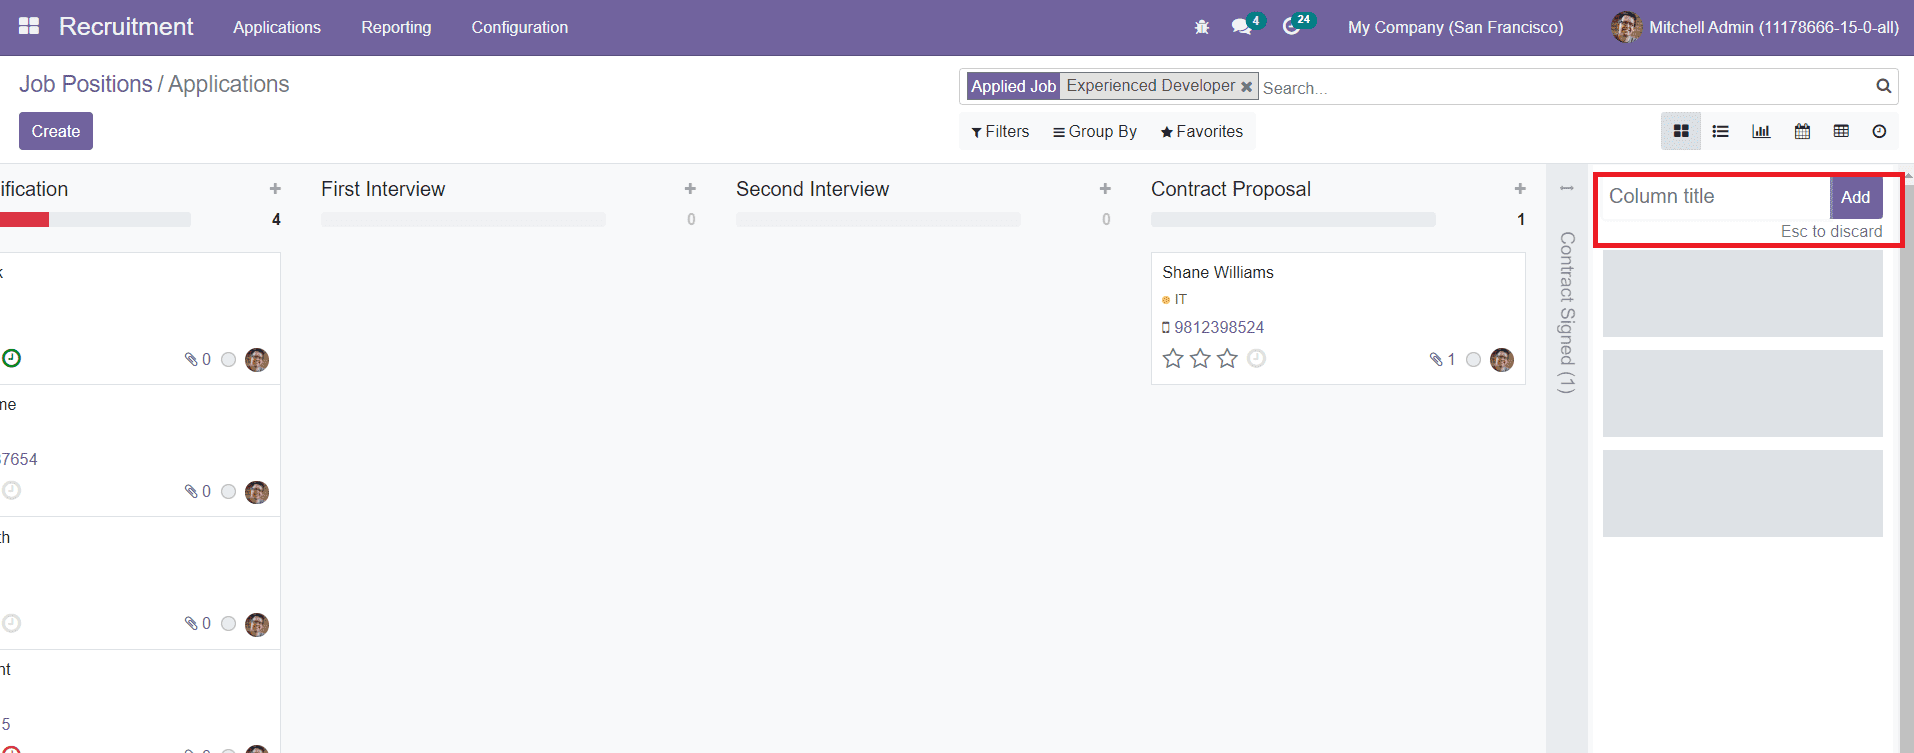
Use the ‘Add’ button to add this to your application window.
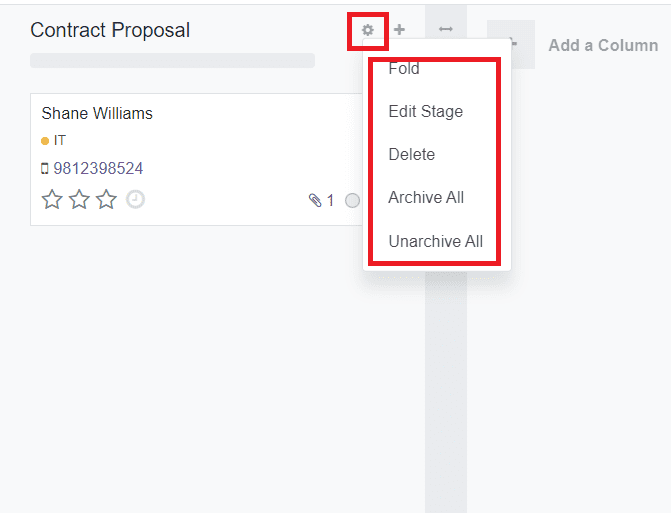
The ‘Settings’ icon near the application stage title will show a drop-down menu. You can manage various actions on the stages using this menu such as Fold, Edit Stage, Delete, Archive All, and Unarchive All. Clicking on the Fold option will fold the state in the Kanban view. Clicking on the Edit Stage button will show a pop-up window as shown below.
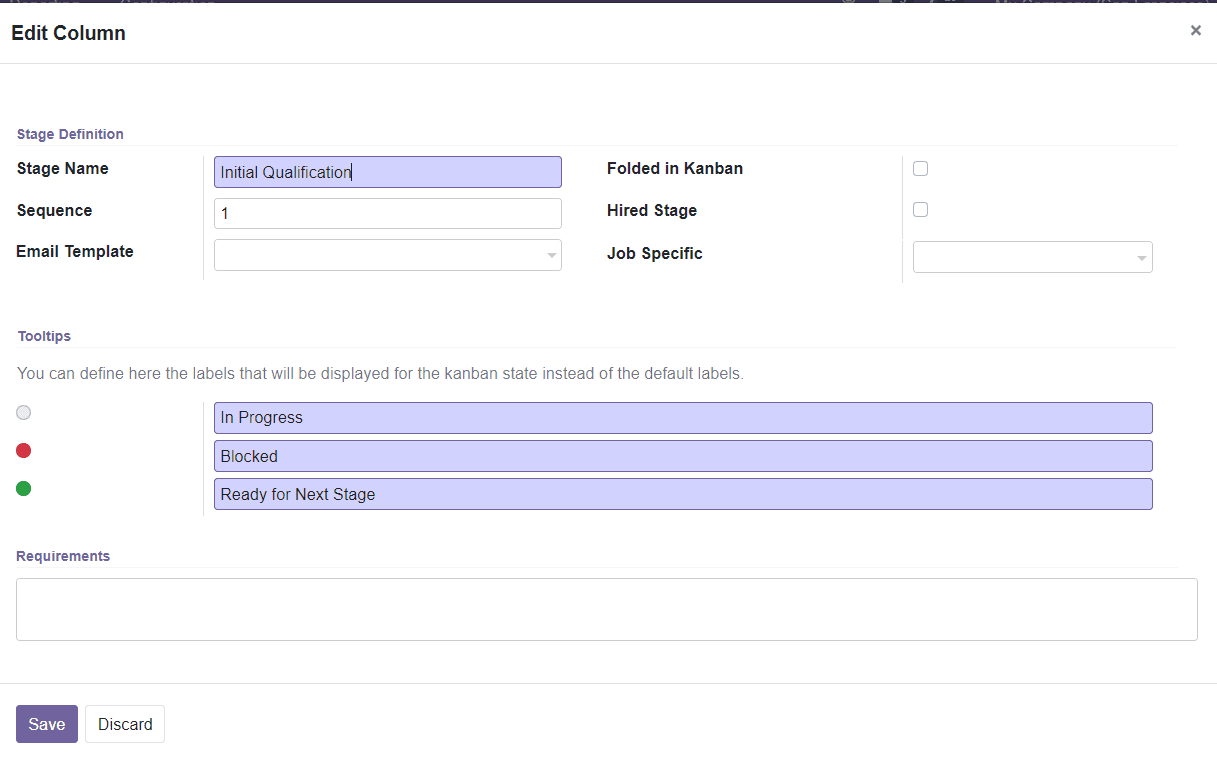
Here, you can edit the Stage Name. the Sequence will define the sequence order when displaying a list of stages. You can set an Email Template in the specified field. If set, a message will be posted on the applicant using the template when the applicant is set to the next stage. You can activate the Folded in Kanban field, to fold the stage in Kanban view when there are no records in that stage to display. You can also activate the Hire Stage which is used to determine the hire date of an applicant. You can make this stage Job Specific by adding specific jobs in the given fields. By doing so, the other jobs will not use this stage. In the Tooltips tab, you can define the labels that will be displayed for the kanban state instead of the default labels. After activating the developer mode, you will get access to the Stages menu from the Configuration menu to create and edit new stages.
We will discuss the Applications platform later in this chapter.
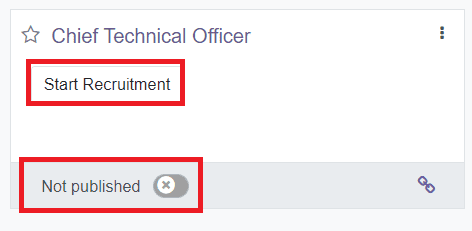
If the job opening is not published, you can activate the field marked in the screenshot below to publish the post and click the ‘Start Recruitment’ option to proceed with the recruitment process.
By clicking the three dots given on the top right corner of each Job Position, you will get various operations tools as shown below.
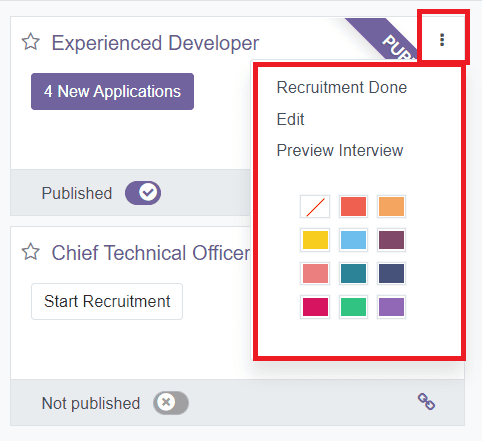
The star icon near the title of the Job Opening can be used to add them to your Favorites. You can stop the recruitment process by clicking the ‘Recruitment Done’ option. The ‘Edit’ tool will help you to edit the content inside the Job Positions.