Configurations
The Events module includes various options to configure under the Configuration menu. These options will help you to improve the performance of the module. According to your demand, you can set up these options and simplify the event management activities using the Events module.
Event Templates
The Event Templates option under the Configuration menu will help you to configure event templates suitable for your events. For common event types, you can select one from the configured event templates as shown below.

You can create a new template using the Create button.
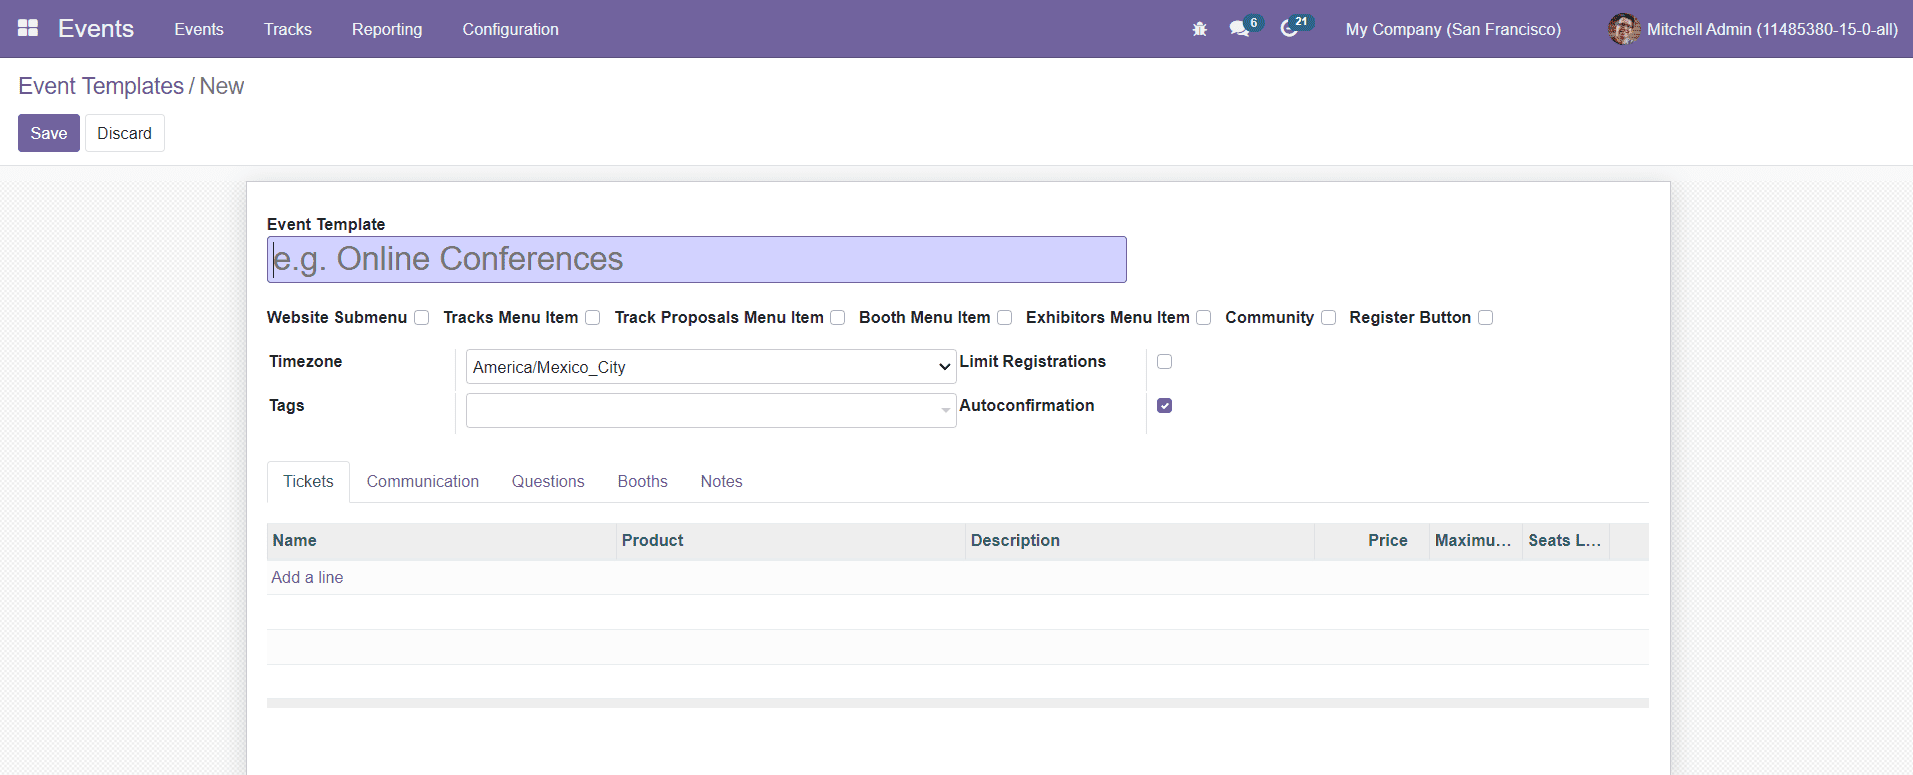
Mention the name of the Event Template in the specified field. The remaining fields in the event template creation window are the same as that of the new event creation window. You can follow the same steps that we discussed in the creation of new events in Odoo earlier in this chapter.
Event Stages
In Odoo, you can assign different stages for events according to the actions taken on them. You can create and manage Event Stages under the Configuration menu of the Events module.

You can see the list of already configured event stages on this platform. You are allowed to use the Create button to create a new stage for events.
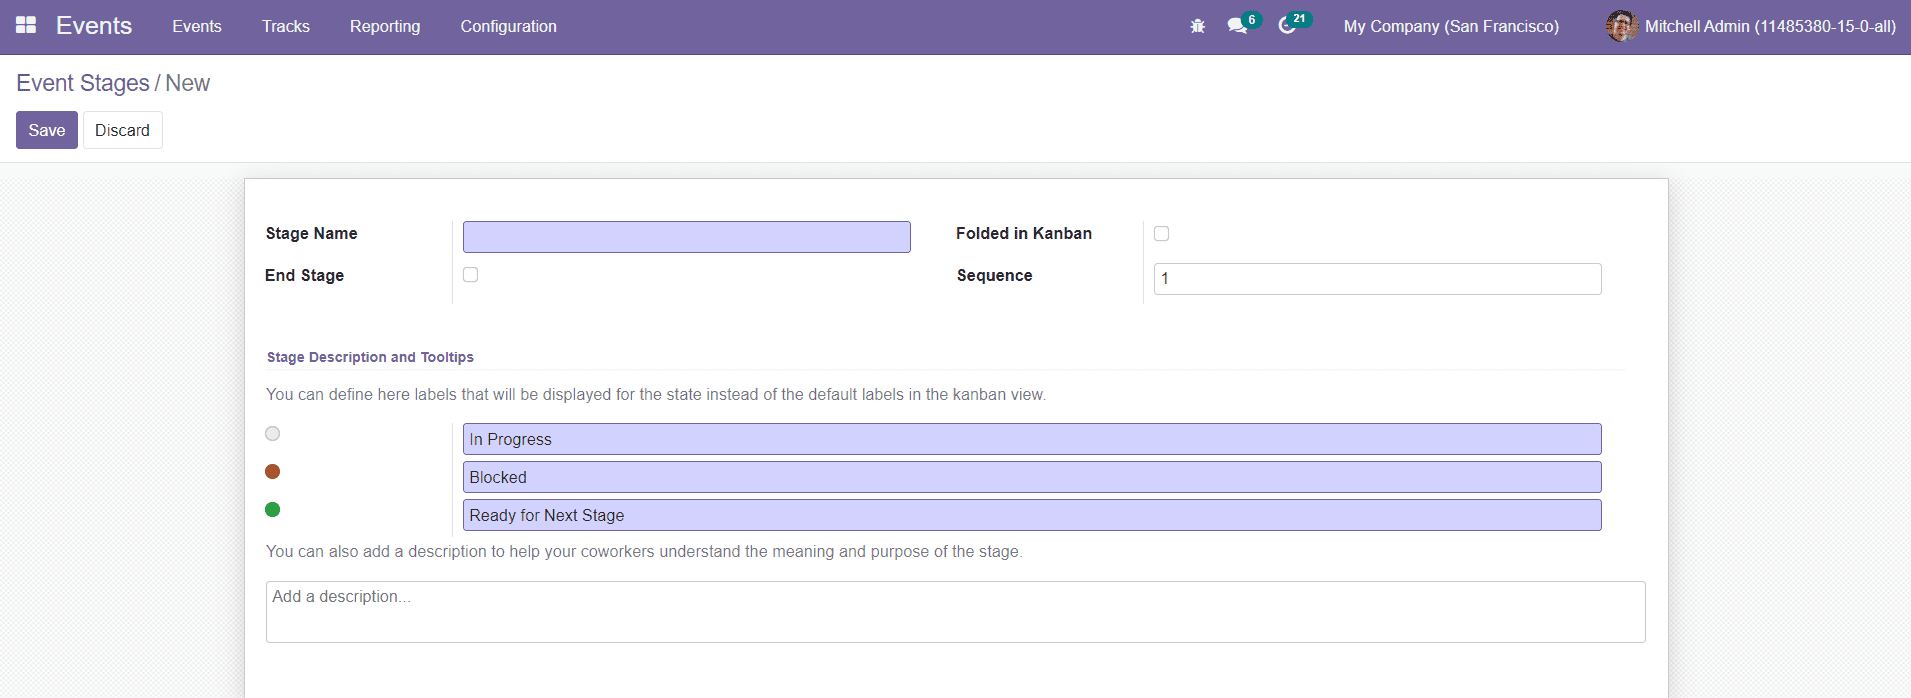
Mention the Stage Name in the specified field. By activating the End Stage option, events will be automatically moved to this stage when they are finished. To fold this stage in the Kanban view, you can enable the Folded in Kanban option. The Sequence number of the stage will be displayed on the screen. In the Stage Description and Tooltips field, you can define the labels that will be displayed for the state instead of the default labels in the kanban view. You can also add descriptions to help your coworkers understand the meaning and purpose of the stage. After completing all fields, you can save the new stage by clicking on the Save button.
Event Tags Categories
The Event Tags Categories option under the Configuration menu can be used to define different categories for the event tags.

The window displays different category tags as shown in the image above. Click the Create button to create a new category for event tags.
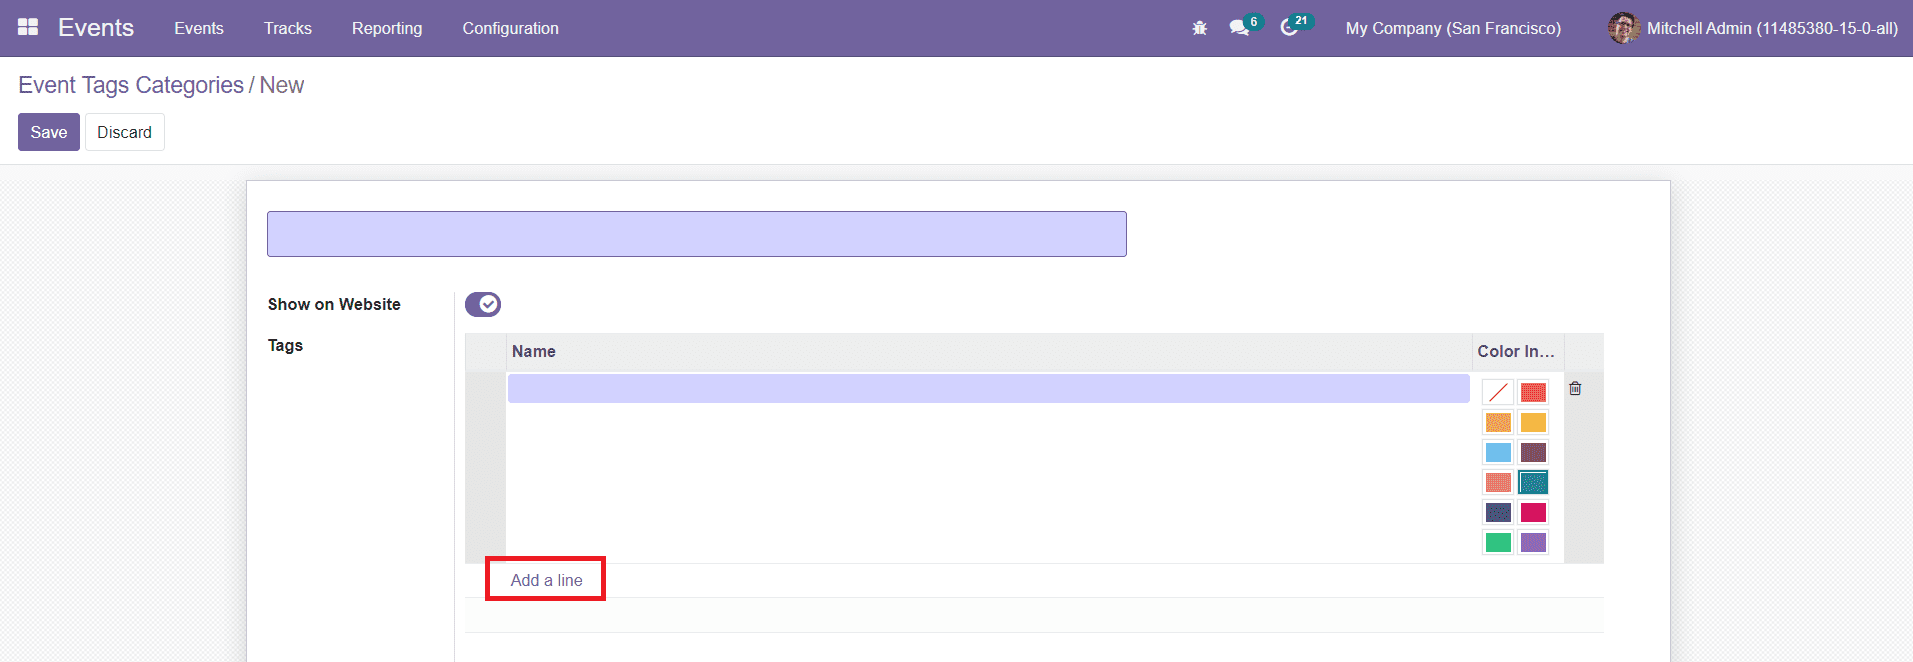
In the new window, you can mention the name of the event tag category. You can activate the Show on Website option to show this tag category on the website. Using the ‘Add a Line’ button you can add Tags and Suitable colors to this category. Click on the Save button to save the new category.
Events Mail Scheduler
The Events Mail Scheduler option under the Configuration menu will show the list of mail scheduled to send to the attendees before or after the event.

As you can see in the screenshot above, the window will show the Event nem, Send, Template, Scheduled Date, and the number sent emails.
Lead Generation
It is easy to generate leads from the details of attendees collected from the Events module. You can configure rules for the lead generation under the Configuration menu of the module.

You will be able to see already created Lead Generation Rules on this platform. The preview of the list will show the Rule Name, Lead Creation Type, When, Event Categories, and Company. You can create a new rule for lead generation using the Create button.
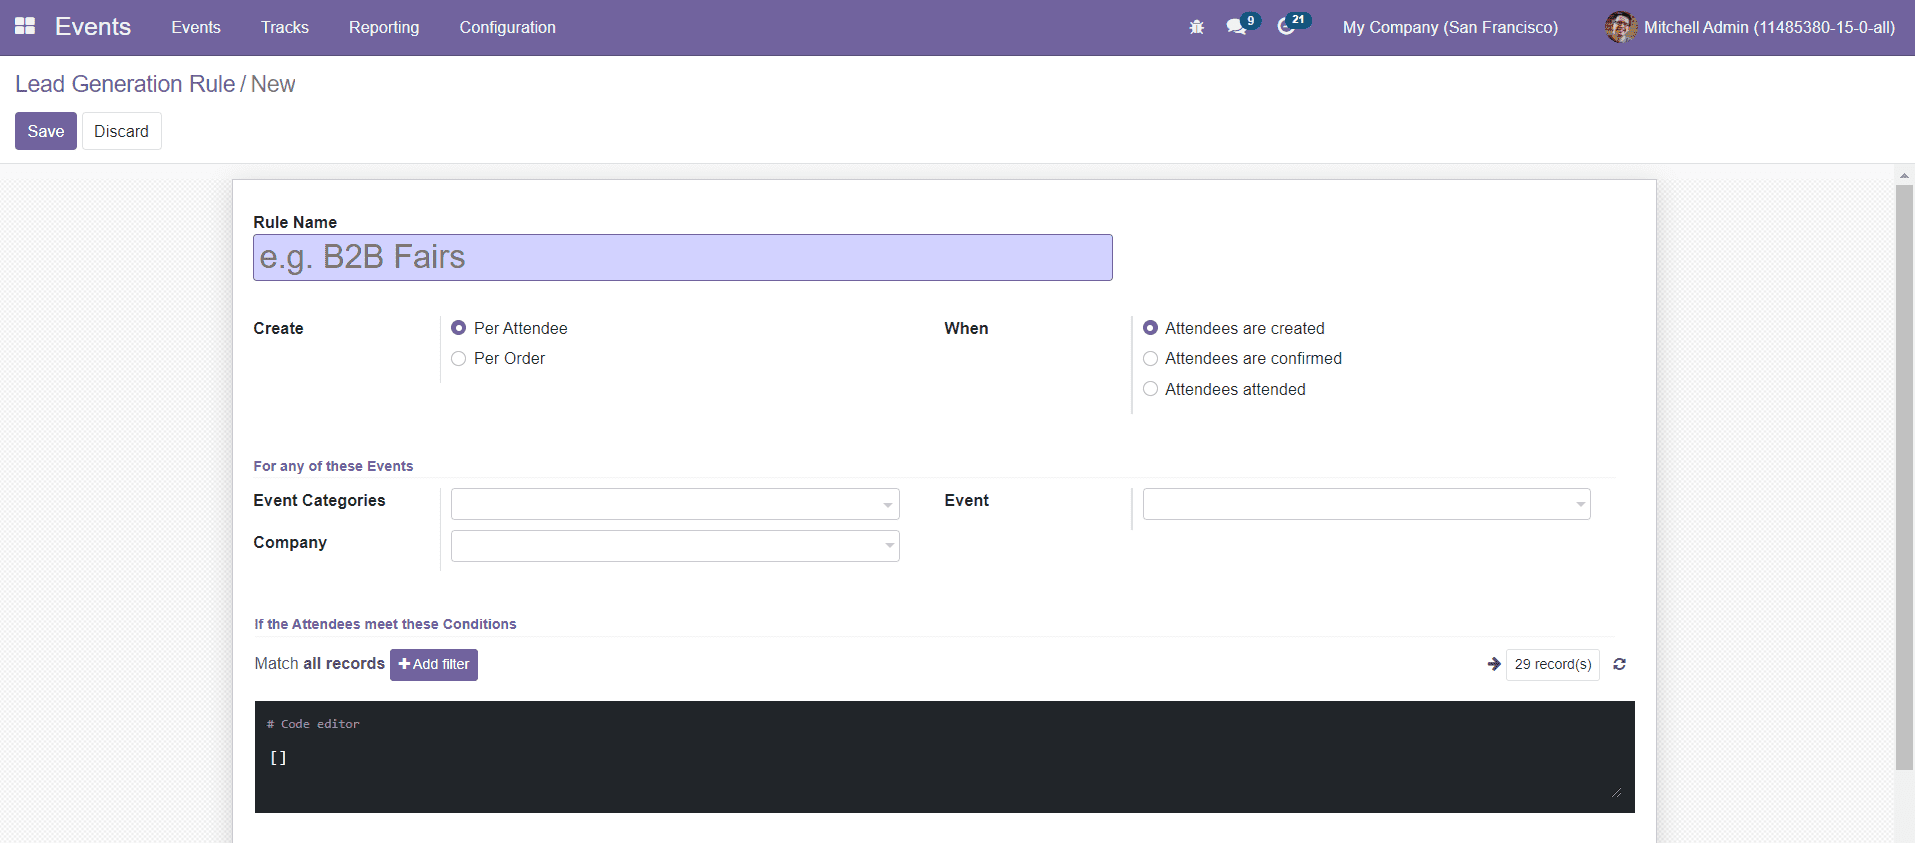
Add Rule Name for the Lead Generation Rule. You can create a lead per attendee or order. By selecting the ‘Per Attendee’ option, a lead will be created for each attendee. For the ‘Per Order’ option, a single lead will be created per ticket batch/sales order. The lead can be automatically or manually created when the Attendees are created, Attendees are Confirmed, or Attendees Attended.
Mention the Event Category and Event to filter the attendees to include those of this specific event category and event. By specifying the Company, Odoo will trigger this rule to the events belonging to the specified company.

You can set filters here to sort the attendees who meet the specified conditions. Under the Lead Default Values tab, you can mention the Sales Team, Salesperson, and Tags. By mentioning the Sales Team and Sales Person, Odoo will automatically assign the created leads to this sales team and salesperson. The tags mentioned here will be automatically added to the created leads. After creating the lead generation rule, you can click on the Save button.
Booth Categories
When conducting an event, companies will rent booths to outside business firms to promote their product and service at the time of the event. In the Odoo Events module, you can categorize the booth into different categories. You will get access to the platform from the Configuration menu of the module.

As you can see in the image above, the window shows different categories of the booth along with its price. You can create a new booth category by clicking on the Create button.
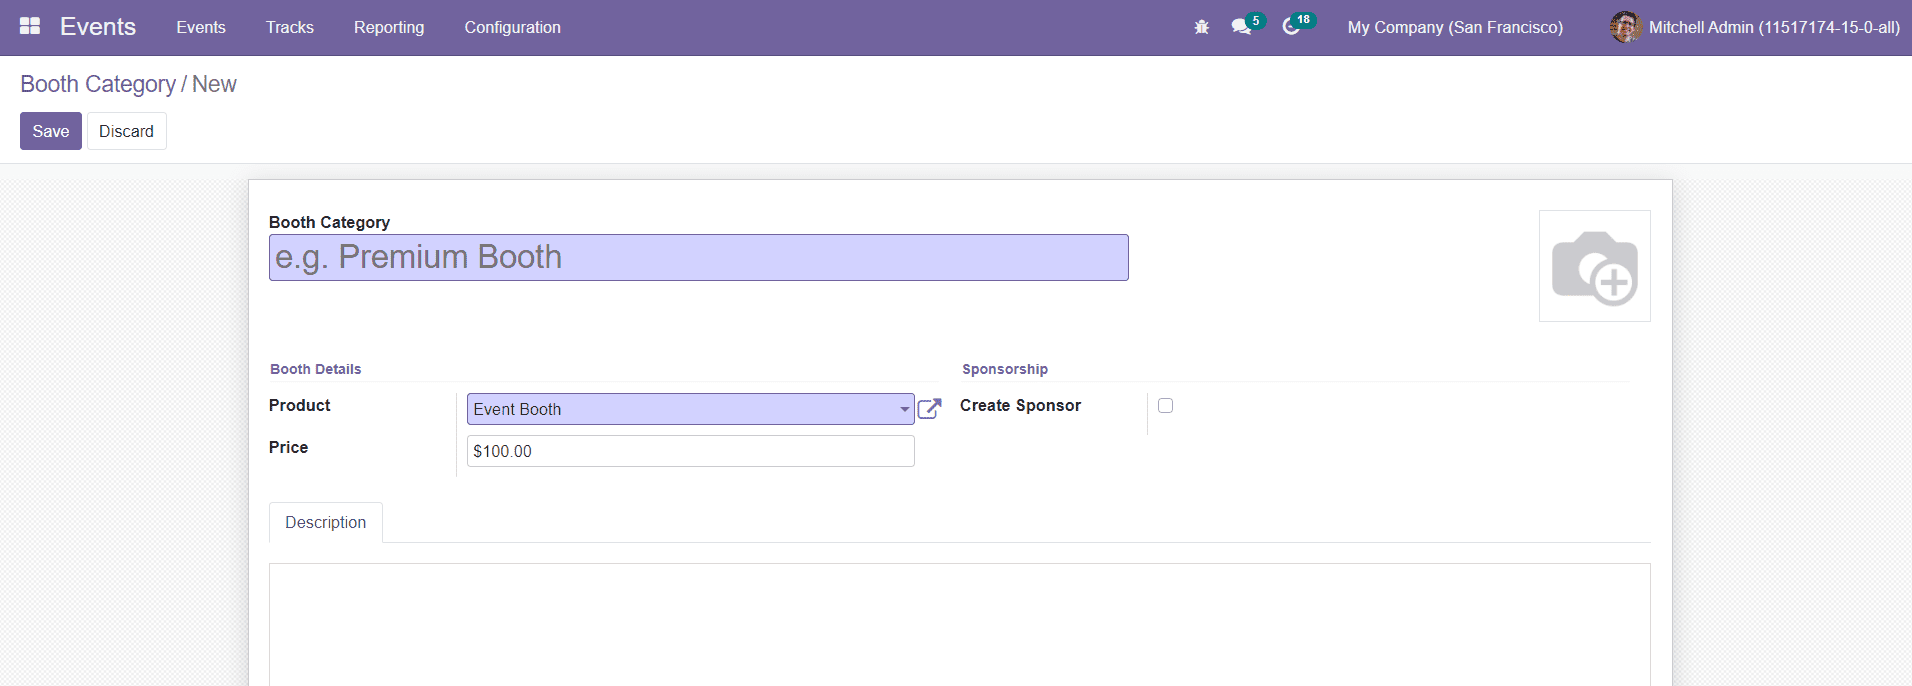
In the creation window, mention the name of the Booth Category in the given space. You can configure Event Booth as a product and define its price in the Sales module. By doing so, you can select Event Booth as Product in the Booth Details tab. In the Sponsorship tab, you can activate the Create Sponsor option. When booking a booth a sponsor will be created for the user. You can add additional information about the booth category under the Description section. Then, click the Save button to save the new booth category.
Now, we can take a look at the configuration of booths in the Events module. The Booth opinion can be also obtained from the Configuration menu.
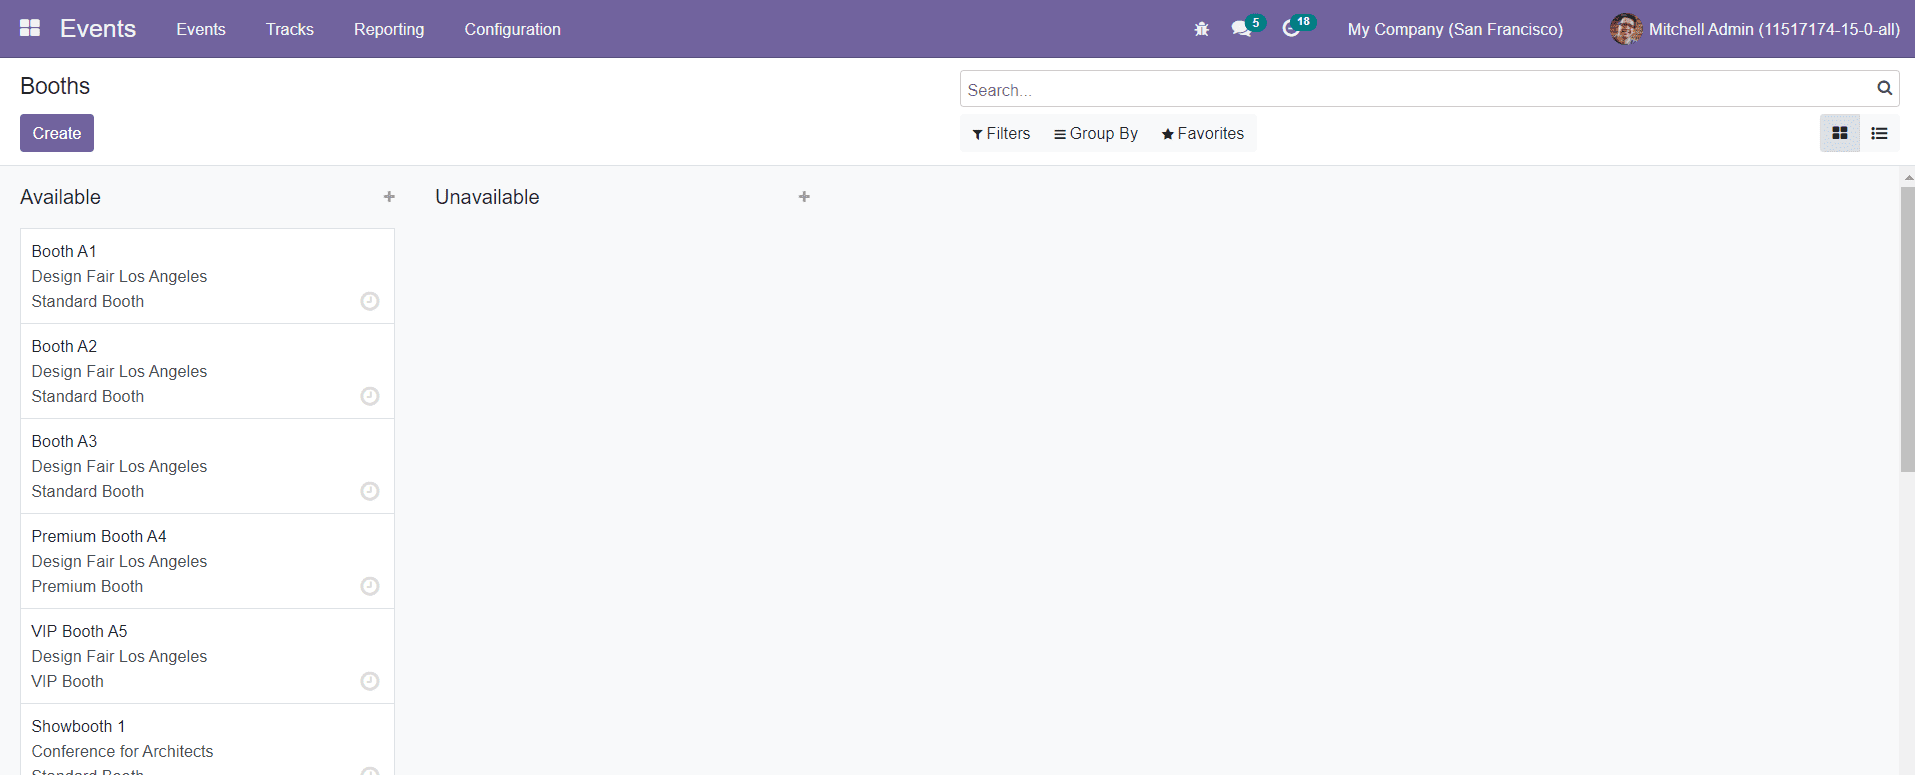
You can see all configured booths on this platform. In Kanban view, the window shows different stages for the booths. All available booths and unavailable booths can be separately seen in the Kanban view. You can change the view of this platform into List view also. To add new booth details, you can use the Create button.
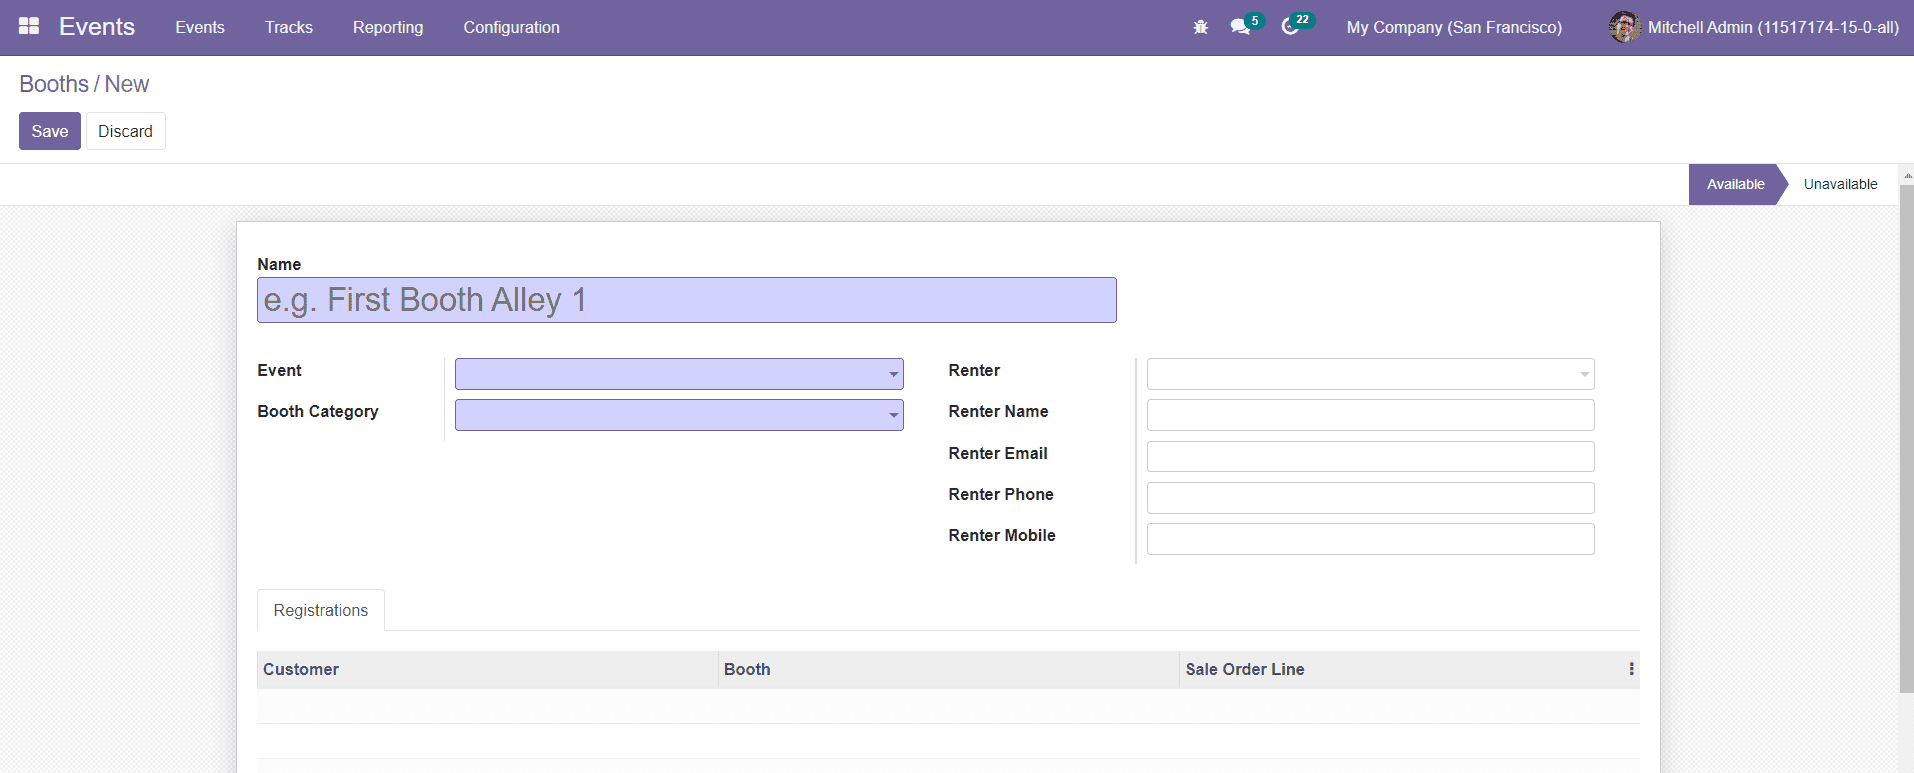
In the new Booth creation window, you can define the Name, Event, Booth Category, Renter, Renter Name, Renter Email, Renter Phone, and Renter Mobile in the corresponding fields. You will get the details of the customer under the Registration tab. You can use the Save button to save the new booth.
Track Stages
The Track Stages option under the Configuration menu will help you to create and manage different stages of the tracks created in the Events module. As you can see in the image below, you will get the list of all created stages of tracks.

If the Visible in Agenda option is activated the related tracks will be visible in the frontend. If the Fully Accessible field is activated, Odoo will automatically publish tracks and the access link will be provided to customers. Now, click the Create button to create a new stage for tracks.
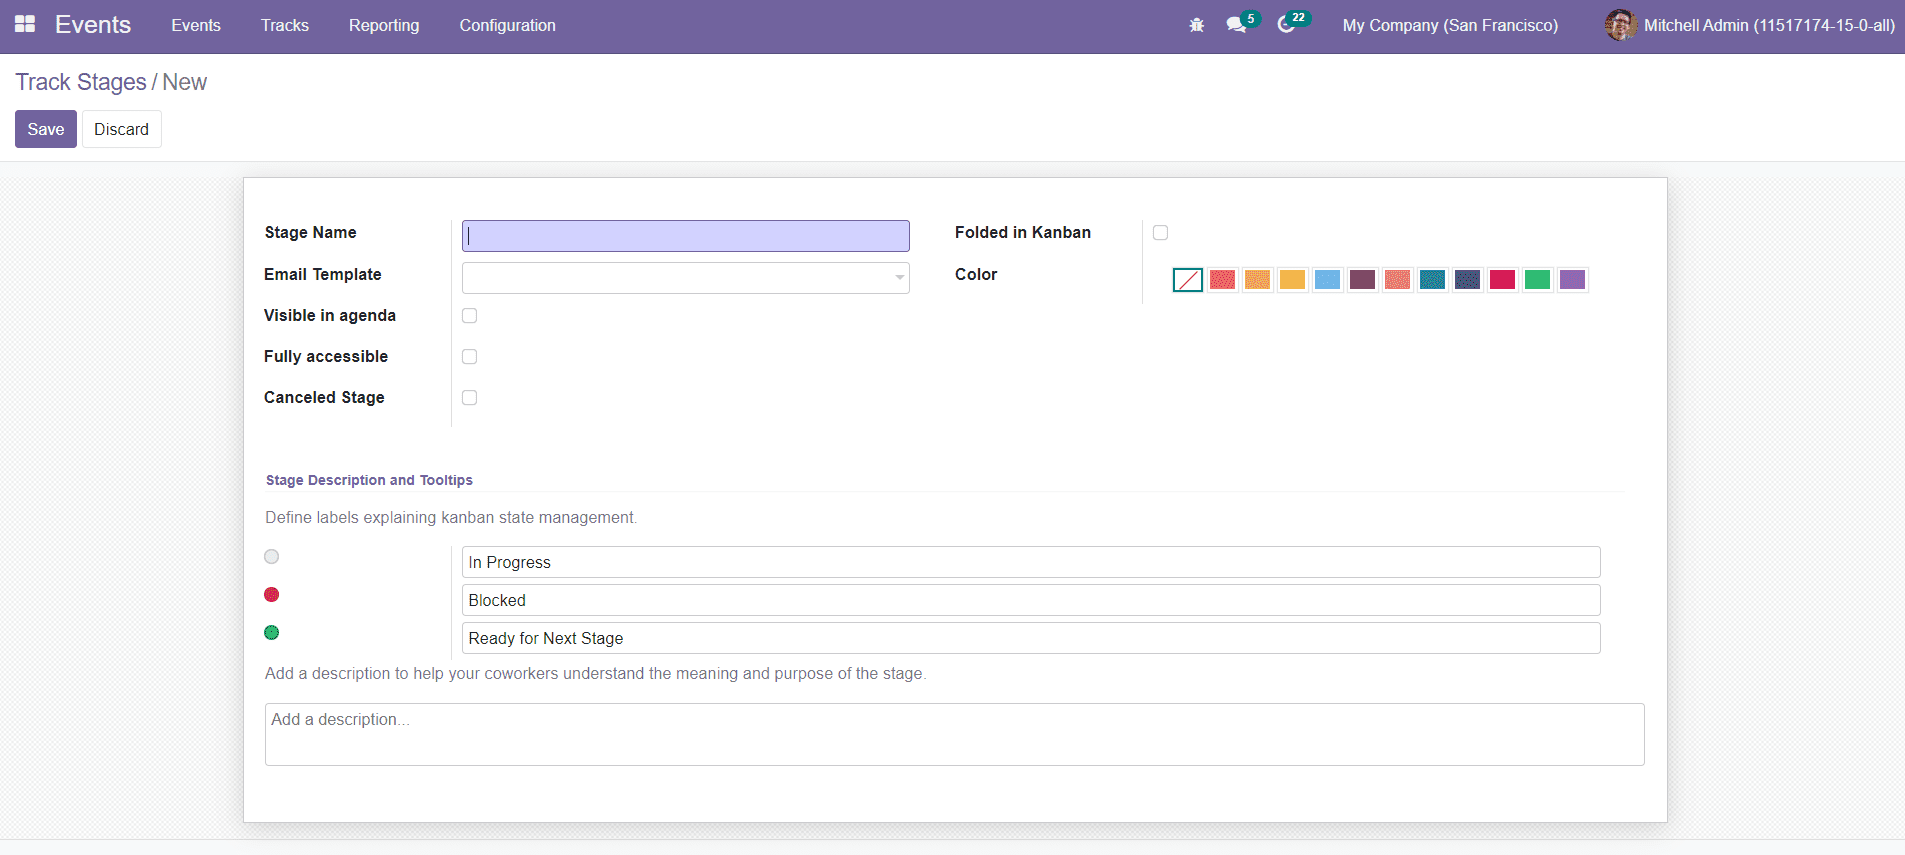
In this window, you can mention the Stage Name in the corresponding field. You can add an Email Template so that whenever a track reaches this step the configured mail will be sent to the respective customer. You can activate Visibile in Agenda, Fully Accessible, Canceled Stage, and Folded in Kanban options according to your demand. You can also select a color for the stage from the given options. Under the Stage Descriptions and Tooltips tab, you can define labels explaining kanban state management and add descriptions about the stage in the given spaces. You can click on the Save button after completing all fields.
Track Locations
The locations configured while creating events and tracks in the Odoo Events module will be recorded in the Track Location platform.

You can add new locations by using Create button.
Track Tag Categories
Just like we created categories for event tags, you can create categories for track tags also. The Track Tag Categories window can be accessed from the Configuration menu of the module.

On this platform, you will be able to see the Name of the tag category and tags under the specified category. Click the Create button to create a new tag category.

Mention the Name of the category and add tags to this category using the ‘Add a Line’ option. You can also select colors for the tags in this window. Click the ‘Save’ button to save the new tag category.
Track Tags
You can easily create and manage tags for the track created in the Events module under the Track Tags option in the Configuration menu. This platform will help you to create new tags.

You can view all configured tags on this platform. The preview of the list will show the Tag Name, Category, and Color Index. Using the Create button, we can create a new tag for the tracks. A new line will appear below to add the Tag Name and select Tag Category. Using the Save button, you can save the new track tag.
Track Visitors
The details regarding the visitors of the tracks published on your website will be recorded in the Tracks Visitors option under the Configuration menu.

The list will show the name of the Track, Visitor, Partner, and Quiz Points. If the visitor added the track to their wishlist, then the ‘Is Wishlisted’ field will be checked. Similarly, the ‘Completed’ field will be checked if the visitor completed the track.
Sponsor Levels
Using the Sponsor Levels option under the Configuration menu, you can assign different levels for the sponsors of your events.

The window will display different levels for sponsors and Ribbon Style. Use the Create button to create a new sponsor level. You can simply add the name of the sponsor level and ribbon style in the new line that appears after clicking the Create button.
Event Quizzes
The quizzes that we created for each event can be found under the Event Quizzes option under the Configuration menu. This platform will record all quizzes created in the Events module.

The preview of the list will show the Name, Event, and Event Track. You can click on a specific quiz to get more details about that particular one.
You will get the record of all questions created for different quizzes on the Quiz Questions platform under the Configuration menu.

Website Menu
The record of all configured Website Menu can be seen under the Website Menu option in the Configuration menu as shown below.
