Employee
The Employee module in the Odoo ERP system is one of the major HR modules that helps to manage and organize all information regarding the employees in an organization. In the Odoo Employee module, you will get a dynamic platform to record compatible profiles for each employee separately. This system is suitable to keep information about the contact details of employees, work information, contract, resume, and many more. Maintaining employee records is particularly essential for the internal purposes of an organization. By documenting a proper profile with information about work experience, qualifications, skills & talents, and career history of an employee, the company can plan appraisal programs, promotions, improve employee policies, conduct skill development activities, and recruitment programs.
In this chapter, we will discuss the Employee module in Odoo 15 in detail.
The main dashboard of the module will display all configured employee profiles in the system.
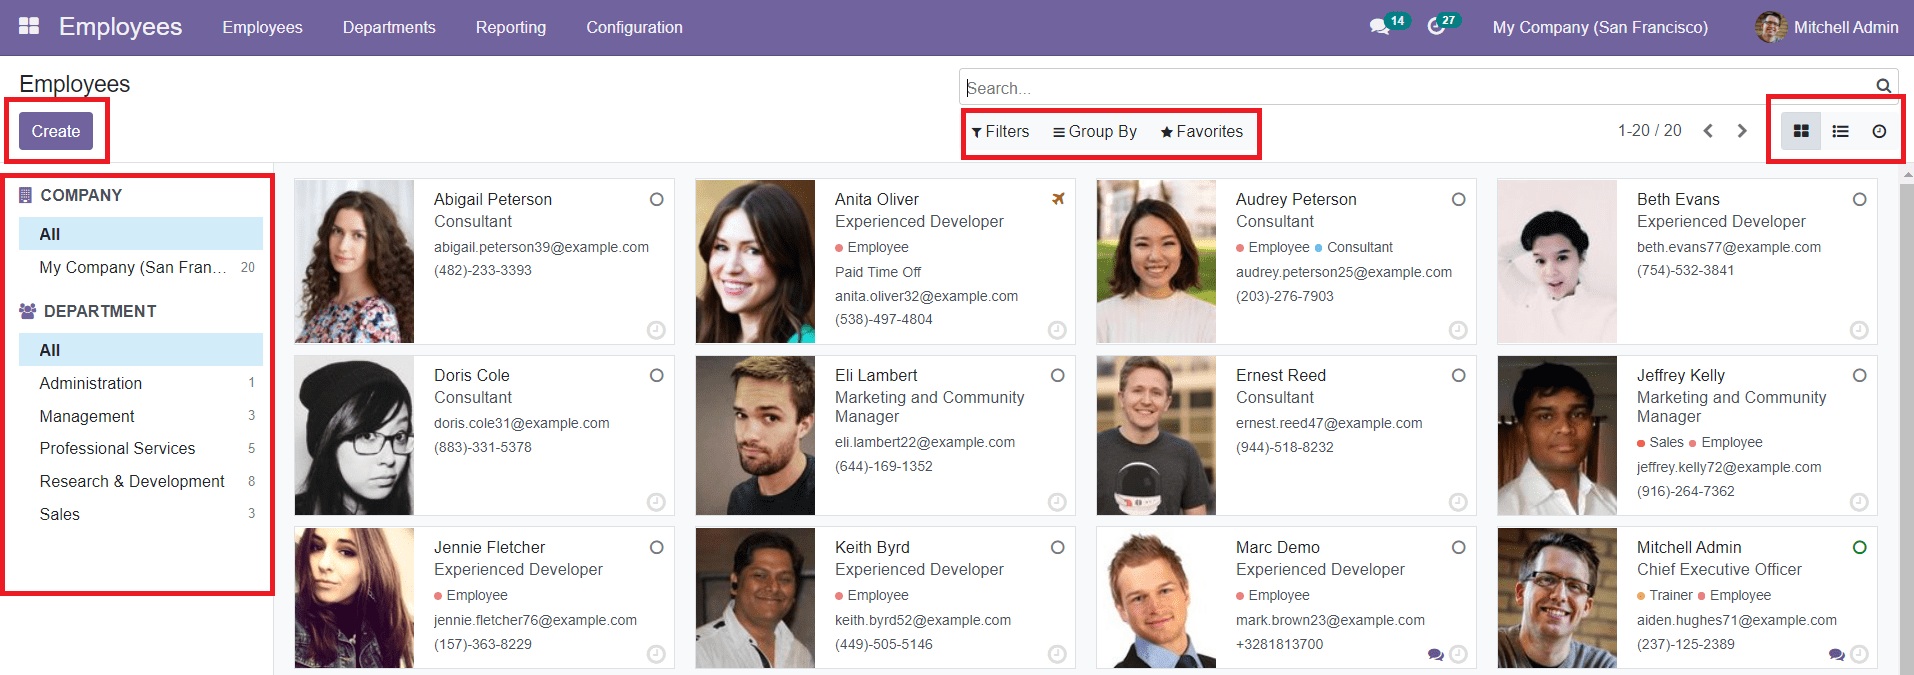
As you can see in the image above, the Kanban view of the Employee dashboard will show each employee profile separately with their images and contact details in preview. This dashboard can be viewed in List view also. The Filters and Group By options will help you to locate employees. You are allowed to use default and customizable options for sorting the employees based on your requirement.
On the left side of the dashboard, you will be able to see the company list. If you are working in a multi-company environment, you can select a company from the list to get the data of the employees in the corresponding company. Below this, you will get the Department list with the number of employees working in each department. This can be used to separate the employees based on their departments.
You can see a clock symbol on each employee profile, which can be used to schedule certain activities with the respective employee. As you can see in the image below, you will get the option to Schedule an Activity by clicking on the clock symbol.

The online status of each employee also can be seen on the top right corner of each profile. Let’s discuss how to create a new employee profile in the Odoo Employee module. For this, you need to click on the ‘Create’ button given in the employee dashboard.
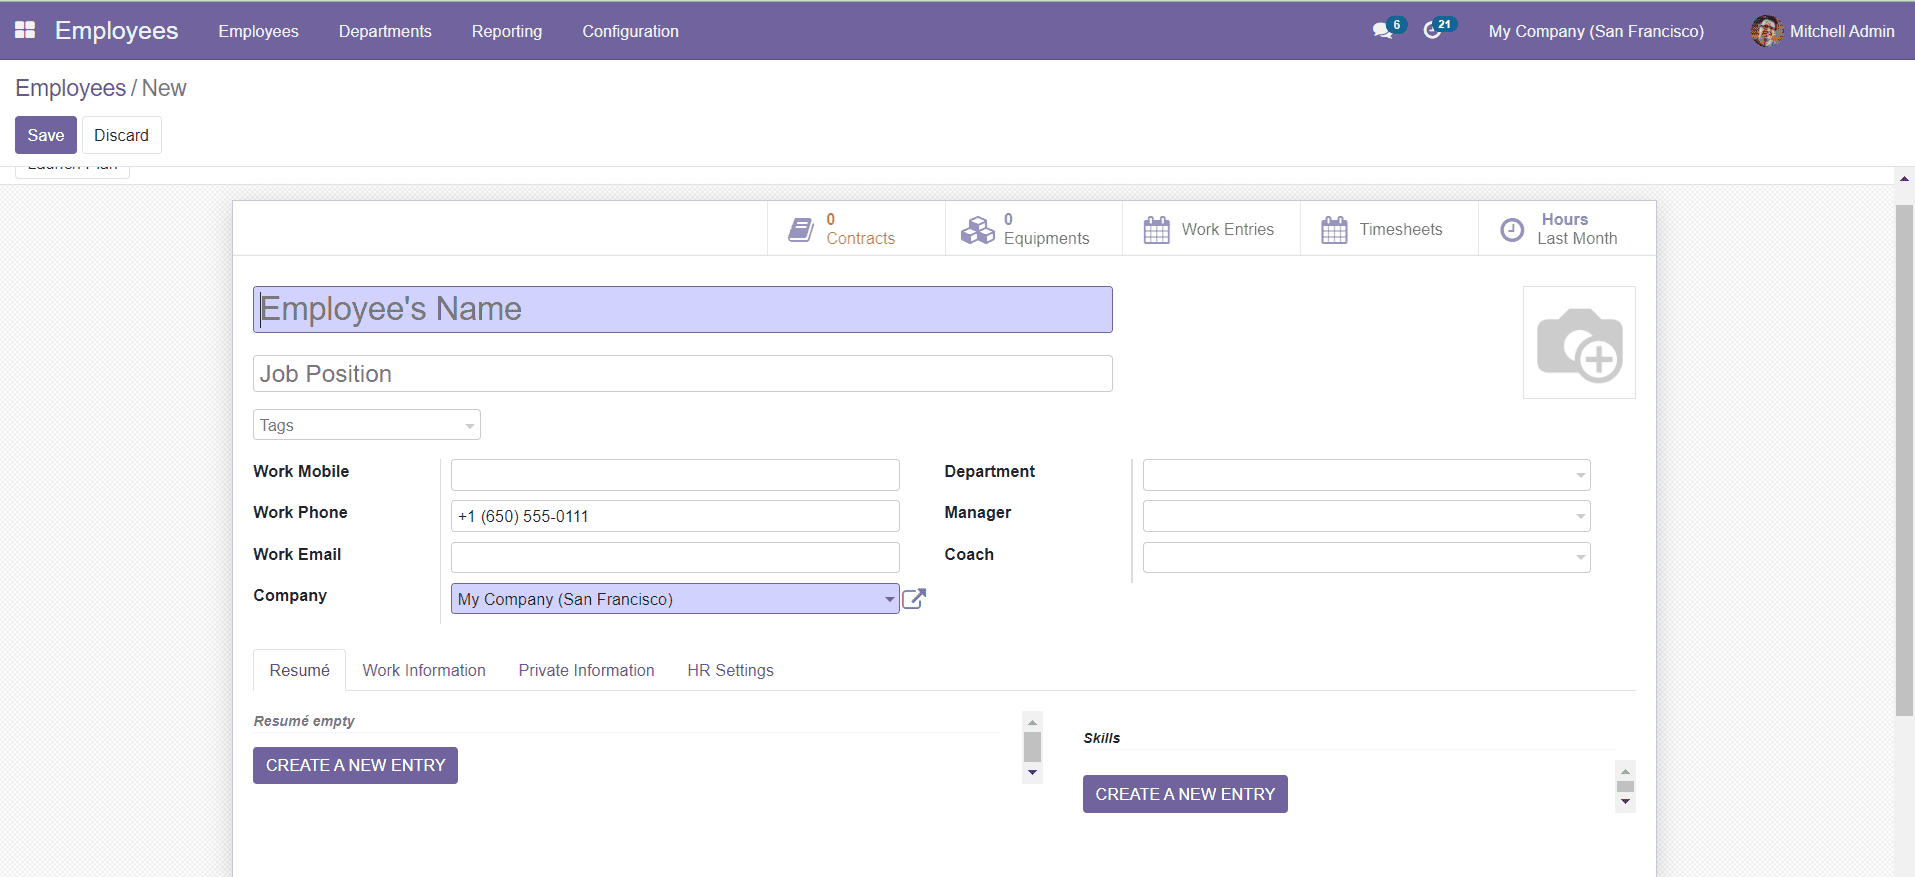
In this window, mention the name of the employee and Job Position in the given fields. Then mention basic contact details such as Work Mobile, Work Phone, Work Email, Company, Department, Manager, and Coach of this employee.
Under the Resume tab, you can add the resume and skills of the employee. Adding these details will enrich your profile and be useful for training and promotional programs.

To add a Resume, click on the ‘Create a New Entry’ button. A pop-up window will appear where you can add your educational qualifications, work experience, certifications, and training details one by one.
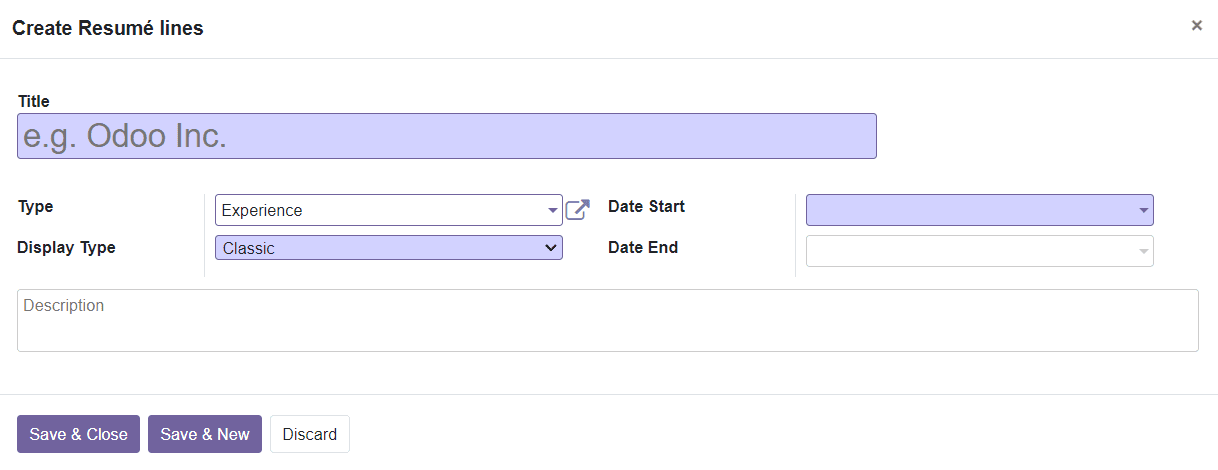
Here, you can add a Title to your resume. Select the Type from the drop-down. It can be Experience, Education, Internal Certification, or Internal Training. It can be created manually to add up based on requirements. Select the Display Type as Classic, Certification, or Course. Mention the starting and ending dates of the program in the Date Start and Date End field. For example, if you want to add your education qualification, mention the qualification as Title, Education as Type, and the time taken to complete the course can be specified in the Date Start and Date End fields. Add a brief description of this resume line in the Description field and save the resume. You can add more resume lines by following the same method.
Now, you have to click on the ‘Create a New Entry’ under the Skills field to add skills as shown in the image below.

A pop-up window will appear to add your skills.

You can mention the Skill Type and Skill in the respective field. For example, if you have selected Language as your Skill Type, then you can mention the languages that you know in the Skill field. Mention the Skill Level and Progress in the specified field which will determine how much you mastered this skill. You can configure skills types & skill levels from the Configuration menu of the module after activating the developer mode. Save this skill using the ‘Save & Close’ button and you can add more skills using the ‘Save & New’ button.
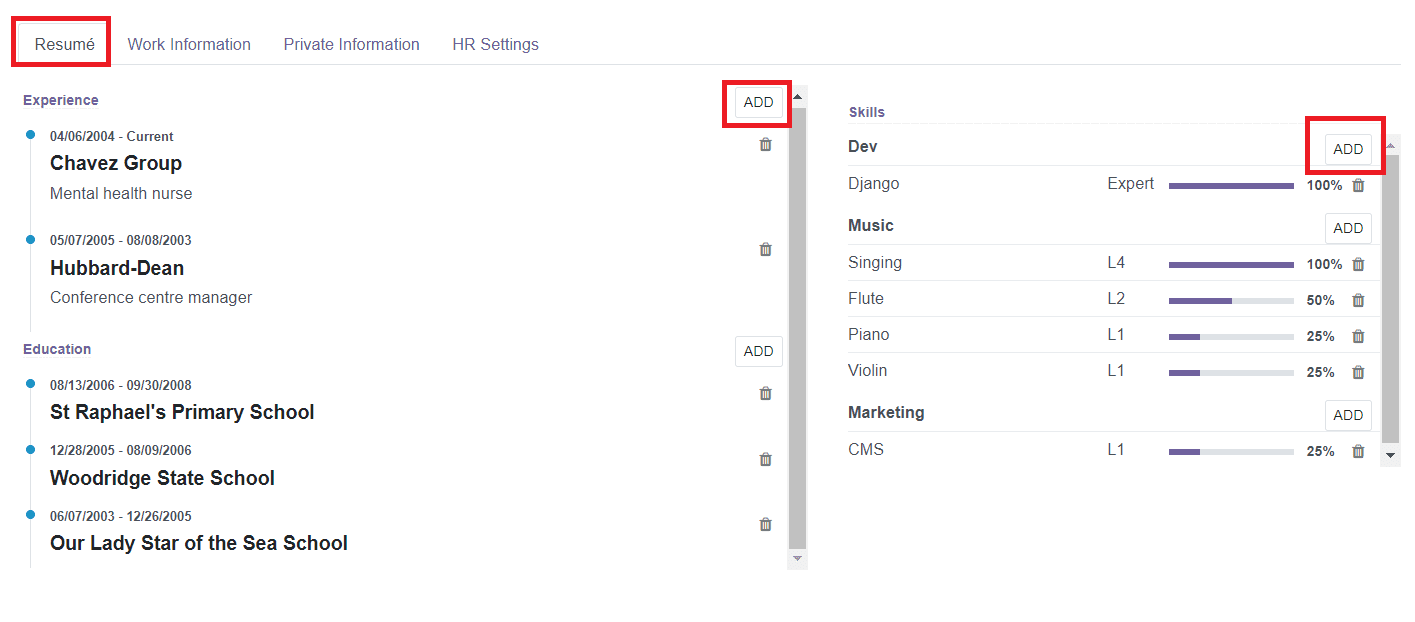
After adding Resume and Skills, you can see the Resume tab in your profile as shown in the image above. The ‘Add’ button given in the respective fields will help you to configure new resume lines and skills to your profile.
The Work Information tab includes the details regarding the work of the employee.
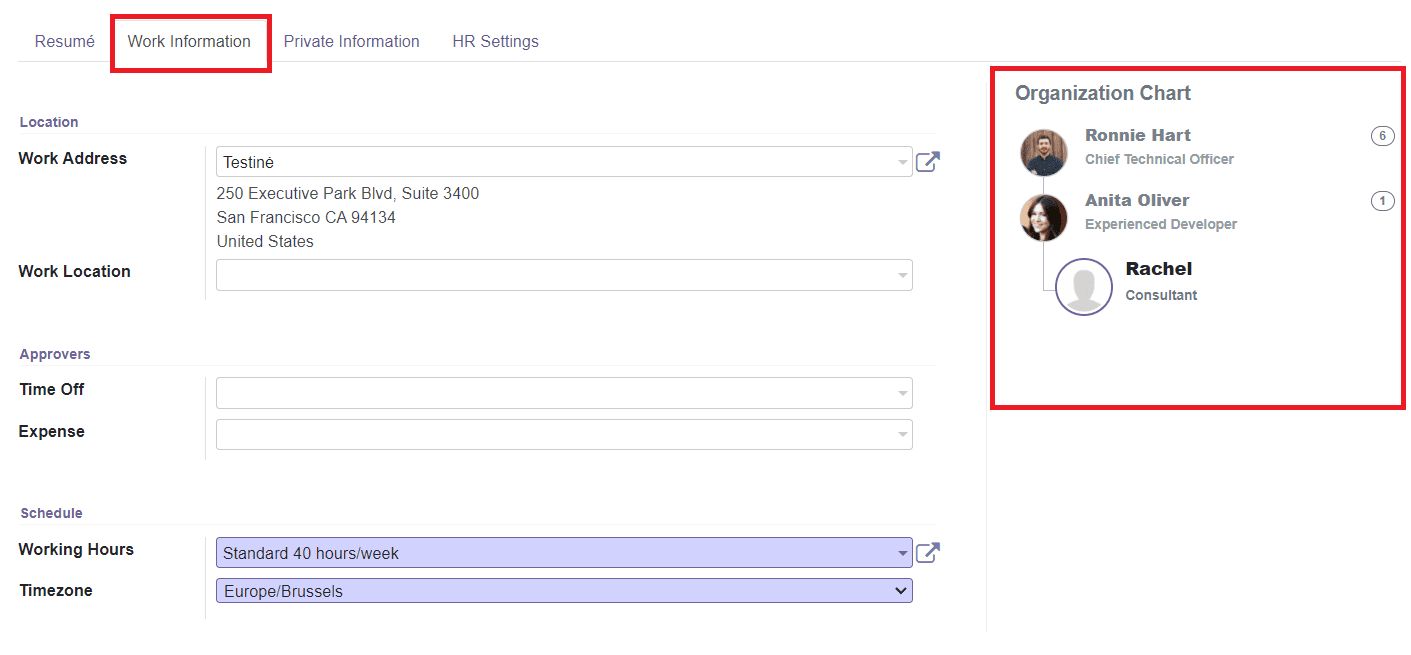
In the Location field, you can mention the Work Address and Work Location. The Work Address will automatically appear based on the Company you selected earlier. The Work Location can be configured from the Configuration menu. Under the Approvers field, you can select the user responsible for approving time off and expenses of this employee in the Time Off and Expense sessions respectively. You can schedule the Working Hours and set a Timezone for this employee in the Schedule field.
On the right side of the screen, you can see an Organization Chart of the employee. This will appear only after configuring the manager/coach and saving the profile.
The Private Information tab will include all important details regarding the employee apart from work-related information.

In the Private Contact session, you can add Address, Email, Phone, Language, and Home-Work Distance in the respective fields. After selecting a language for the employee, all documents and emails sent to this contact will be translated into the selected language. You can add the Citizenship details such as Nationality, Identification Number, Passport No, Gender, Date of Birth, Place of Birth, and Country of Birth in the corresponding fields.
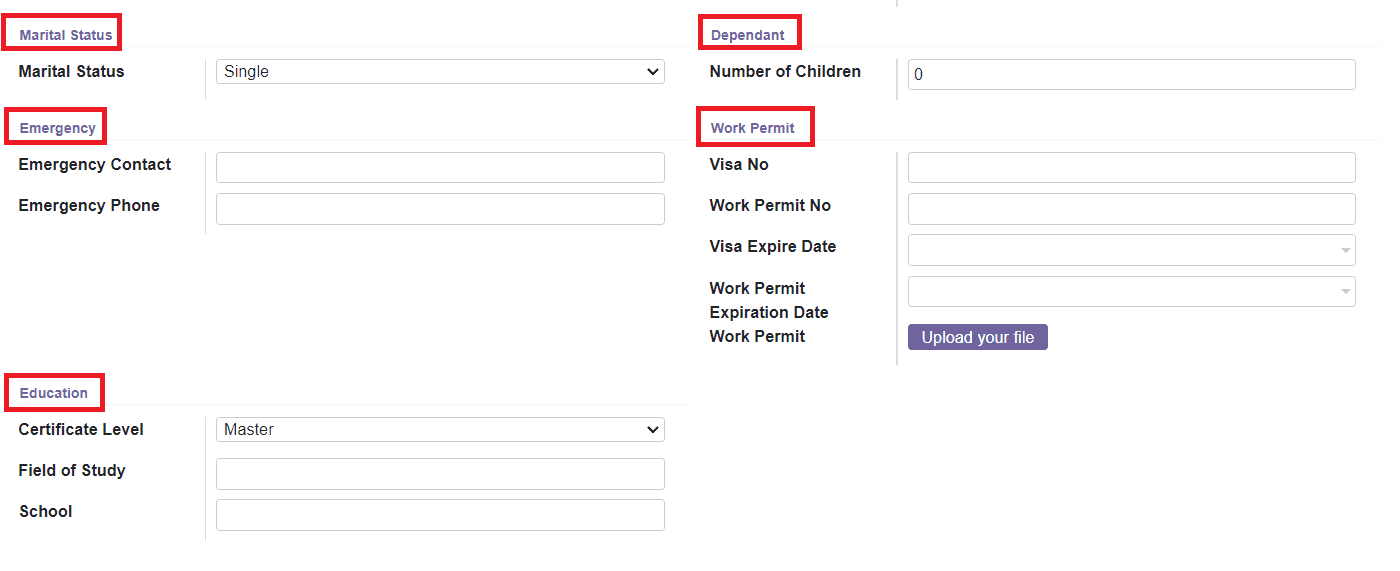
In the Marital Status field, you can specify the employee’s marital status. You can add a person who is related to the employee as Emergency Contact and add his/her phone number in the Emergency Phone. In the Dependant field, you can add the Number of Children.
The details regarding the Visa No, Work Permit No, Visa Expire Date, and Work Permit Expiration Date can be specified under the Work Permit field. Using the Upload option, you can upload the Work Permit of the employee. The Education tab can be used to mention the Certification Level of the employee, Field of Study, and School details.
The HR-related details of the employee can be configured under the HR Setting tab.

You can select the Employee Type from the drop-down menu which will define the category the employee belongs to. It can be Employee, Student, Trainee, Contractor, or Freelancer. Mention Related User in the given field. Mentioning the Related User name is very important for the resource to manage its access. In the Payroll session, add the Current Contract of the employee and Job Position. In the Application Settings field, you are allowed to define the Fleet Mobility Card and Timesheet Cost.
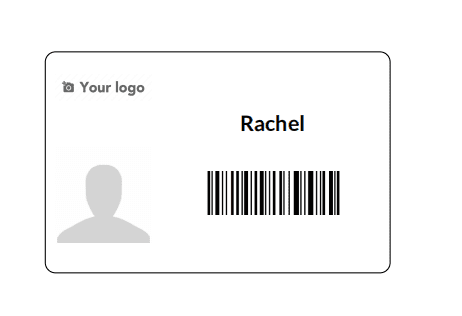
In the Attendance/Point of Sale session, you can mention a PIN Code to check-in/out in the Kiosk mode of the Attendance module and to change the cashier in the Point of Sale module. You can also generate a Badge ID from here which is used for employee identification. By clicking the ‘Generate’ option, you will be able to get a Badge ID code.

You can click the ‘Print Badge’ button to take a printout of the Badge as shown below.
After completing all fields in the new employee configuration window, you can click on the ‘Save’ button to save the new employee data to your system.
When you select an employee profile from the dashboard, you will get a detailed view of the data regarding that particular employee along with many advanced options on the top of the window as shown below.
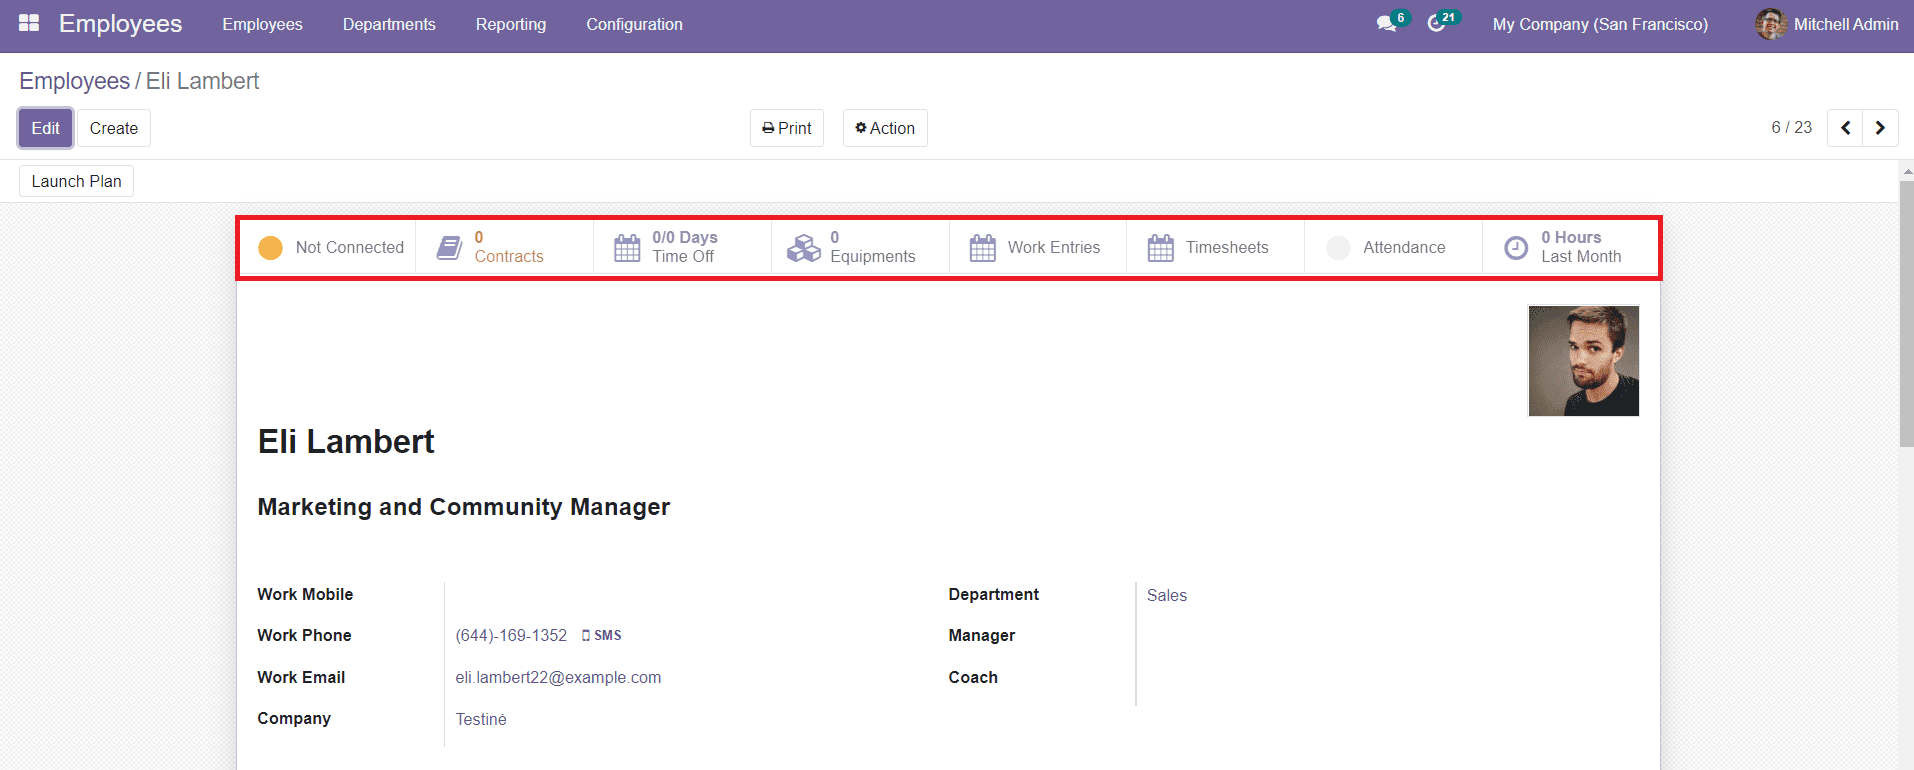
You will get the options to see the Contracts configured to this profile, Time Off, Equipment, Work Entries, Time Sheets, Attendance, and Worked Hours Last Month. The Contract button will show the ongoing contracts configured with this employee. The Time Off button will help you to get the details of the number of remaining leaves and the time-off calendar of the respective employee. The Equipment button will display the information about the equipment configured with this employee profile. The work entry-related details and timesheet of the employee can be found in the Work Entries and Time Sheets buttons respectively. Attendance of the employee can be obtained from the Attendance button. The number of hours worked last month is also found in the smart tab.
The ‘Launch Plan’ button on the screen will help you to launch a new plan with the employee. When a new employee joins the company, we need to set certain activities with the employee in order to familiarise the company working. By clicking this option, a pop-up window will appear as shown below.

Here, you can select the Onboarding Plan for the new employee. The activities configured under the Onboarding plan will automatically be assigned to the new employee.
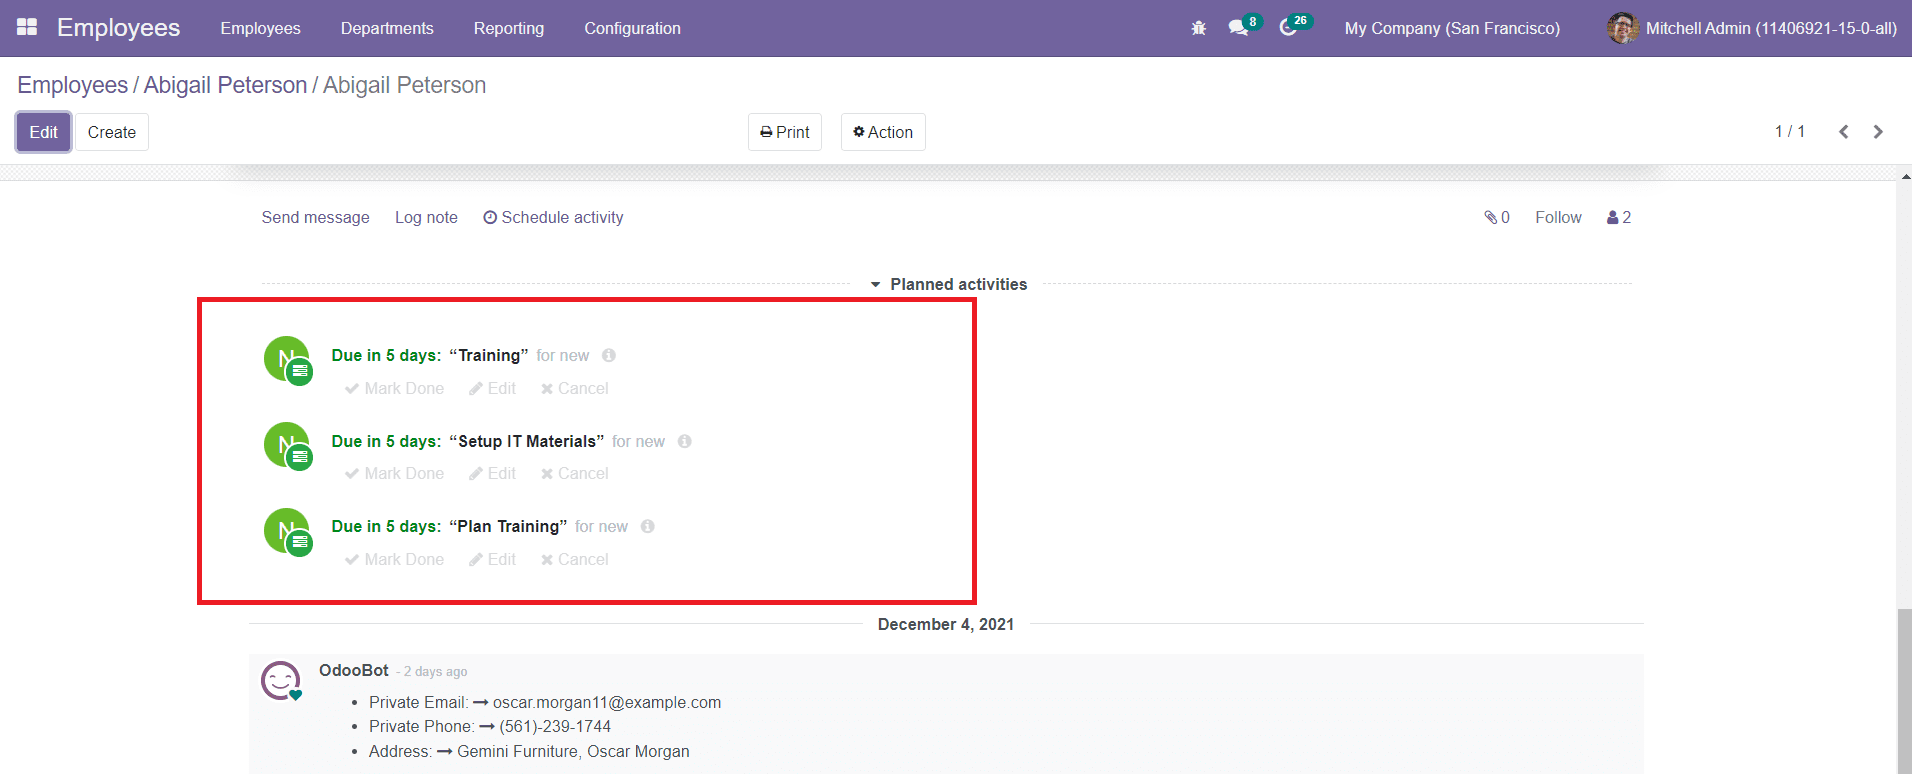
Similarly, you can plan Offboarding activities for the employee when the employee leaves the company.
This is how we create employee profiles in the Odoo Employee module. Now, let’s take a look at the configuration of employee contracts in the next session.