Contacts
Odoo has the dynamic contact management module to record all contact details of the employees and customers of an organization. You can effectively manage the contact information in this module without any difficulties and confusion. This module will act as a dedicated digital address book where you can configure the basic contact details of your employees, customers, suppliers, and partners of your business. Maintaining contact details is very important in a business environment.
You will be able to get easy access to this module and easily retrieve the contact information at any time on this platform. When you open the module, you will land on the home dashboard of the contacts. This platform will show all available contacts in the system.
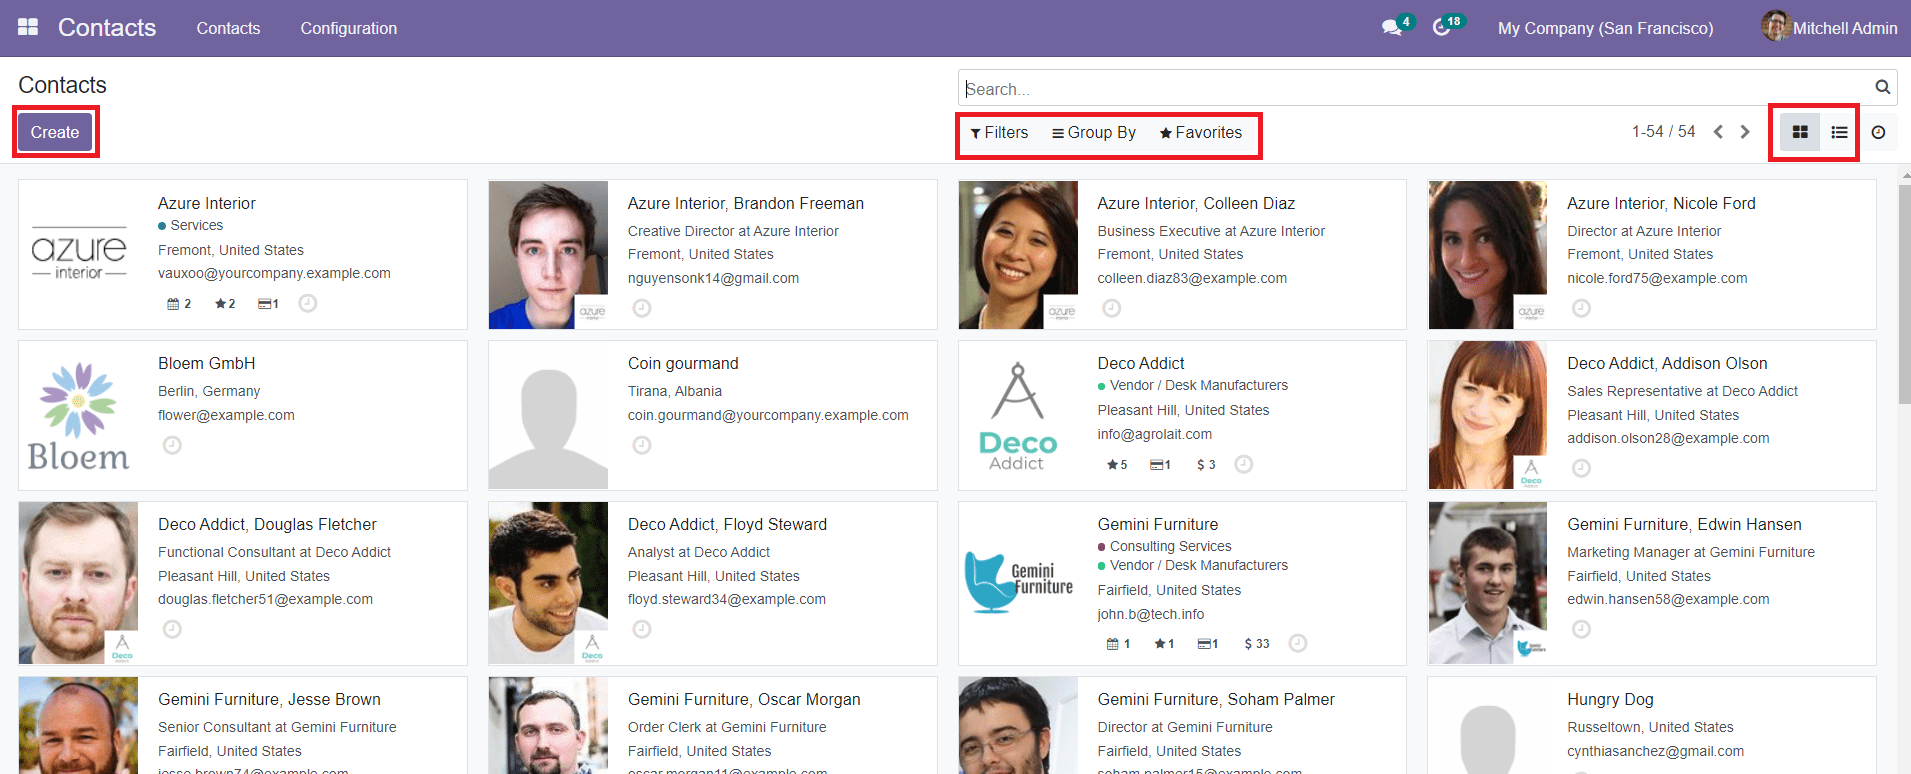
The Kanban view of the contacts will show basic contact information and image of the respective contacts. The default, as well as customizable Filters and Group By options, can be used to sort the available data of contacts. You can also use the Favorites option to add selected contacts to your favorite list.
The List view of the contact can be viewed as shown in the screenshot below.
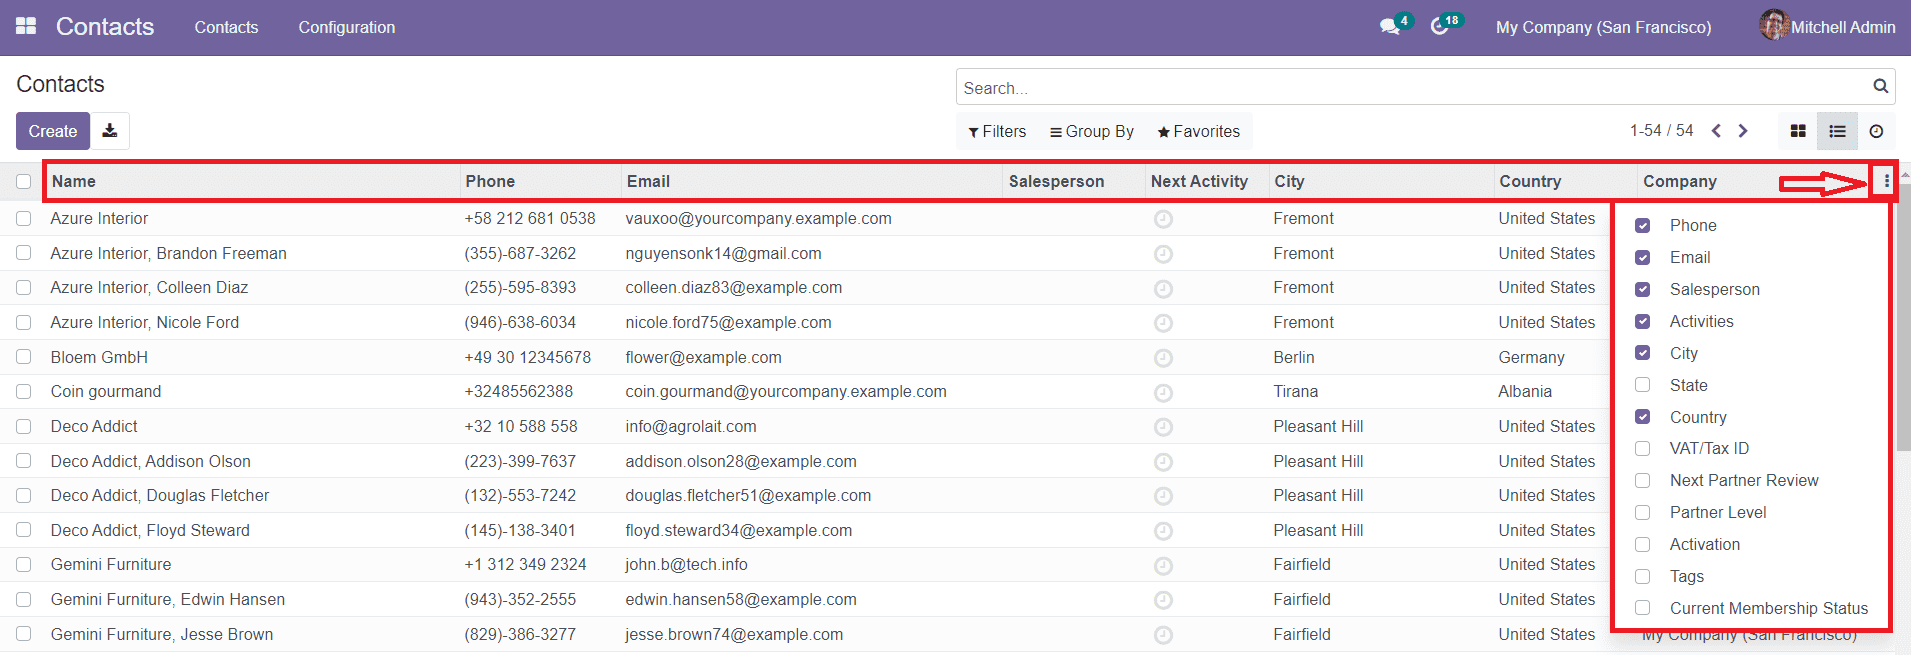
The list of contacts will show the Name, Phone, Email, Salesperson, Next Activity, City, Country, and Company of the contact. The three dots shown on the top right corner of the list will show additional categories to expand the list view.
Now, let's discuss how to configure new contact details in this module.
Initially, you have to click on the ‘Create’ icon given in the home dashboard of the module. You will be directed to a new contact creation window as shown below.
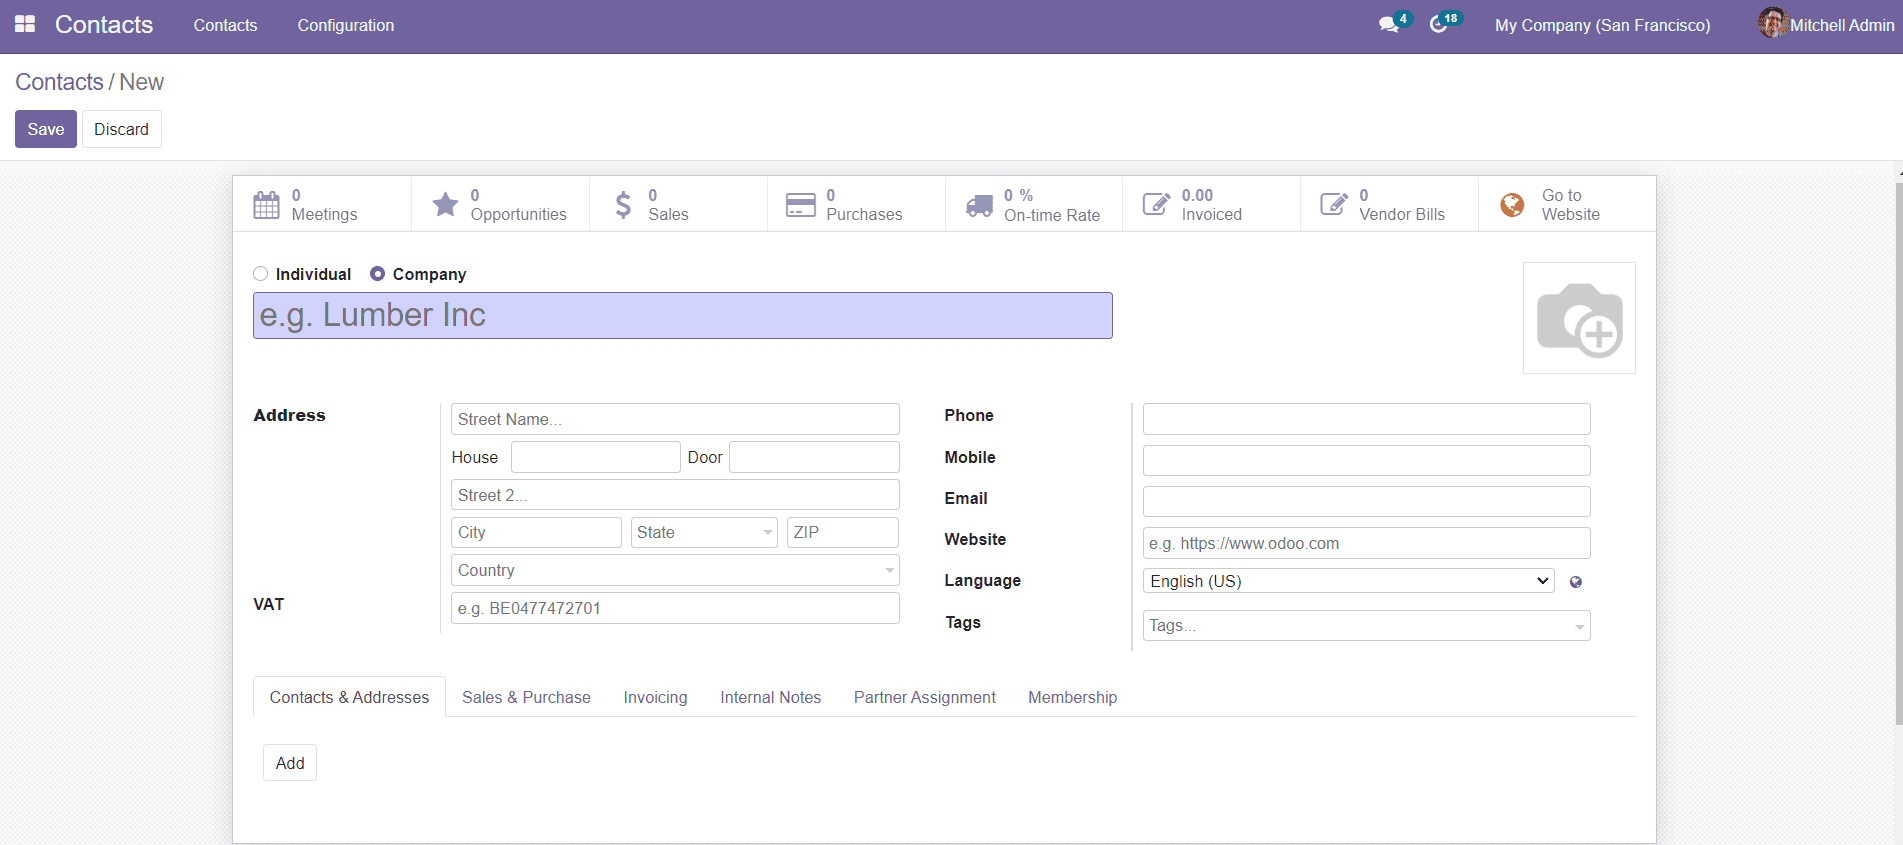
This field will allow you to create Individual contact as well as Company contact. You can select the suitable option in the respective field. Mention the Name of the Contact, Address, VAT, Phone, Mobile, Email, Website, Language, and Tags in the given spaces.
Under the Contact & Addresses tab, you can add contact information using the ‘Add’ button. By clicking on the ‘Add’ button, a pop-up window will appear as shown below.
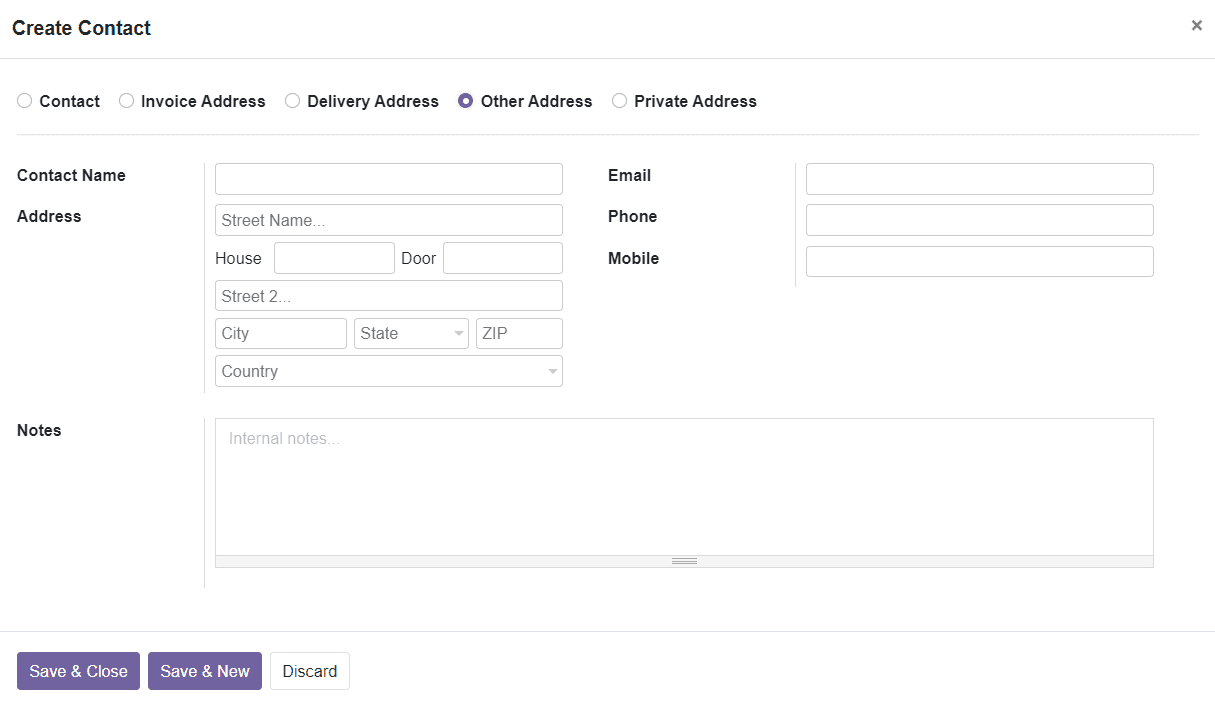
You can add multiple addresses to this platform. The Invoice and Delivery addresses are used in sales orders. The Private Address will be visible only for authorized users. You can add the Contact Name, Address, Email, Phone, and Mobile number in the given fields. The Notes field can be used to add additional notes about the contact addresses. You can save the details by clicking the ‘Save & Close’ button. To add a new address, you can use the ‘Save & New’ button.
The details regarding sales and purchasing of the particular contact can be configured under the Sales & Purchase tab.
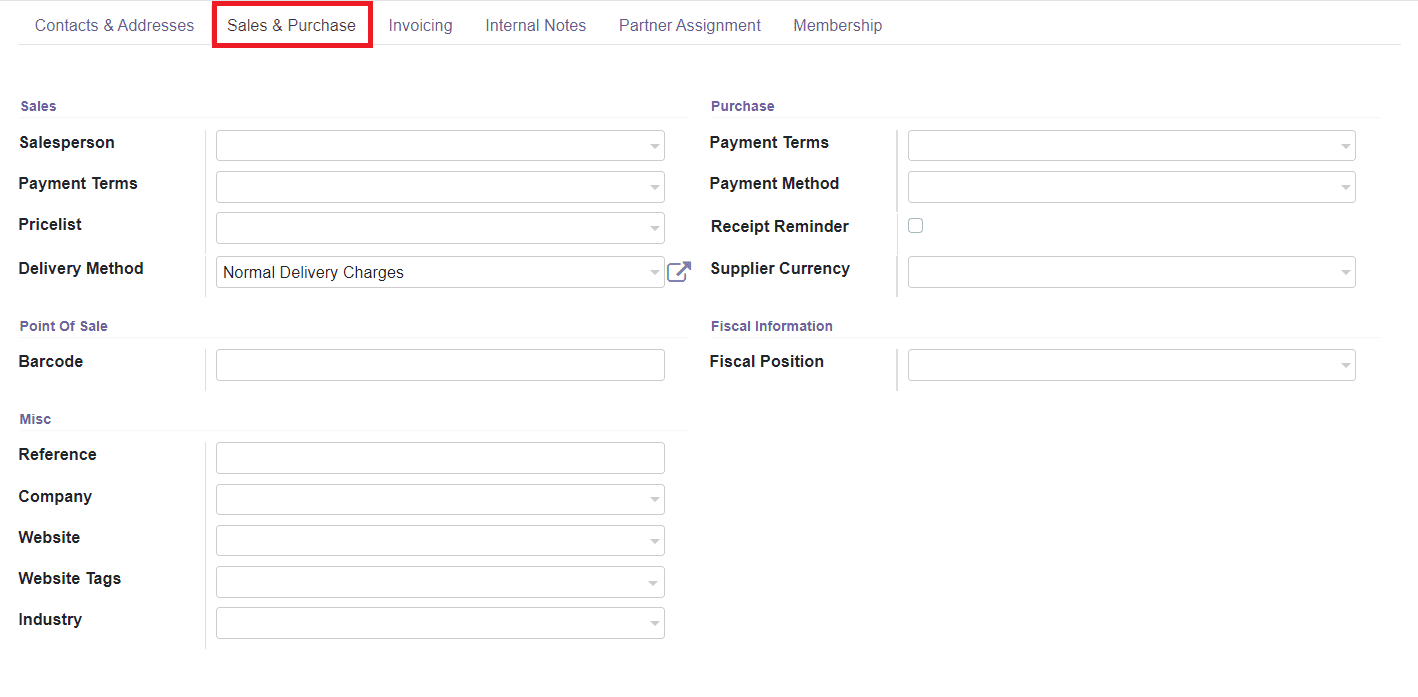
In the Sales field, you can assign a person as Salesperson and select Payment Terms and Price Lists in the given spaces. You can also add the Delivery Method for the sales orders. In the Point of Sale field, you can add the Barcode to identify this contact. In the Purchase tab, you can add the Payment Terms, Payment Methods, and Supplier Currency for purchases. You can enable the Receipt Reminder to send an automatic confirmation email to the vendor to confirm the date. You can specify the Fiscal Position in the Fiscal Information menu.
In the Miscellaneous information field, you can add Reference, Company, Website, Website Tags, and Industry.
In the Invoicing tab, you are allowed to add the Bank account details of the contact.
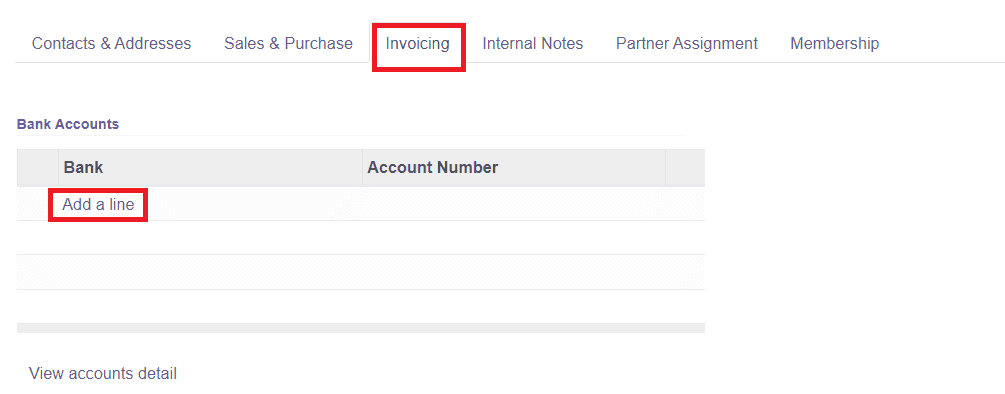
By clicking the ‘Add a Line’ button, you can add the Bank details and Account Number.
Odoo gives you an additional field to add Internal Notes about the contact.

In the Partner Assignment tab, you can add the Geo Location of the contact in the specified field.
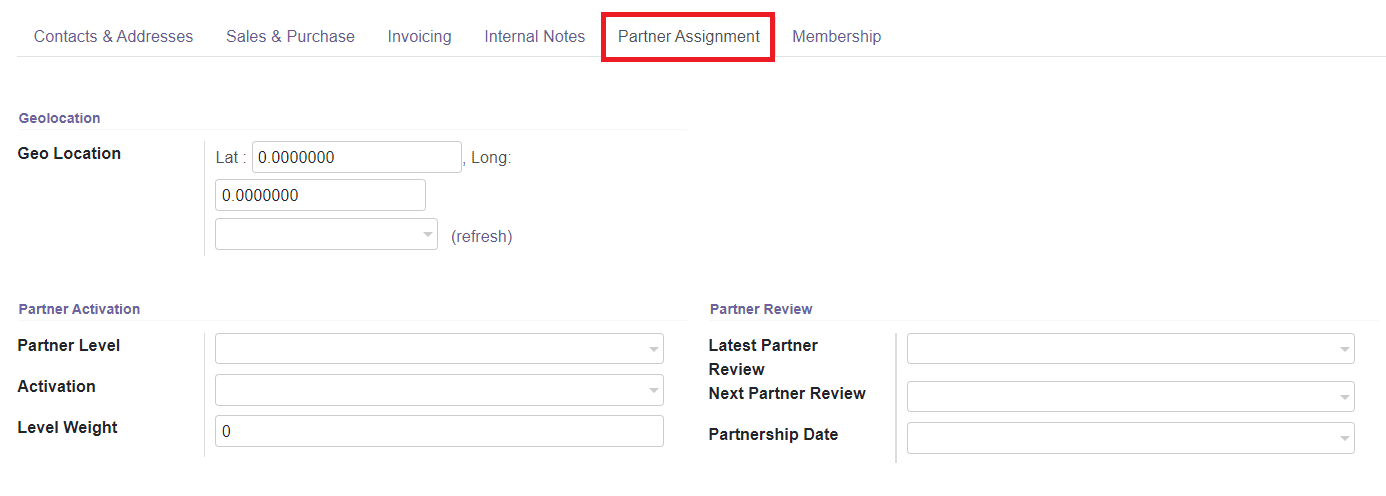
In the Partner Activation field, you will be able to specify the Partner Level, Activation, and Level Weight. You can define the Latest Partner Review, Next Partner Review, and Partnership Date in the Partner Review tab.
The membership details about the contact can be defined in the Membership field.

You can select the Free Member option if you want to give free membership for the contact. In the Associate Member field, you can assign a member with whom you want to associate your membership. You can also specify your Current Membership Status in the given field.
After completing all necessary fields in the new contact creation window, you can click the ‘Save’ button to save the new contact.