SMS Marketing
Odoo SMS Marketing is an instant marketing tool that allows you to perform SMS Marketing
activities related to the marketing campaigns in an efficient manner and also it
will keep track of the campaigns. The advantages of SMS over other marketing techniques
such as emails and phone calls are it is short, personal, and instant. There is
no doubt that it is a good platform for sharing promotions, discounts, coupons,
and many more aspects to keep your customers connected with you.
Contacts Lists
As an SMS Marketing module, you will first have to create a Contacts list. The Odoo
platform allows you to create the Contacts list with ease. So we can discuss how
to create contact lists on the platform. The Contact Lists window can be accessed
from the Contacts Lists tab. The image of the window can be viewed below.
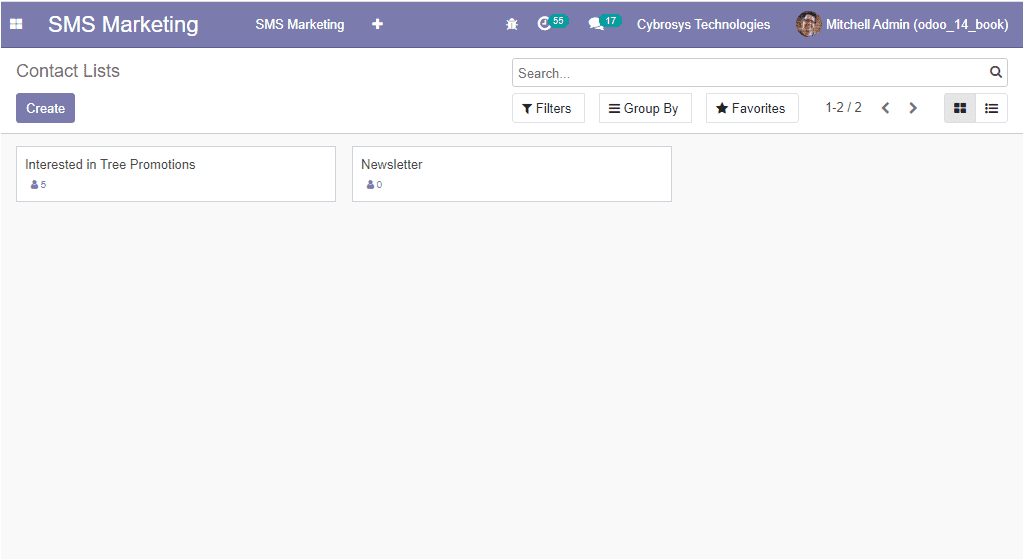
In this Contacts lists window, you can view all the Contacts Lists created in the
platform and if you are clicking on the Create icon available, you will be depicted
with a pop-up window as depicted below.
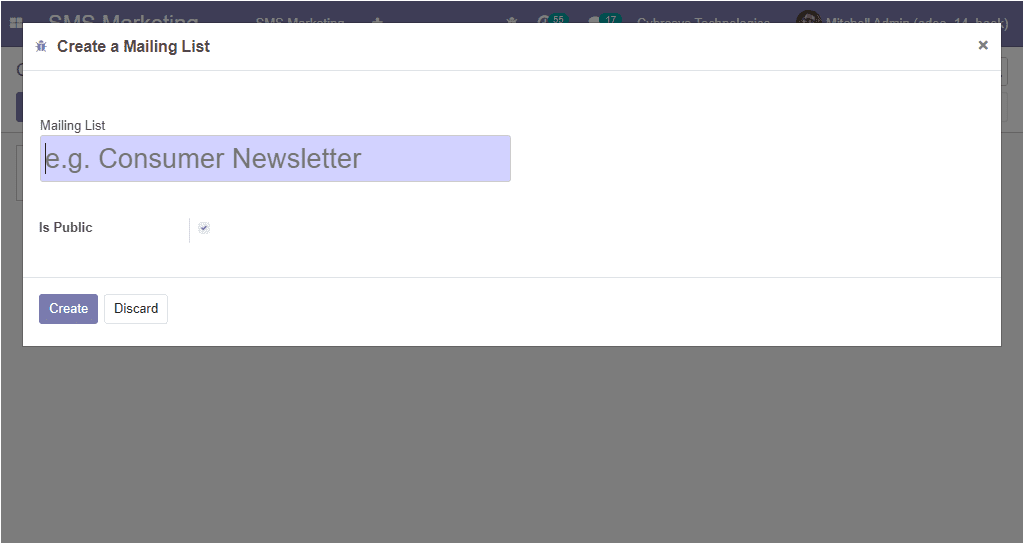
In the Create a Mailing List window, you can provide the Mailing list name, and
also you can enable the option Is Public. By doing this the mailing list can be
accessed by the recipient on the unsubscription page to allow him/ her to update
his subscription preferences. After providing the details, you can select the Create
icon available. This contact list can be used to create a target audience.
Now we can discuss the Contacts menu available on the platform.
Contacts
The Contacts window available in the module can be accessed by taking the route
SMS Marketing -> ContactsLists -> Contacts. The image of the window is depicted
below.
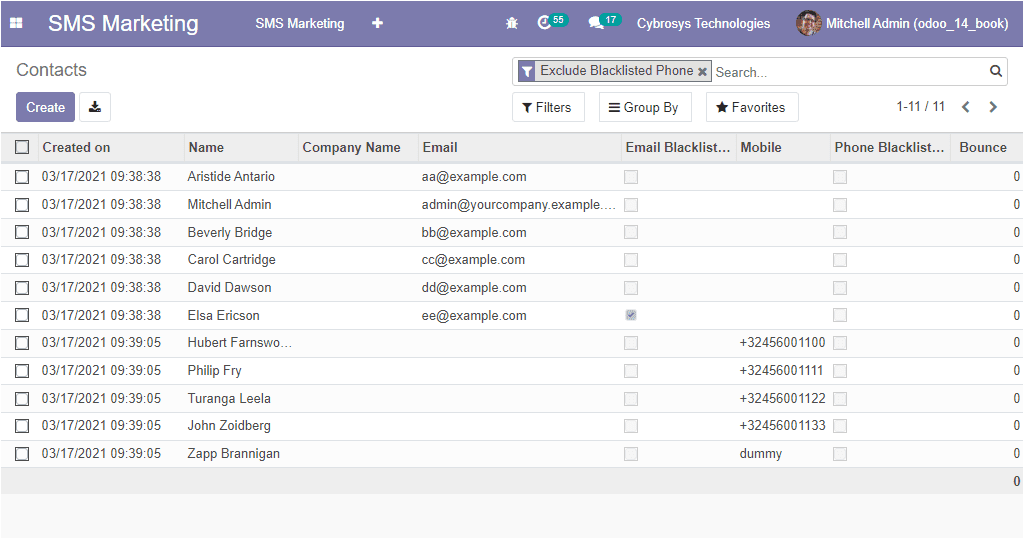
In this Contacts window, you can view all the contacts along with the Name, Created
date, Email ID, Email Blacklisted, Mobile number, Phone Blacklisted, and the Bounce.
Using the Create icon available in the window, you can create new contacts. Let
us have a look at the image of the contacts creation window.
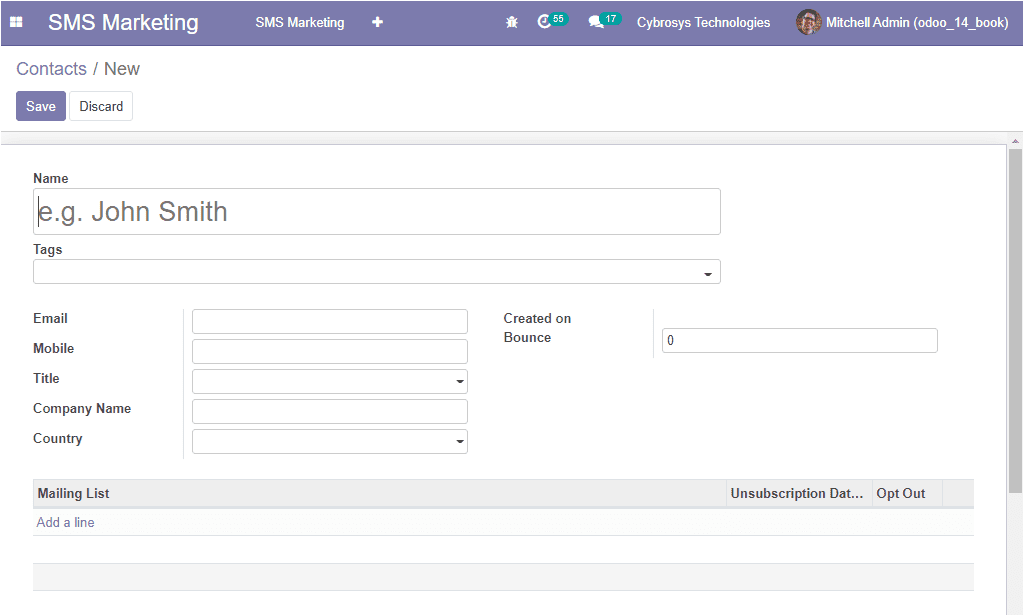
In this creation window first, you can provide the Contact Name then allocate the
Tags. After that, you can mention the Email ID and the Mobile number along with
the Company Name and Country. Under the Mailing list, you can add the Mailing List
by selecting the Add a line option available. This option allows you to add the
contact to the required contact lists. Also, you can enable the option Opt-Out for
providing permission to unsubscribe from the SMS services.
As we are clear on the aspects of Contacts and Contacts Lists in the platform and
now let us discuss how to create SMS Mailings in the platform.
Create SMS Mailings
The home dashboard window of the Odoo SMS marketing module is depicted below.
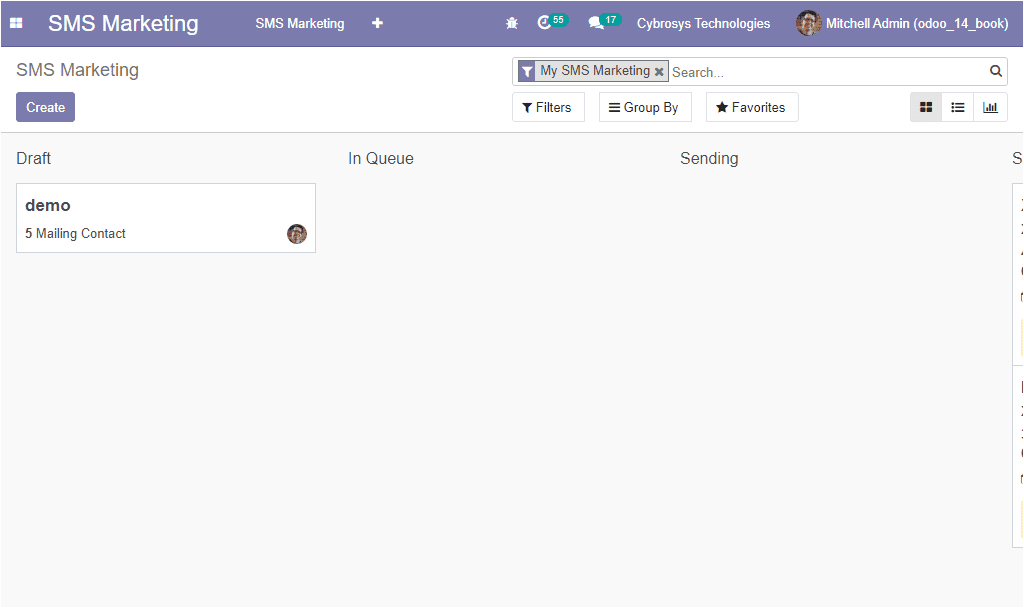
In this home dashboard window of the SMS marketing module, you can view different
stages such as Draft, In Queue, Sending, and Send on the basis of the status of
the SMS mailings. All the drafted messages in the platform can be viewed under the
Draft stage. In the same way, we can describe each stage. To create new SMS mailings
you can select the Create option available on the top left corner of the window.
The image of the creation window is depicted below.
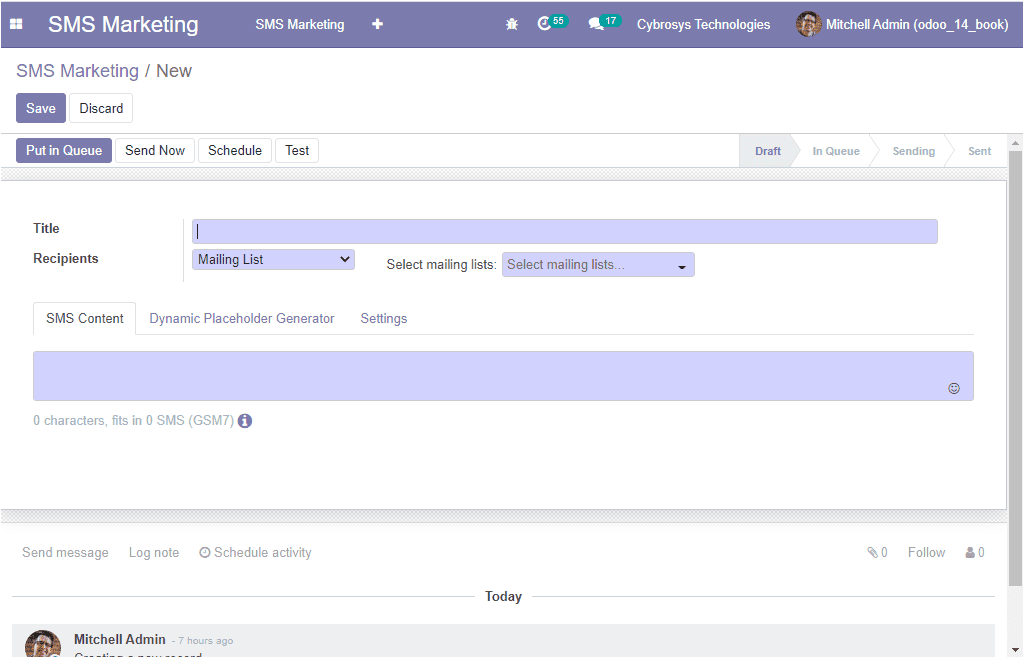
In this SMS mailings creation window, you can provide the Internal Title of the
SMS. Here you can specify what is the content of the mailings. Then you can fill
the next field Recipients where you can add the receivers of the SMS from the drop-down
menu available. The Select mailing lists can be selected from the list being defined.
The content for the SMS can be described under the SMS Content tab available. Below
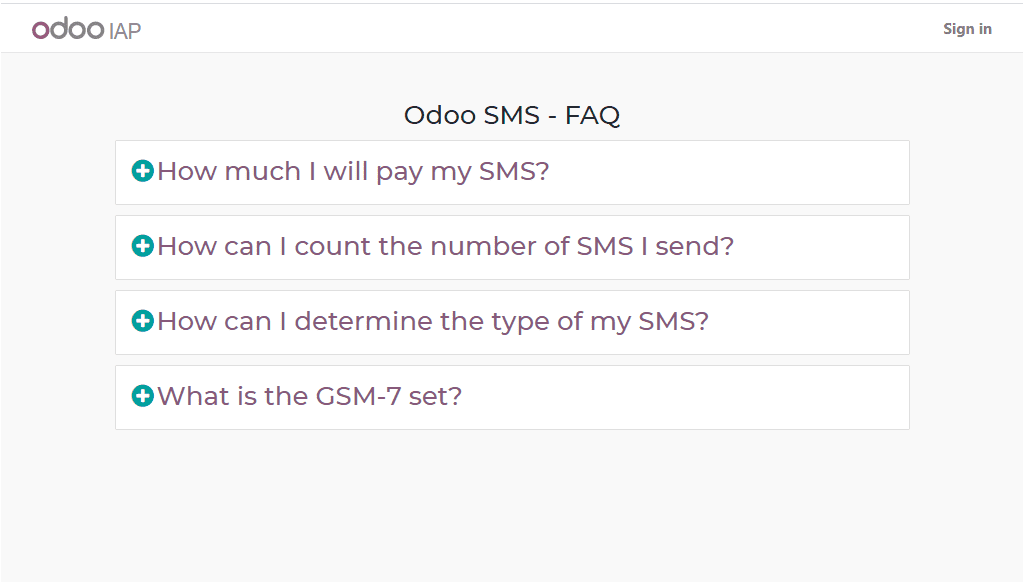
the SMS content tab, you can also view an information icon that will allow you to
find the price to send an SMS to a country. This option will also help you to find
the number of SMSs sent and many more aspects of SMS mailing.
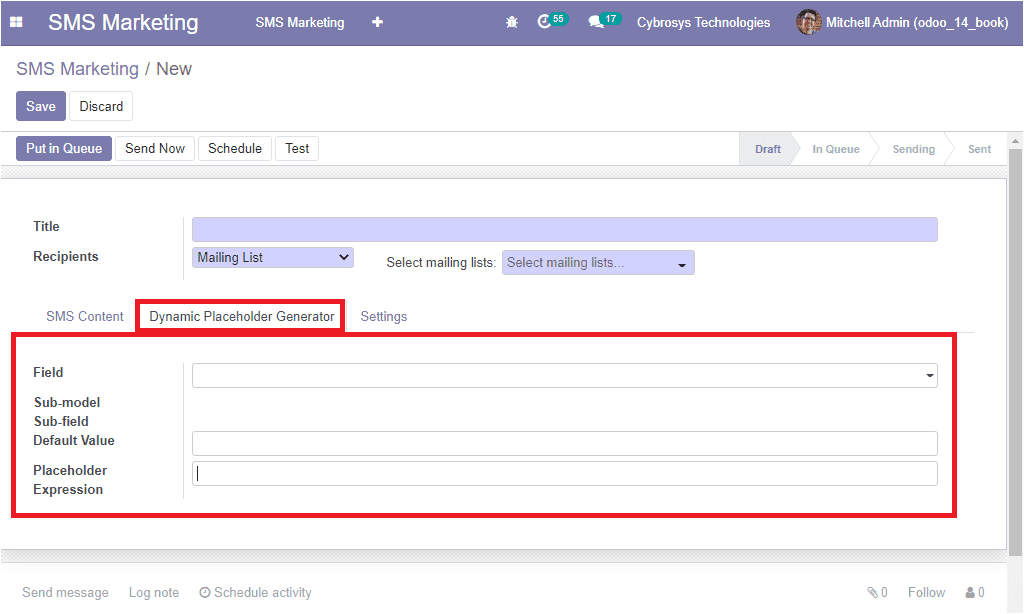
Under the Dynamic Placeholder Generator tab, you can select the target Field from
the related document models available in the dropdown menu available. You are also
able to allocate Default value and Place holder Expression.
Under the Settings tab of the SMS mailing creation window, you can provide the Name,
Responsible person, and also you can enable the Include opt-out link option. This
option will help the receiver if the receiver is not interested in receiving the
SMS anymore, he/she will be able to unsubscribe from the mailing list. In addition,
you have the provision to view the history of the send links from the Link Tracker
available under the Configuration tab of the SMS Marketing module. The image of
the window is showcased below.
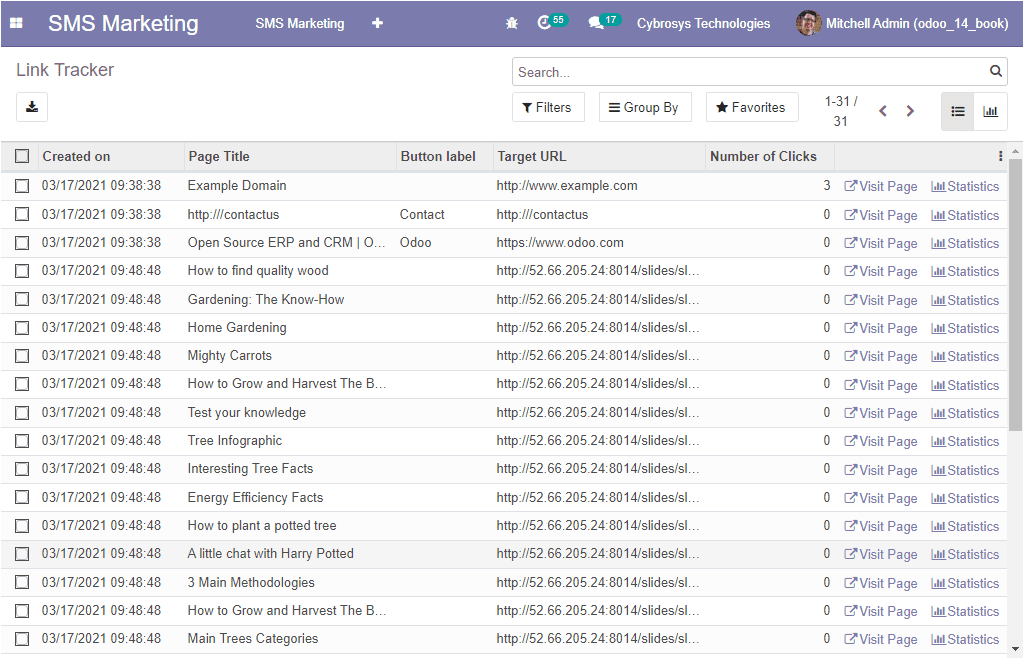
In this Link tracker window, you can find the history of all sent links. Back to
the SMS Marketing mailing creation window, where under the Settings tab, you have
more details to fill in as the Marketing information such as Mailing Campaign, Source
Medium which is the delivery method. Also, you can enable the option Allow A/B Testing.
If enabled, recipients will be mailed only once for the whole campaign. This lets
you send different mailings to randomly selected recipients and test the effectiveness
of the mailings, without causing duplicate messages. After providing all the required
information in the SMS mailings creation window, the next step is to decide when
you want it to be delivered. For that, you can view some options on the top left
side of the window as shown below.
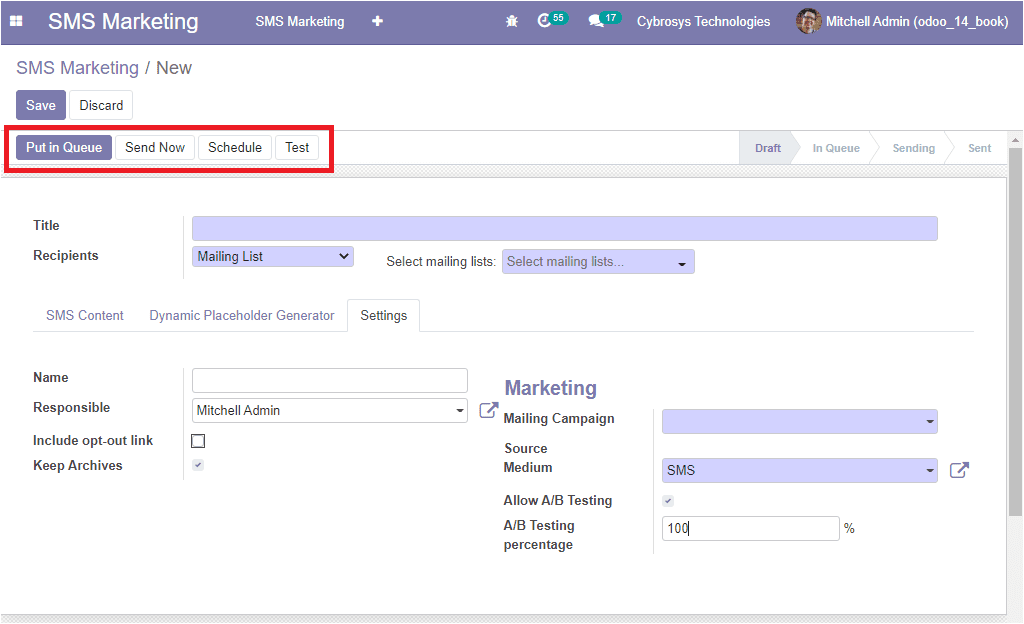
The Put in Queue button available will help you to generate mailings with the next
automatic run and the Send Now button can be used to send the messages quickly.
This option is more considerable when the number of recipients is low. The Schedule
button available will allow you to schedule the time for sending SMS. Finally, the
Test button can be used to send SMS for test purposes.
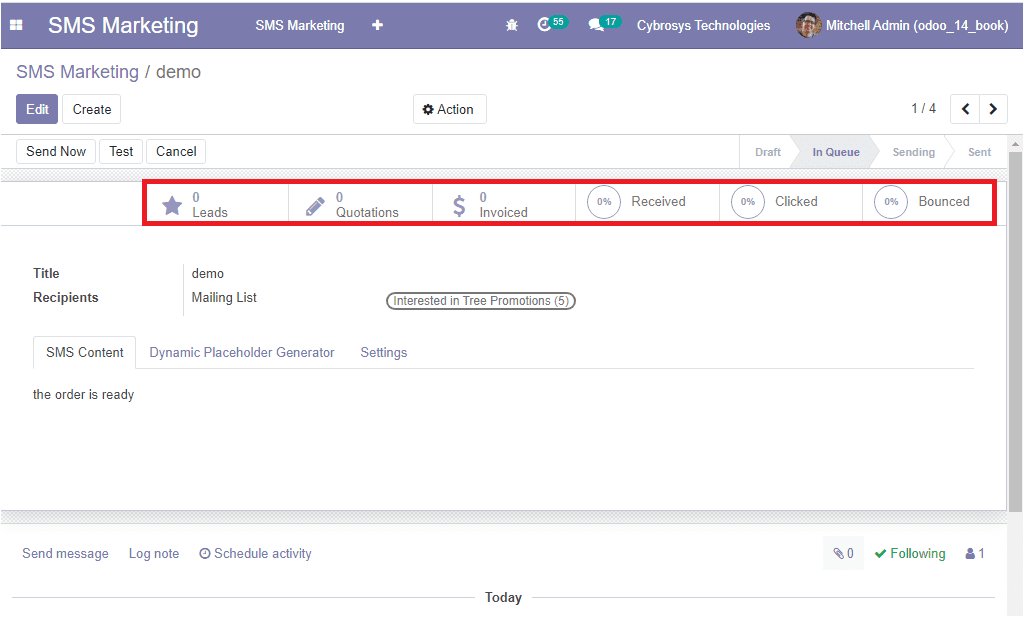
Once you select the Put in Queue button, you will be visible with the analytics
of the SMS campaign as smart buttons like how many people have Received, Clicked,
and Bounced the messages along with the Leads, Quotations generated and Invoiced.
All these options can be viewed in the below image.
So far we were discussing how to create and send the SMS mailings in the Odoo SMS
marketing module and now let us discuss how to create Campaigns on the platform.
Campaigns
The Campaigns window available in the module can be accessed by selecting the Campaign
menu available. The image of the Campaign window is showcased below.
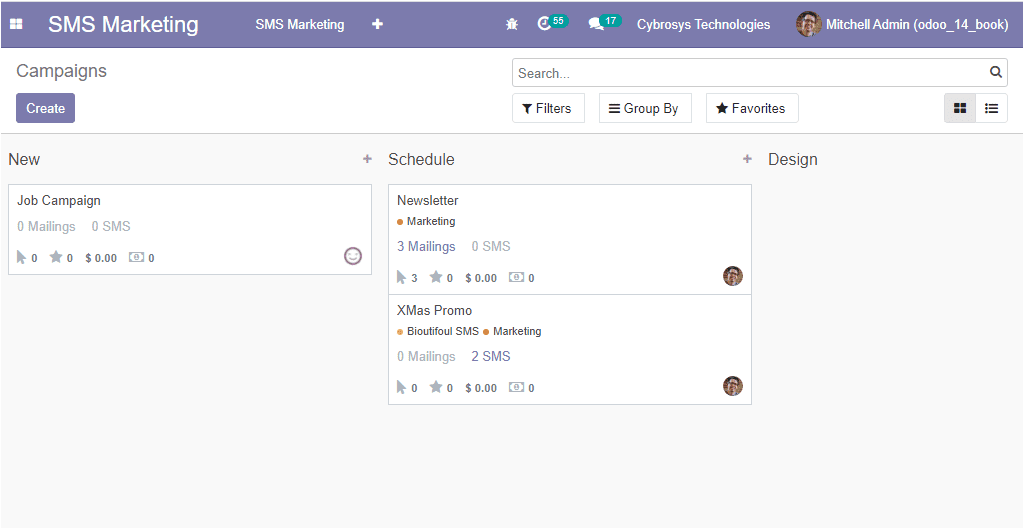
In this Campaigns window, you can view all the campaigns created in the platform
are arranged in different stages on the basis of their status. The stages are named
New, Schedule, Design, and send. You have the provision to customize the stages
on the basis of your requirements. You can create new Campaigns with the help of
the Create icon available. The image of the Campaign creation window can be viewed
below.
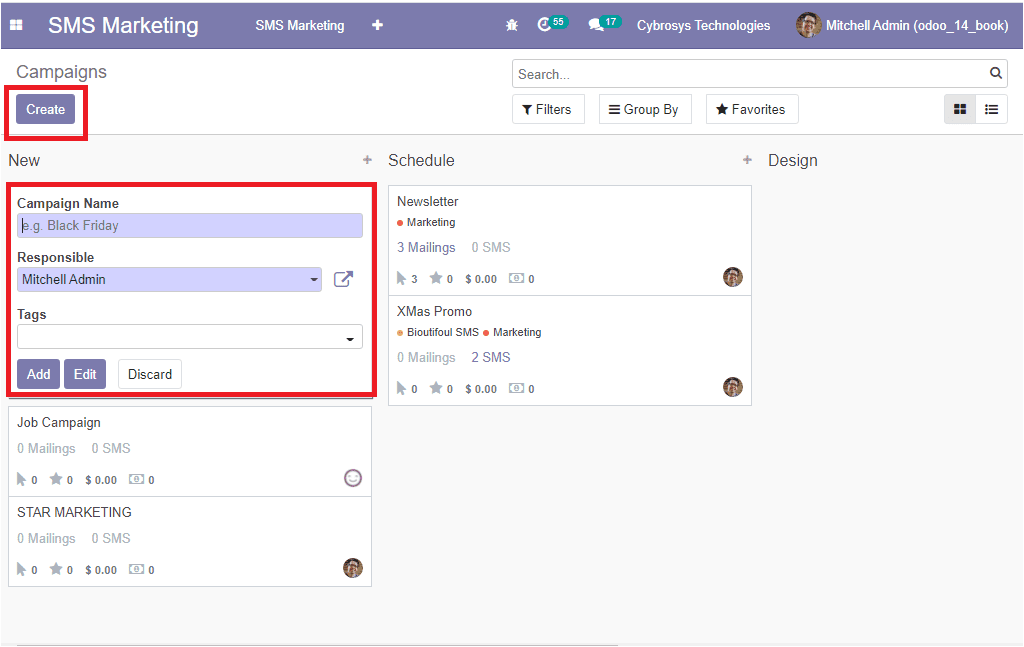
In the pop-up window, you can provide the Campaign Name along with the Responsible
person and Tags.
Now it is the time to discuss the configuration of the blacklisted phone numbers
option available.
Blacklisted Phone Numbers
The configuration of the Blacklisted Phone Numbers option can be done by going to
SMS Marketing -> Configuration -> Blacklisted Phone Numbers. The image of the window
is depicted below.
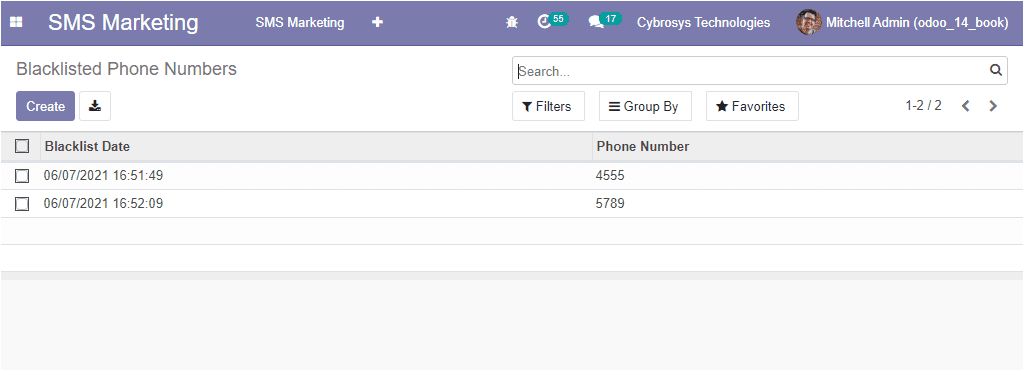
In this window, you can view all the blacklist phone numbers described in the platform
along with the Blacklist Created Date and the respective Phone Number. You are also
able to create new blacklisted phone numbers. This can be done by selecting the
Create icon available on the top left corner of the window. The image of the Creation
window is showcased below.
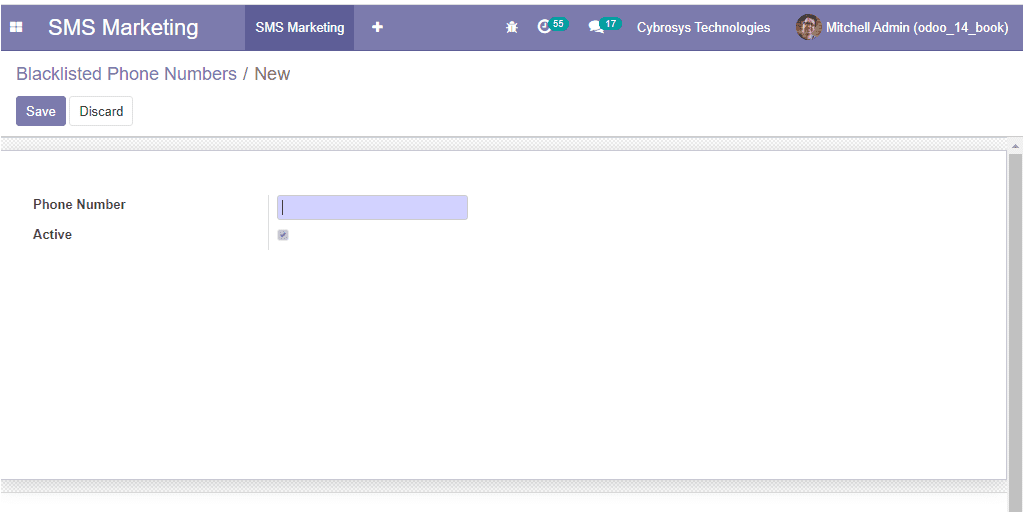
In this creation form, you can mention the Phone number and can enable the Active
option available. Then you should save the details by selecting the Save button
available.
Now we can go to the Reporting window available on the platform.
Reporting
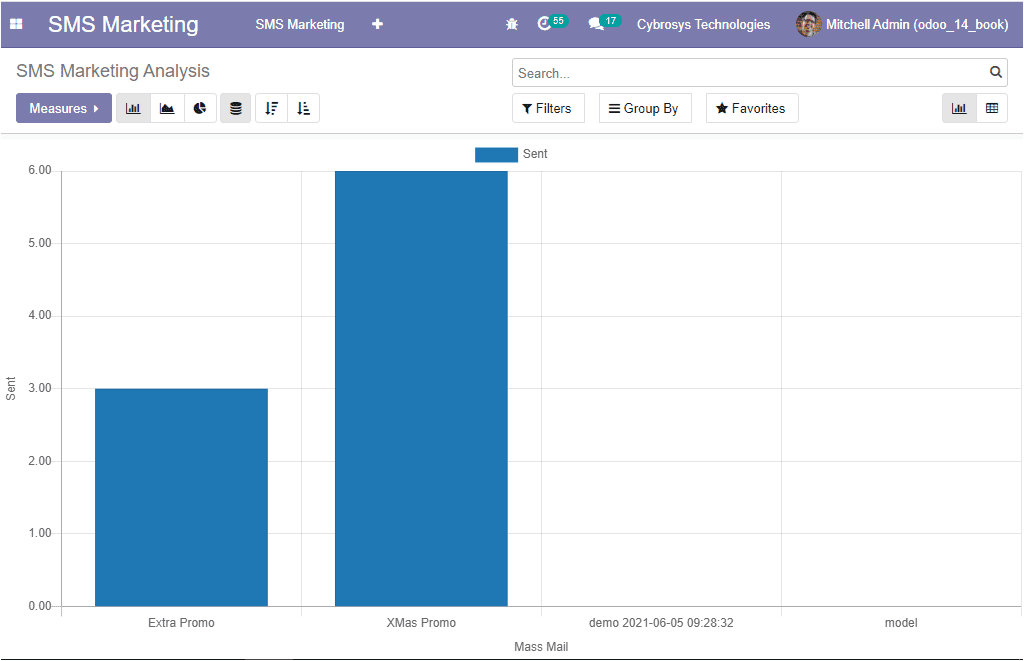
The reports of all the activities and operations in the module can be viewed in
a visual format under the Reporting menu available. The window can be viewed in
both Graph and Pivot view. Customizable and default functionalities such as Filters,
Group by, and Favourite Searches are also available with the window. By using this
window, you can easily analyze the performance of SMS mailings. Moreover, the various
reports in the window can be viewed in different formats such as Bar charts, Line
Charts, and Pie charts. The below image depicts the SMS Marketing Analysis displayed
in the Bar chart.
We have discussed all the important peculiarities related to the Odoo SMS Marketing
module and we are clear that Odoo SMS marketing is the best choice to improve your
business sales. This effective marketing strategy allows you to plan, organize,
and schedule marketing campaigns and also keep track of the campaigns in a better
way.