Vendor Management
The Odoo Purchase module allows effective vendor management which helps organizations
to manage costs and take away the risk factors associated with vendors. The Vendors
described in the platform can be accessed by selecting the Orders tab of the module.
For that, you can go to Purchase -> Orders -> Vendors . The image
of the window is depicted below.
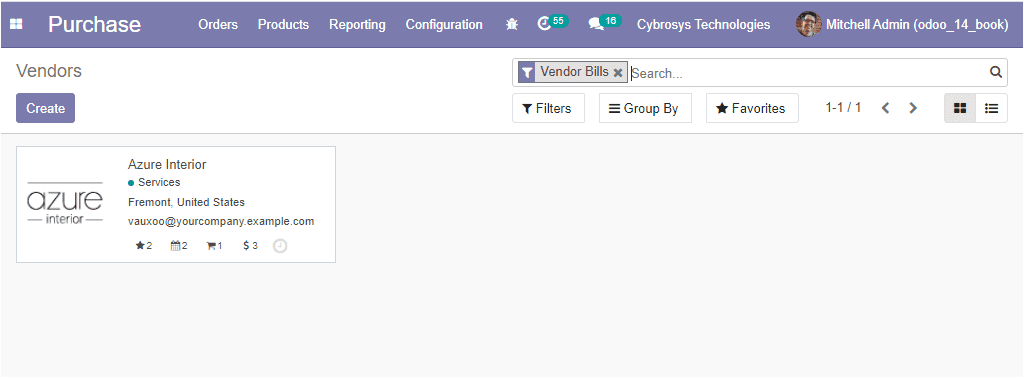
In this window, you can view the list of vendors described in the platform along
with their details. This menu can be viewed in both Kanban and List view. Moreover,
the data available in the window can be filtered, sorted out using the various customizable
options available. It is also possible to create new vendors using this window.
This can be done by selecting the Create icon available. The image
of the creation window is depicted below.
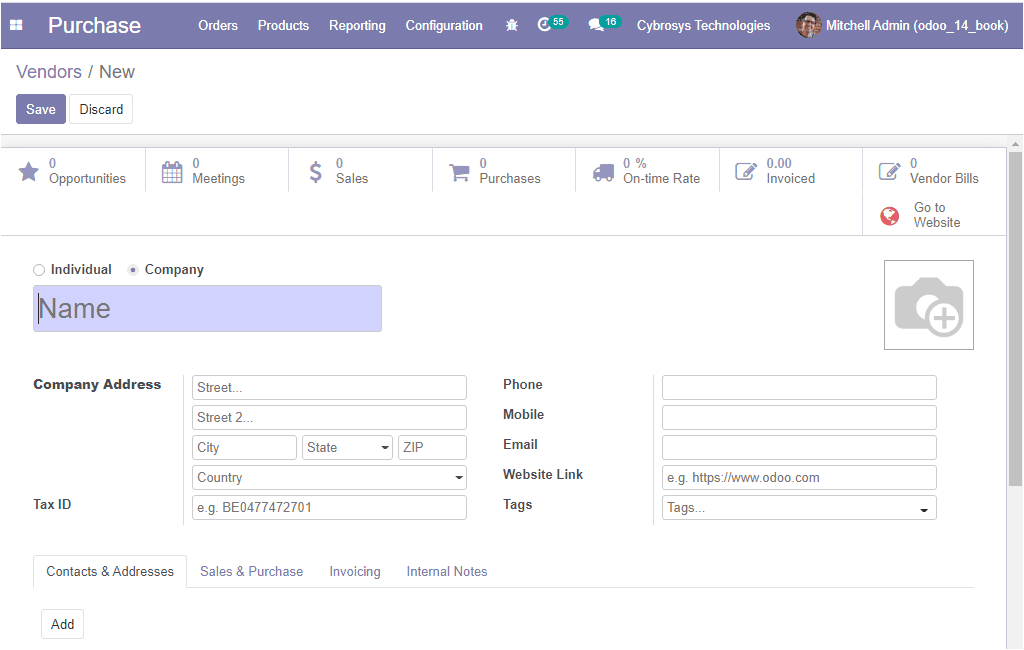
In this vendor creation form, you can allocate the Vendor Name, and also mention
it as an Individual or Company. Then you can provide the Company Address and the
Tax Identification Number. After that, you can provide the contact details of the
company such as Phone and Mobile number along with the Email ID. Additionally, you
can describe the Website Link and the Tags
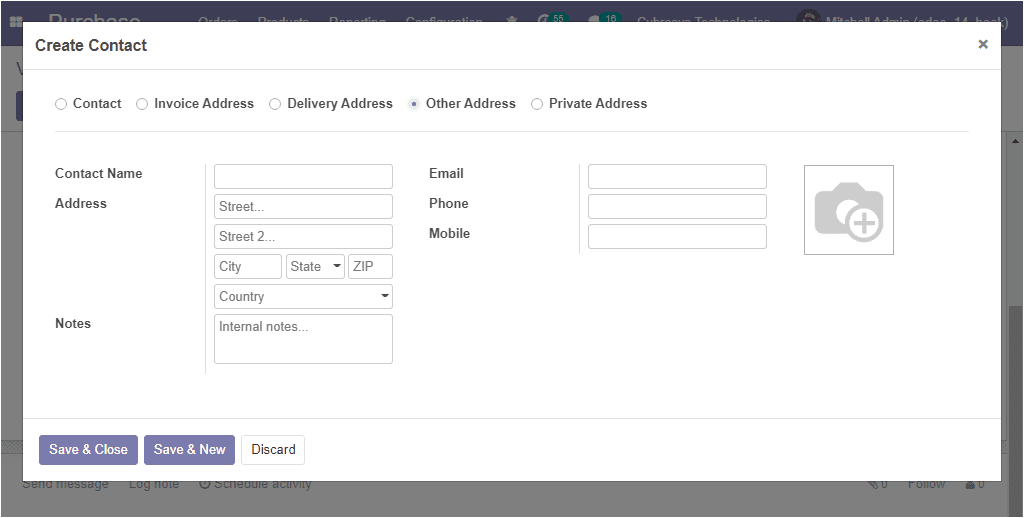
Under the Contacts & Addresses tab, you can add the respective
address and the details by selecting the Add button.
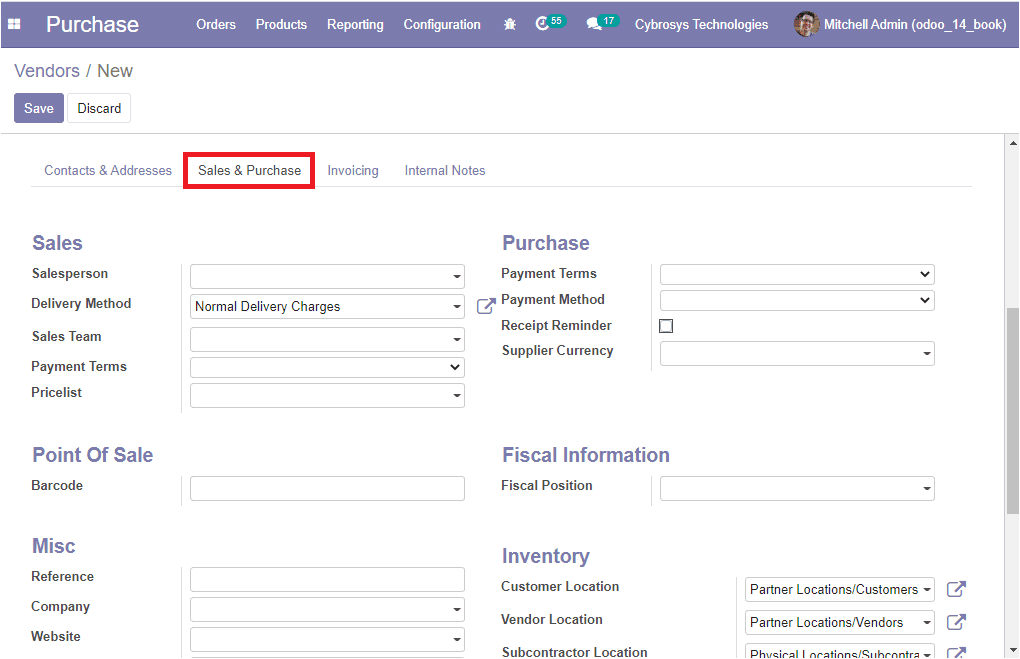
Now let us have a look at the Sales & Purchase tab of the vendor
creation form. Here you can provide the sales details such as Salesperson, the internal
user in charge of this contact. Allocate Delivery Method which is the default delivery
method used in sales orders. Also, you can specify the Sales Team, Payment Terms,
and Pricelist. Under the Purchase details, you can define the Payment Terms, Payment
Methods, Receipt reminder, and the Supplier currency options of the module. Moreover,
you can use a Barcode to identify this contact. This can be allocated under the
Point of Sale operation. Additionally, the Fiscal position can be mentioned under
Fiscal information. The Miscellaneous information such as Reference details, Company,
Website and the Industry can be described. At last, the Inventory details such as
Customer Location, Vendor Location, and Subcontractor location can be allocated.
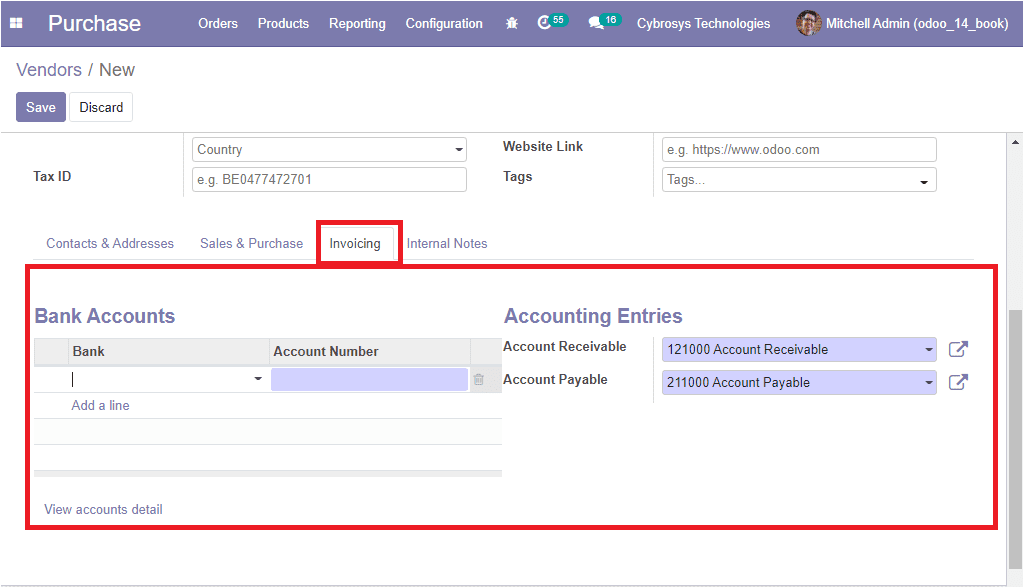
The invoicing aspect of the vendor can be defined under the Invoicing
tab of the respective vendor. The bank account of the vendor along with the bank
details and the account number can be described by selecting the Add a line option
available. Also, the Accounting Entries operation for the Account Receivable and
Account Payable chart of accounts can be allocated.
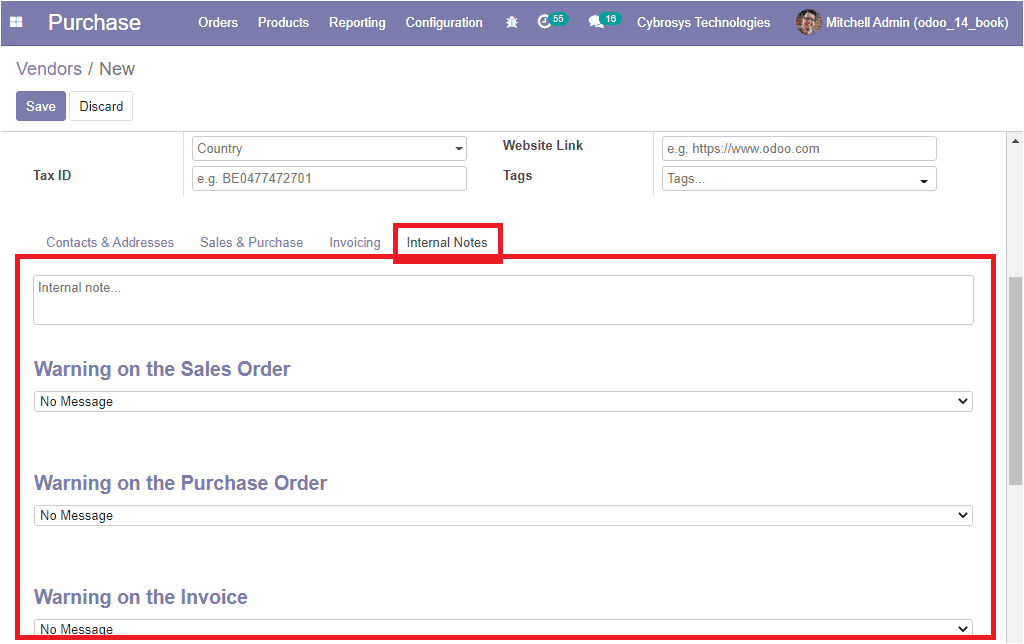
Under the Internal Notes menu of the vendor, you can provide a
vendor description as Internal notes. Moreover, Odoo allows you to raise warnings
on the Sales Order, Purchase Order, Invoice, and Picking. This warning lets you
block messages or raises warnings on purchase orders based on a vendor or a product.
If you have any issues with a vendor, you can raise warnings using this feature.
You can also block a particular product by giving a blocking message.
Now let us move on to the Vendor Pricelists aspect of the module.
Vendor Pricelists
One of the important tasks for vendor management software is to set the pricelist
for the different products available and are supplied by each vendor. In the Odoo
purchase module, you can access the vendor pricelist menu from the configuration
tab of the purchase module.
Purchase -> Configuration -> Vendor Pricelists.
The image of the Vendor Pricelists window is depicted below.
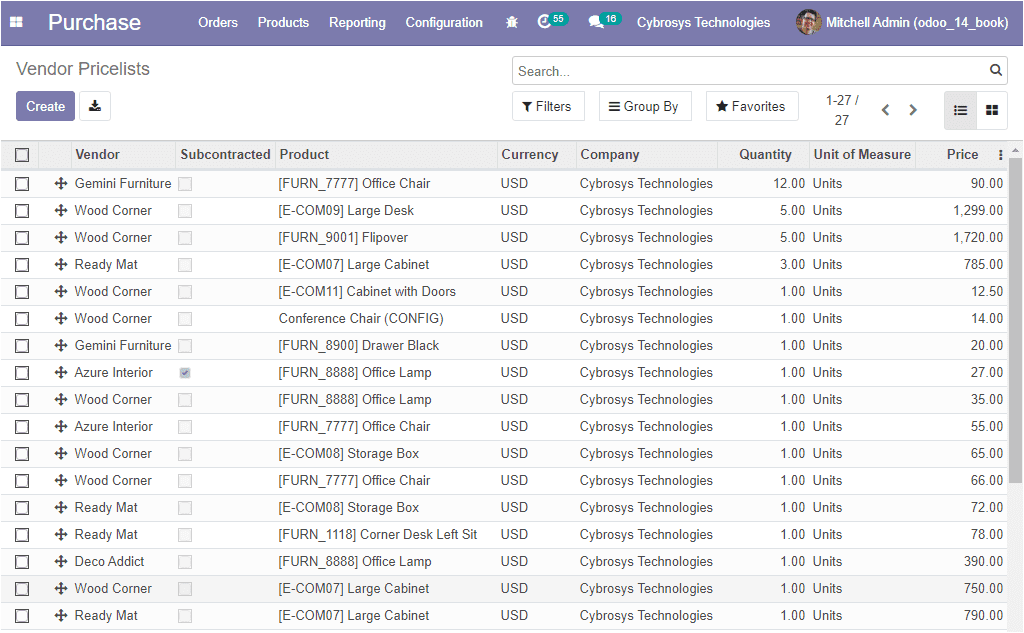
In this window, you can view a list of all the Pricelists described in the platform
along with the details of the Vendor of this product, Product information, Currency,
Company, Quantity, Unit of Measure, and the Price for purchasing the product. Moreover,
the data in the window can be viewed in both List and Kanban view, and also the
details can be filtered, sorted, and grouped on the basis of different conditions
of operations.
You also have the provision to create a new vendor pricelists by selecting the
Create icon available. The image of the creation window is depicted
below.
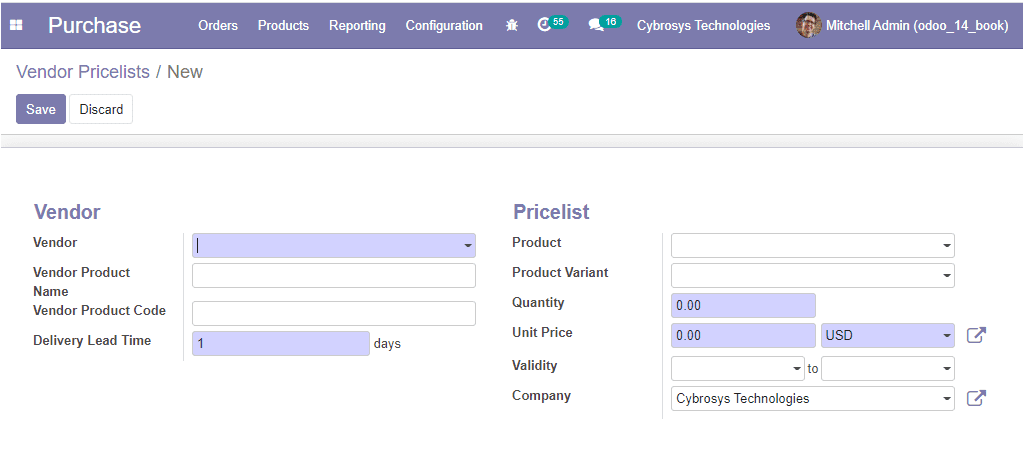
In this creation form, you can provide the Vendor details, allocate the Vendor Product
Name along with Vendor Product Code. Moreover, you can assign the Delivery Lead
Time. After that, you can define the Pricelist details such as Product, Product
variant, Quantity, Unit Price, Validity, and Company. After providing the data,
you can save the details by selecting the Save icon available.
As we are clear on Vendor Pricelists and now let us have a look at how to create
requests for quotation and purchase order in this module.