Purchase Agreements
Purchase Agreements are a type of agreement between the vendor and a customer that
defines terms and conditions related to the sale of goods. The Odoo platform allows
you to create various purchase agreements with the vendors for the purchase of products.
Multiple agreements can also be created with the vendor and it can be possible for
multiple products too.
Creating a purchase agreement type
The Purchase Agreement menu in the platform can be accessed from the Orders tab
of the Odoo purchase module. To get the advantages of this feature in your dashboard,
first, you should enable the Purchase Agreement option available in the Settings
menu under the Configuration tab. The image of the settings window is depicted below.
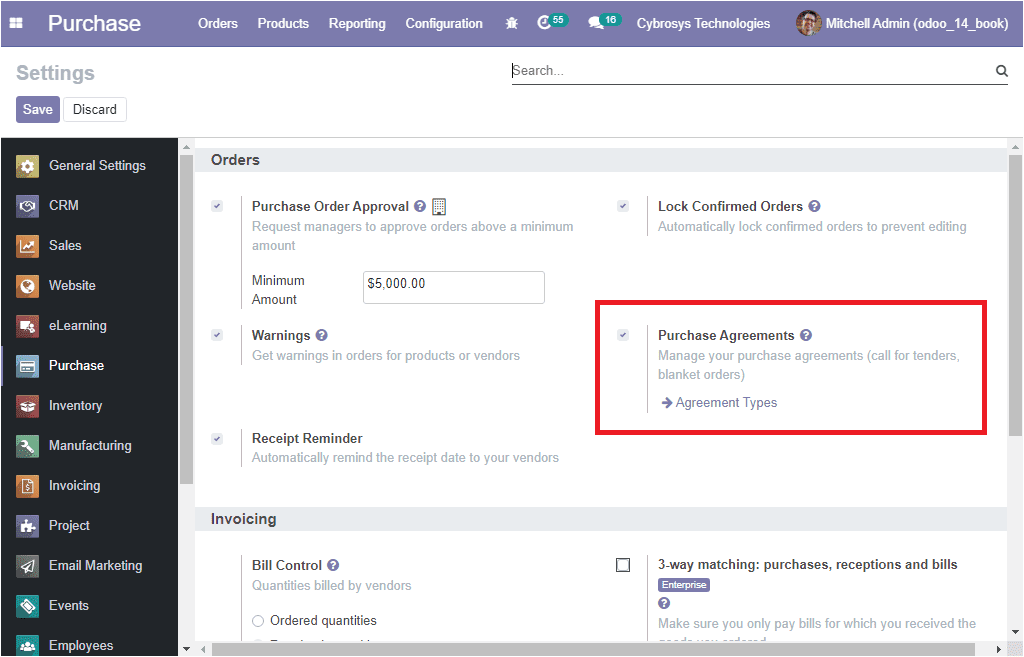
If you are enabling the Purchase Agreements option, the purchase agreement type
is also displayed on the settings menu. By selecting this option you will be directed
to the Purchase Agreements Type window. Furthermore, it is also possible to access
the window from the Configuration tab of the module.
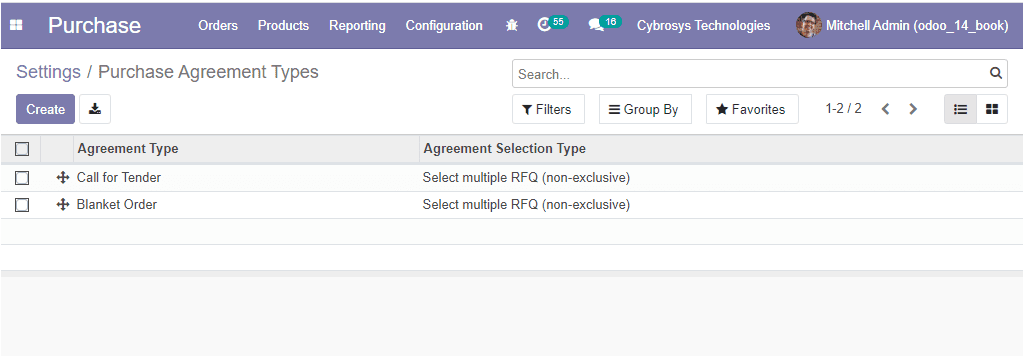
In the Purchase Agreement Type menu, you can view all the purchase agreement types
described on the platform. The created agreement type can be edited by selecting
the respective one. Moreover, the window can be viewed in List and Kanban view.
The various default, as well as customizable options such as filtering, group by,
and favorite search, as well as customizable options such as filtering, group by,
and favorite search are also possible. The image of the window is depicted below.
Additionally, you have the provision to create new Purchase Agreement types by selecting
the Create icon available. The image of the window is depicted below.
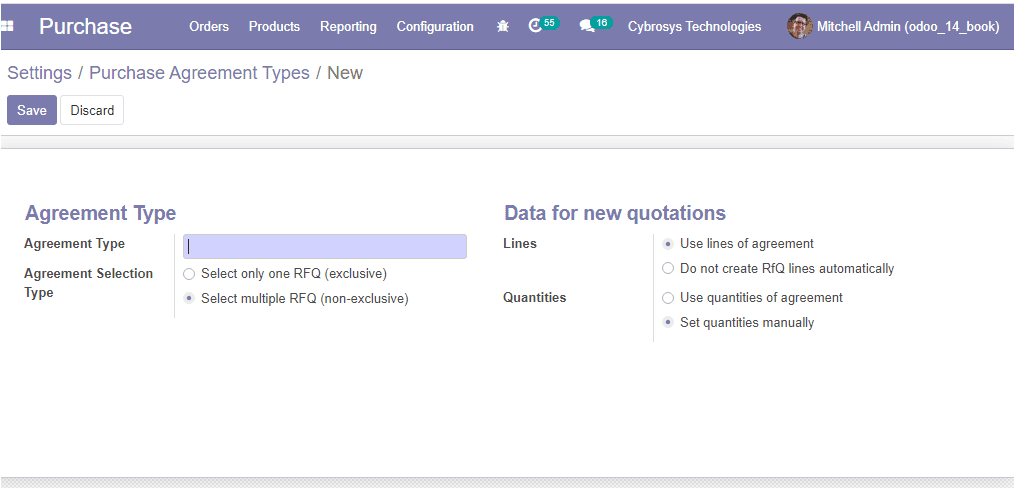
In this purchase agreement type creation window, you can allocate the Agreement
Type and the Agreement Selection Type can be made based on a single RFQ( exclusive)
or multiple RFQ ( non-exclusive). Under the Data for new quotation define the lines
of agreements and the quantities related.
Now let us examine how to create a new purchase agreement.
Creating a new purchase agreement
The Purchase Agreement window in the platform can be accessed by taking the route
Purchase -> Orders -> Purchase Agreements.
The image of the window is depicted below.

In this Purchase Agreements window, you can view all the purchase agreements described
in the platform along with details of Reference, Purchase Representative, Company
along with the Ordering date, Agreement Deadline, Source Document, and Status. You
can edit the agreements by selecting them. Moreover, the Create icon available on
the top left corner of the window allows you to create new purchase agreements.
The image of the creation window is depicted below.
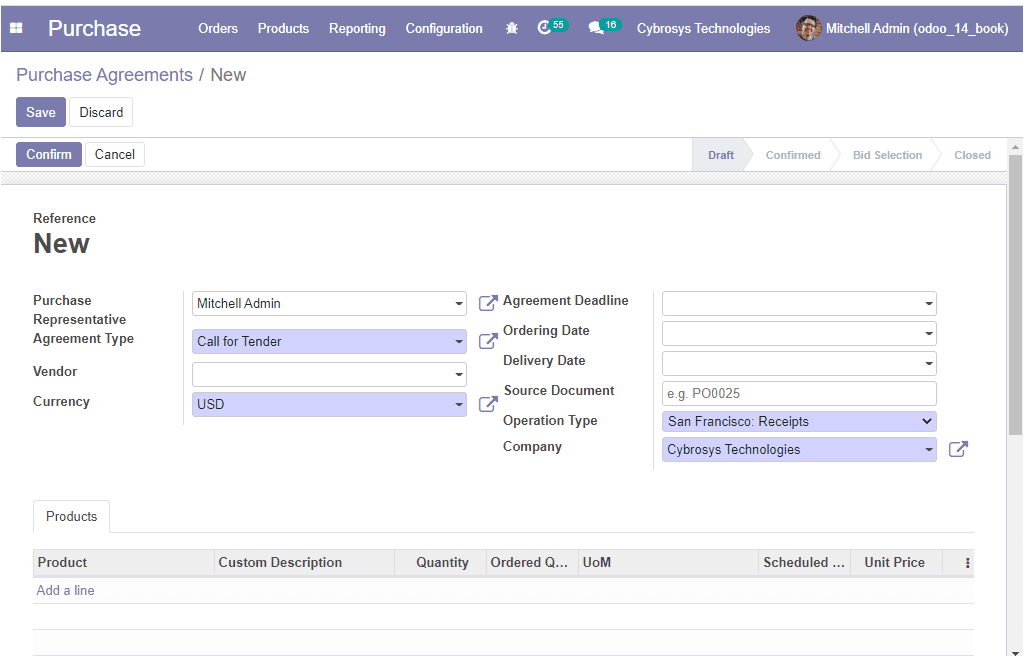
In this creation form, you can specify the Purchase Representative, the Agreement
type can be allocated from the ones being defined in the agreement types window.
Then you can assign the Vendor to which the agreement is associated. Additionally,
you can provide the Currency, Agreement Deadline, Ordering Date, Delivery Date along
with the Source Document, Operation Type, and Company of operation if the platform
is managing multiple companies.
Under the Products tab, you can add the product by selecting the
Add a line option available. You can also define the Custom Description, Quantity,
Ordered Quantity, Scheduled Date, and Unit Price along with the product description.
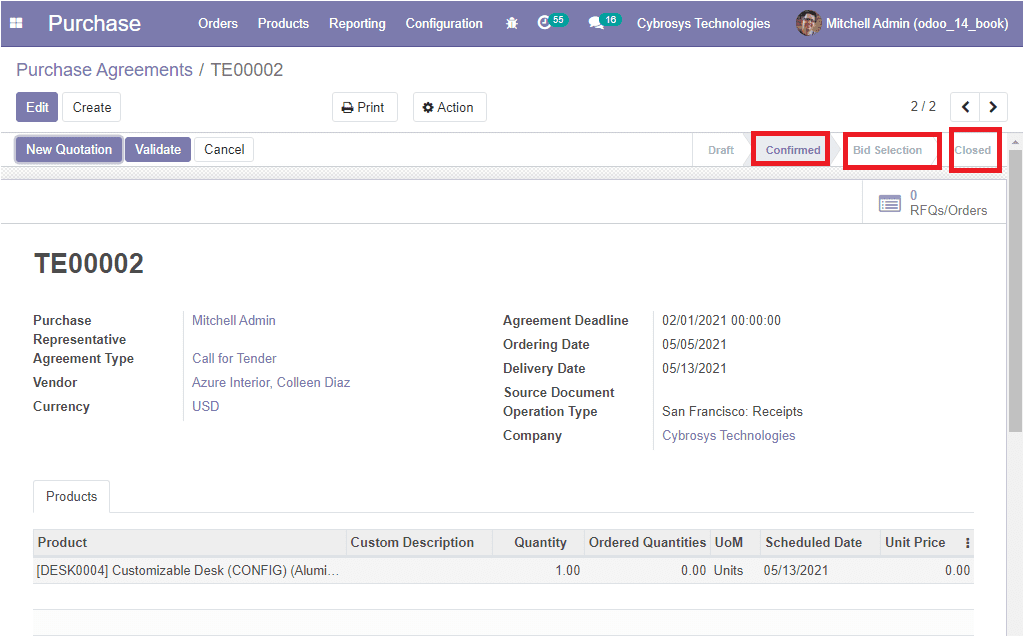
Additionally, you can add multiple products to an agreement. After giving all the
required details, you can save the details by selecting the Save button. If the
agreement is confirmed, the status changes to Confirmed. Later
it will be changed into Bid Selection and Closed
depending on the operations conducted on the platform.
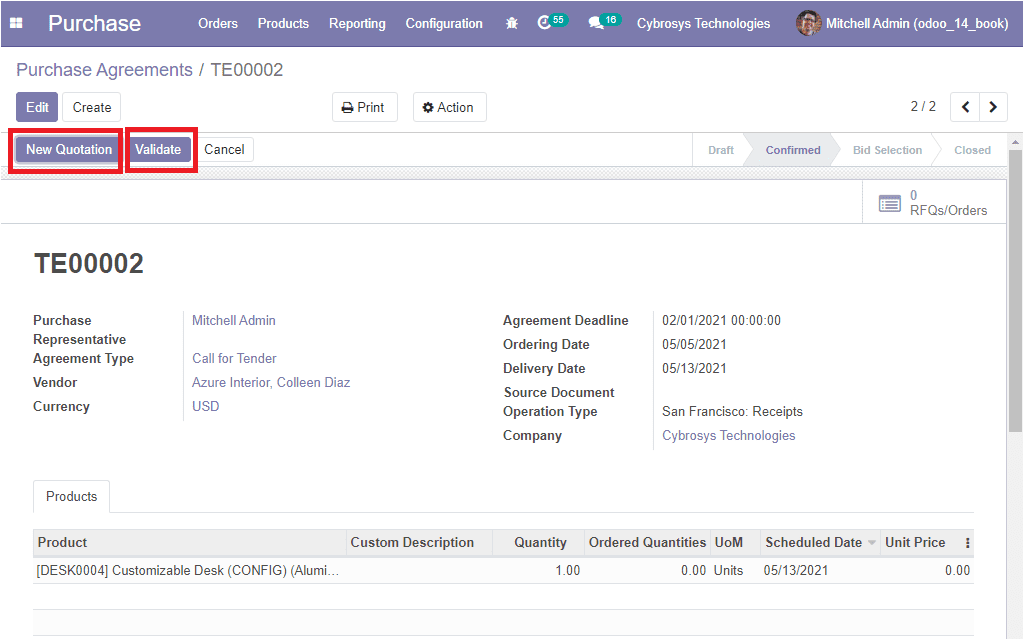
Once the agreement is confirmed, you can also have the options to Validate
and New Quotation options on the left side of the window as shown
in the below image.
You can generate new quotations by selecting the New Quotation button. The image
of the quotation creation window is depicted below.
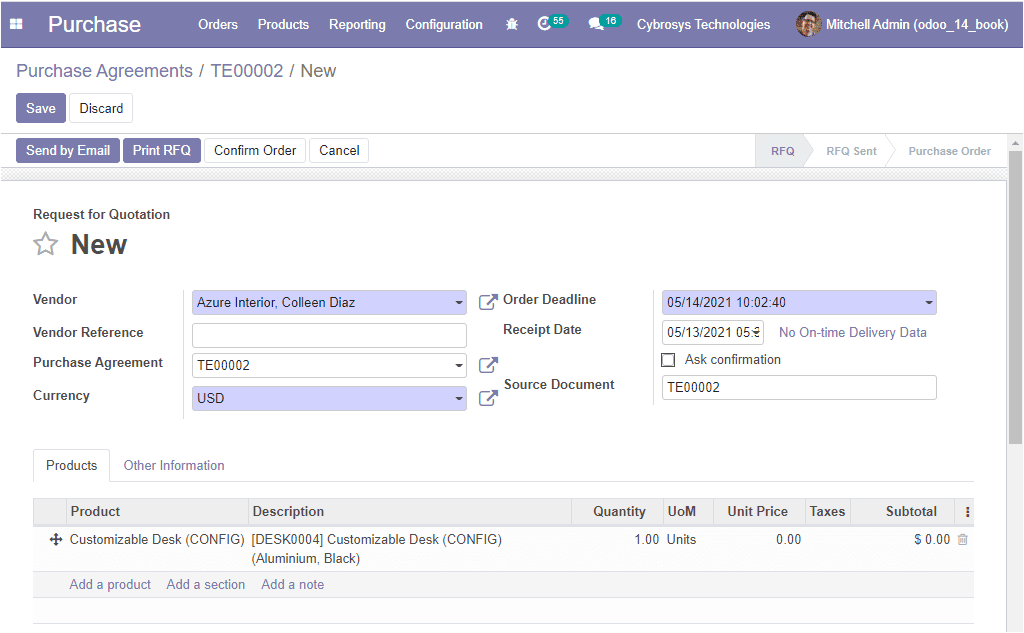
In this window, you can view that the Vendor details, Currency, and Purchase Agreement
information are automatically filled in based on the quotation. You can also allocate
the Vendor Reference and other details can be allocated. The Product allocation
is also auto-filled and you have the provision to modify or add new products to
the quotation. Now the Request For Quotation (RFQ) can be sent by email via selecting
the Send by Email option and it is also possible to take a printout
by selecting the Print RFQ button. Moreover, there are options
to create a purchase order by selecting the Confirm Order button. Also, you have
the provision to cancel the quotation request by selecting the cancel option available.
If you are selecting the Send by Email option, you will be depicted with the email
creation window as shown below.
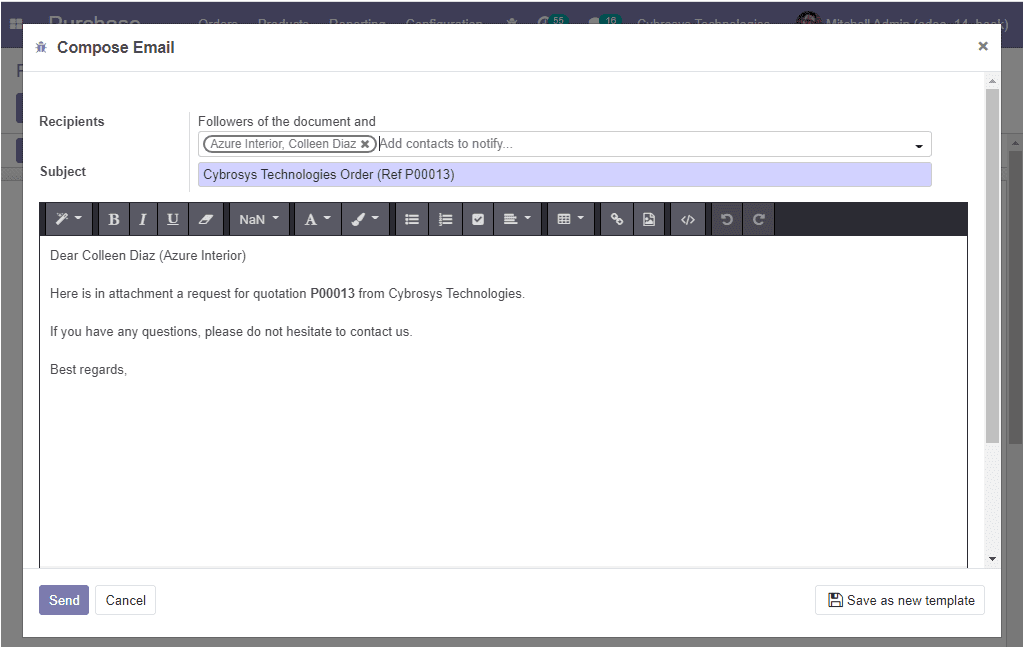
The template for the emails is automatically defined and the window allows you to
create, edit the content and the subject being described. Moreover, the edited content
can be saved as a template for further use. This can be done by selecting the
Save as new templates option available at the right bottom of the window.
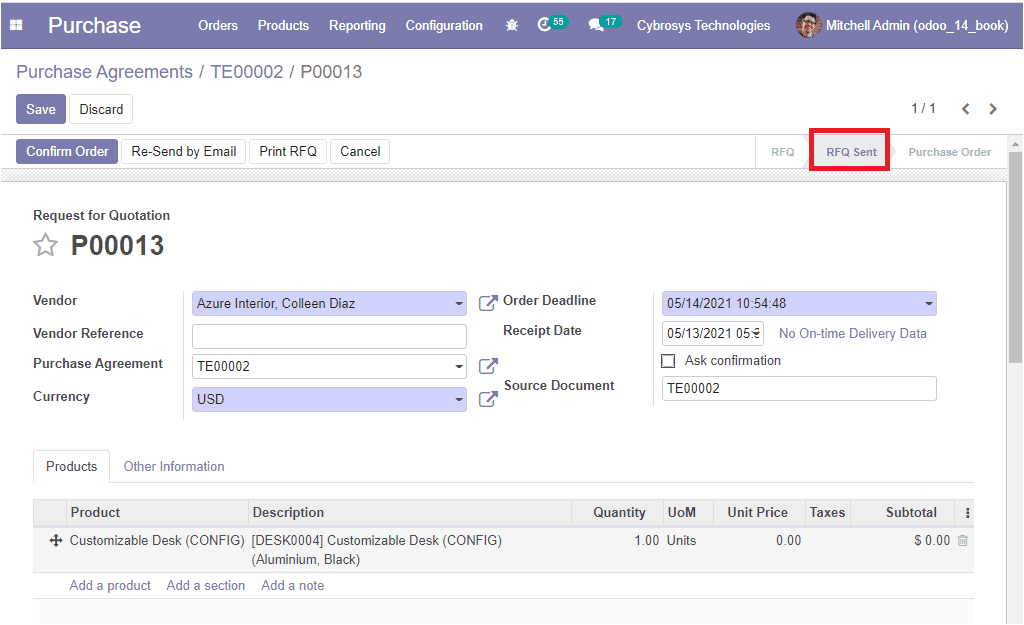
After that, you can be able to send the email by clicking on the Send
icon available. Now the status will be changed to RFQ Sent as depicted in the below
image.
So far we were discussing how to create a new purchase agreement in the platform
and now let's discuss the purchase orders aspect of the module.
Purchase Orders
In the Odoo platform, the purchase orders are created based on the sending and creation
of RFQs. Also, the platform allows you to create purchase orders directly without
sending out the RFQs. This will help the users to handle the regularized purchase
operations of the company.
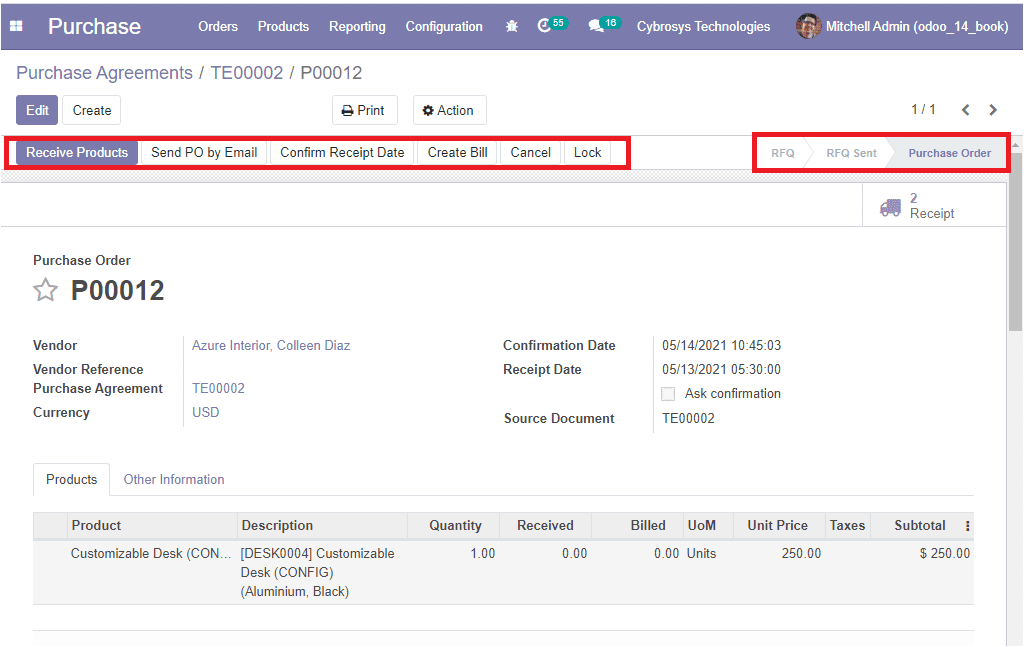
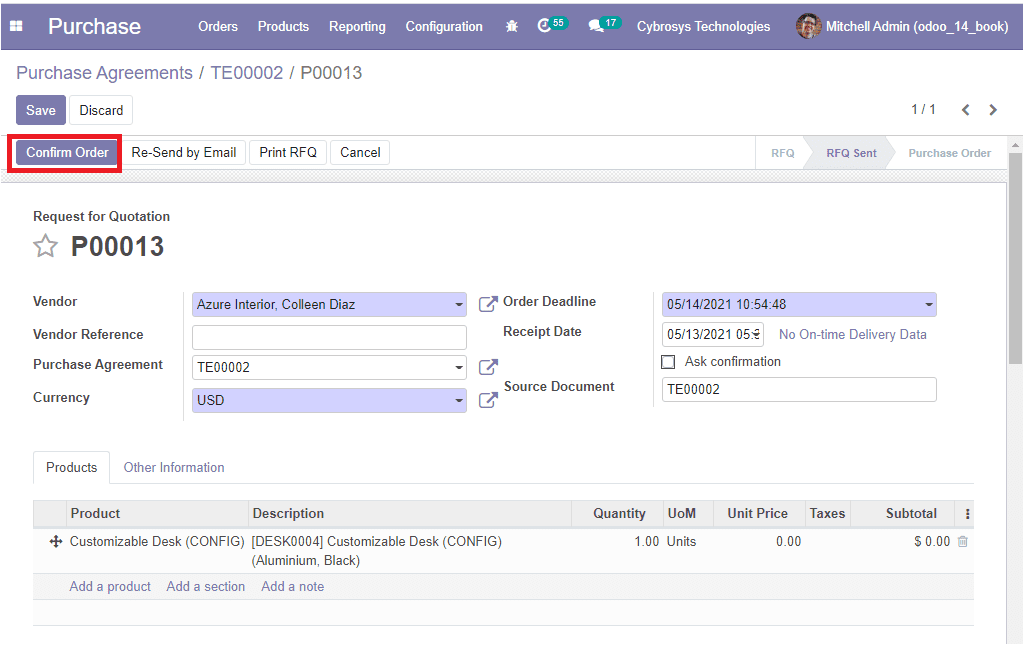
When the RFQ is sent to the vendors, you have the option to create a purchase order
straight away from the RFQ window. This can be done by selecting the Confirm
Order option.
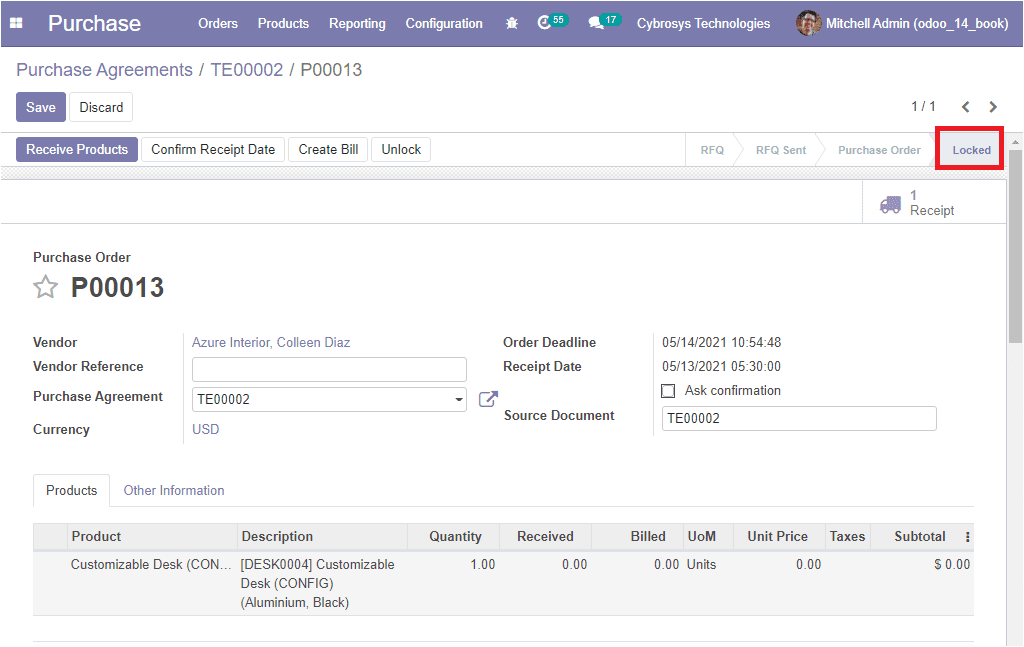
On selecting the Confirm Order button, the confirmed order request will be sent
to the vendor. Now the status will be changed to Locked as shown
below image.
This is an option offered by Odoo for the users to lock the purchase order which
would enable them to avoid any further edits on the purchase order to be made by
any other employee or the users of this platform. To make use of this option, first,
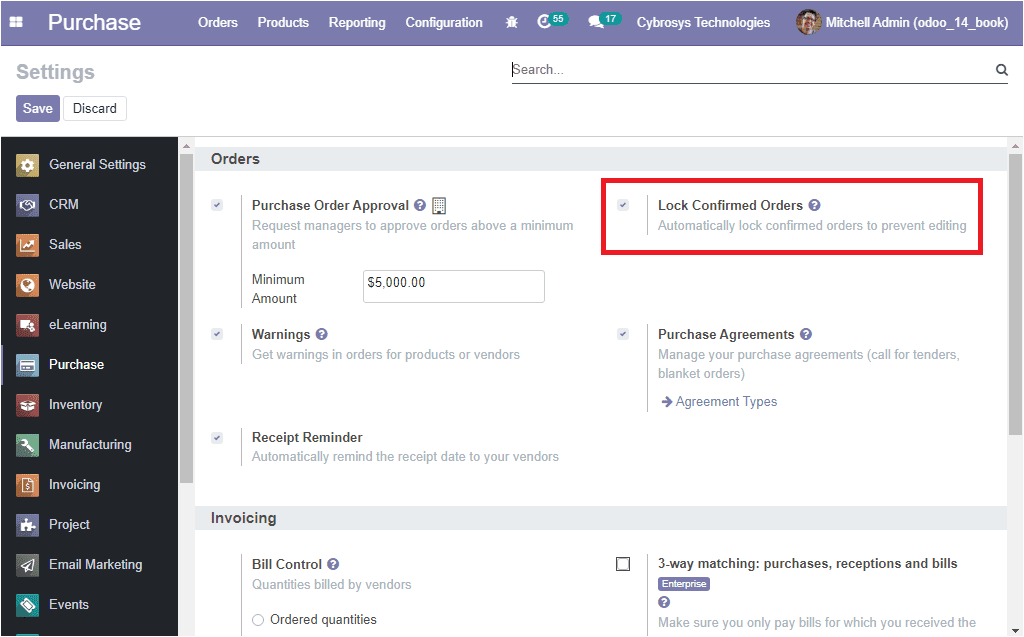
you should enable the Lock Confirmed Orders option from settings. This can be done
by taking the route Purchase -> Configuration -> Settings. In settings,
under the Orders tab, you can view the Lock Confirmed Orders option as depicted
in the below image.
Moreover, you can view the Unlock option and this option can be used to unlock the
respective order.