Product Management
The Odoo platform offers you an efficient product management tool that will allow
you to define the products, product variants, and all other aspects related to the
product. The product menu in the purchase management module can be accessed from
the product tab available in the home dashboard of this module.
Now let us discuss how to create a product on the platform.
Product creation
By selecting the product menu in the home dashboard you will be depicted with a
product window as shown below.
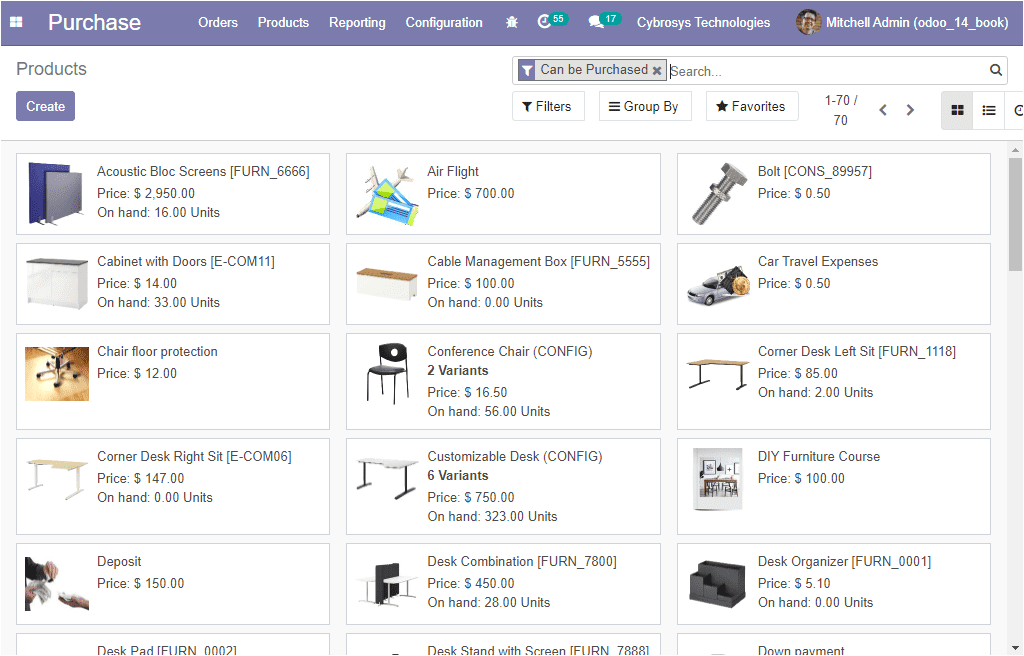
In this window, you can view all the products described on the platform. All the
default, as well as customizable options such as filters, group by, and favorite
search, are available as in all other menus in the platform. Moreover, this list
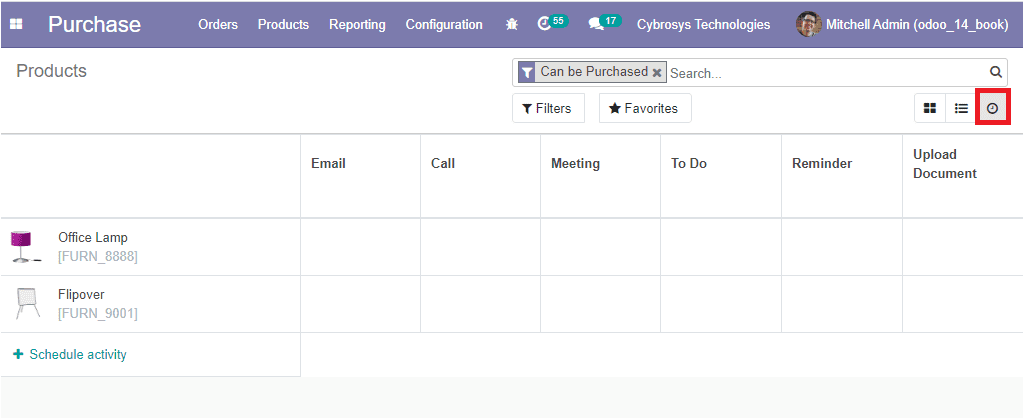
of products can be viewed in both List and Kanban view. In addition, you also have
the Activity view. The activity view is used to display an overview of all activities
related to the respective product. In this window, the activities will be shown
in a table where the rows are used to record activities and columns mark the different
activities. The image of the View activity window is depicted below.
Now back in the product window, you can create a new product in the platform by
selecting the Create icon available on the top left corner of the
window. The image of the creation window is depicted below.
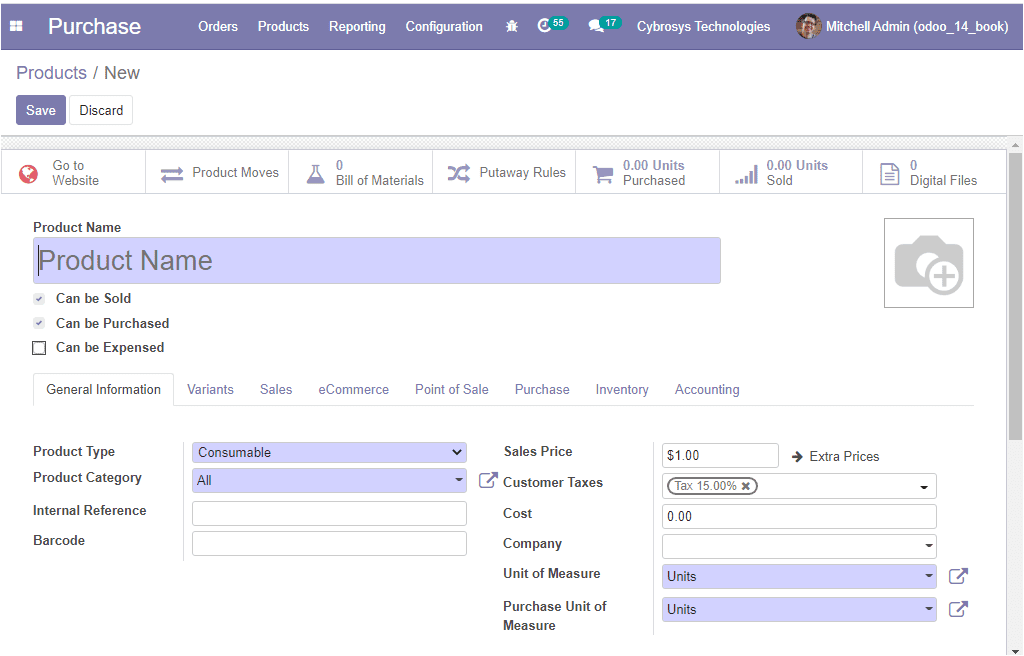
In this product creation window, you can provide a name to the product first. Then
you can specify whether the product can be sold, purchased, or it can be selected
at an expense. In addition, you can view the smart buttons available which will
allow you to go to the company website, the product moves menu, the bill of materials
menu if it is a manufactured product, put away rules defined, units purchased menu,
units sold menu, Digital files menu. Additionally, you can provide an image of the
product in the allotted space.
Under the General Information tab, you can define the Product Type as consumable,
storable, or service product. The Product Category can be allocated using the dropdown
menu available. You also have the provision to create a new one using this dropdown
option. The Internal Reference field can be specified as per the company specifications.
Additionally, the platform supports the barcode operation that can be effectively
established on the product by defining it in the product menu.
The Sales Price is the price at which the product is sold to customers can be provided
along with the extra prices allocated and the default Customer Taxes used when selling
the product. The Cost of purchase can be specified in accordance with the vendor
bill. Moreover, the company can be mentioned if the platform is operating with multi
companies. Apart from these options, you can also define the default Unit of Measure
used for all stock operations along with the Purchase Unit of Measure. It must be
in the same category as the default unit of measure.
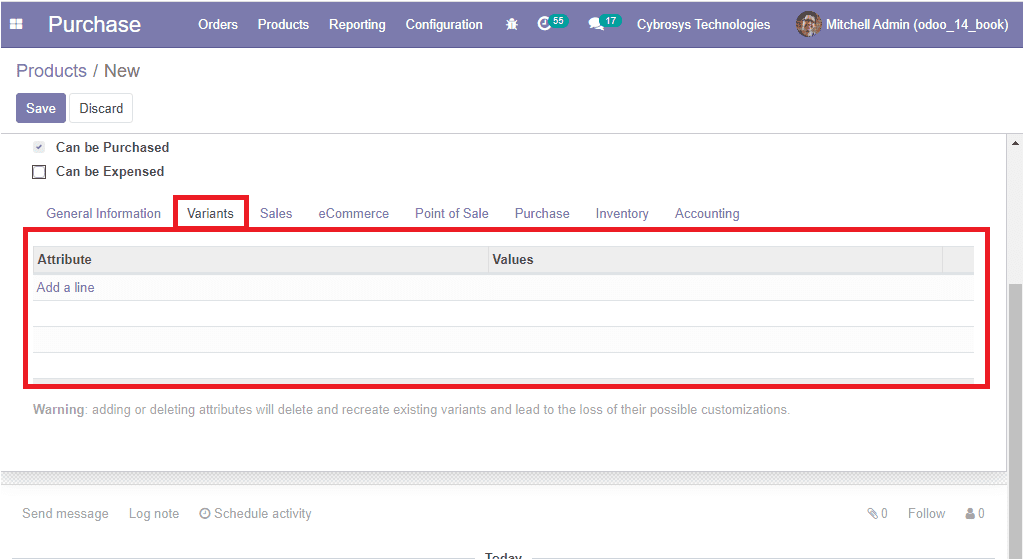
Under the Variants menu, the product variants for the respective product can be
allocated. This can be done by selecting the Add a line option available.
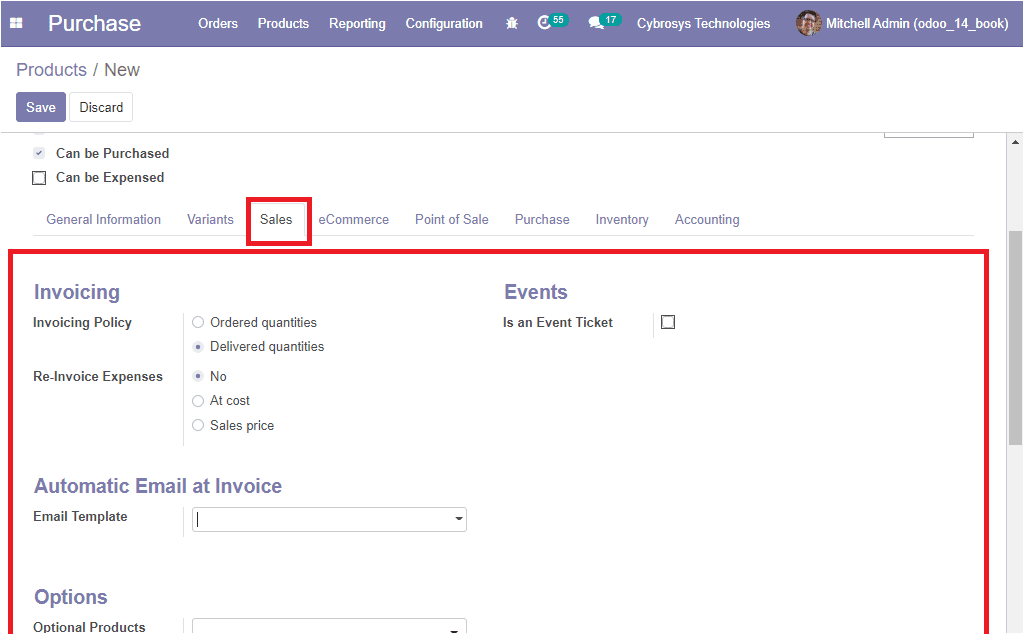
In the Sales tab of the product creation window, you can mention the Invoicing policy
on which the product should be invoiced based on the ordered quantity or the delivered
quantity. Also, the Re Invoice Expenses can be described in accordance with the
company policy. With this option, a validated expense can be reinvoiced to a customer
at its cost or sales price. Moreover, you can specify the Email Template for sending
a product-specific email once the invoice is validated. The Optional product can
also be mentioned based on the requirements and it can be suggested whenever the
customer views add to cart. Additionally, a description of the product that you
want to communicate to your customers can be described in the Sales Description
box available. This description will be copied to every sale order, delivery order,
and customer invoice.
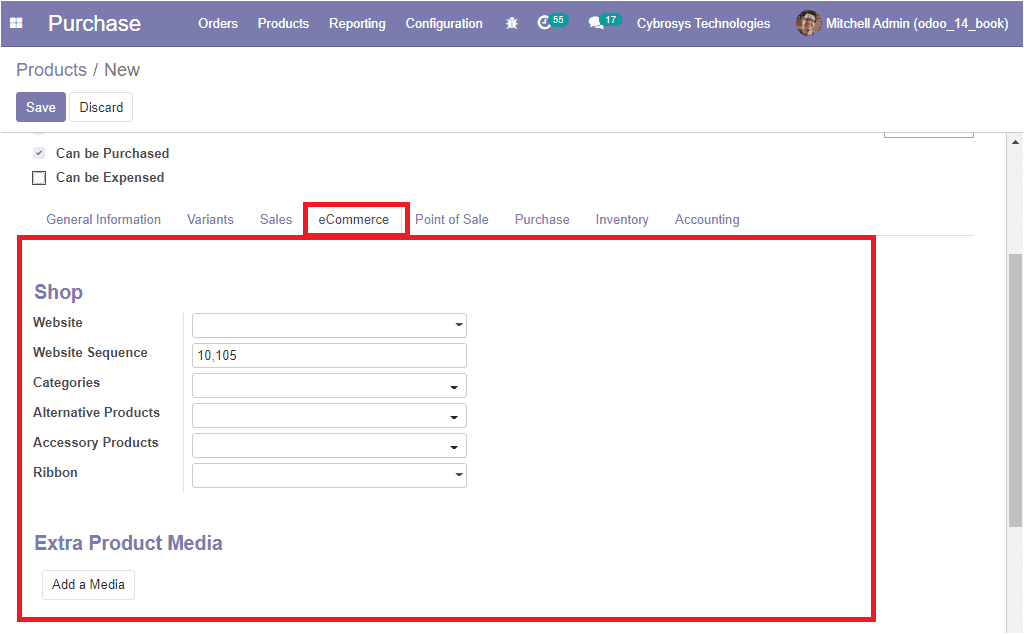
The eCommerce description of the product can be made under the eCommerce tab of
the product creation window. Under this menu, you can describe the website information
if the platform is operating on a multi-website option. Then you can allocate the
Website Sequence along with the Categories of operation. Moreover, Alternative Products
and Accessory Products can be mentioned.
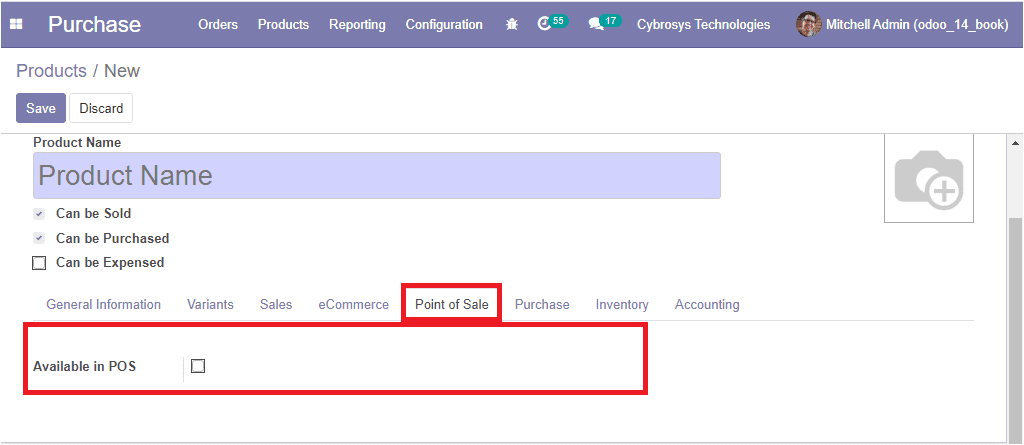
Under the Point of Sale tab, you can enable the option Available in POS for appearing
the product in the point of sale.
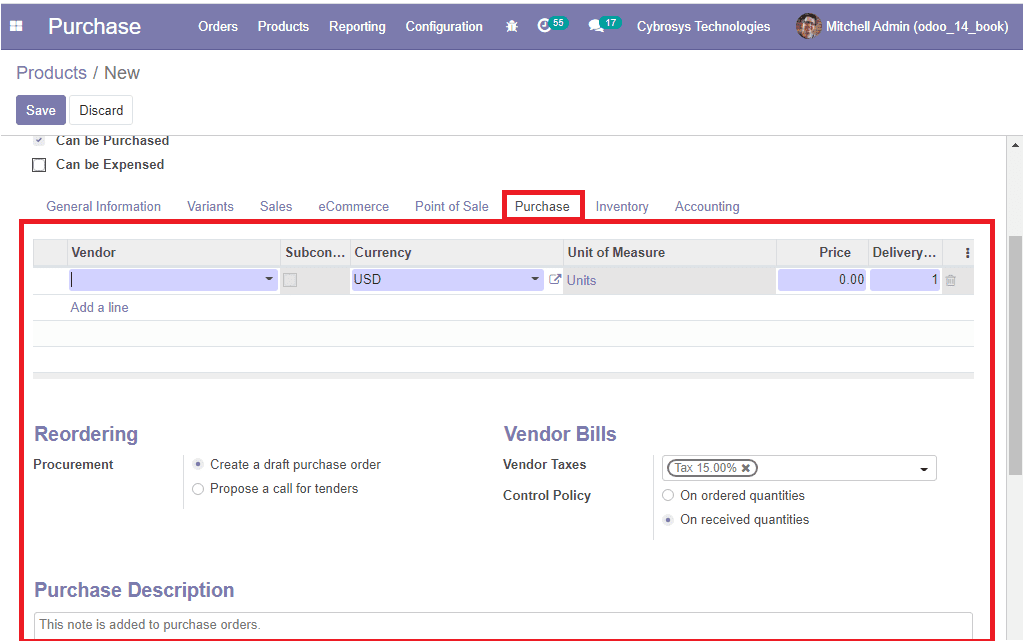
In the Purchase tab of the Odoo product creation window, you can provide various
purchase details. First, you can mention the Vendor information. This can be described
by selecting the Add a line option available in the menu. Under the Procurement
field, you have two options.
- 1. Create a draft purchase order: Based on your product configuration, the system
will create a draft purchase order.
- 2. Propose a call for tenders: If the purchase requisition module is installed and
this option is selected, the system will create a draft call for tender.
The vendor bill description can also be described with the fields such as Vendor
taxes and the Control policy of the bill generation in the platform. Additionally,
you can provide a custom-made purchase description of this particular product.
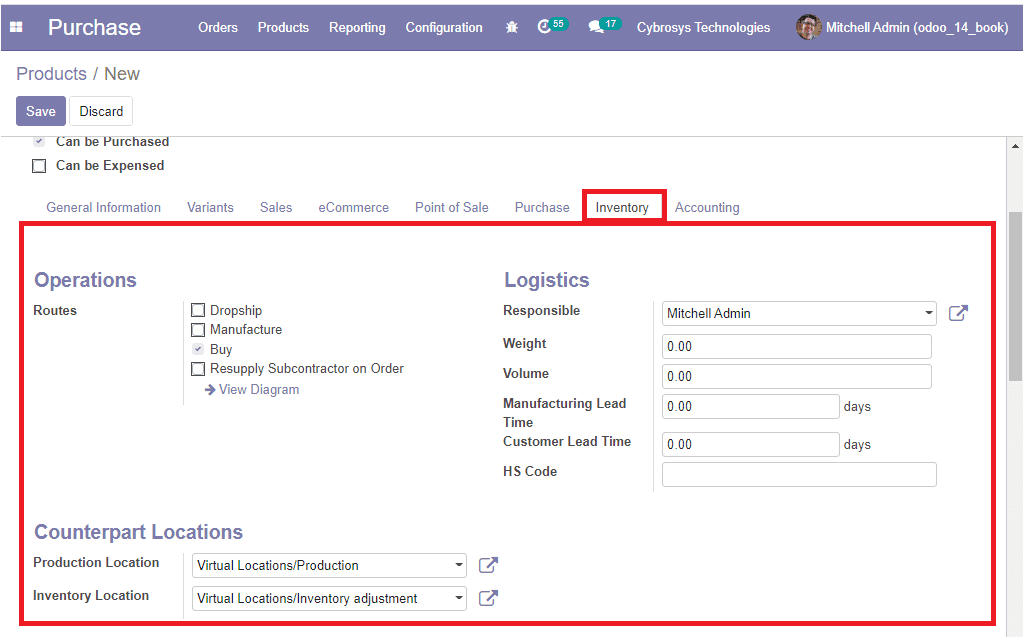
Now let us move to the Inventory tab of the product creation window. Under this
tab, all the inventory aspects of the particular product can be allocated. The Route
operations of the product can be allocated. The logistics operations needed for
the respective inventory operation can be mentioned such as the Responsible person
and he/she will be responsible for the next activities related to logistic operations
for this product. The Weight and Volume of the product can be allocated along with
the Manufacturing Lead Time and Customer Lead Time. In addition, under the counterpart
locations you can define the Product Location and Inventory Location.
Moreover, you can give the different ways to package the same product under the
Packaging menu. This can be done by selecting the Add a line option available.
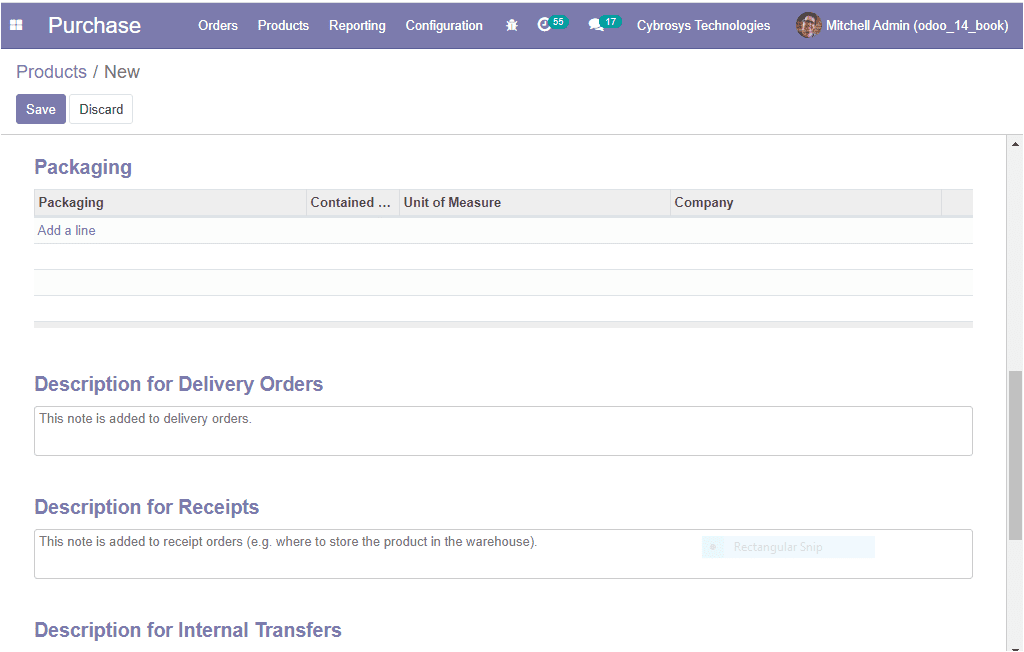
On selecting the Add a line option, you will be depicted with a pop-up window as
depicted below where you can provide the package type, quantity of products contained
in the package along with the barcode, and company details.
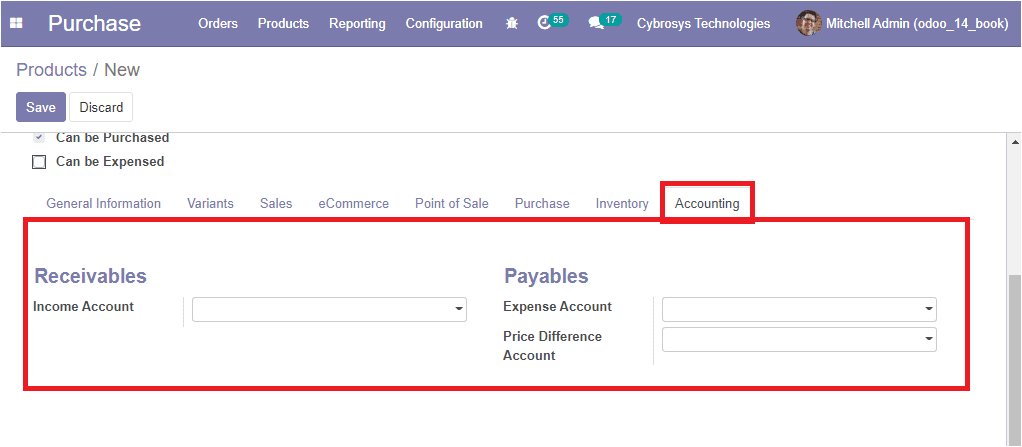
At last, the Accounting details of the respective product can be defined under the
Accounting tab available in the platform. Here the financial operations of the product
can be described both in terms of receivable and payable aspects.
So far we were discussing the Product window and how to create products in the Odoo
Purchase module and now let us discuss the Product Category window of the purchase
module.