Configurations
Creating request for quotation
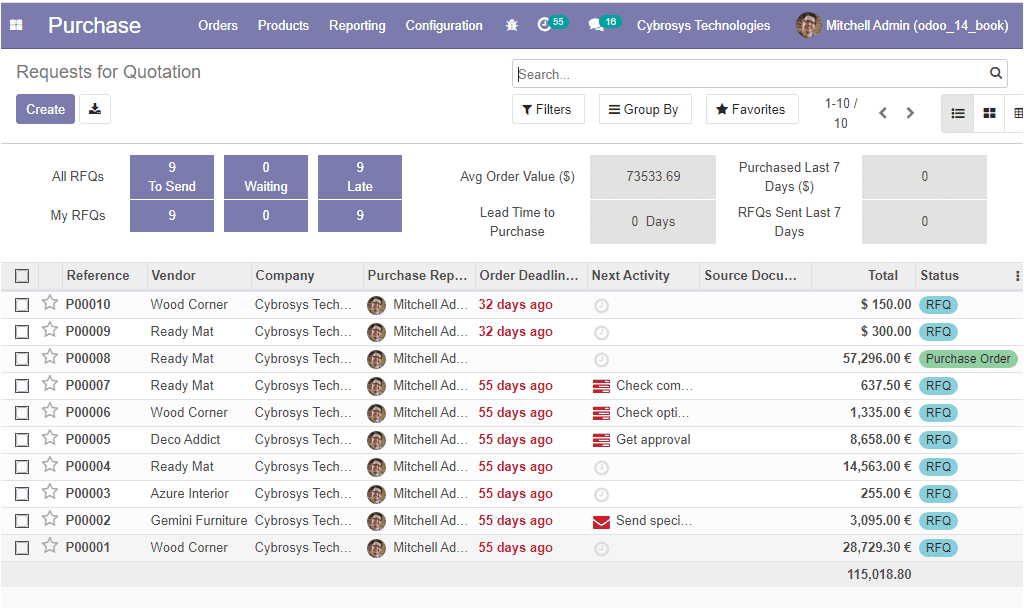
Now let us discuss how to create a request for quotation on the platform. The request
for quotation is the finest way to send the request for required products to your
supplier. If the supplier is interested in your request and answered for your request,
you can either accept or reject the offer. The request for quotation window can
be accessed from the Orders menu of the Purchase module. The image of the window
is depicted below.

In this window you can view all the requests for quotations described in the platform
along with the Reference number, Vendor details, Company, Purchase representative,
Order deadline, Next activity, Total amount, and Status. The window can be viewed
in List, Kanban, and Pivot views. Moreover, the window can be filtered and grouped
by using the default as well as customizable sorting options.
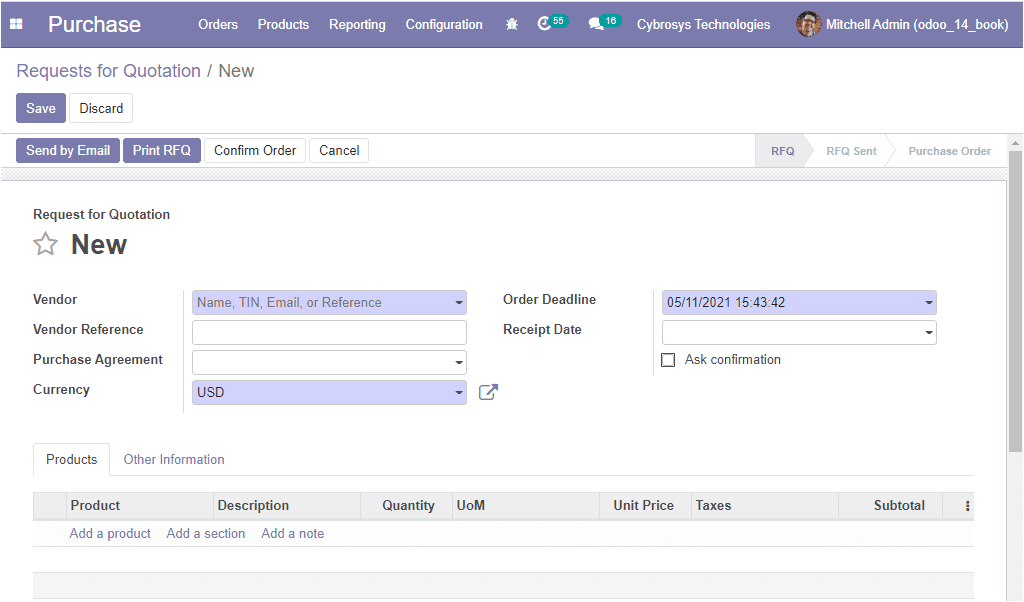
For creating a new RFQ, you can click on the create icon available on the top left
corner of the window. The image of the window is depicted below.

In this RFQ creation window, you can allocate the Vendor first. Then you can provide
the Vendor Reference. It is the reference of the sales order or bid sent by the
vendor. It is used to do the matching when you receive the products as this reference
is usually written on the delivery order sent by your vendor. After allocating the
vendor reference you can define the Purchase Agreement, Currency along with the
Order Deadline and Receipt Date. Order Deadline depicts the date within which the
quotation should be confirmed and converted into a purchase order. Now come to the
Receipt Date option. It is the delivery date promised by the vendor. This date is
used to determine the expected arrival of products.
Under the Products tab, you can add a product along with the Description, Quantity,
unit price, and taxes. You also have the provision to add a section and a note by
selecting the respective menu.
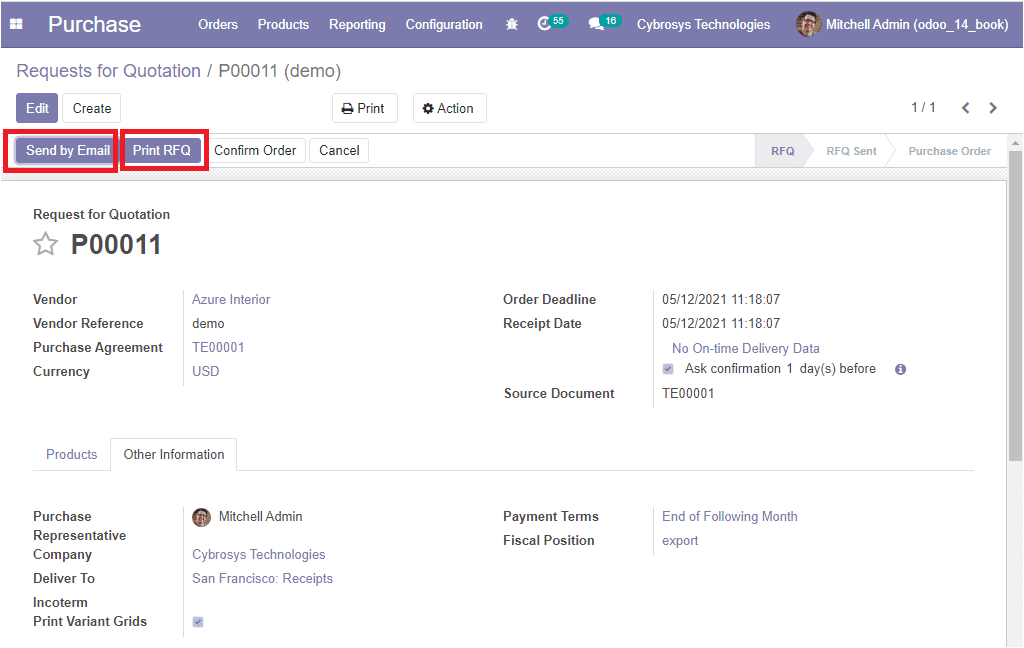
In the Other Information tab, you can assign the Purchase Representative, Deliver
To, Incoterms, Payment Terms, and Fiscal Position. Additionally, you can enable
the Print Variant Grids option. If enabled with this option, the matrix of configurable
products will be shown on the report of this order.
After providing all the required data, you can save the details by selecting the
Save button available. Now the RFQ can be sent to the vendor via emails and also
the platform allows you to take a printout of the RFQ and send it to the vendor.

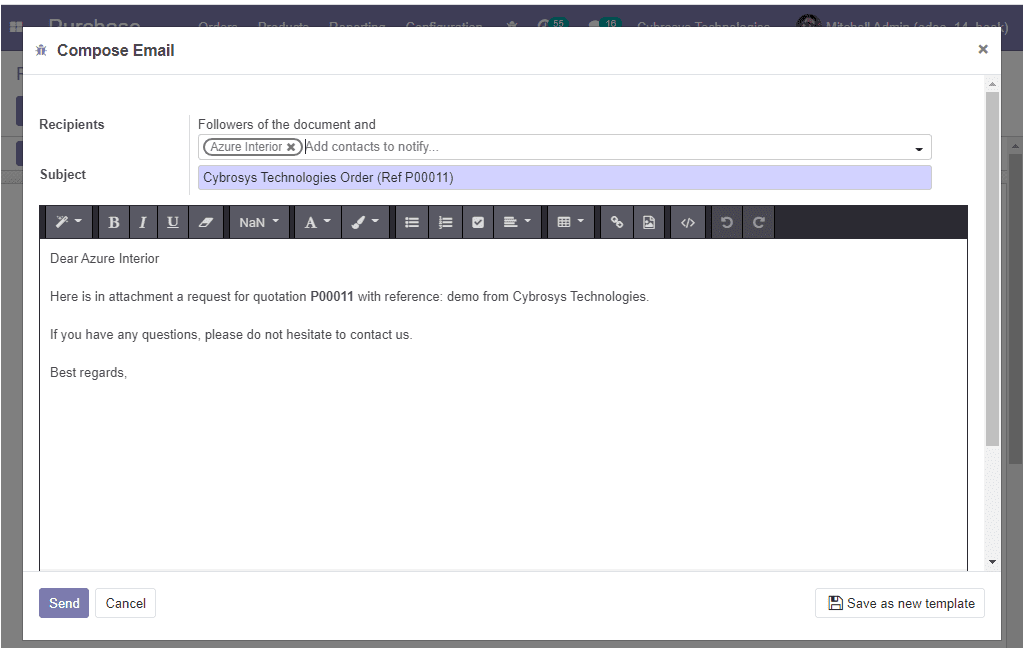
If you click on the Send by Email button, you will be depicted with an email creation
window as shown below.

An automated email template is created and you have the provision to make desirable
changes in the description details as per your requirements. Then you can send the
email by selecting the Send button.
When the RFQ is confirmed, you can confirm the order by selecting the Confirm Order
button.
We now understand how to create requests for quotation in the purchase module and
now let us discuss the Purchase Agreement aspects of this module.