Point of Sale Configuration
The Point of Sale menu can be accessed from the configurations tab of the Odoo POS
module. The POS module operations will allow you to effectively run the retail operations
of the company such as shops, restaurants, or bars. All the POS configuration and
operations can be conducted using this menu. The image of the POS window is depicted
below.

In the Point of Sale window, you can view all the various POS sessions described
in the platform along with the Company details. You also have the option of creating
new sessions. This can be done by selecting the Create icon available. The image
of the POS creation window is depicted below.
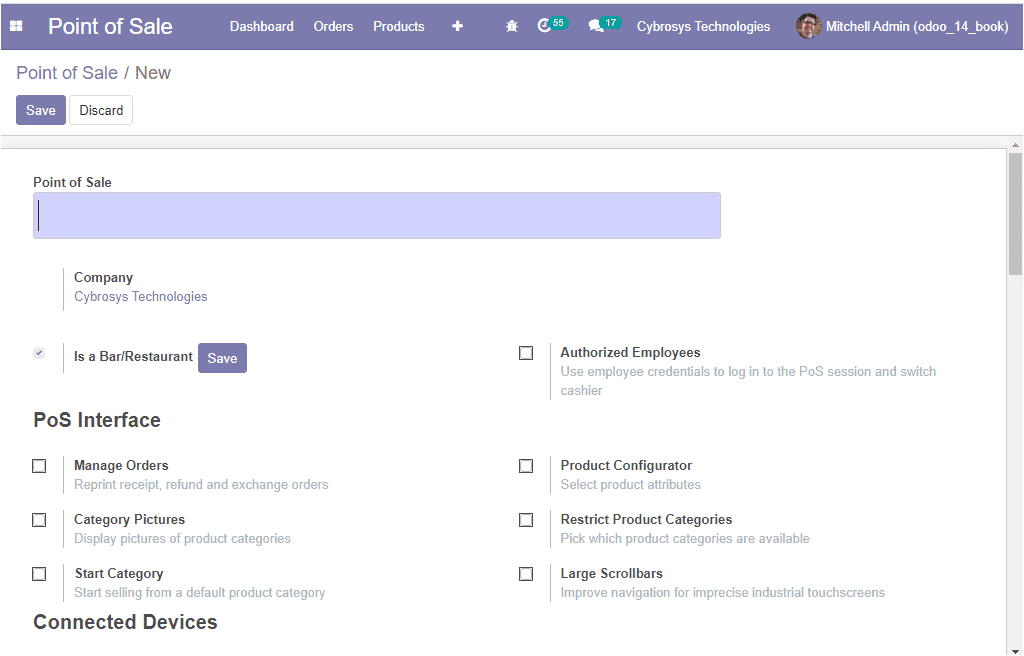
In this creation form, you can allocate all the fields related to the business operation.
Initially, you can provide a name for your Point of Sale operation. It will act
as the internal identification of this operation. The company details are auto allocated.
If the new POS session is for a restaurant or bar, you can enable the respective
option available. Additionally, the Authorized Employees option can also be enabled.
Under the POS Interface, you can enable or disable the options to manage orders,
Category pictures, Start Category, Product Configurator, Restrict Product Categories,
and Large Scroll bars.
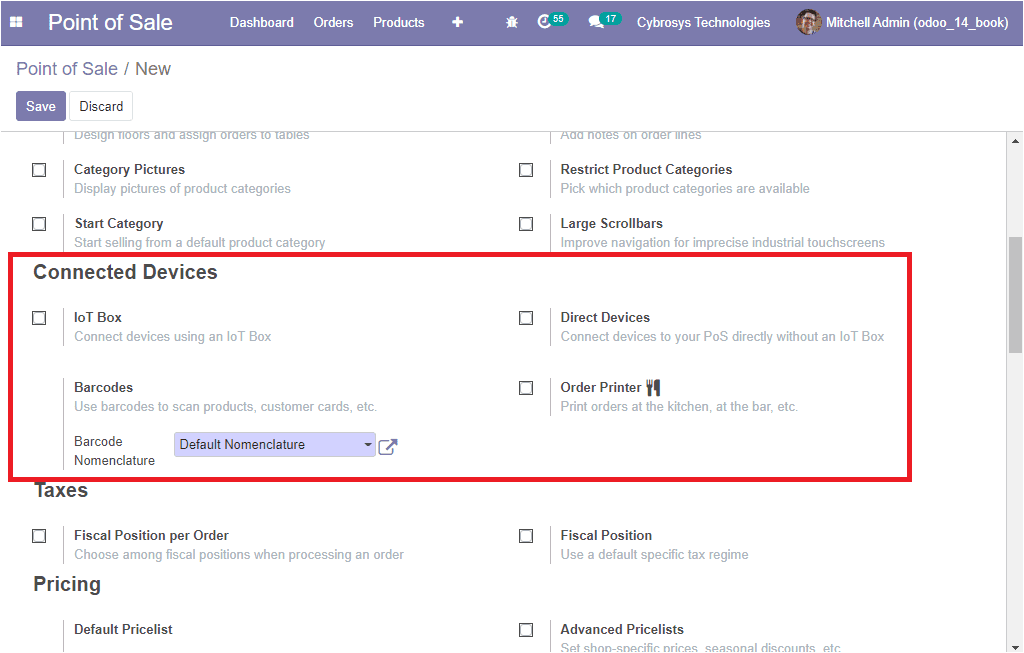
Under the Connected Devices menu of the POS session, you have the options such as
IoT Box, Direct Devices, Order Printer. You can enable these options for connecting
your database with these useful hard wares.
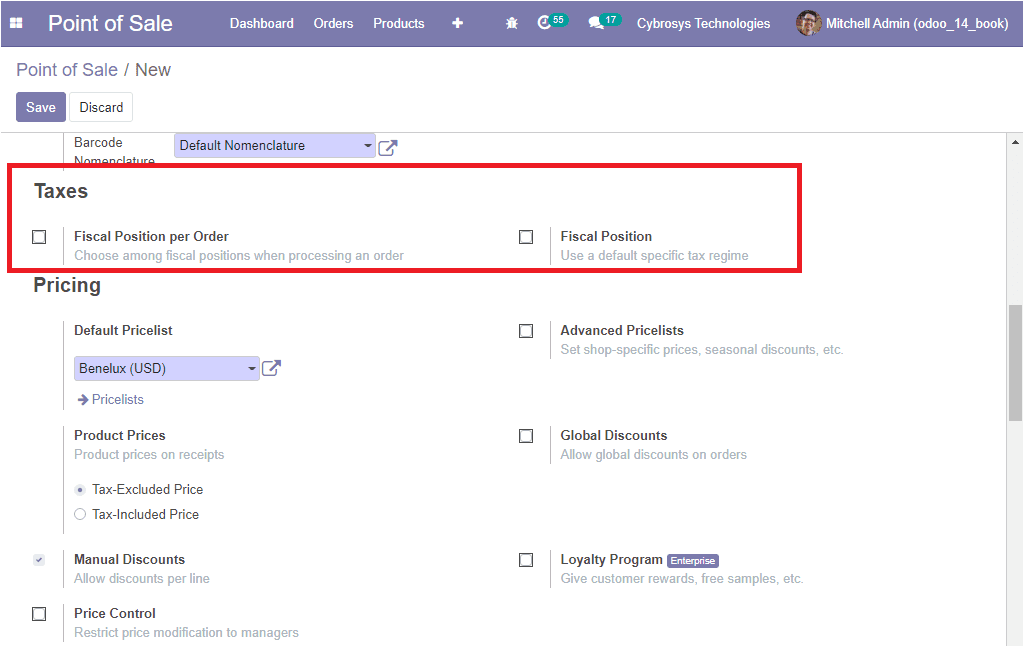
In the Taxes menu, you can enable the Fiscal Position per Order and also for the
various orders and the company operations.
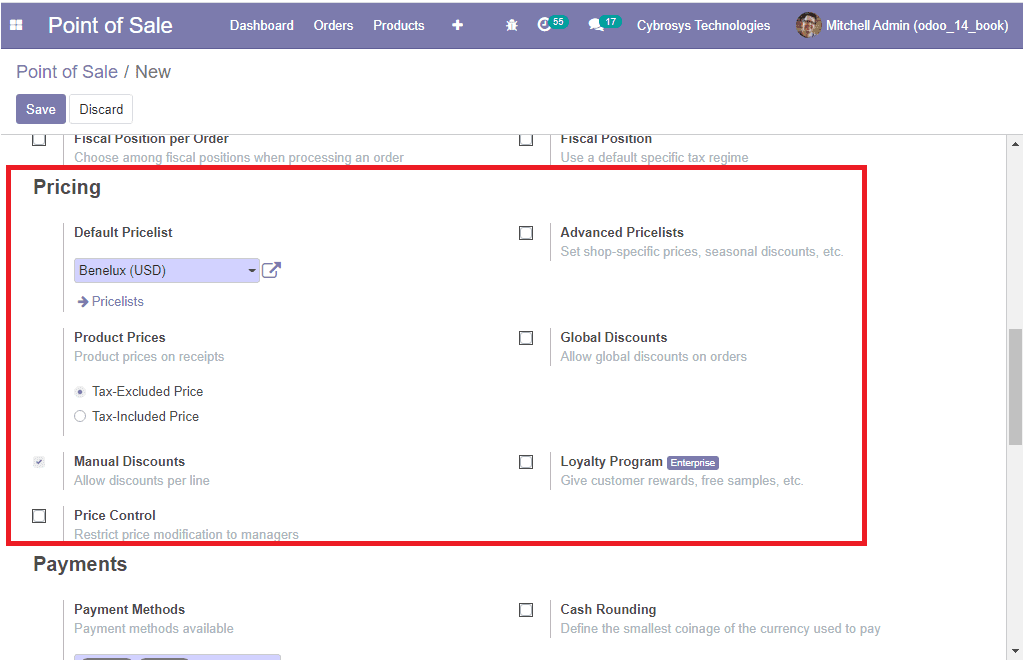
Under the Pricing menu, you can allocate the default pricelist from the list being
defined in the platform. The Advanced Pricelists option can be enabled for setting
seasonal discounts or shop-specific prices and many more. The Product Prices can
be made tax excluded or tax included. Additionally, Manual discounts, Global discounts,
Price Control options can also be enabled.
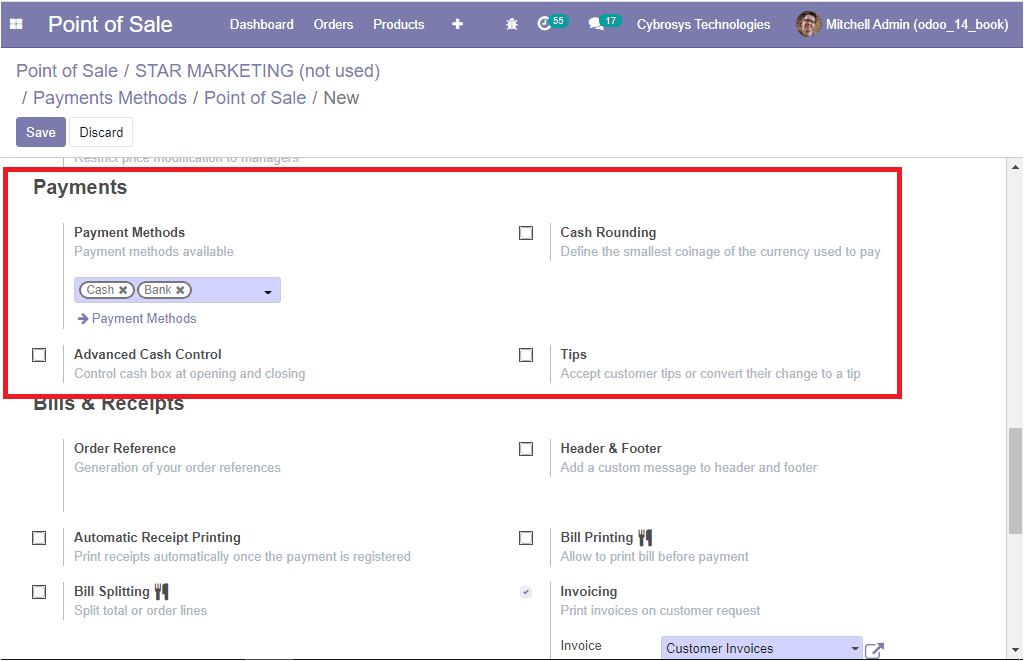
Under the Payments menu available in the Odoo POS creation window, the payment methods
can be allocated for the POS operation. Also, the Advanced cash control, Cash rounding,
and Tips options can be enabled.
Now let us discuss what are the options available under the Bills & Receipts menu
available under the POS creation form. Here you can enable the option Header & Footer
for adding a custom message to the header and footer. Moreover, the options for
Automatic Receipt Printing, Bill Splitting, Bill Printing can also be enabled. Finally,
the Invoice journals for the invoicing operation can also be defined. The image
of the Bills & Receipts tab is depicted below.

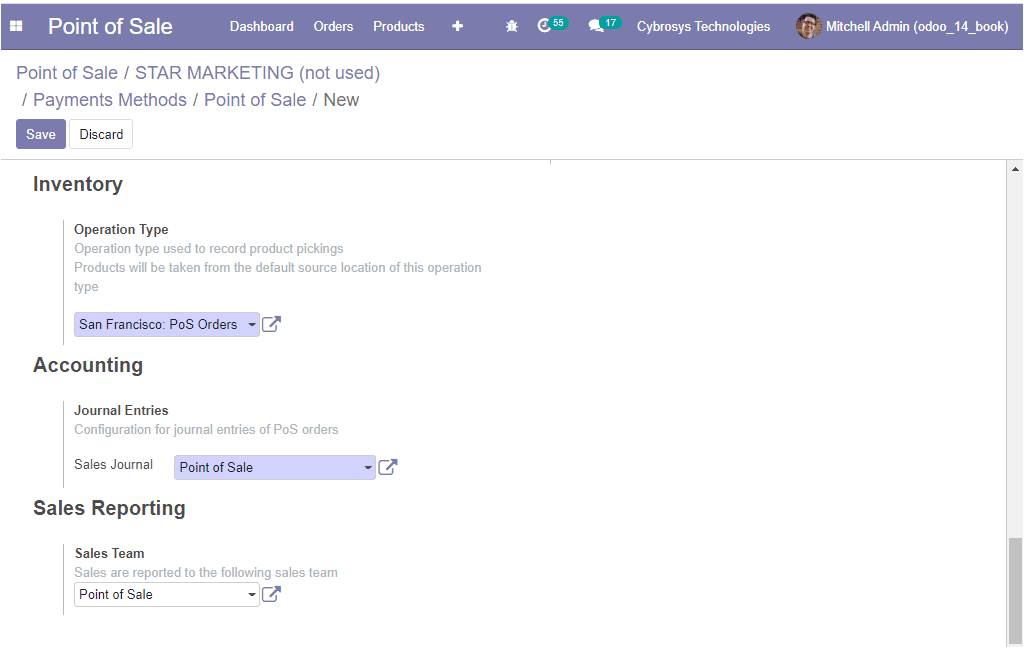
In the Inventory menu, the operation type can be mentioned from the drop-down menu
available. In addition, the Accounting menu allows you to specify the journals for
the sales operations being conducted. Finally, in the Sales Reporting menu, the
sales team for the operation can be described and this can be done on the basis
of the sales team listed in the Sales module of the platform.
