Notes
As a business entity, you have many things on your mind to remember, future plans and to inform, and many more things to schedule. It is no doubt that note is an important aspect in business and it can make your business operations smooth and organize it in a better way. The Notes module available in the Odoo platform allows you to create and manage all the notes and their operations. The module helps you to take down your business notes, plans, or ideas digitally which will be helpful in reducing paper wastage. In addition, this module helps you to store the information or data within the database which will be more convenient for future access. Also, the small module can be easily integrated with other modules in Odoo such as sales, purchase, point of sale, etc. Moreover, the features available in the Notes module such as searching for notes based on the content and the date of note are also made easy and comfortable. You can categorize the notes based on your requirements. Using this module you can easily categorize notes, schedule activities, create multiple stages of notes, and you also have the various default as well as customizable features.
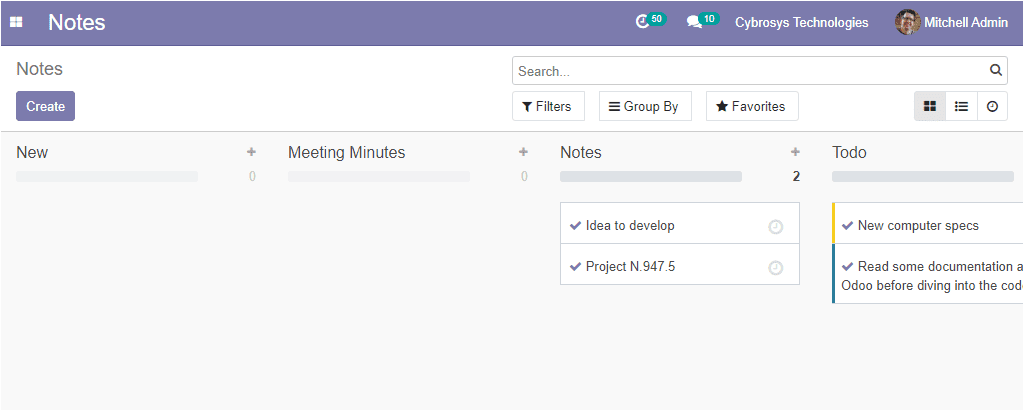
The home window of the Notes module is depicted below where you can view various default fields such as New, Meeting minutes, Notes, Todo and you have the provision to create new stages by selecting the Add a column button.
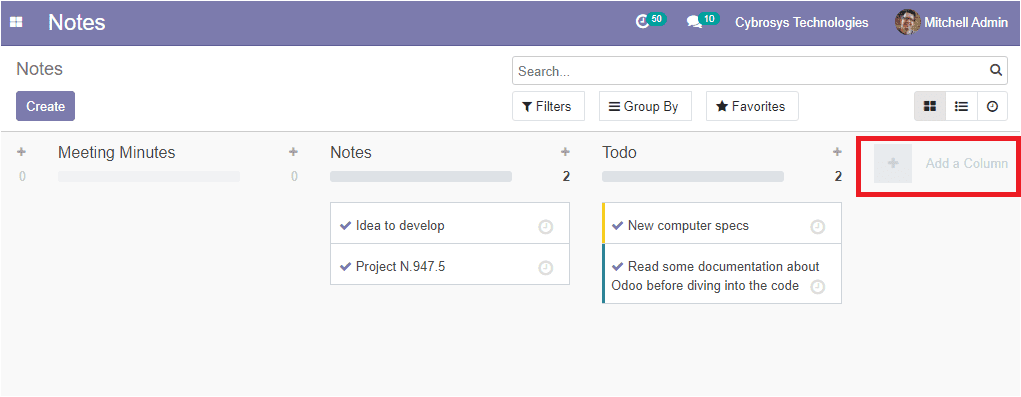
Using the Add a column option you can generate different notes based on your business requirements. The image of the Add a column option is depicted below.
The list can be filtered and grouped by default options as well as the customizable options available in the window. Moreover, you can create customized note types by selecting the + icon, the quick add option available on the right top side of each stage as depicted in the following image.
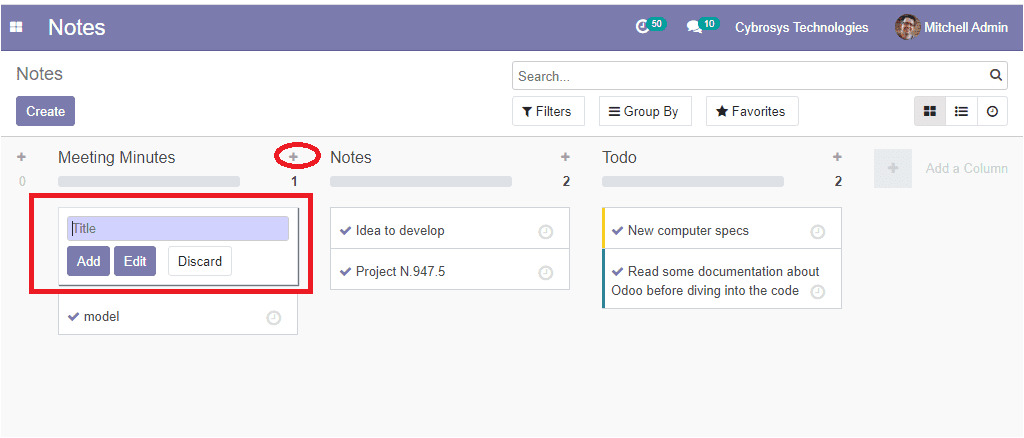
Now you can provide the title for the pop-up window and select the Add button for saving the details. Now the provided details will be displayed under the respective stage and you can click on them for creating notes. The image of the window is depicted below.
Additionally, the details in the home window can be viewed in the Kanban and list view. The above image is in the Kanban view and the list view image is depicted below.

In the list view, you can view the data are arranged in an order of note summary, stage name, status, tags if any, and the next activity option for scheduling activities.
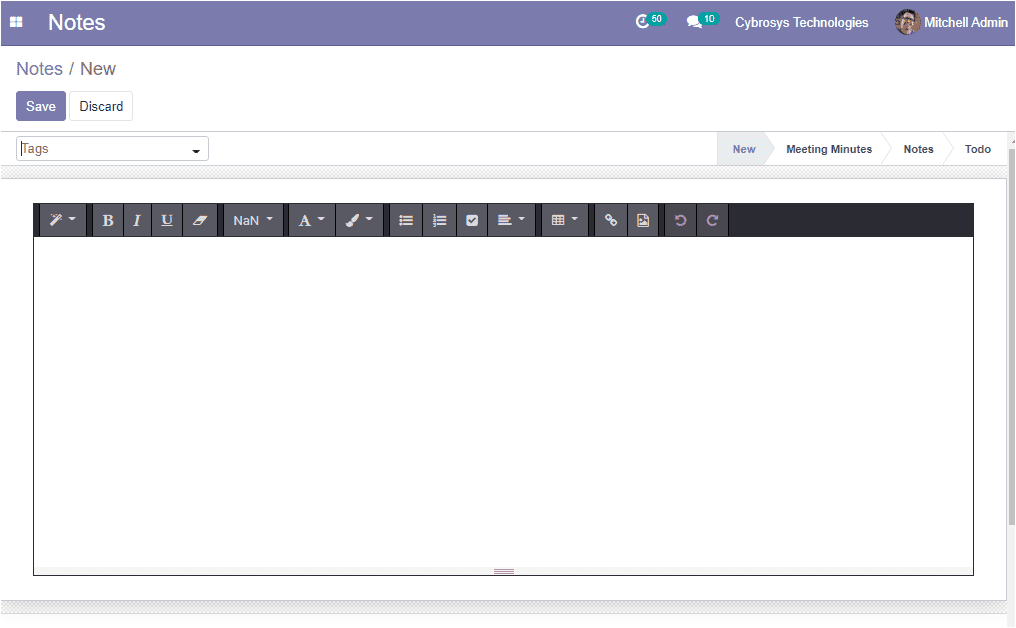
For creating new notes in the platform you can select the Create icon available on the top left corner of this window. The image of the creation window is depicted below.
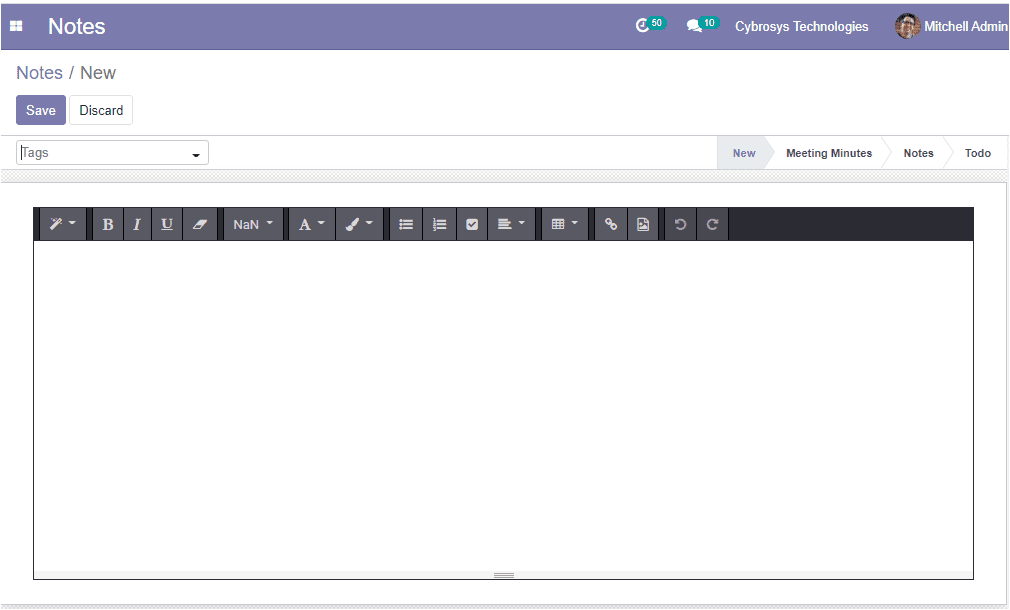
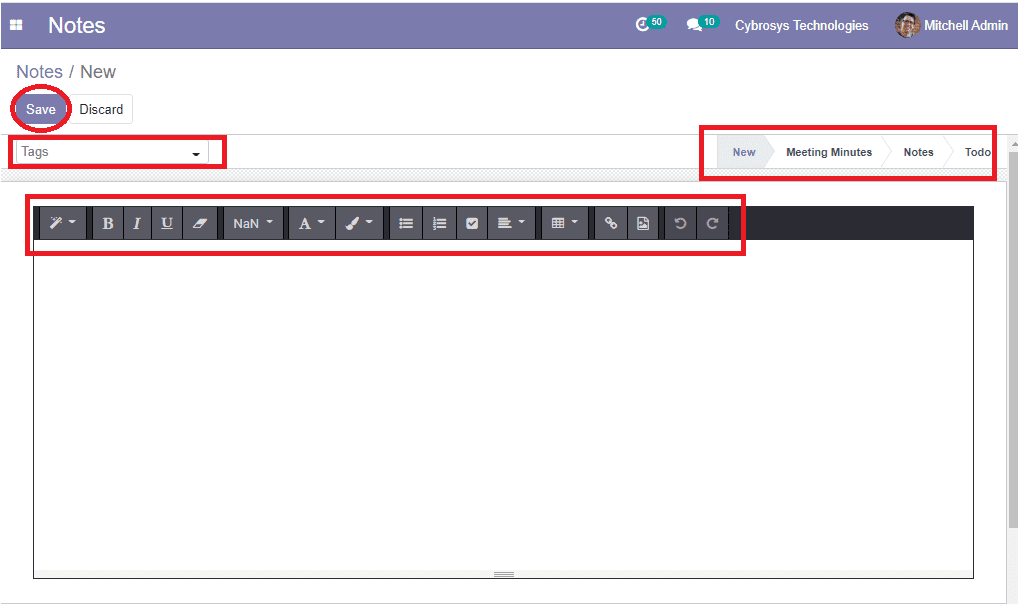
In this creation window, you are provided with all the editing tools to create custom-made notes as per your requirements and you have the provision to attach the external links to it. Moreover, you can allocate the Tags for your note by selecting the Tags option available on the top left corner of the window. This will help you to make searches for this note easy and identifiable. In addition to it, you have the provision to change the aspect of the note from new to the meeting minutes, notes, to do, or any other stage which was created by you.
Now come back to the home dashboard, the platform allows you to highlight important data using the various visual parameters and this can be available by clicking on the three dots in the described notes. You will be depicted with the dropdown menu as depicted below.
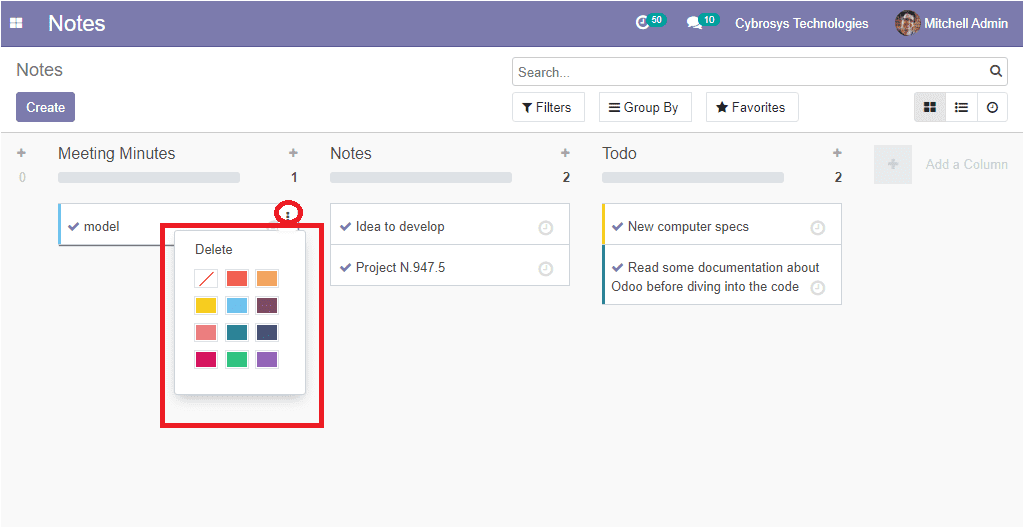
Using this option you can make each note described in the platform in a different color shade for easy access and understanding. Activity scheduling is the main feature available in the module. The various activities such as calls, meetings, emails, reminder, To Do, and many more can be scheduled under each note available in the module. This can be done by selecting the clock icon available and you will be depicted with a pop-up window where you can click on the Schedule an activity option displayed.
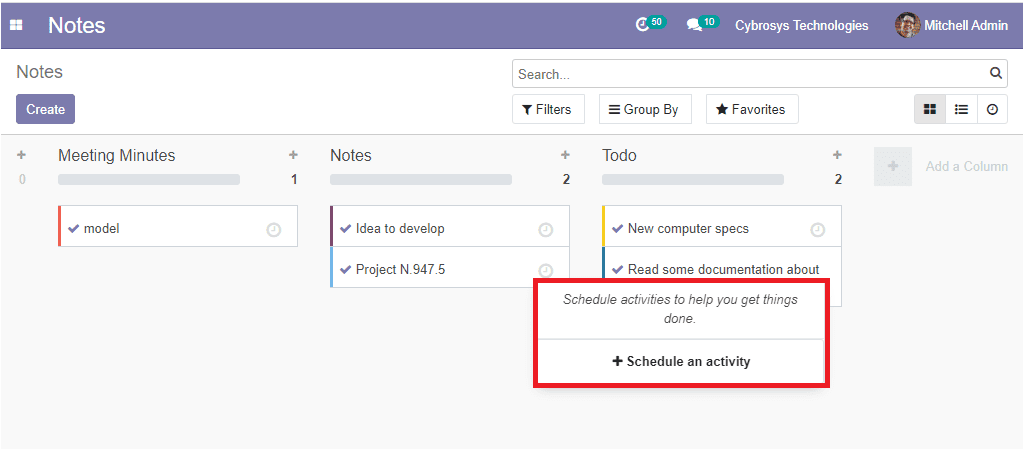
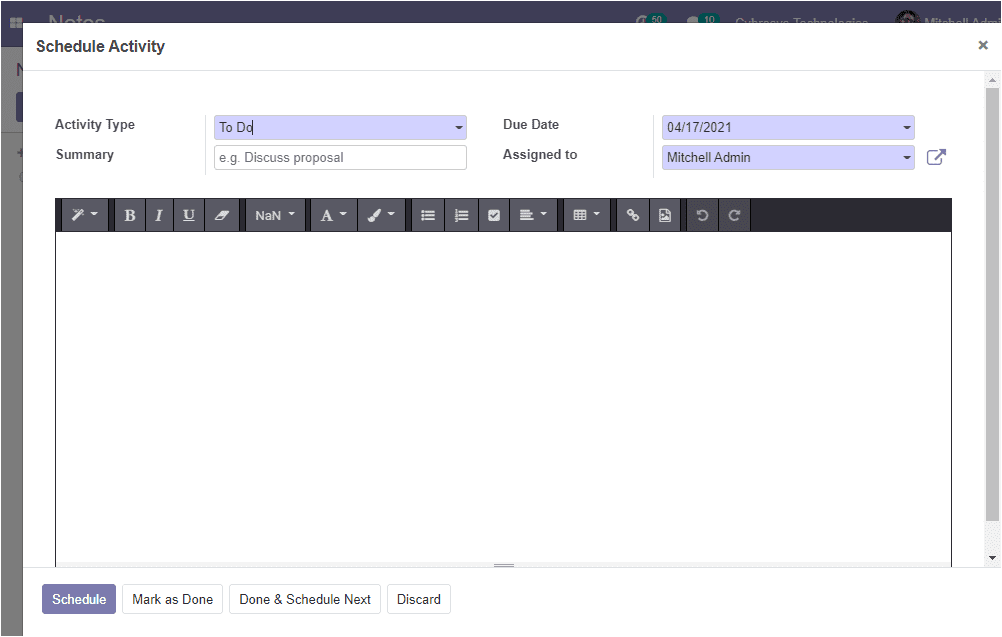
Using this window you can schedule an activity by allocating the details such as Activity Type, Summary, Due date, and assigned person. Then you can provide a detailed description of the activity allocated space. For this, you can make use of the various tools available. After providing all the details you can click on the Schedule button for scheduling the activity. The schedule activity window is depicted below.
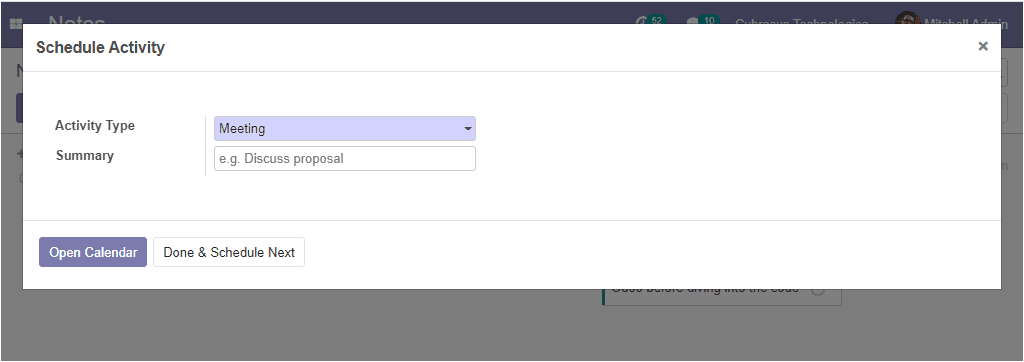
In the case of scheduling a meeting, you will be depicted with another window as depicted below where you can provide the activity summary along with the activity type. For scheduling the date you can click on the Open Calendar button available.
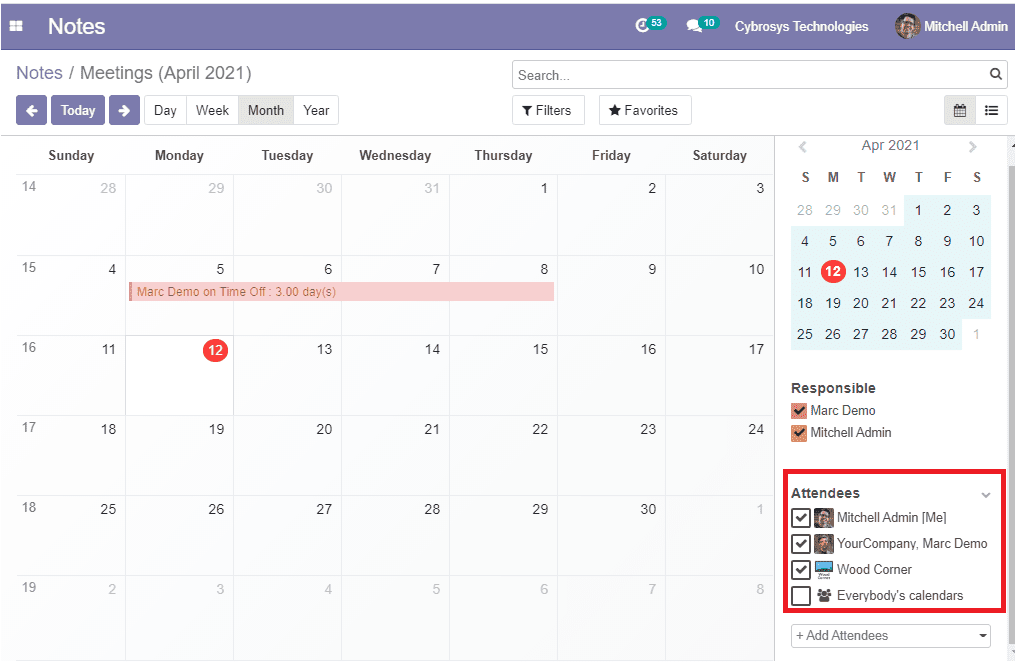
When opening the calendar you can view all the activities scheduled on the respective date and you have the provision to schedule new activities. Moreover, the participant of the activity also be allocated as per the need and the scheduled time also can be defined on the date of operation.
This is all about the Notes module available in the Odoo 14 community edition. Using this simple module, you can effectively manage and keep all the activities and important data without losing them. It can also be archived in the database for future reference. Moreover, it helps to avoid inefficiencies due to the misplacing of to-do notes written on papers.