Manufacturing Order Management
In the Odoo platform, we can conduct the manufacturing process in two ways. This
means the manufacturing with routings and work center as well as the manufacturing
in single-step / without routings. In the former way, you can create a product by
customizing the work order by creating a work center and routing. In the case of
manufacturing in single steps, you can create a manufacturing order by taking the
simple default stages for completion.
Manage manufacturing in a single step without routing
This method is beneficial for the manufacturing processes which are limited to one
place, one person, and one step. By default, Odoo manages manufacturing processes
without routings. Now let us create a Manufacturing Order in this method. For that,
we can go to Manufacturing -> Operations -> Manufacturing Order.

In this window, you can view all the Manufacturing Orders defined in the platform
along with the details of Reference code, Scheduled Date, Product Name, Unit of
measure, Material Availability status, Quantity, Company associated, and the Status
of each manufacturing order. All the customizable and default functionalities such
as Filters, Group By, Favourite search could be seen. Moreover, the manufacturing
orders window can be viewed in the List view as well as in the Kanban view.
Also, you have the provision to create a new Manufacturing Order by selecting the
Create icon available in the top left corner of the window. In this window, you
can provide the Product name, allocate the Quantity to produce, and define the Bill
of Material using the dropdown menu. The Bill of Materials allows you to define
the list of required components to make a finished product. The date at which you
plan to start the production can be mentioned under the Scheduled Date option. Additionally,
you can allocate the Responsible person along with the company associated. Apart
from these options, you have the provision to prioritize the Manufacturing Order
by clicking on the star available on the top of the window. By doing this the components
will be reserved first for the manufacturing order with the highest priority. The
image of the window is depicted below.
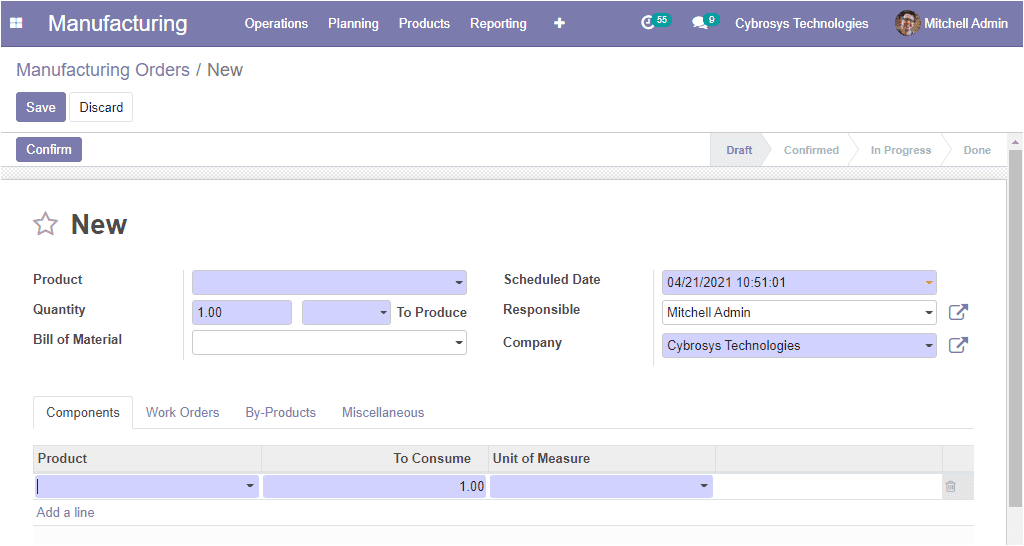
Under the Component tab, you can add the products by clicking on the Add a line
option available. This tab is used for providing the details of raw materials used
for production. Now we can move to the Work Orders tab available in the window.
The image of the window is depicted below where you can view an Add a line option.
By selecting this option you can provide the details such as Operation, Work Center,
Scheduled Start Date, Expected Duration, Real Duration, and the Status.

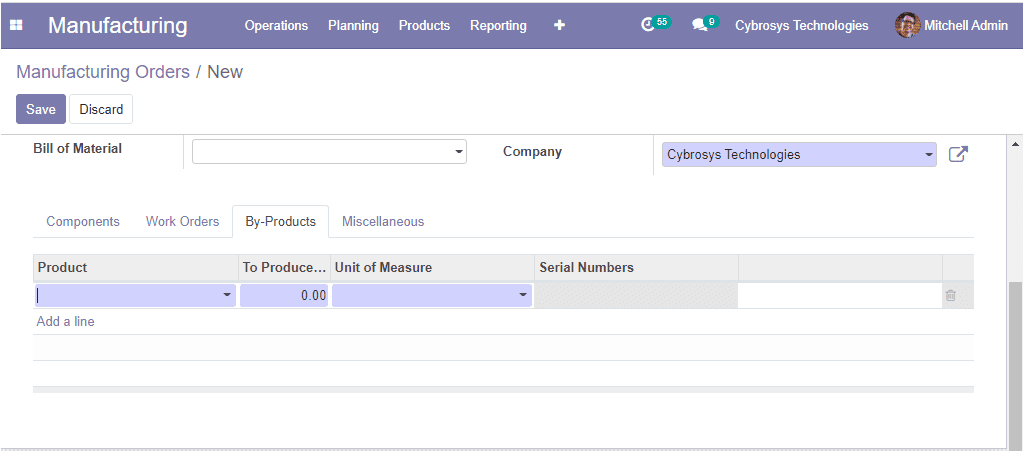
Under the By-Products tab, you can add the by-products if any. This can be done
by selecting the Add a line option available. Here you can provide the Product details,
the quantity to produce, along with the Unit of Measure and Serial Numbers. The
image of the window is depicted below.
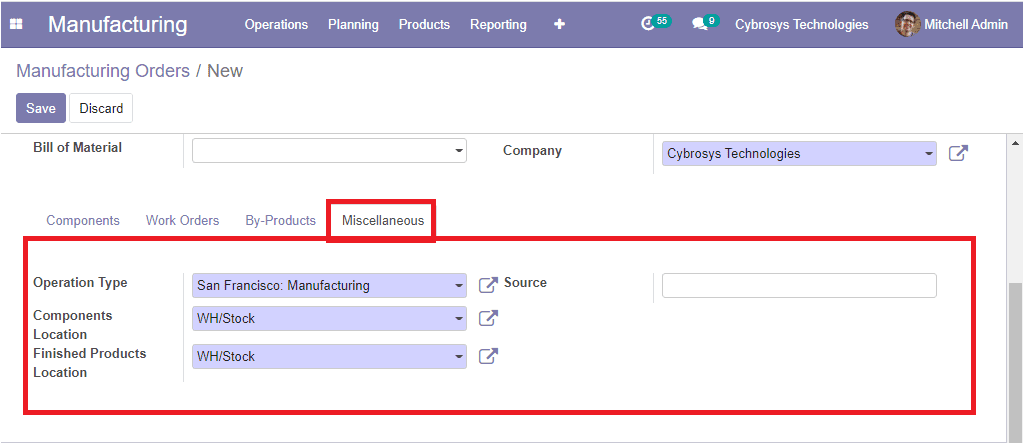
Under the Miscellaneous tab, you can define the Operation Type, Components Location,
and the Finished Products Location can also be allocated. The reference of the document
that generated this production order request can be defined in the Source menu available.
After filling in all the required fields, you can click on the Save button to save
the details. Then you can click on the Confirm button to confirm the Manufacturing
Order.
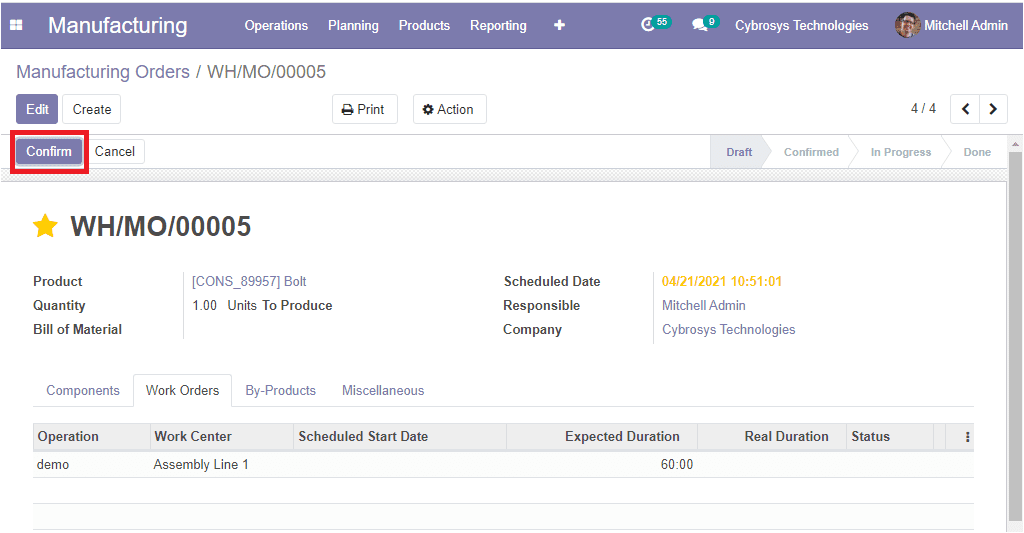
Upon selecting the Confirm button on the manufacturing order, the status will change
from Draft to Confirmed in the window of the respective manufacturing order as depicted
in the following screenshot.
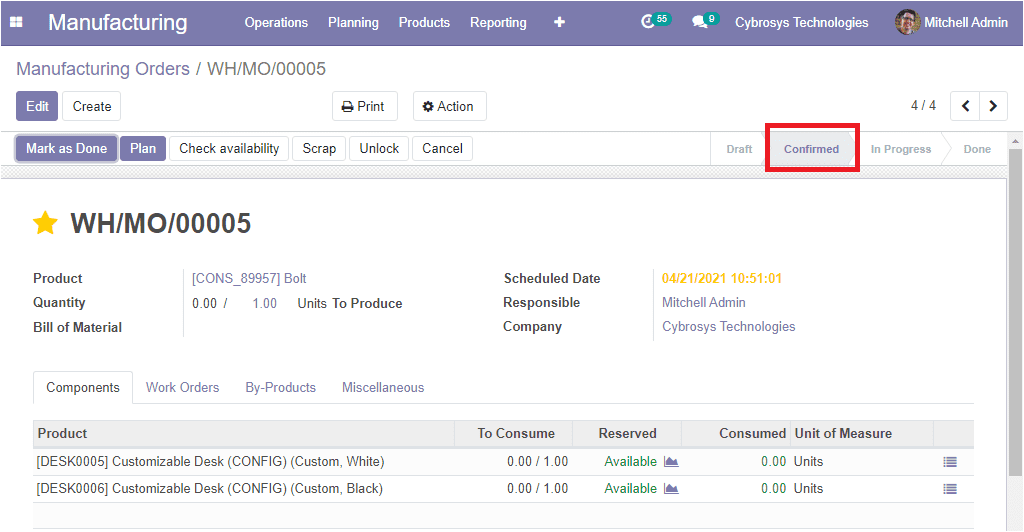
Here in this window you can view various tabs such as Mark as Done, Plan, Check
availability, Scrap, Unlock and Cancel. You can also view the corresponding Status
such as Draft, Confirmed, In Progress, and Done. you can click on the Check Availability
button for viewing the availability of raw materials in the inventory. The availability
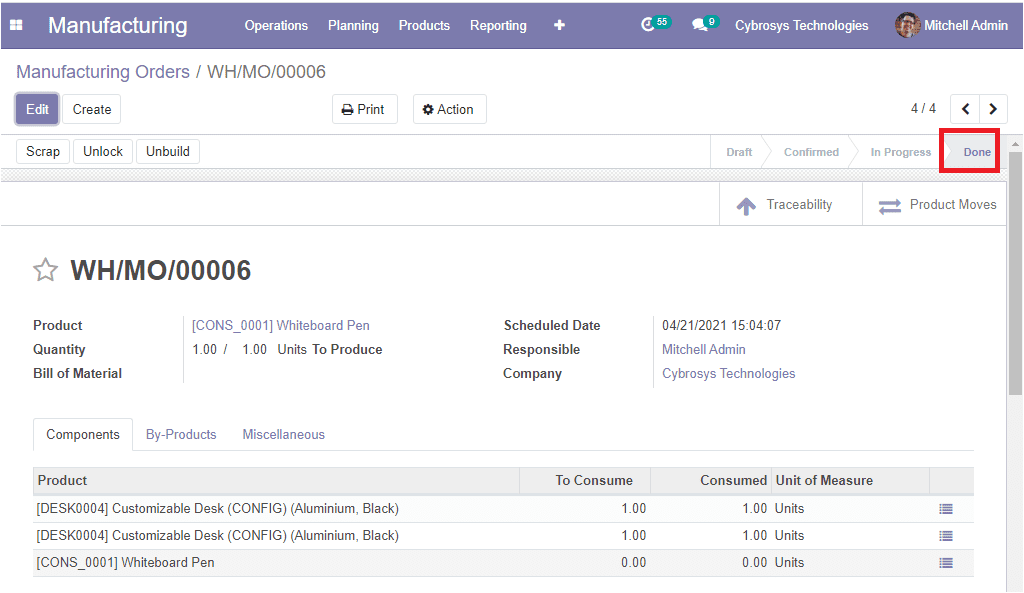
status can be viewed under the Reserved menu. The Mark as Done button allows you
to complete the production process. On clicking the Mark as Done, the status will
change from Confirm to Done as shown in the below image.
So far we were discussing how to manage manufacturing in a single step without routing
and now let us discuss how to manage manufacturing with routings and work centers.