Lunch
One of the simplest modules in the Odoo platform, the Lunch module will allow you to handle all the activities related to the food distributions within your organization. The organizations which provide lunch for their employees need an efficient ERP application like Odoo to manage the menu and the food items ordered by the employees.
Now let us discuss the module in detail.
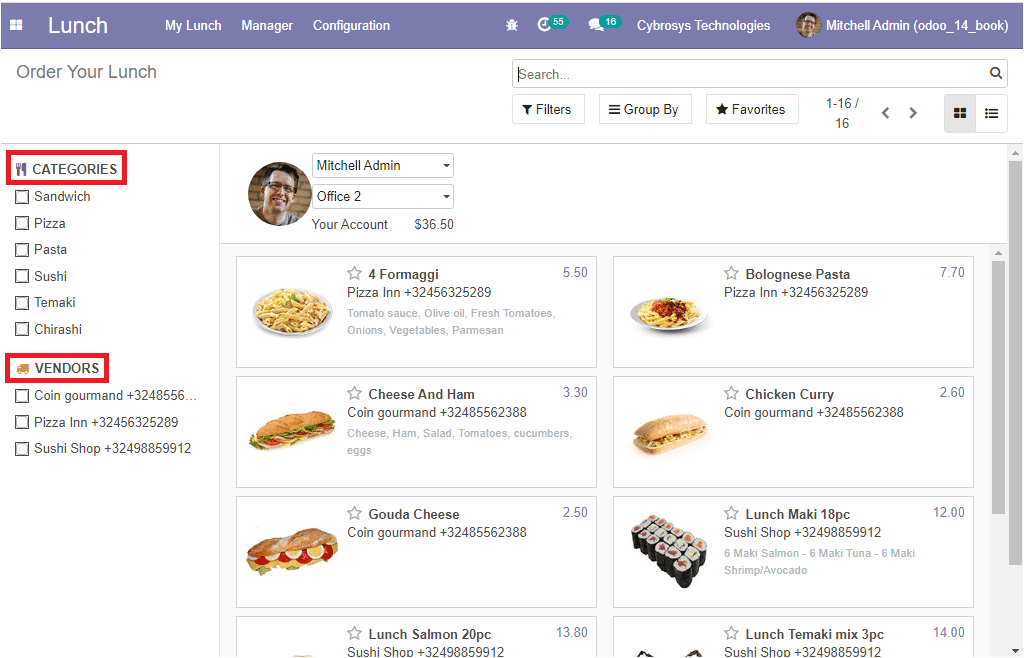
The dashboard of the Odoo Lunch module is depicted below. In this dashboard, you can view all the already created food orders and the Food Categories and Vendors details can be viewed on the left side of the window. Odoo allows you to easily categorize the lunch orders with a set of parameters such as filtering, group by option, favorite search, and so on.

You can create a Product list in the Lunch module. Now let us discuss how to configure a product list on the platform.
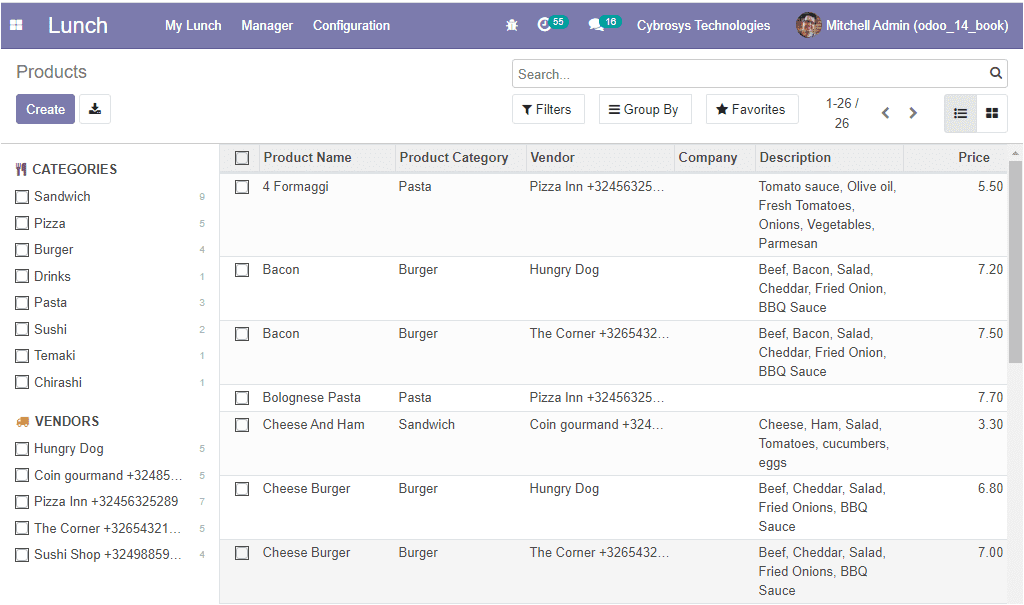
For this, you can go to Lunch -> Configuration -> Products. The image of the window is depicted below. Here in this window, you can view all the Products described on the platform along with the Product Category, Vendor, Food Description, and Prices details.

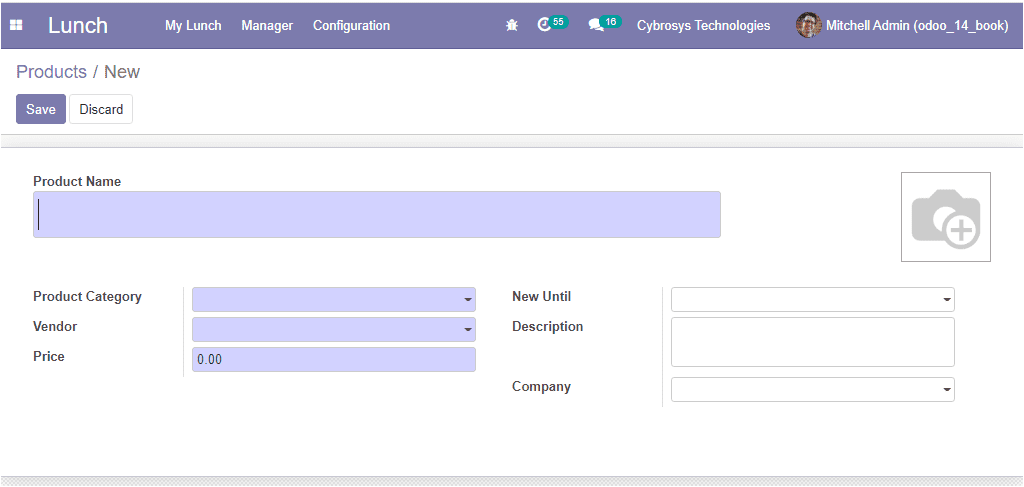
To configure new products, you can click on the Create icon available on the top left corner of the window. In this creation form, you can provide the Product Name along with the Product Category, and Vendor. Moreover, you can allocate Price, Food description, and Company details. Additionally, you can set the order validity by selecting the New Until option. Finally, you can provide the image of the product in the allotted space. After filling in all the fields, you can select the Save button to save the details. Now the newly created product will be added to the Product list.

So far we were discussing the product configuration in the platform and now let us discuss the Product Category option.