Mailings
The Odoo platform allows you to create new mailings by selecting the Create icon
available in the Mailings window. For that, you can go to Email marketing -> Mailings
-> Create. Upon clicking on the Create button, you will be depicted with a Mailings
creation form as shown below.
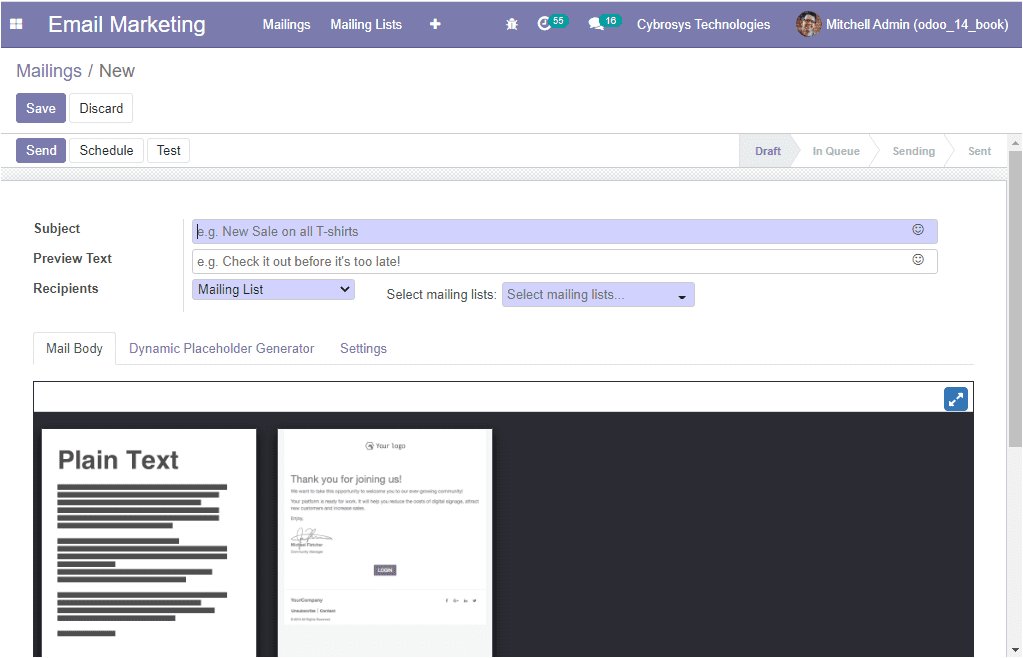
Here in this creation form, you can specify the Subject of emails in the allotted
space and you can describe the Preview Text which are the attractive preview sentences
that encourage recipients to open this email. In most inboxes, it is displayed next
to the subject. You can also keep the box empty if you prefer the first characters
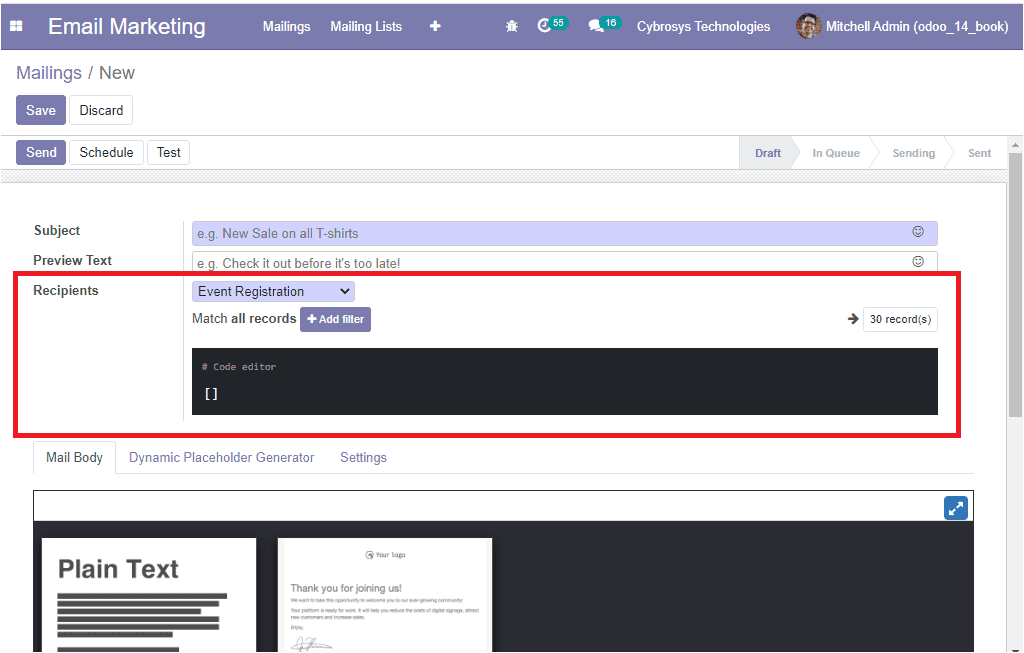
of your email content to appear instead. After that, you can add the Recipients
model from the drop-down menu. After selecting the recipients, you can select the
related records and the record can be filtered.
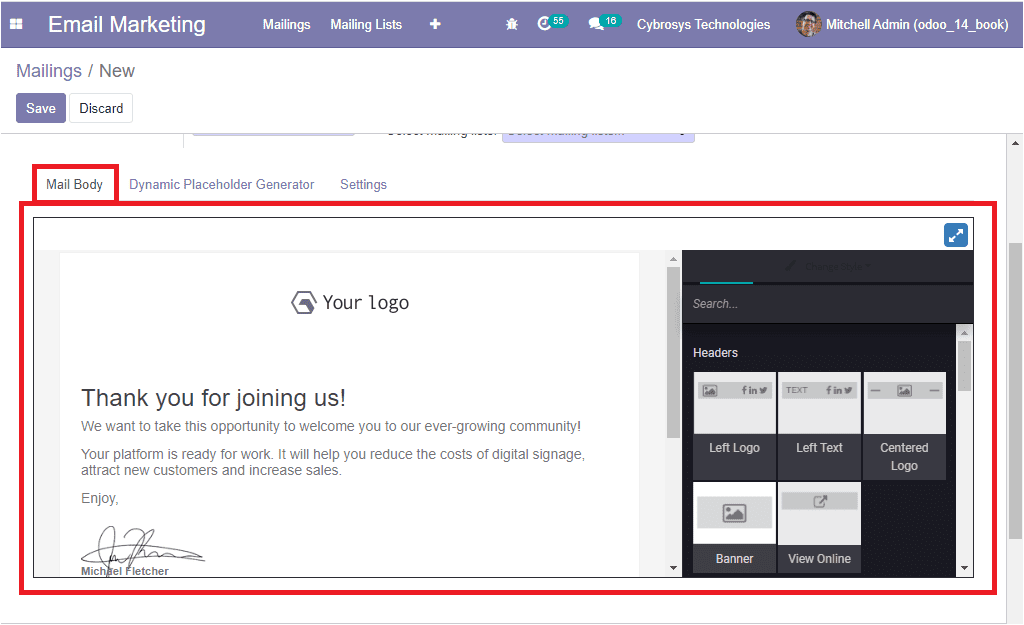
Under the Mail Body tab, you can choose the suitable template for the mail and you
can make desirable changes by using the drag and drop option.
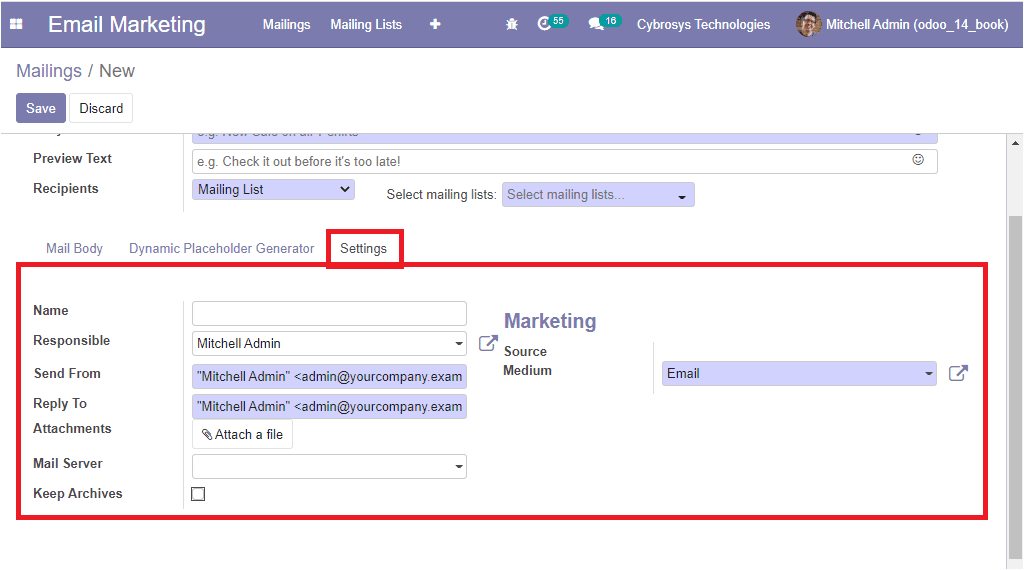
In the Settings tab of the window, you can provide the Name, Responsible person,
Send from, Reply-To, Mail Server. Moreover, you can attach an important file under
the Attachment option.
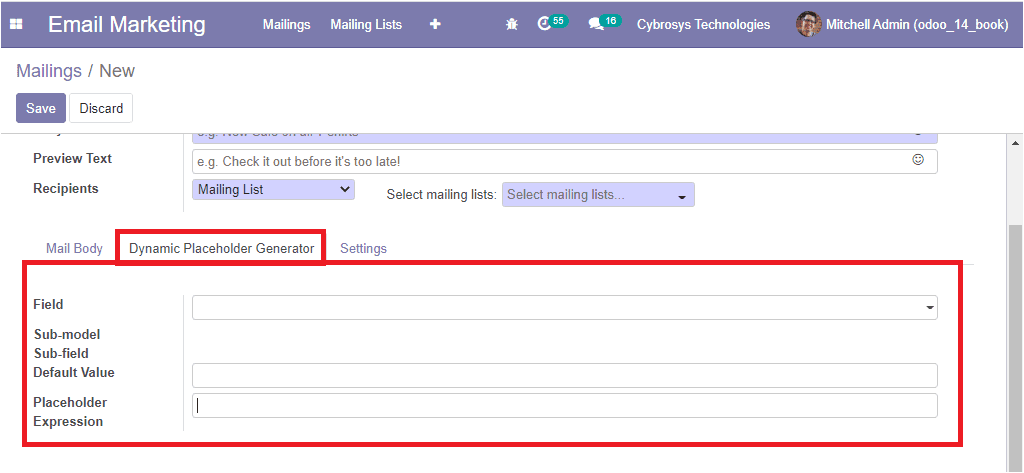
Under the Dynamic Placeholder Generator, you can view the options such as Field,
Sub-model Sub-field Default Value, and Placeholder Expression.
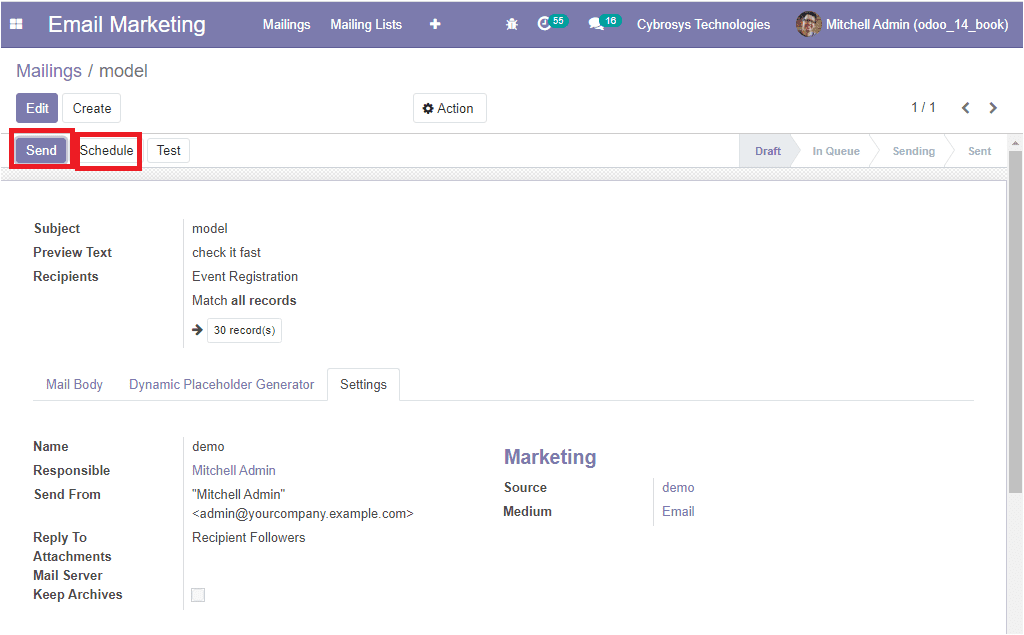
After providing all the necessary details, you can click on the Save button to save
the details. Now you have the provision to send the email or Schedule them for another
day in the future by selecting the Schedule button available.
So far we were discussing the Mailings window in the platform and now let us discuss
the Mailing lists.