Landed Cost
Landed cost is the final amount of the product after completing all the procedures that are necessary for getting the product to the buyer’s hand. That means it is the amount of purchasing costs including the purchase amount, amount of the product shipment, insurance, tax, service charges, currency conversion, transportation fee, and other related costs before receiving it into the hands.
The landed cost will vary from one company to another according to the company policies and the product type.
For accessing the landed cost in Odoo, the user should enable the landed cost option available in the settings menu.
Go to Inventory -> Configuration -> settings -> Valuation -> Landed costs

After activating the landed cost option from settings, the user can fix landed costs in the landed cost menu available under the operation tab of the inventory module.

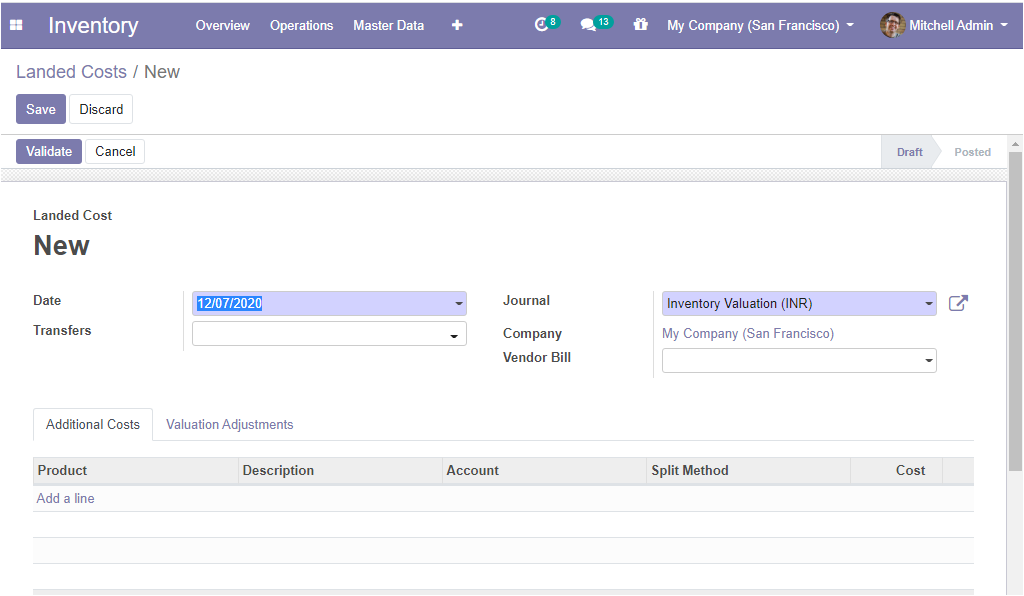
The user can click on the Create menu for creating a new Landed cost. The below image depicts the landed cost creation window.

In this creation form, the user can fill up the essential details such as Date, Transfers, company details related to this journal, vendor bill along with the respective journal
The user can define the products for which the landed cost type is created by selecting Add a line option.
The split method of landed cost can be configured based on the following attributes.
• Equal: Selecting the option enables to equally divide the landed cost.
• By Quantity: Selecting this option enables cost division based on product quantity.
• By Current cost: On selecting the by current cost option leads to dividing the costs based on the product’s current cost.
• By Weight: Using this option for dividing the cost based on the product weight.
• By Volume: In this option, costs will be divided depending on the product’s volume.
As we clear on the landed cost terminology in the platform now we can move on to the next feature run scheduler available in the operation dashboard of the inventory module.