Events
Odoo Events management module is an all-in-one event management platform that suits both large and small-scale businesses. Using this module you can handle all the steps of your event management from the beginning of your event organization to ticket sales and promotion programs. This unique event management module has the capacity to take forward various types of events such as seminar, exhibition, conference, show, sport, conference and many more.
Firstly install the Events module from the Odoo App store
Upon entering the dashboard, you have a view of all described events with some keynotes. By viewing this window you will be able to get an overview of the scheduled events. The date and time of the events, the name of the events, and the number of expected attendees are mentioned here. The image of the window is depicted below.
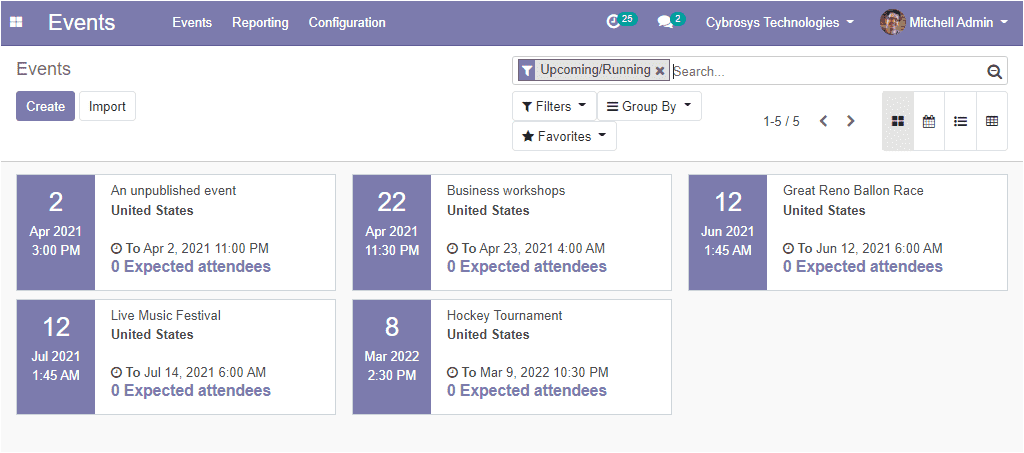
Here in this window, you can view different customizable and default functionalities like any other modules in Odoo. Moreover, the window can be viewed in different views such as kanban, calendar, list, pivot. The above image is in the kanban view. Additionally, you can create new events by selecting the create icon available in the top left corner of this window.
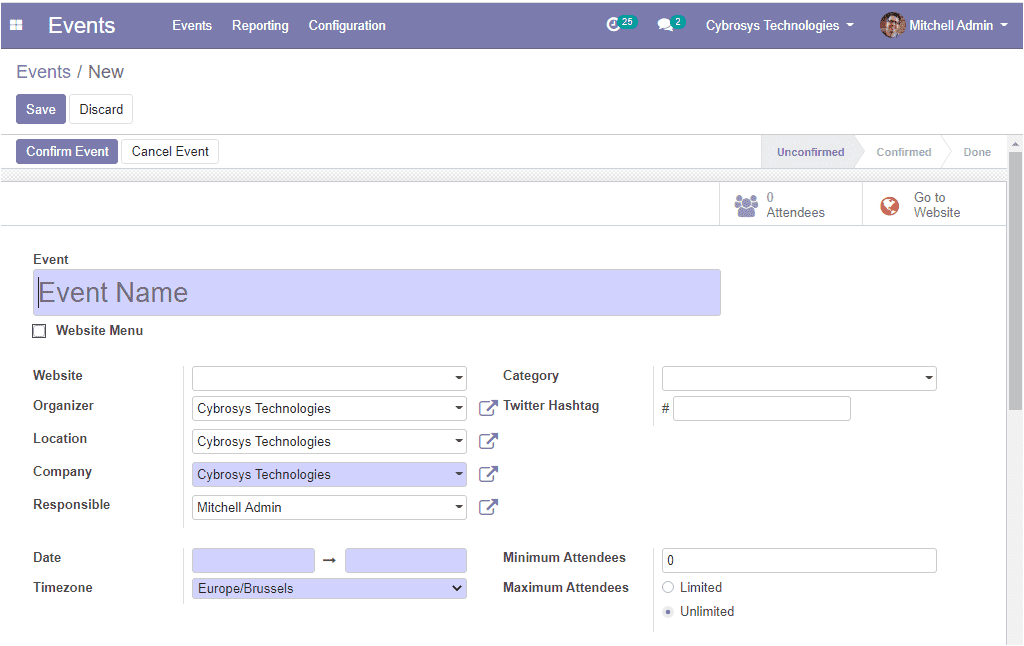
In the events creation form, you can provide the details such as the events name, the website where you are planning to publish the event, and you can mention the organizer of the event and the location, company, responsible person of the event. Additionally, you can mention the date and the timezone can be selected from the dropdown menu. Moreover, you can specify the category of the event whether it is an online or physical event or you can mention the type of the event along with the Twitter hashtag. Finally, you can mention the number of attendees. For each event, you can define a minimum reserved seat or number of attendees, if it does not reach the mentioned registrations the event cannot be confirmed. In the case of maximum attendees, you have two options. That is limited and unlimited.
Under the Tickets tab of the events module, you can have different types of tickets. For having the advantages of this option you should enable the option from settings.
This can be done by going to Events -> Configuration -> Settings.
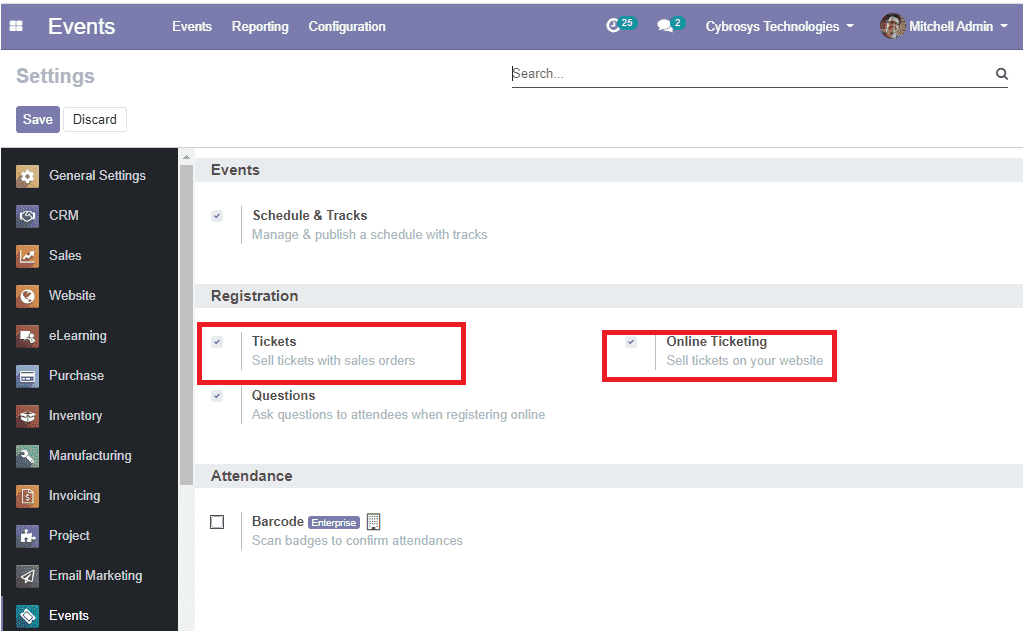
You can check the boxes near the options Tickets and the Online Ticketing option. In order to mark the changes, you should click on the Save button.
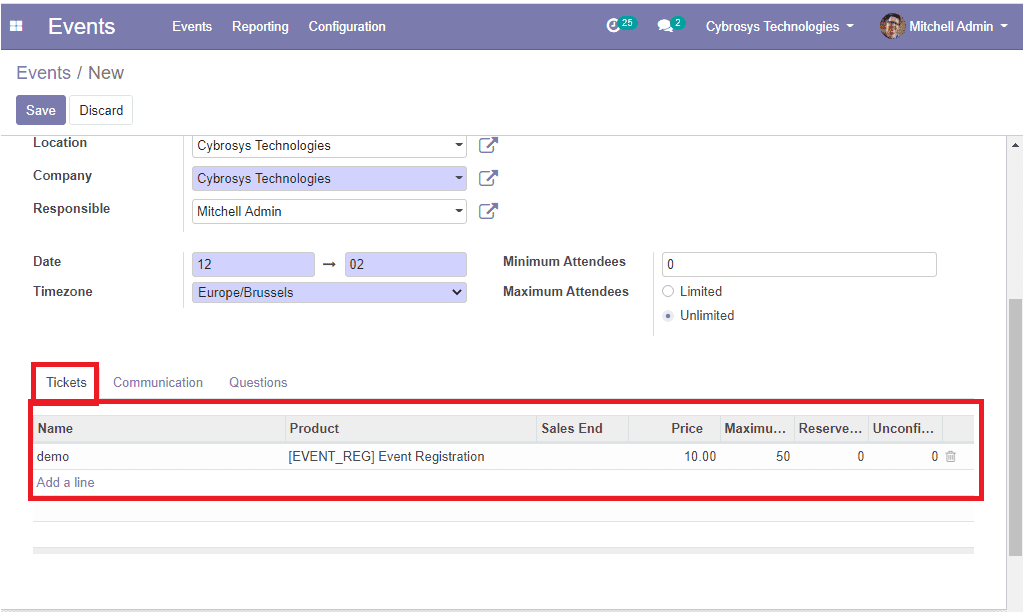
Come back to the events creation form. Now you can add different types of tickets by selecting the Add a line option where you can include the details such as the price for the tickets, the start and end dates for the registration, and the maximum available seats, reserved seats, and other details. The image of the window is shown
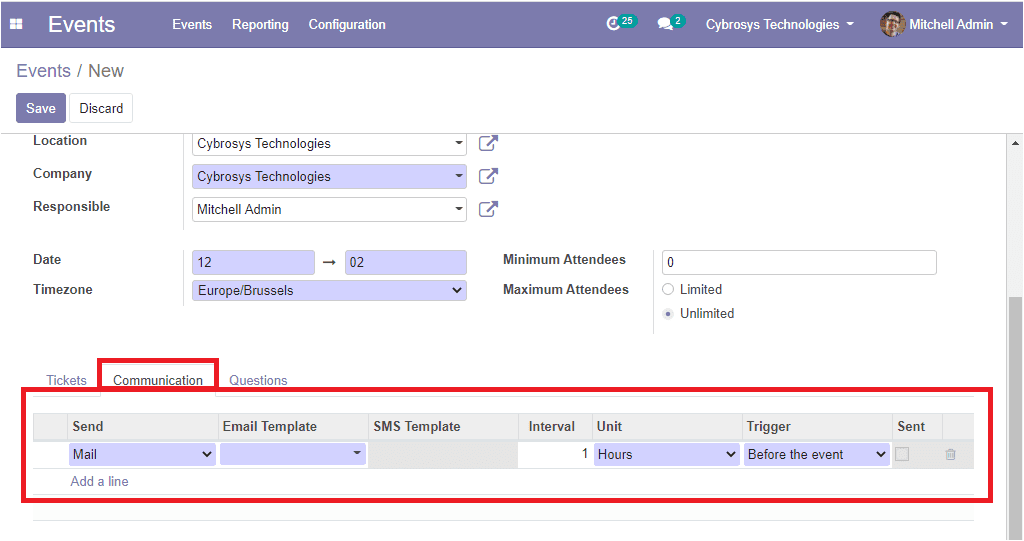
Using the communication tab of the event’s creation form you can start the communication with the attendees via both email and SMS. You have the provision to select the mode of communication along with the frequency with which you want to communicate with your attendees. You can also select the units, trigger option for messaging before the events and after the registration process.
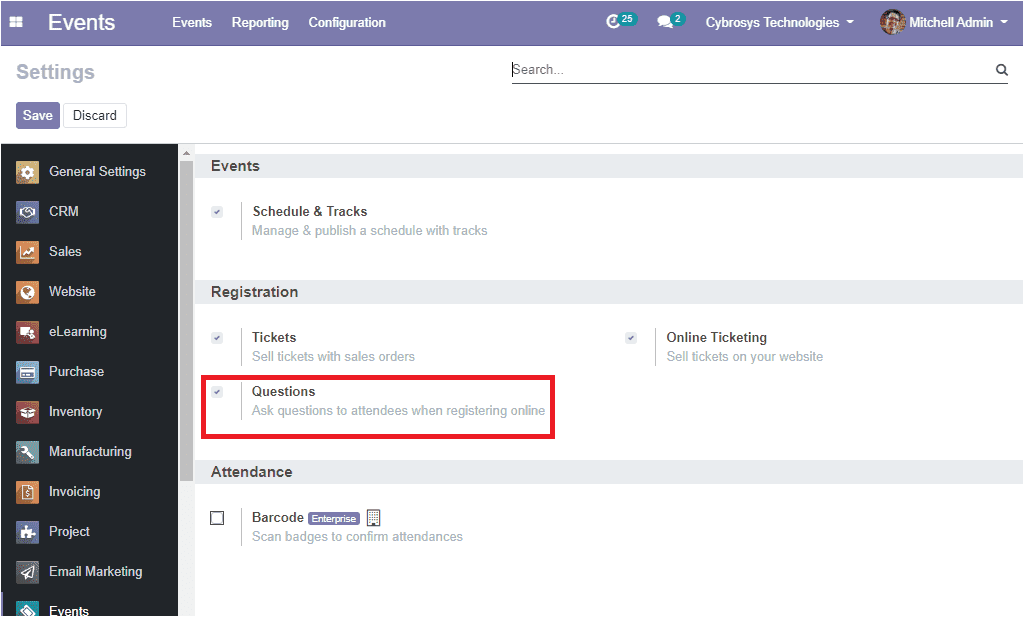
Here Odoo provides a Questions tab also. This option allows you to ask questions to the attendees when registering online. For accessing this feature firstly you should enable the option from the settings.
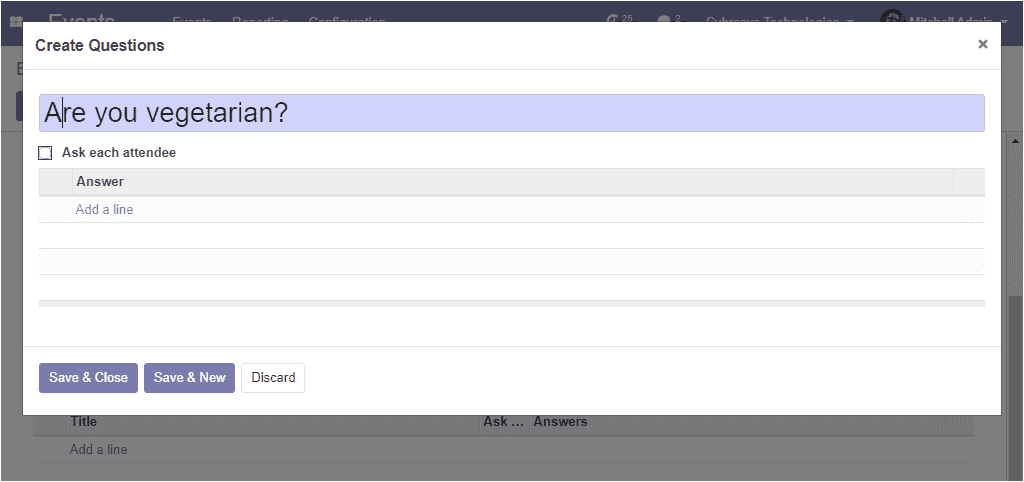
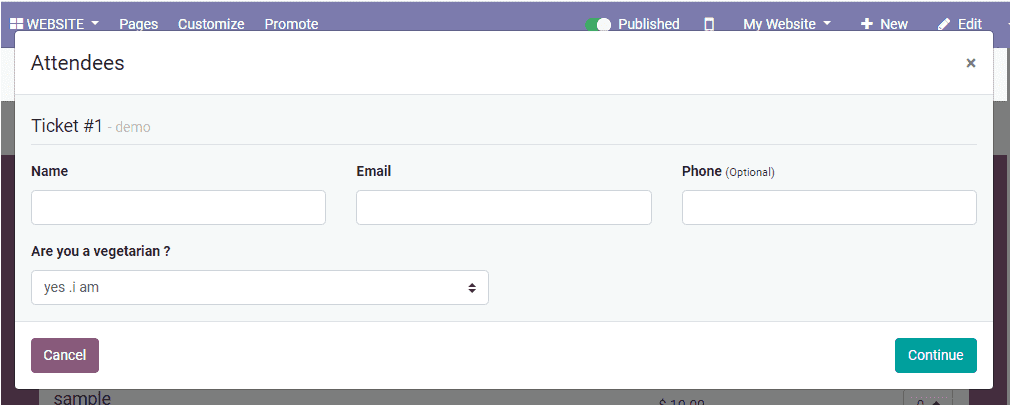
Now you can edit your questions and answers. Using this tab you can provide directions such as plastic things are not allowed and if you are providing any lunch for the event and you want to know if there are any vegetarians. Now you can post the question of whether the participant is a vegetarian or not under this tab.
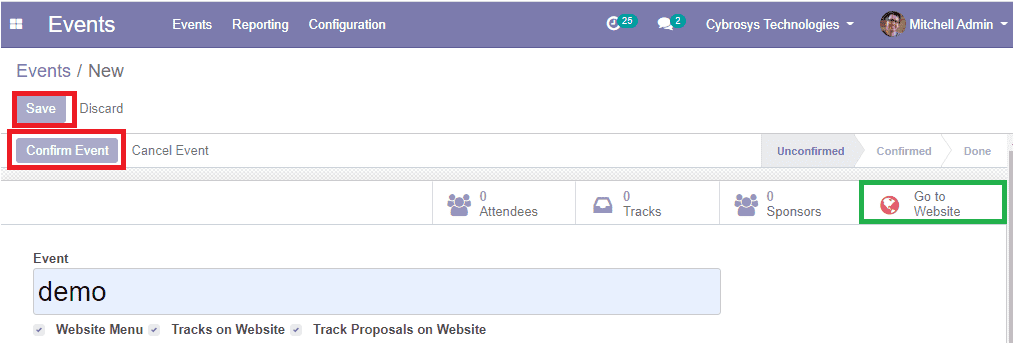
After providing all the required details in the events creation window you can save the event by clicking on the Save button. Now you can confirm the event by selecting the confirm button. The event can be published on the website. This can be done by clicking on the Go to Website button.
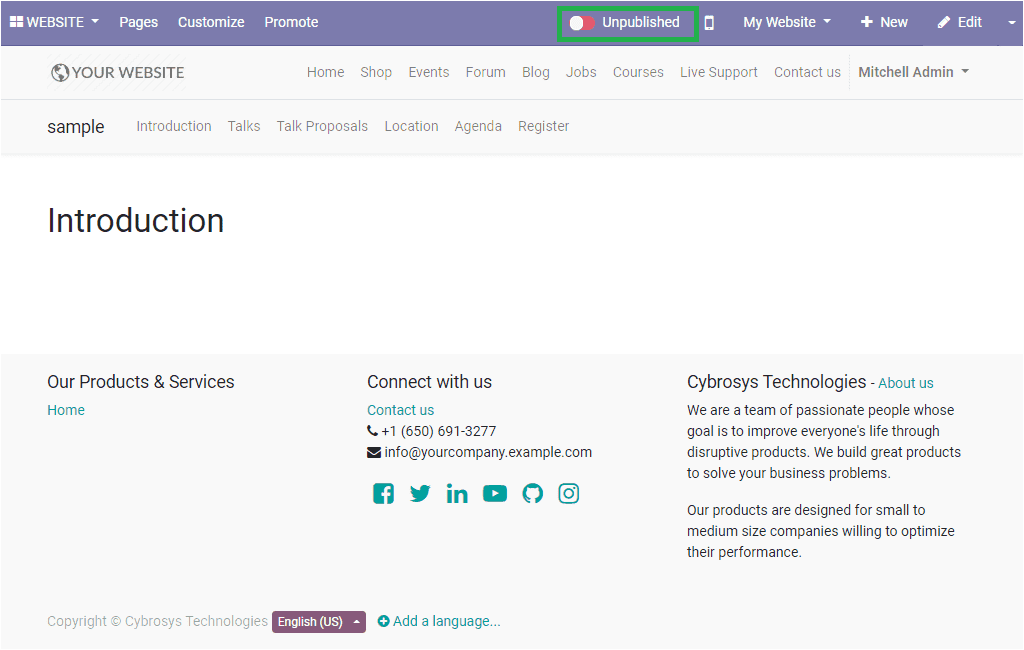
Upon clicking the Go to Website button you will be navigated to the website page where you can turn unpublished to published as shown below.
Now you can click on the Register button for registering the event.
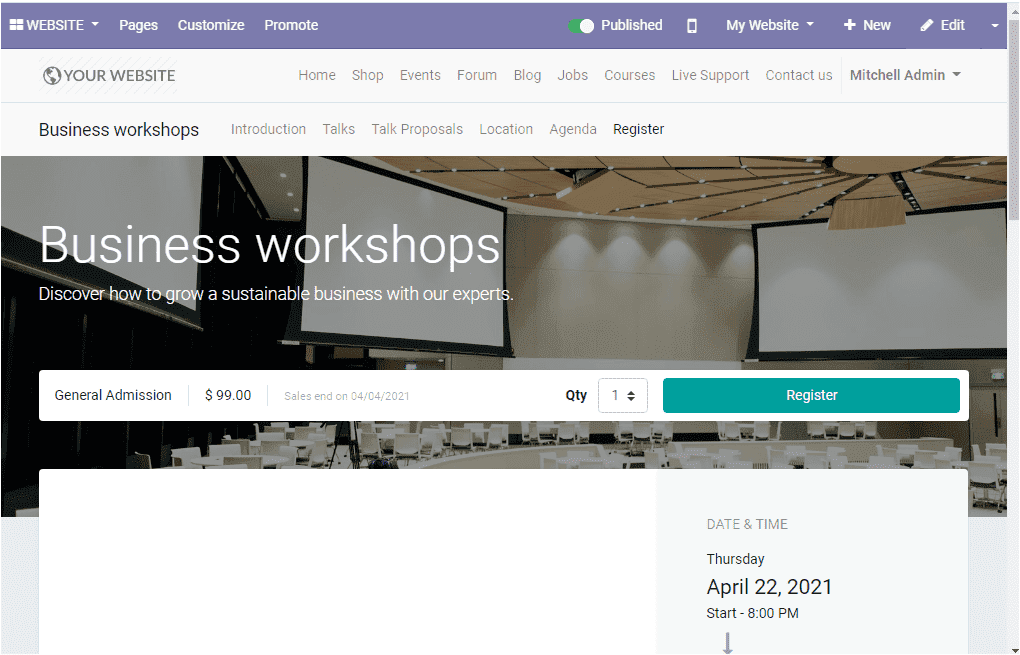
Now it is time to register the tickets by clicking the Register button and you will be depicted with a popup window where you can register the attendees by providing the name, email address, and phone number.
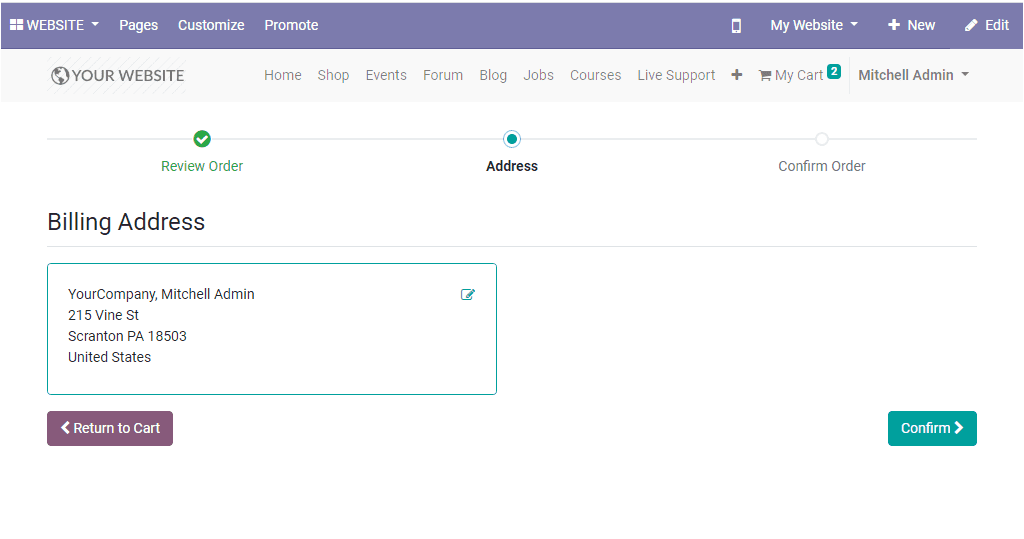
After providing the required information you can select the Continue button and this action will lead you to the confirmation page. The image of the confirmation page is depicted below.
It is also possible to view the details of your attendee on the events window. If you are entering the events window there you can view the attendees’ tab as shown below.
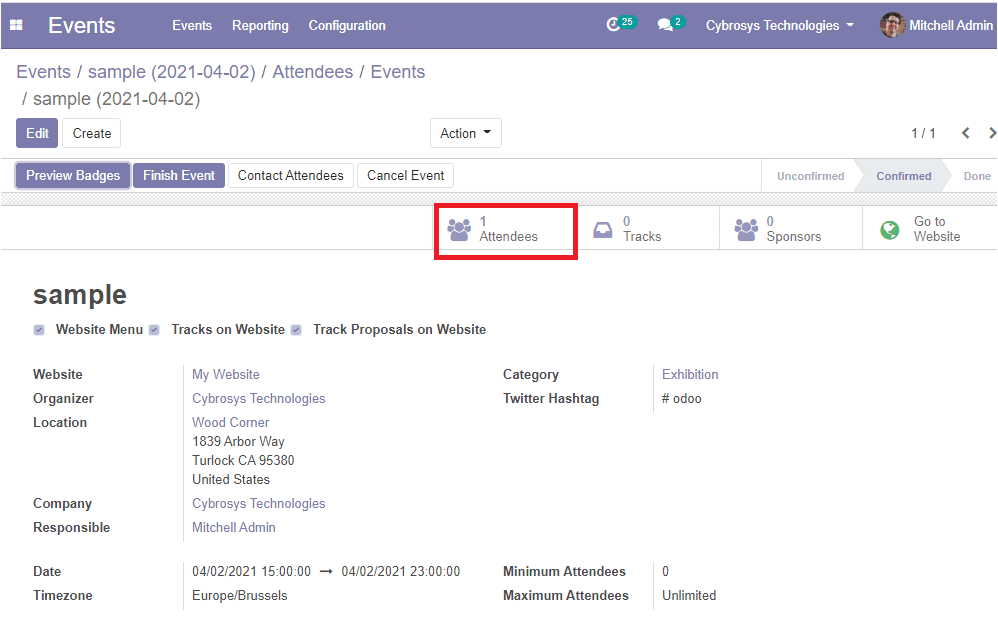
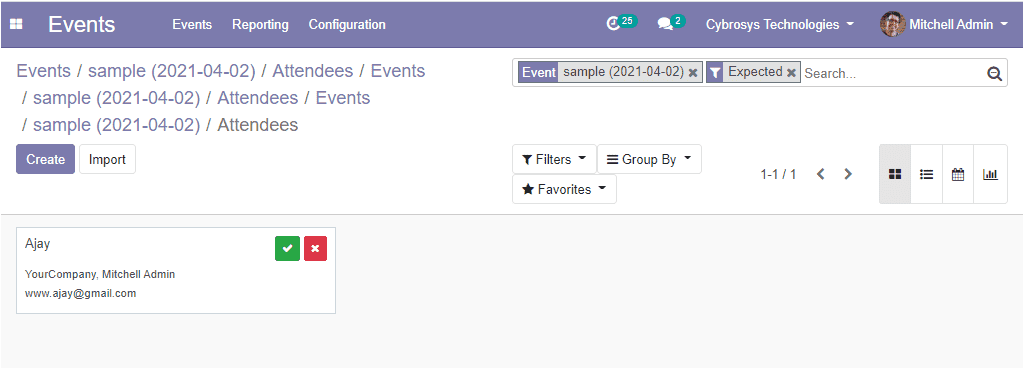
Upon clicking the Attendees tab you will be directed to the attendee’s window as depicted below.
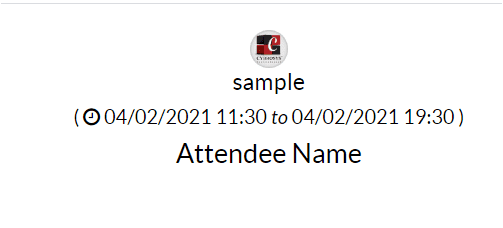
Now you can come back to your created events window for viewing a Preview Badges menu available in the top left corner of the window. This option allows you to view the badge preview.
So far we were discussing the various operations conducted in the Odoo events module and now let us move on to the reporting section of the module.
Reporting
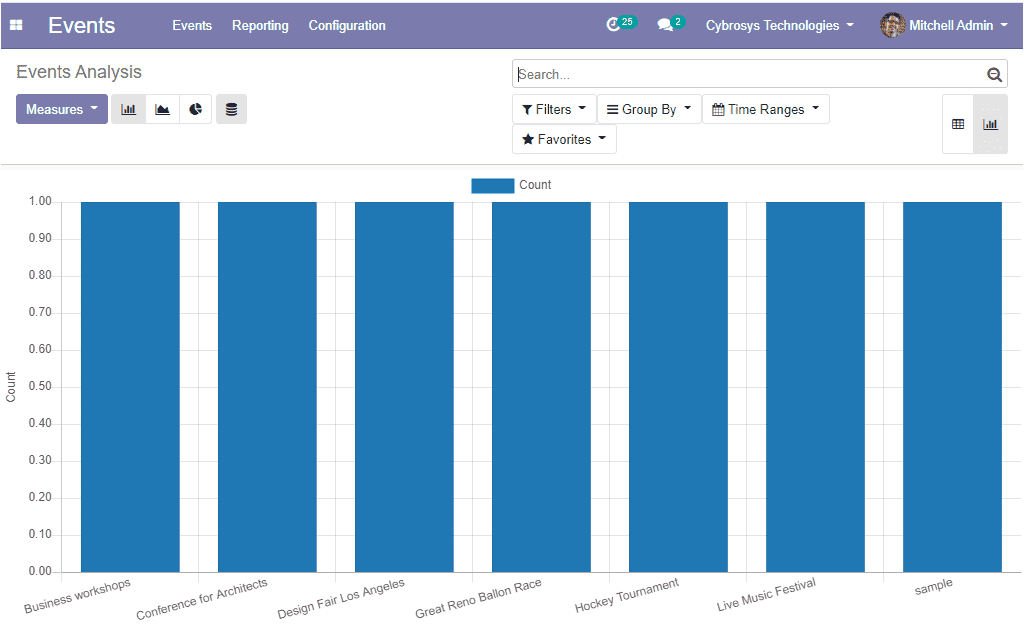
The report generating feature of the Odoo platform allows you to generate various analytical and quantitative reports based on the events, attendees, and questions. The various customizing options such as filtering, group by, sort out and favorite search are also possible. The reports can be viewed in kanban, graphical, and list view. The below image depicts the events analysis window.
The Odoo events module can practically manage any kind of your events in a professional way. The all-in-one sales and organizing capability will reduce the expenses and the efforts.