A task represents a specific unit of work within a project. It helps teams organize, track, and manage activities related to a project efficiently. Efficient task management is essential for businesses to ensure that their projects are on track to increase productivity. Task Management allows businesses to create, assign, and track tasks effectively, ensuring that projects stay on schedule and team members remain productive.
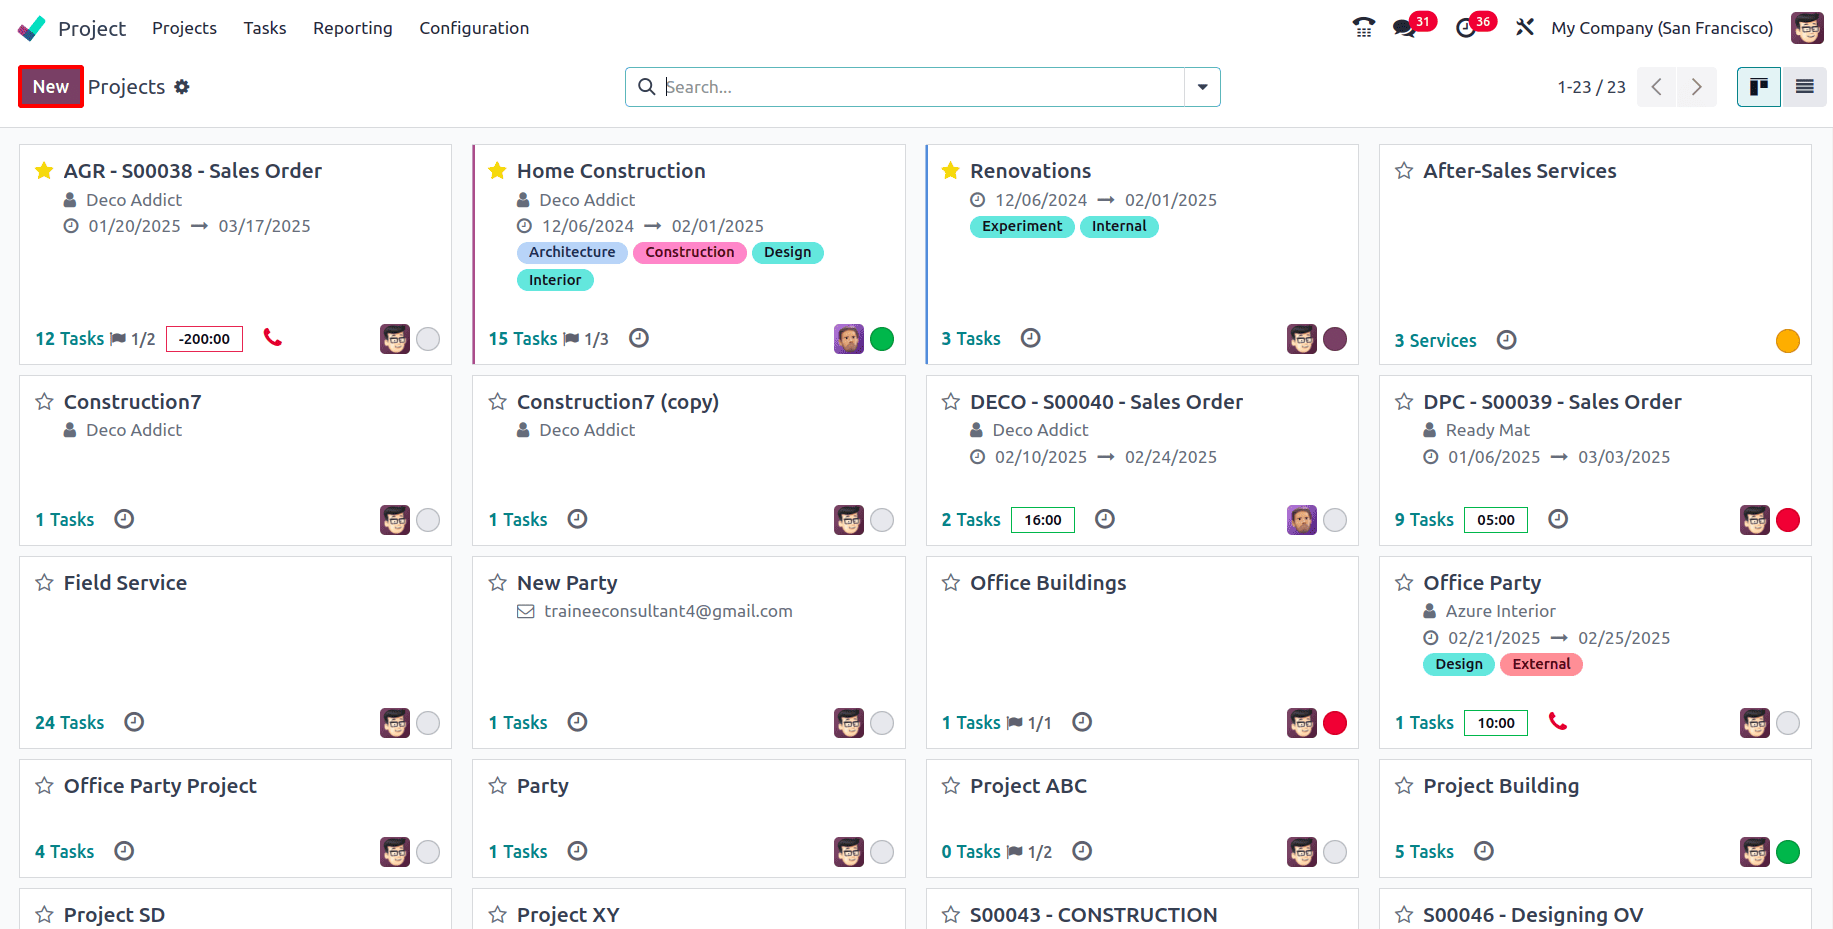
To begin with, create a project under which the tasks can be created. To create a new project, navigate to the Project module. In the dashboard, all the projects can be viewed and to create a new one, click on the New button.
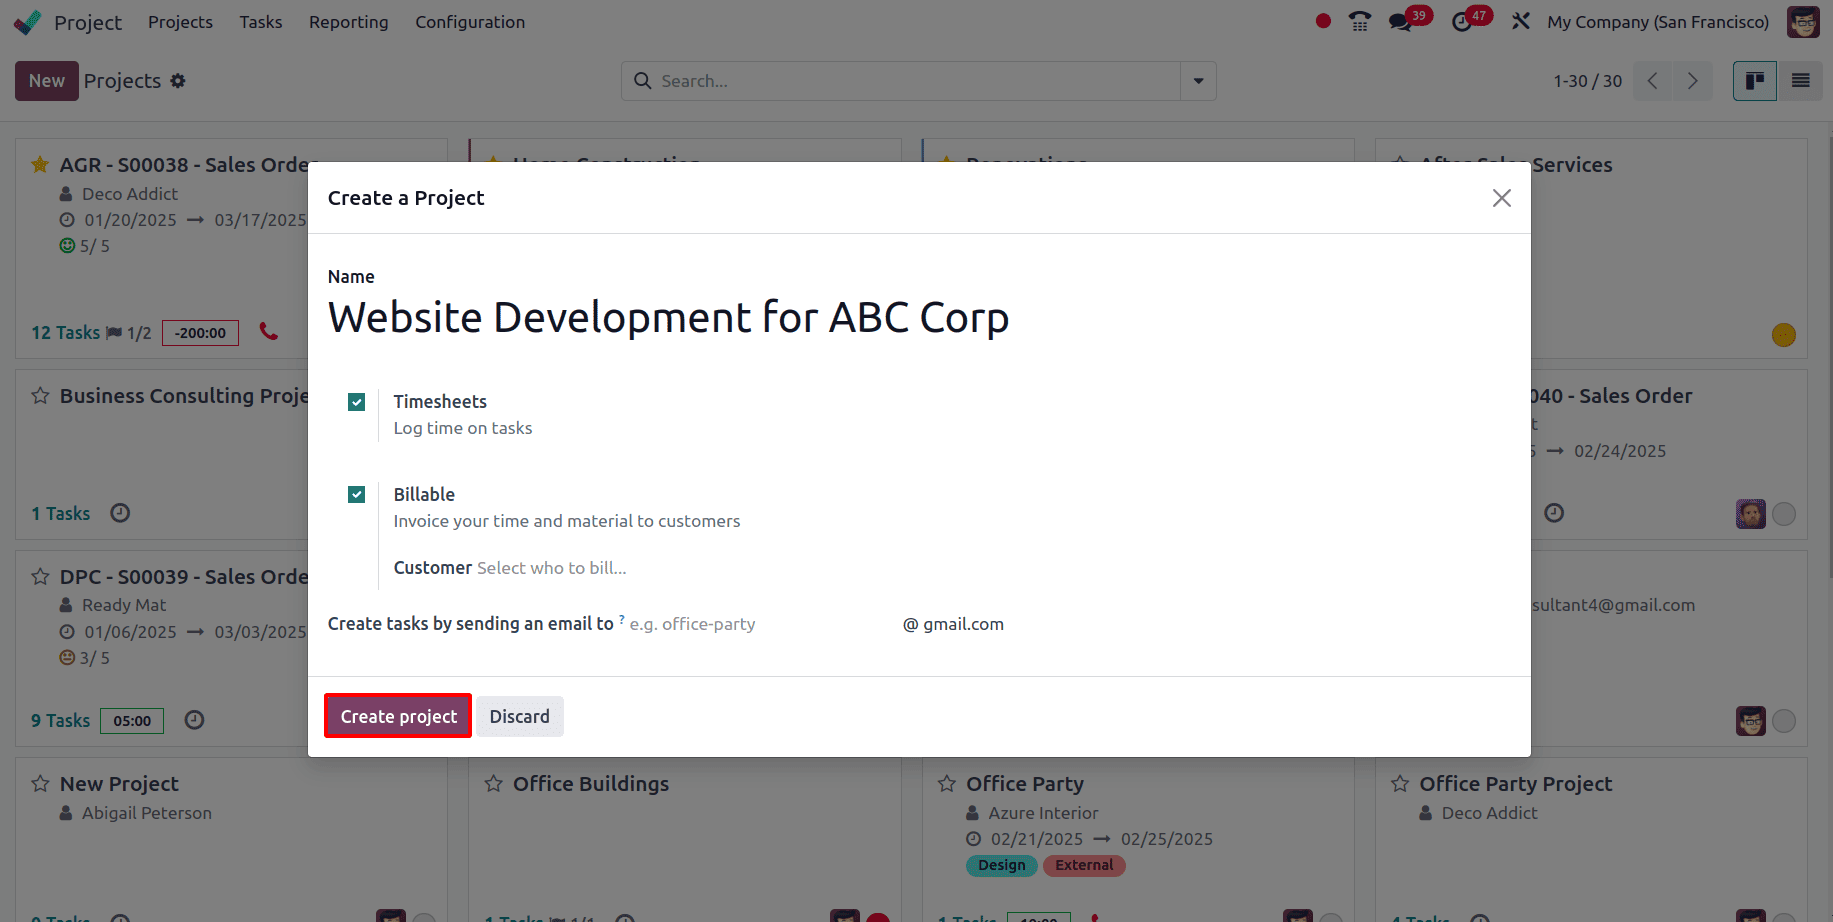
In the wizard that appears, fill in the following details:
* Name: The name of the project can be added here.
* Timesheets: Activate the Timesheet option to log time spent on tasks.
* Billable: Check the Billable option to allow invoicing for time and materials.
* Customer: Link the project to a specific customer.
* Create tasks by sending an email to: Specify an email alias in this field to enable task creation when a mail is sent to this alias.
After the details have been added, click on the Create Project button to create a new project.
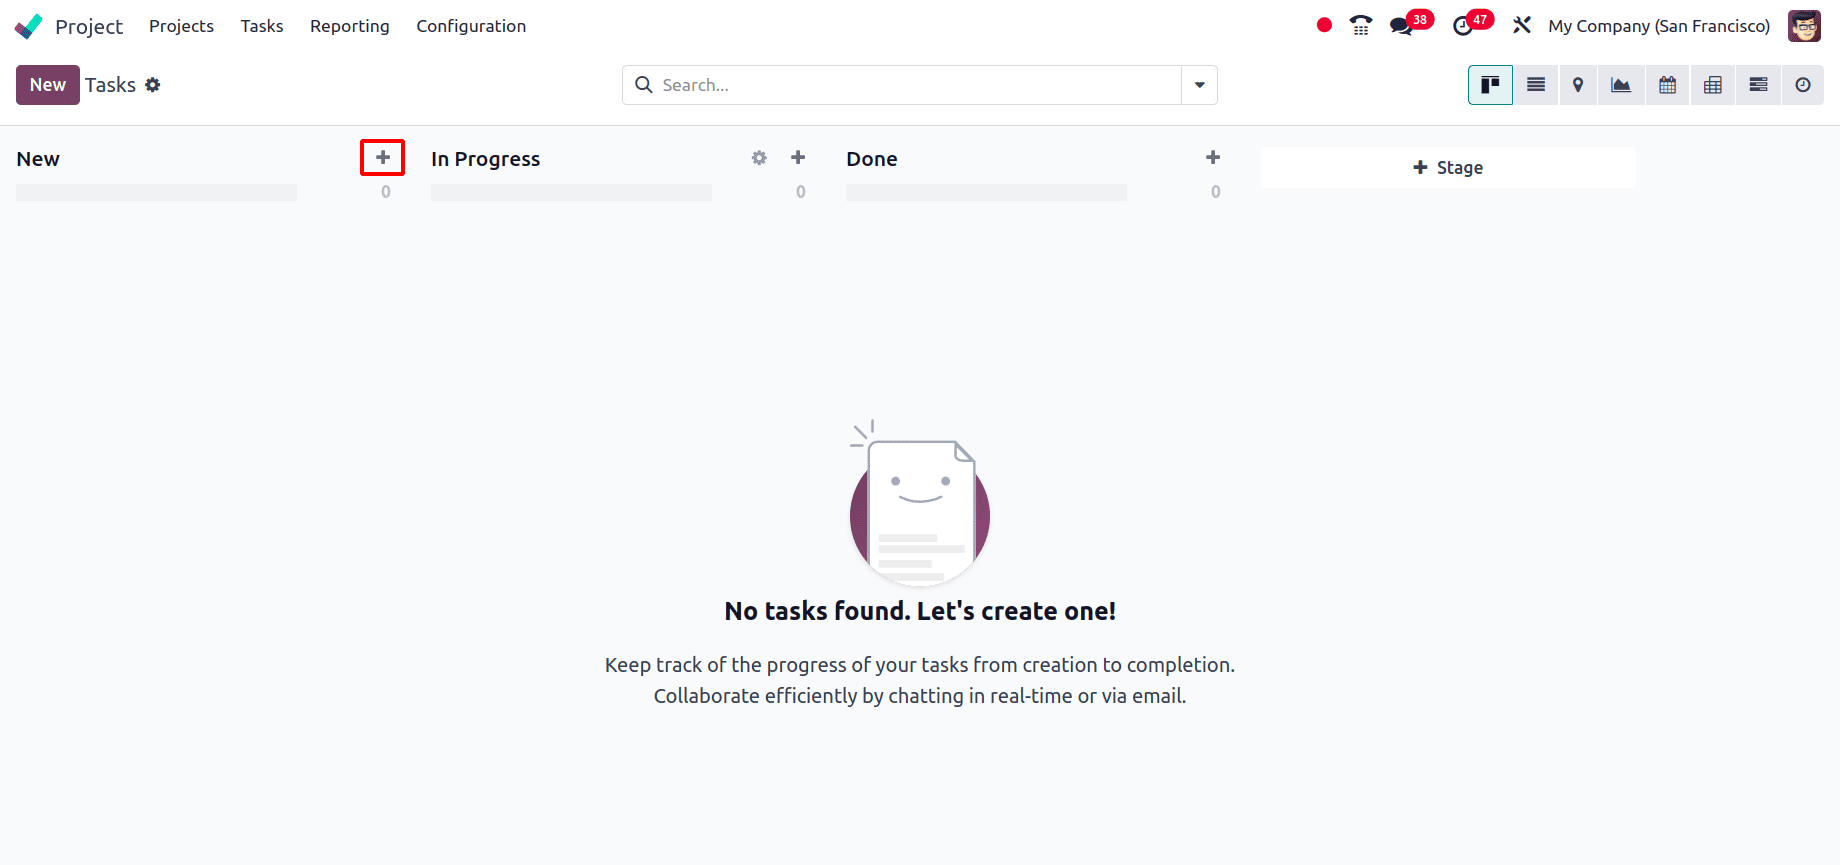
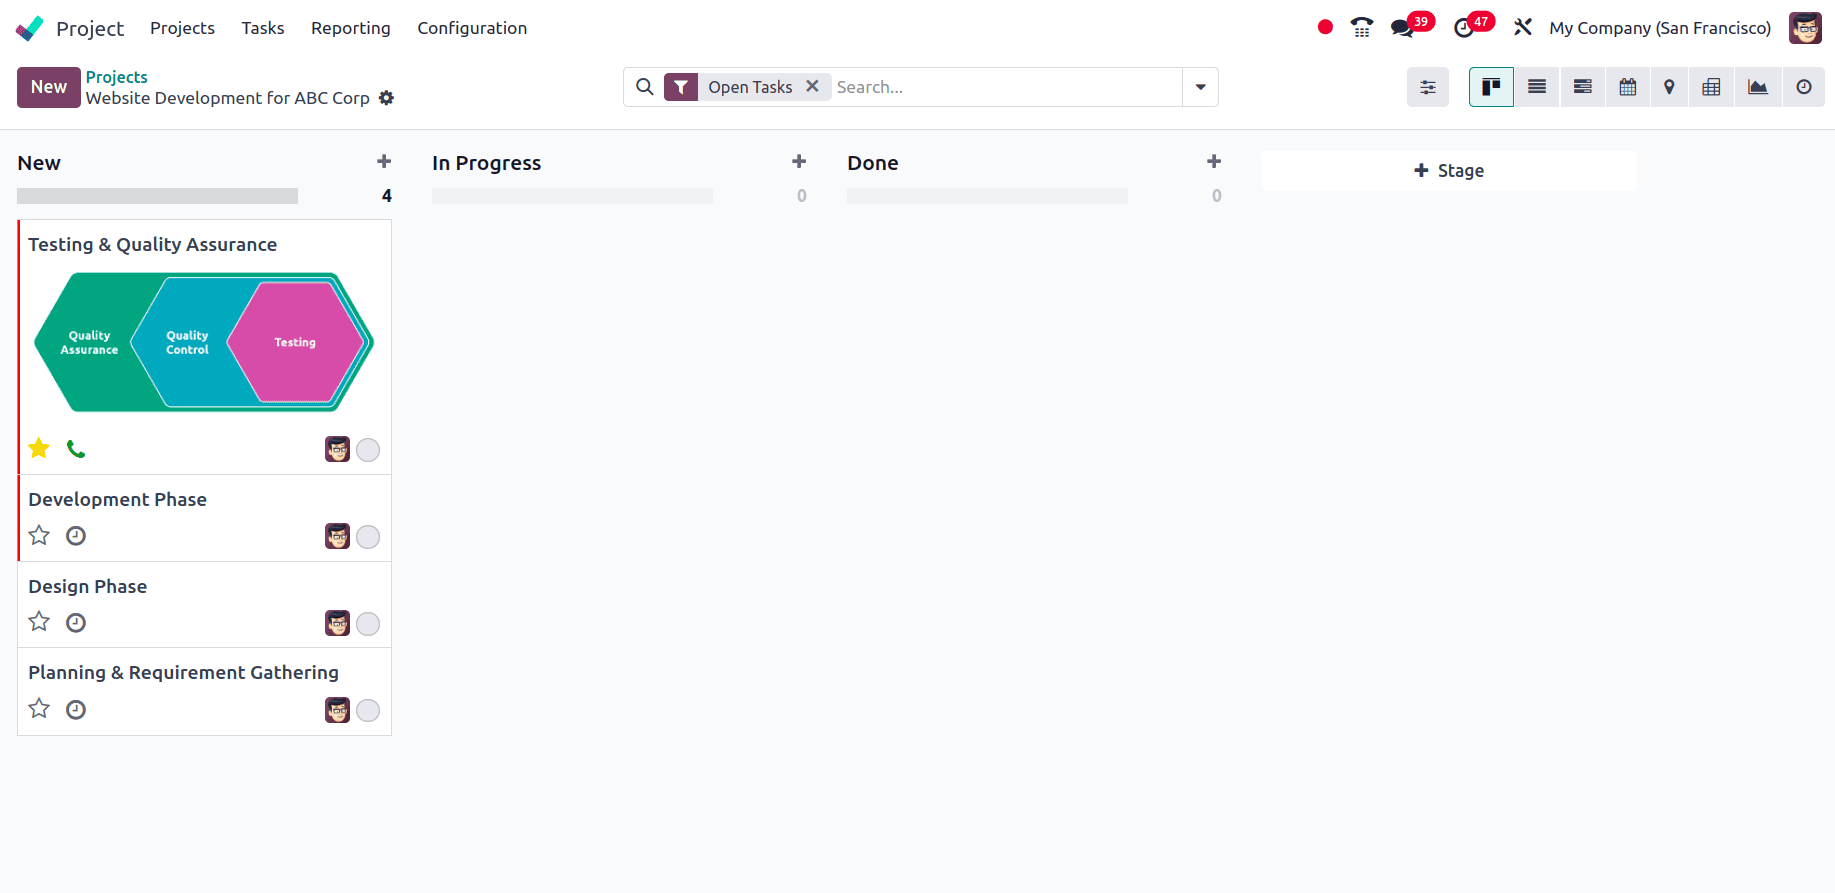
After clicking the Create Project button, a new page appears where task stages can be added. Enter the stage name in the provided field and click the Add button. The tasks are shown in the Kanban view by default.
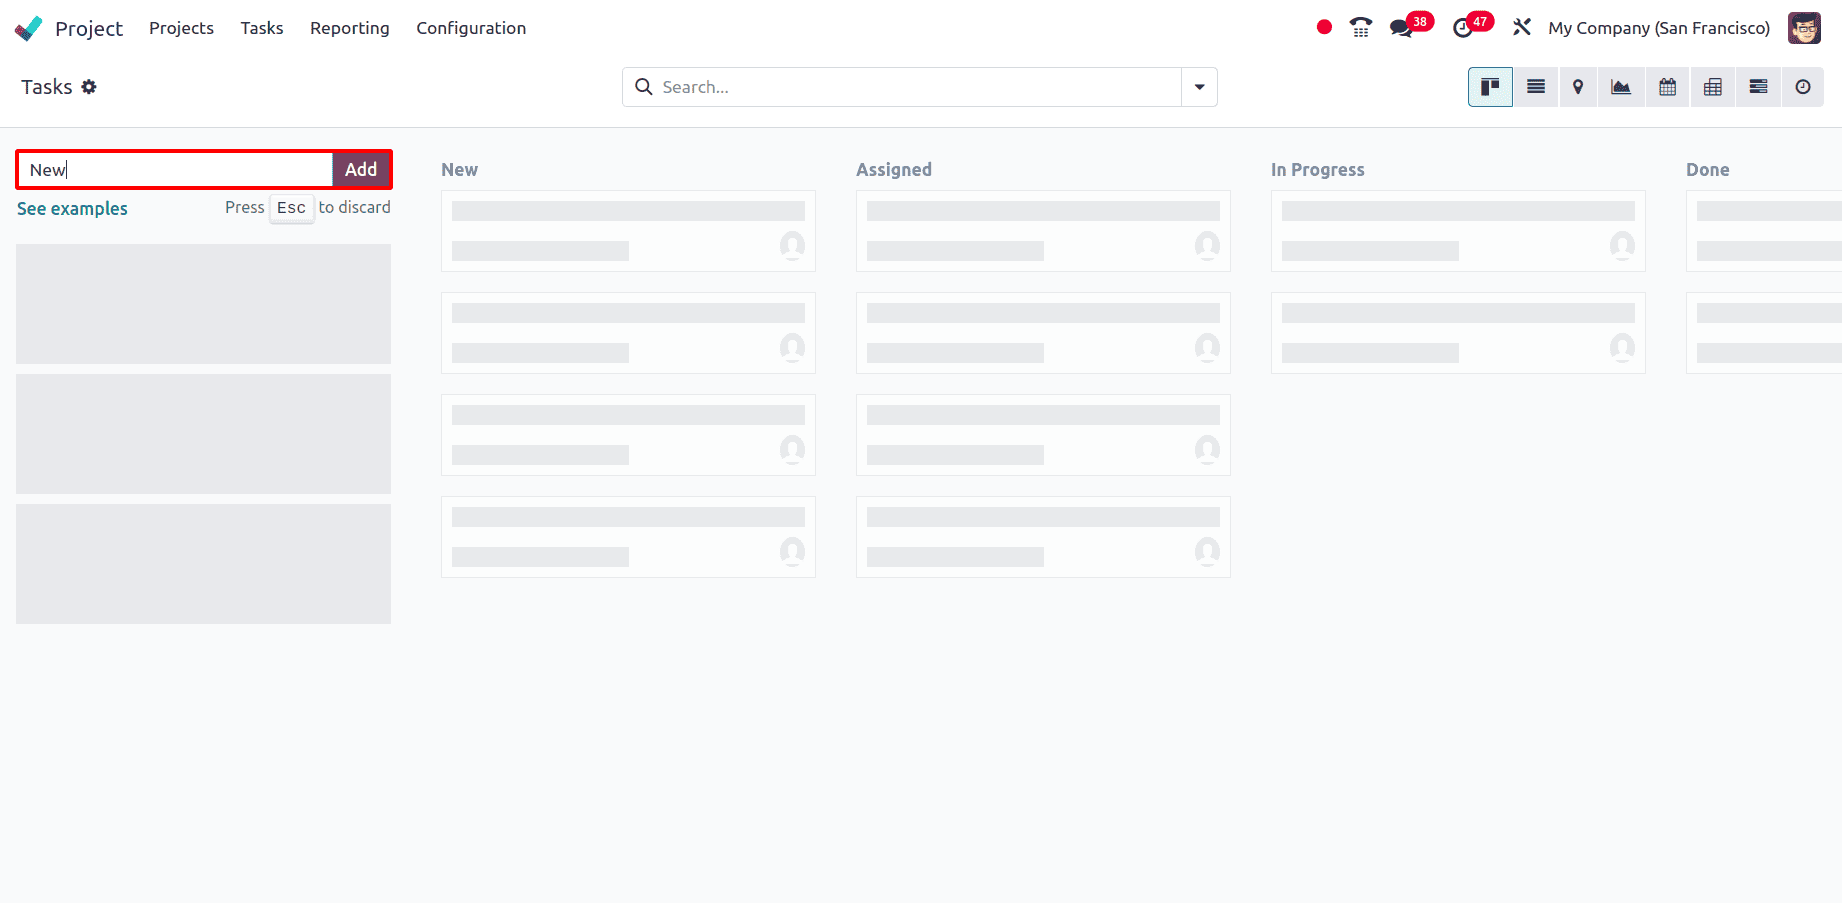
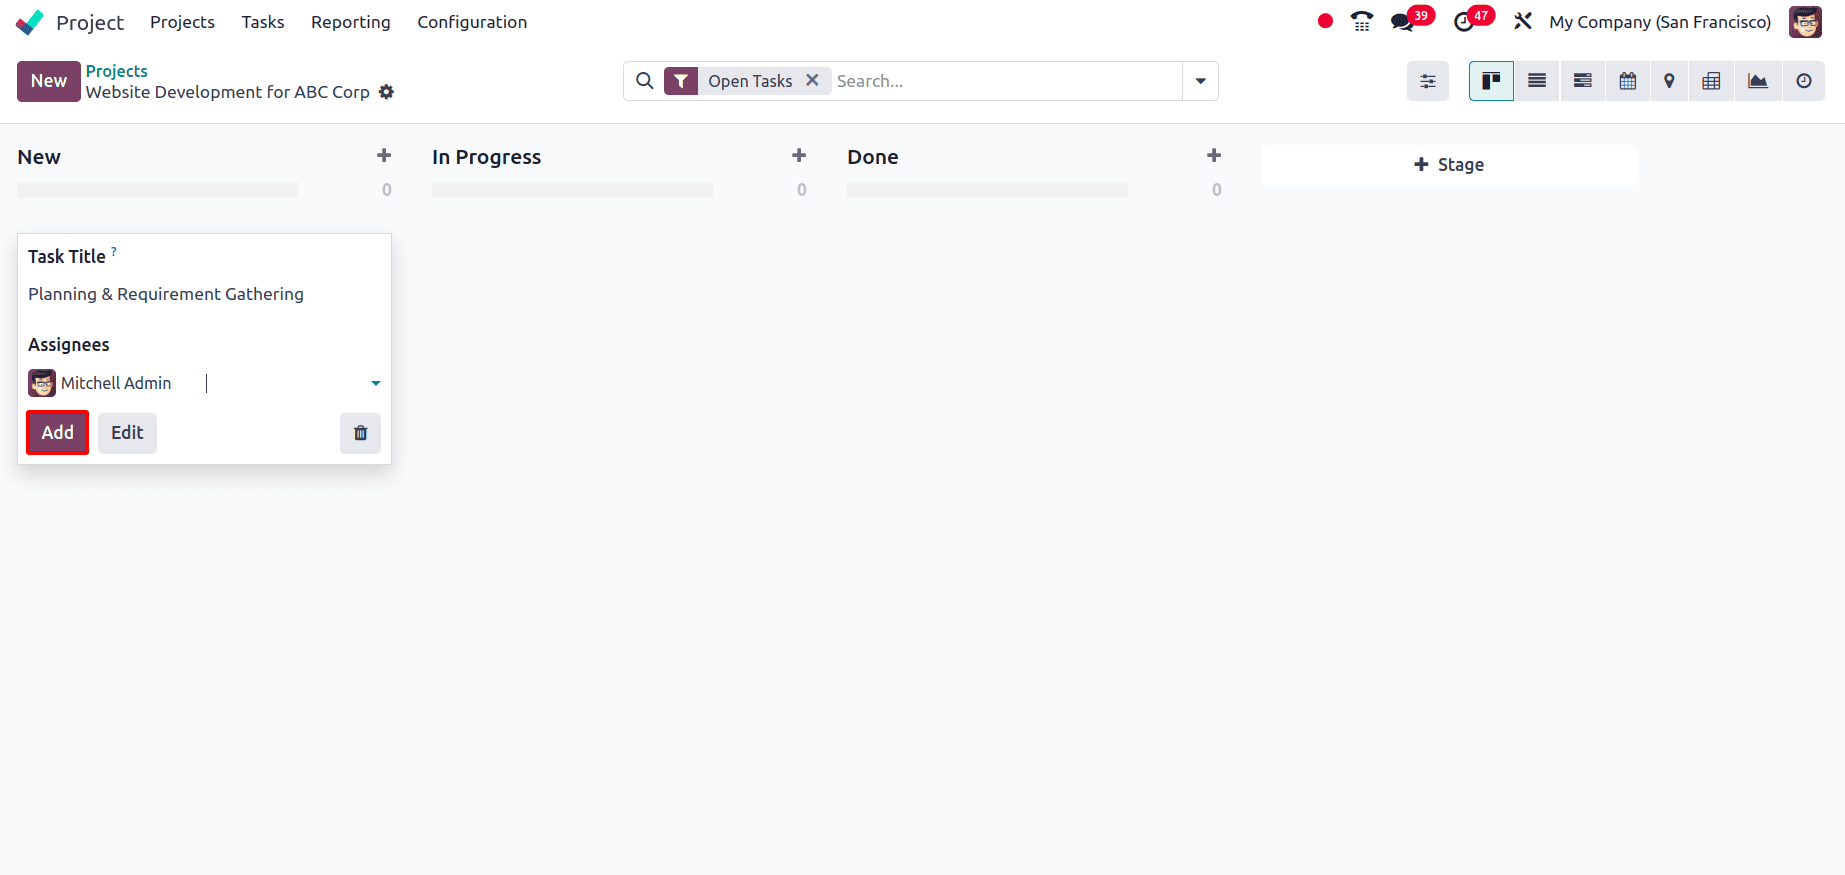
Once all stages are added, tasks can be created under them. To add a task to a specific stage, click the + icon on that stage or use the New button at the top left corner to add a task under the first stage.
When adding a task, enter the Task Title and assign it to a user. Click Add to create the task within the selected stage, or click Edit to modify task details.
Add all the required tasks for the project.
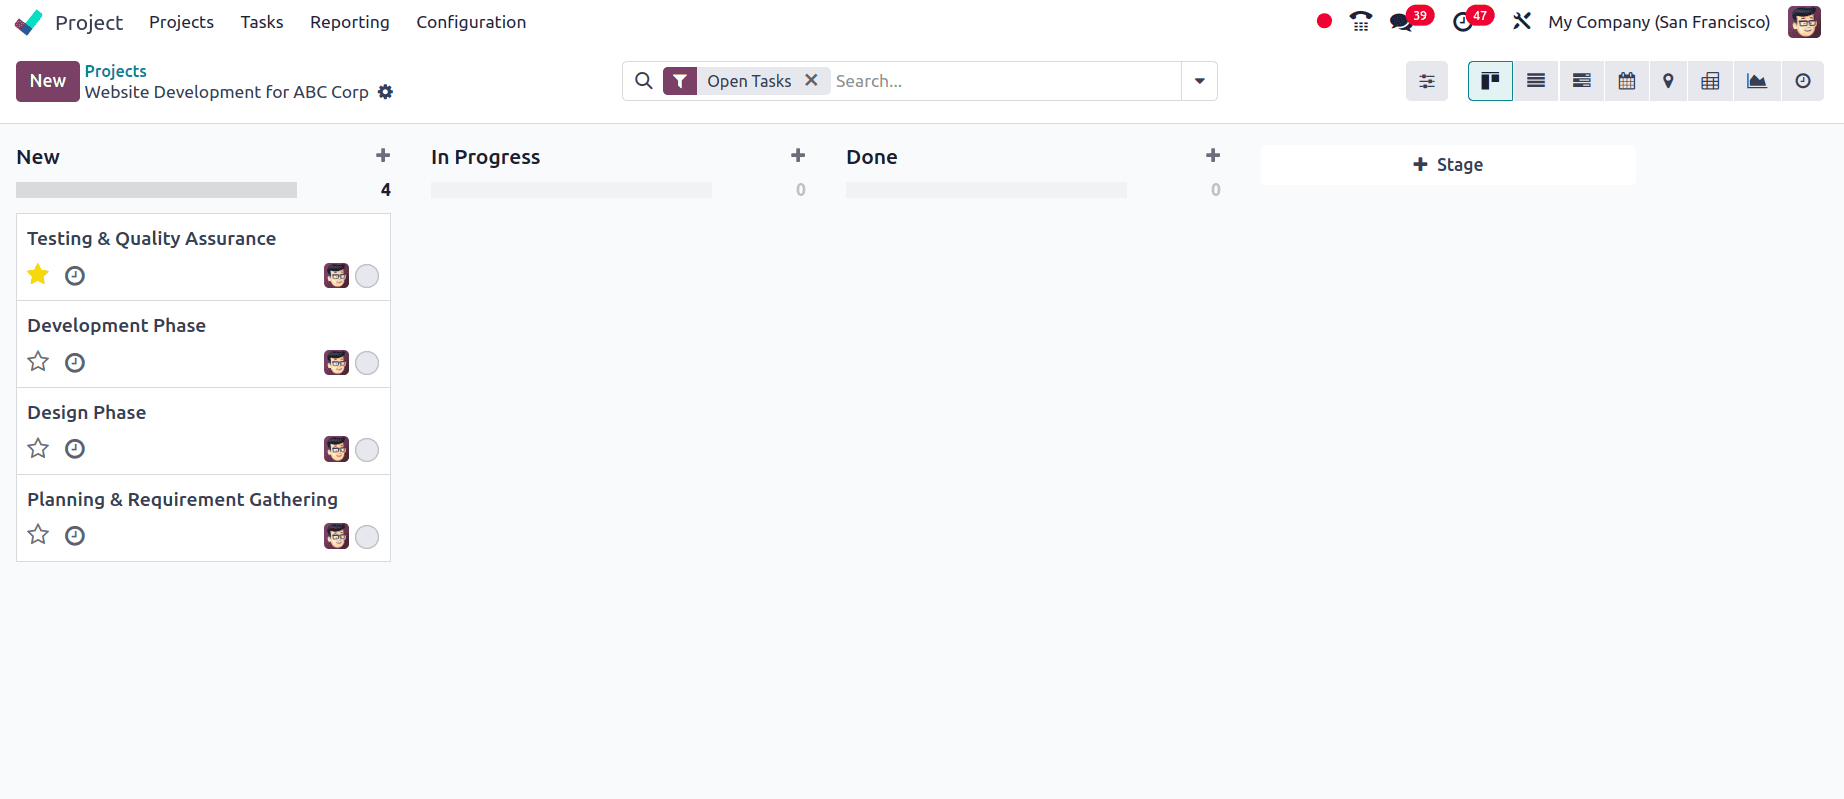
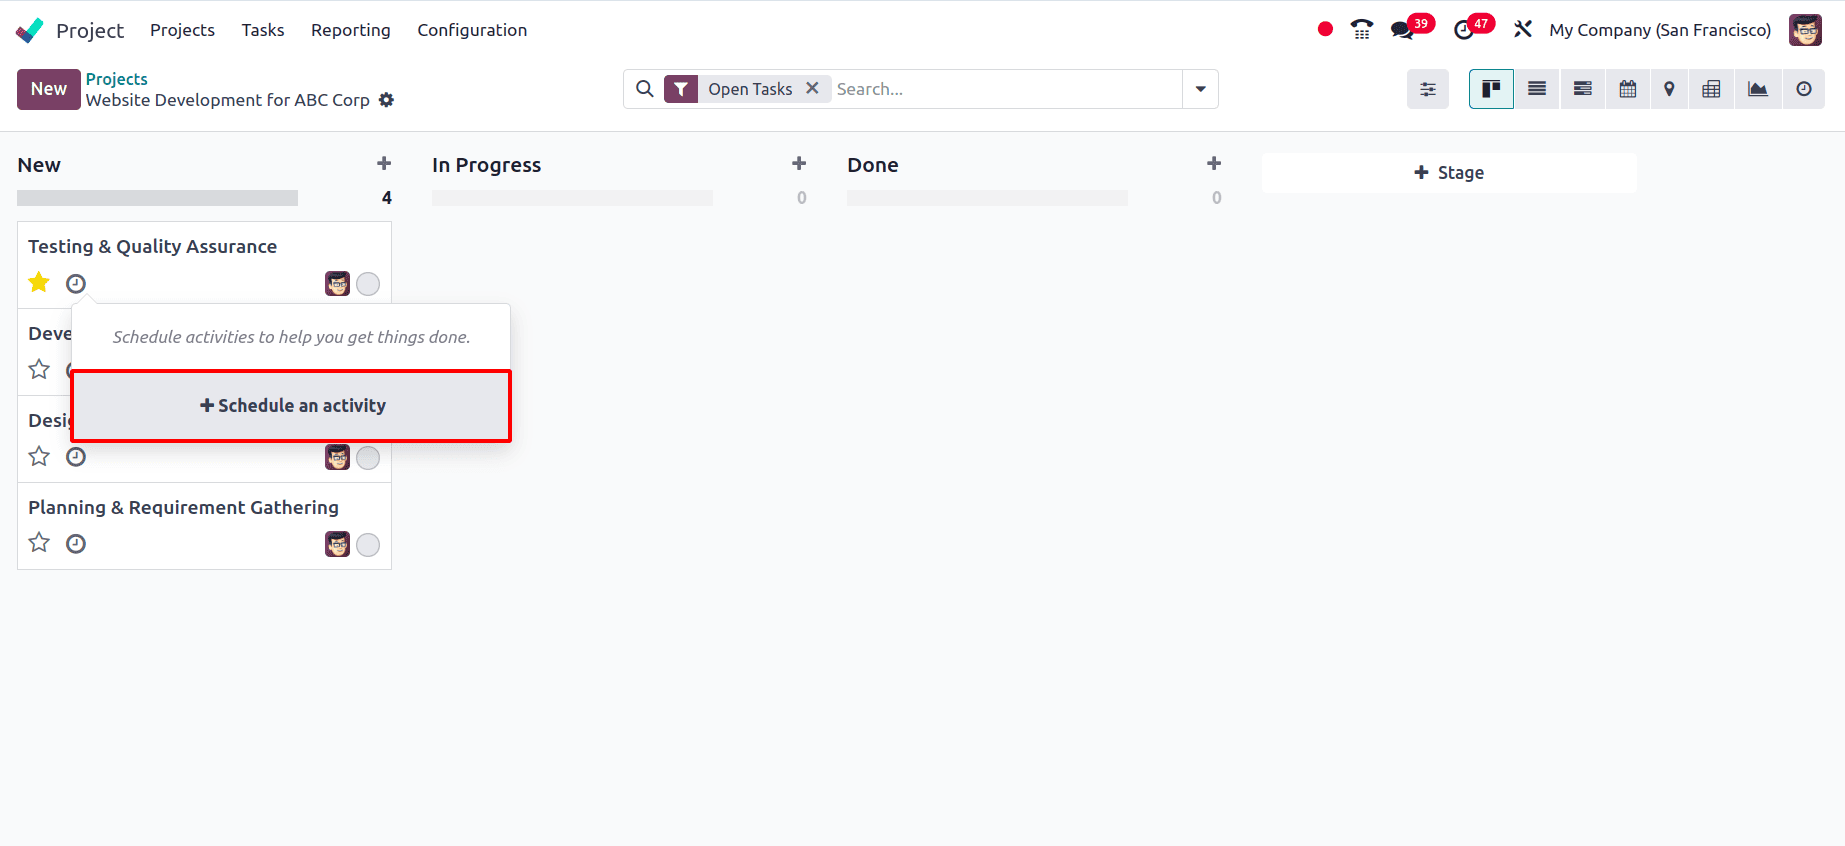
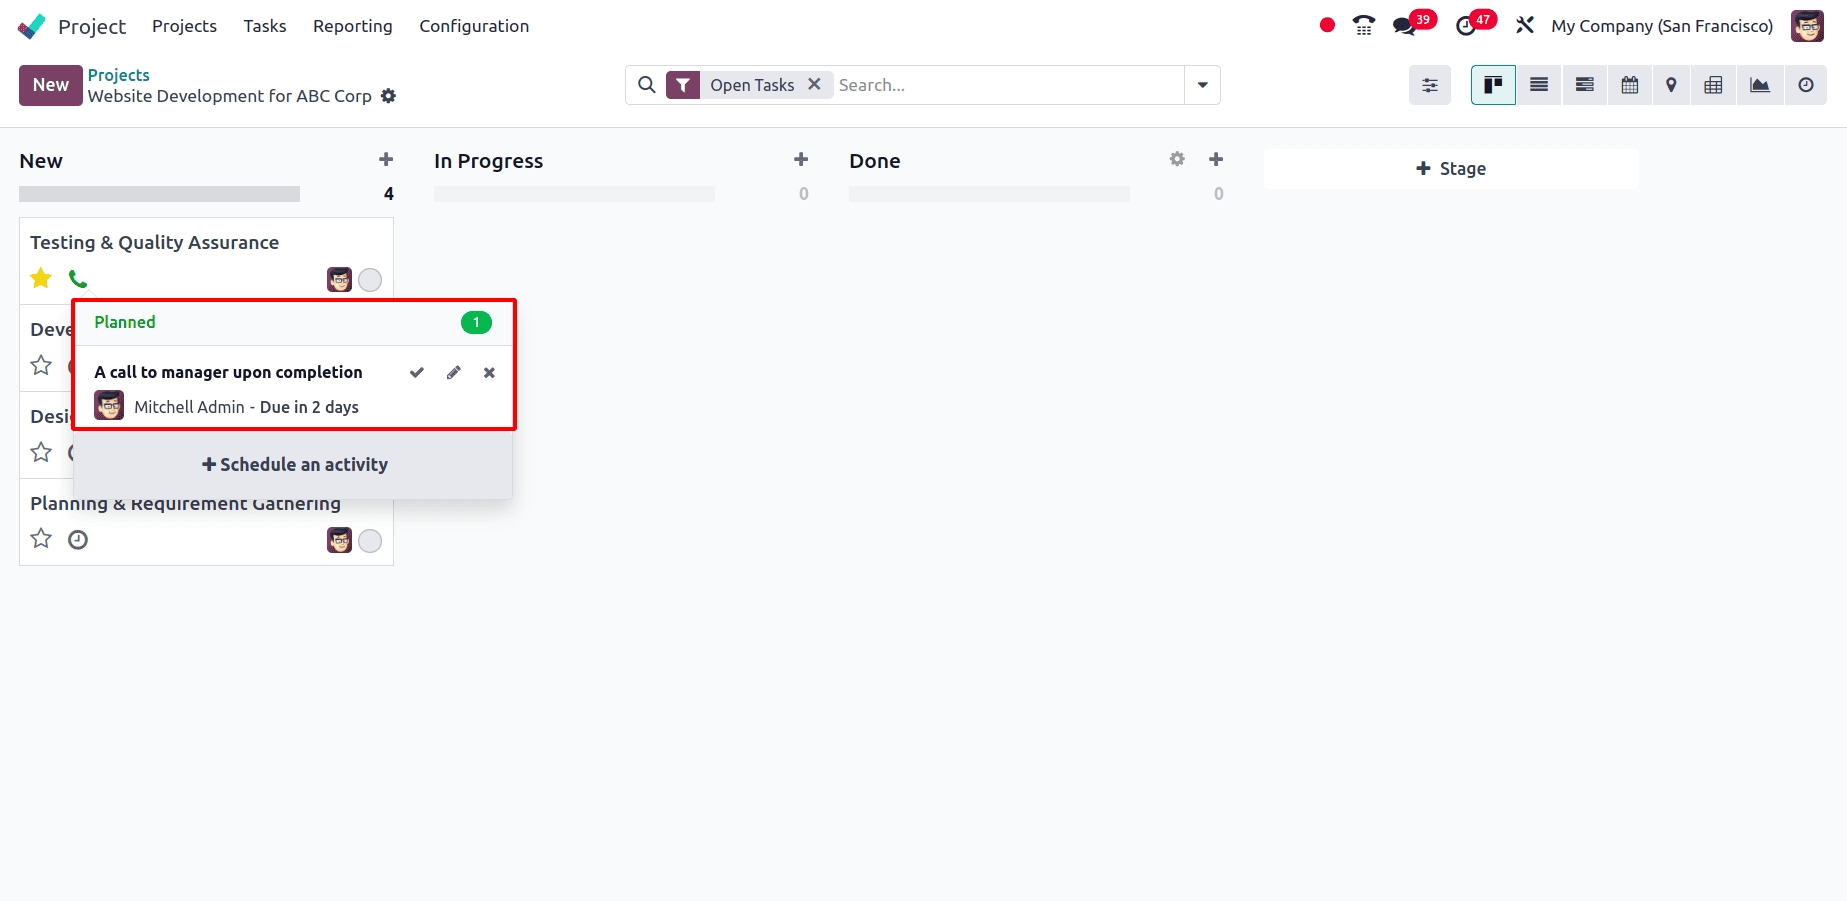
On the task card, by clicking on the Star icon the priority of the task can be set as high, to schedule an activity for the task, click on the clock icon, and on the + Schedule an activity.
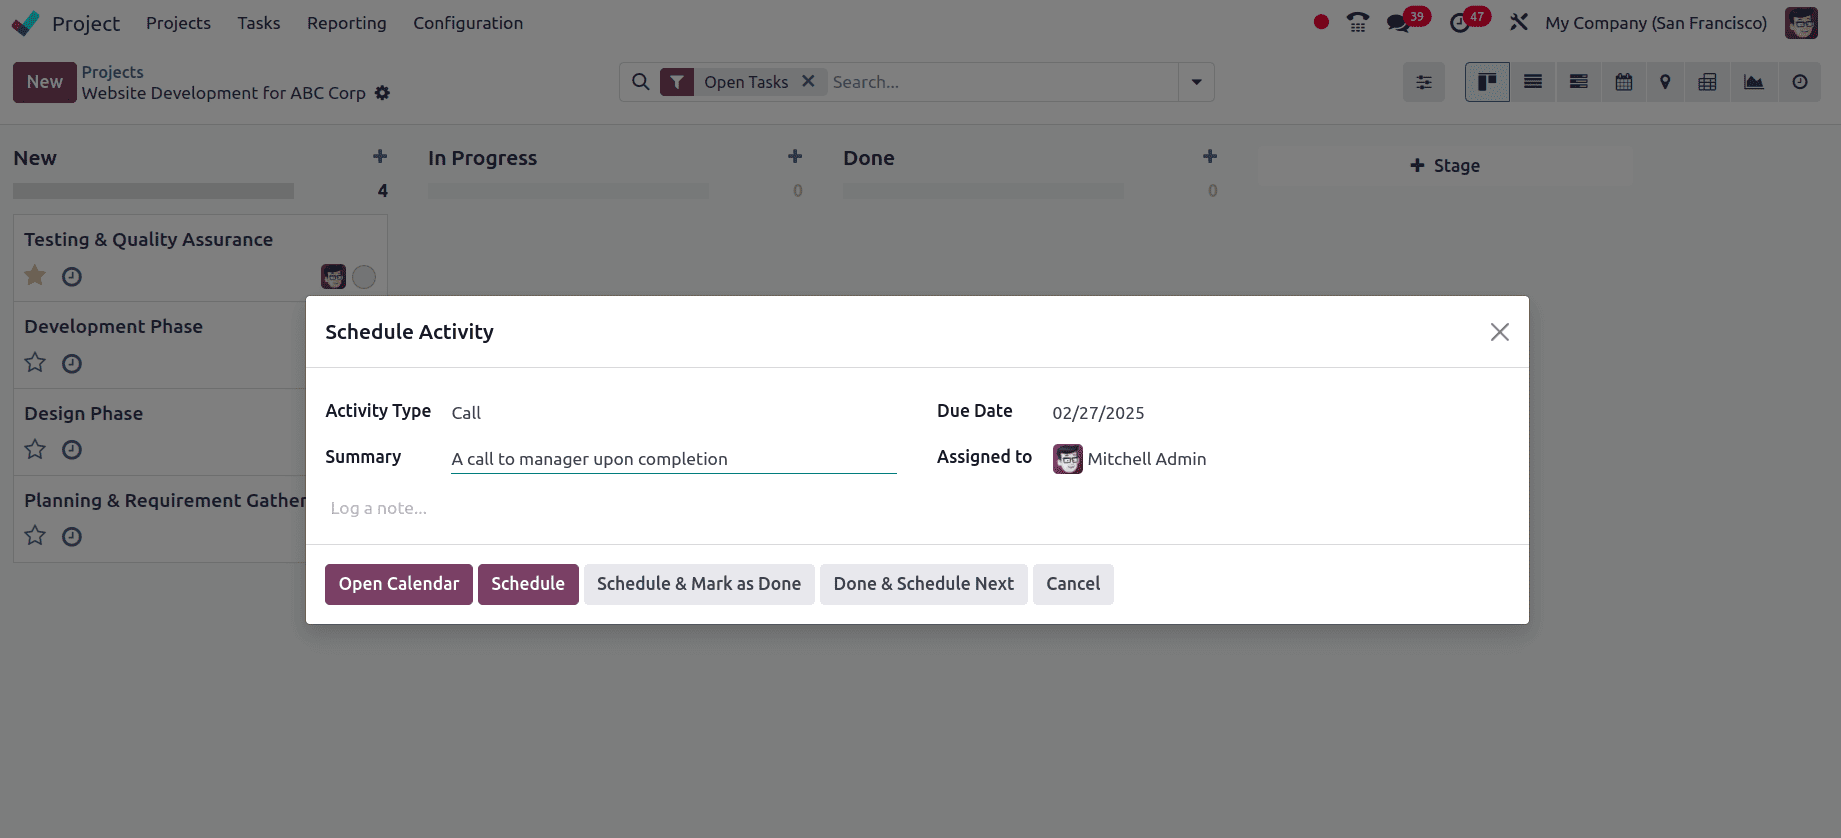
In the resulting wizard, add all the details of the activity that needs to be scheduled for the task, like the Activity Type, whether it is a call, meeting email, etc. A Summary can be provided for the activity to understand what this activity is for at a glance, and then the Due Date and the Assigned to person can also be given. Then click on the Open Calendar to go to the calendar and schedule the activity from the calendar, or click on Schedule to schedule the activity directly, or if the activity needs to be scheduled and marked as done, click on Schedule & Mark as Done. Next, to mark the activity as done and schedule another activity, click on Done & Schedule Next.
Once the activity has been scheduled, it can be viewed in the task.
Also, when the task is complete and is ready to go to the next stage, users can simply drag and drop the task to the required stage.
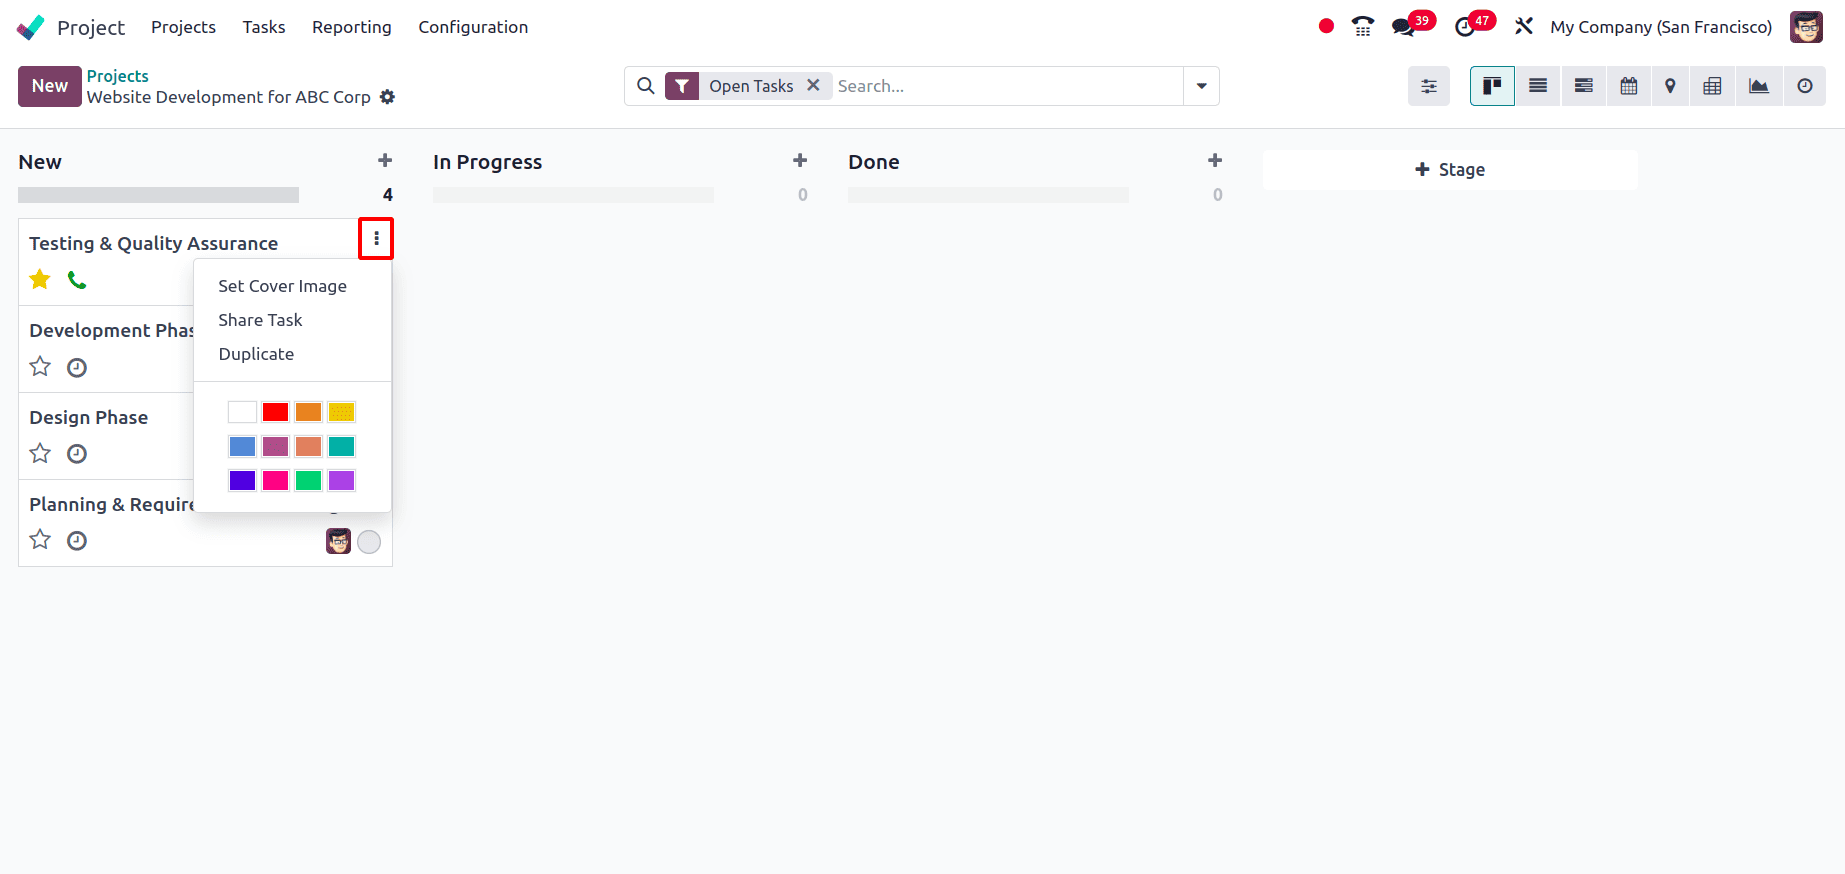
For each task card, there will be three vertical dots symbol that gives the users extra options such as:
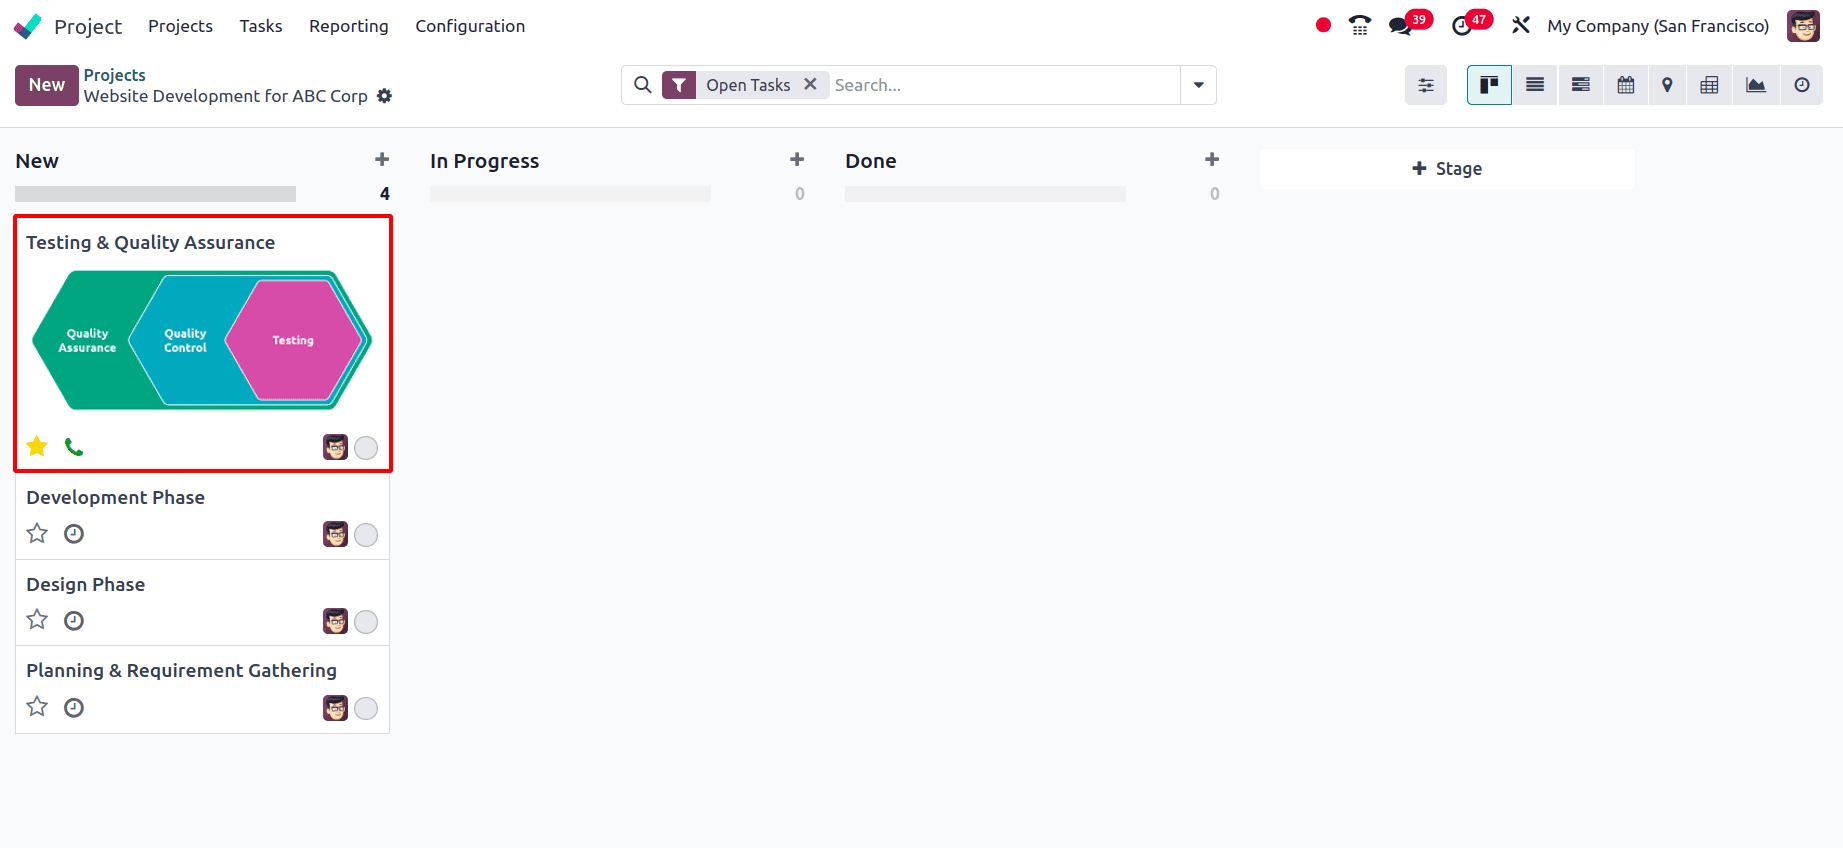
* Set Cover Image: Users can upload an image from the system to set it as a cover image for the task.
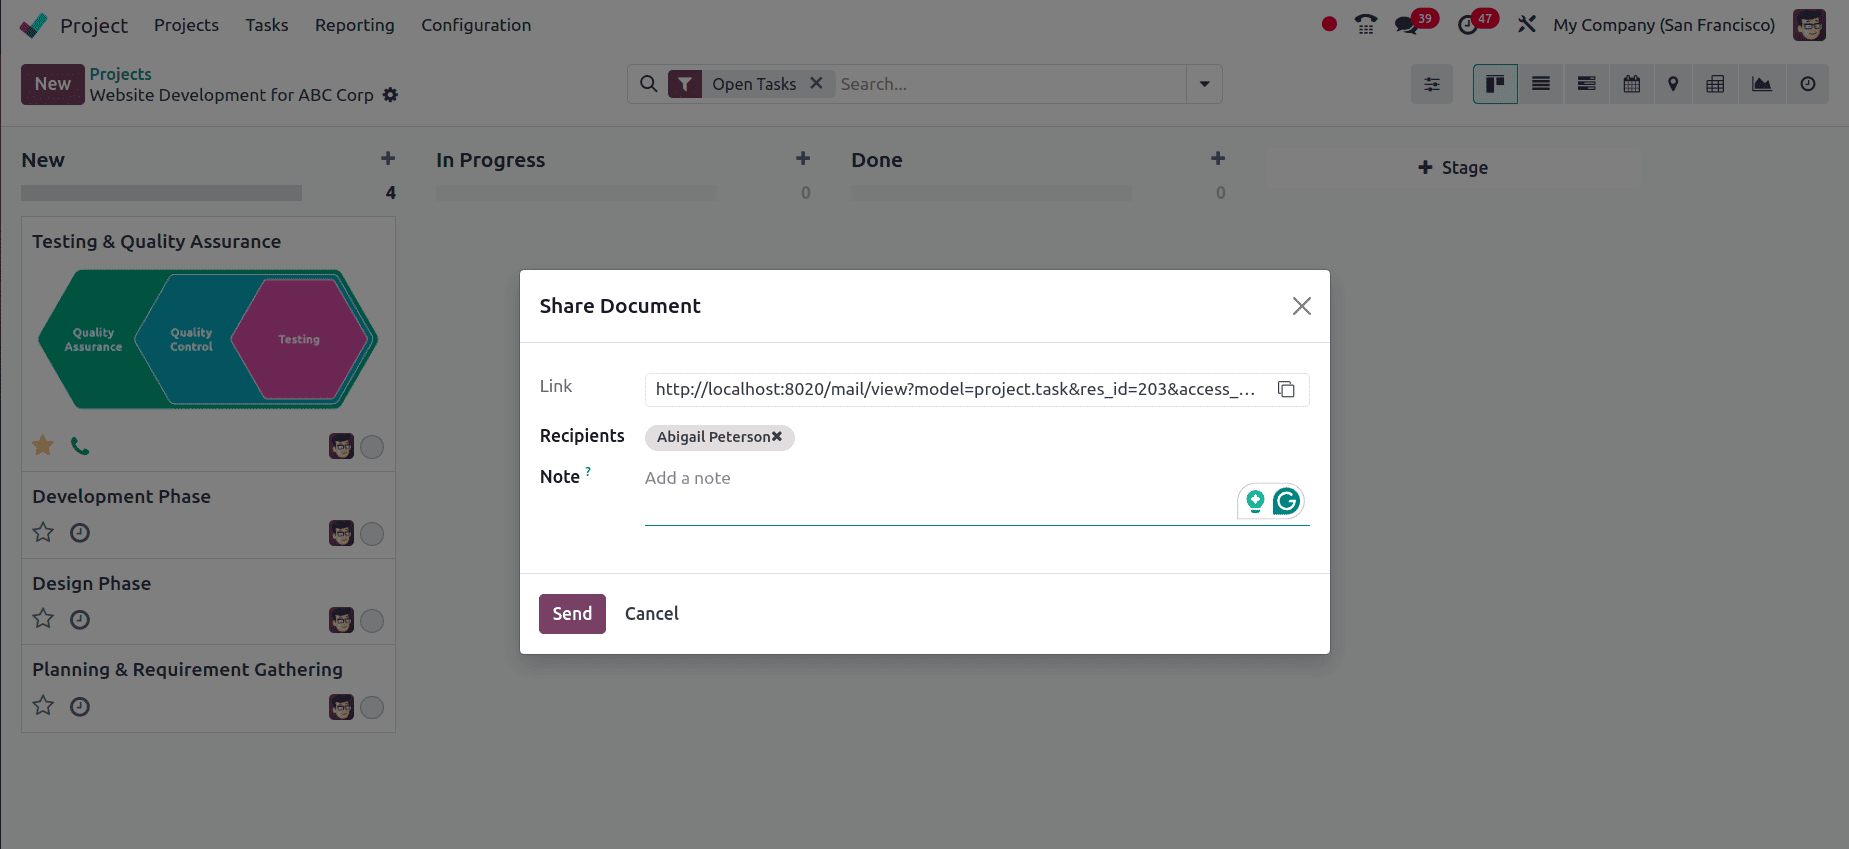
* Share task: This helps to share the task with different users via mail.
* Duplicate: It helps to create a duplicate of the task.
Also, there is a colour palette available, which helps to add the colour to the task card for easy identification purposes.
For each task stage, there is a settings option, which includes options like Fold, Edit, Automations, Delete, Archive All, and Unarchive all.
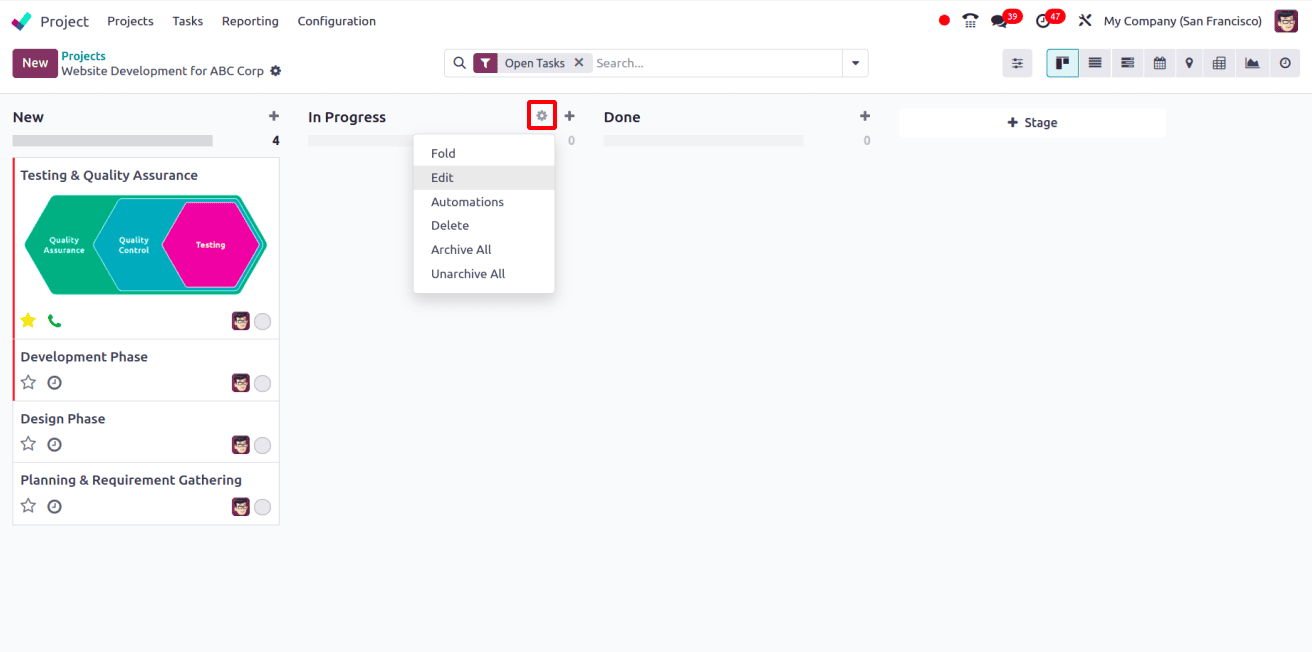
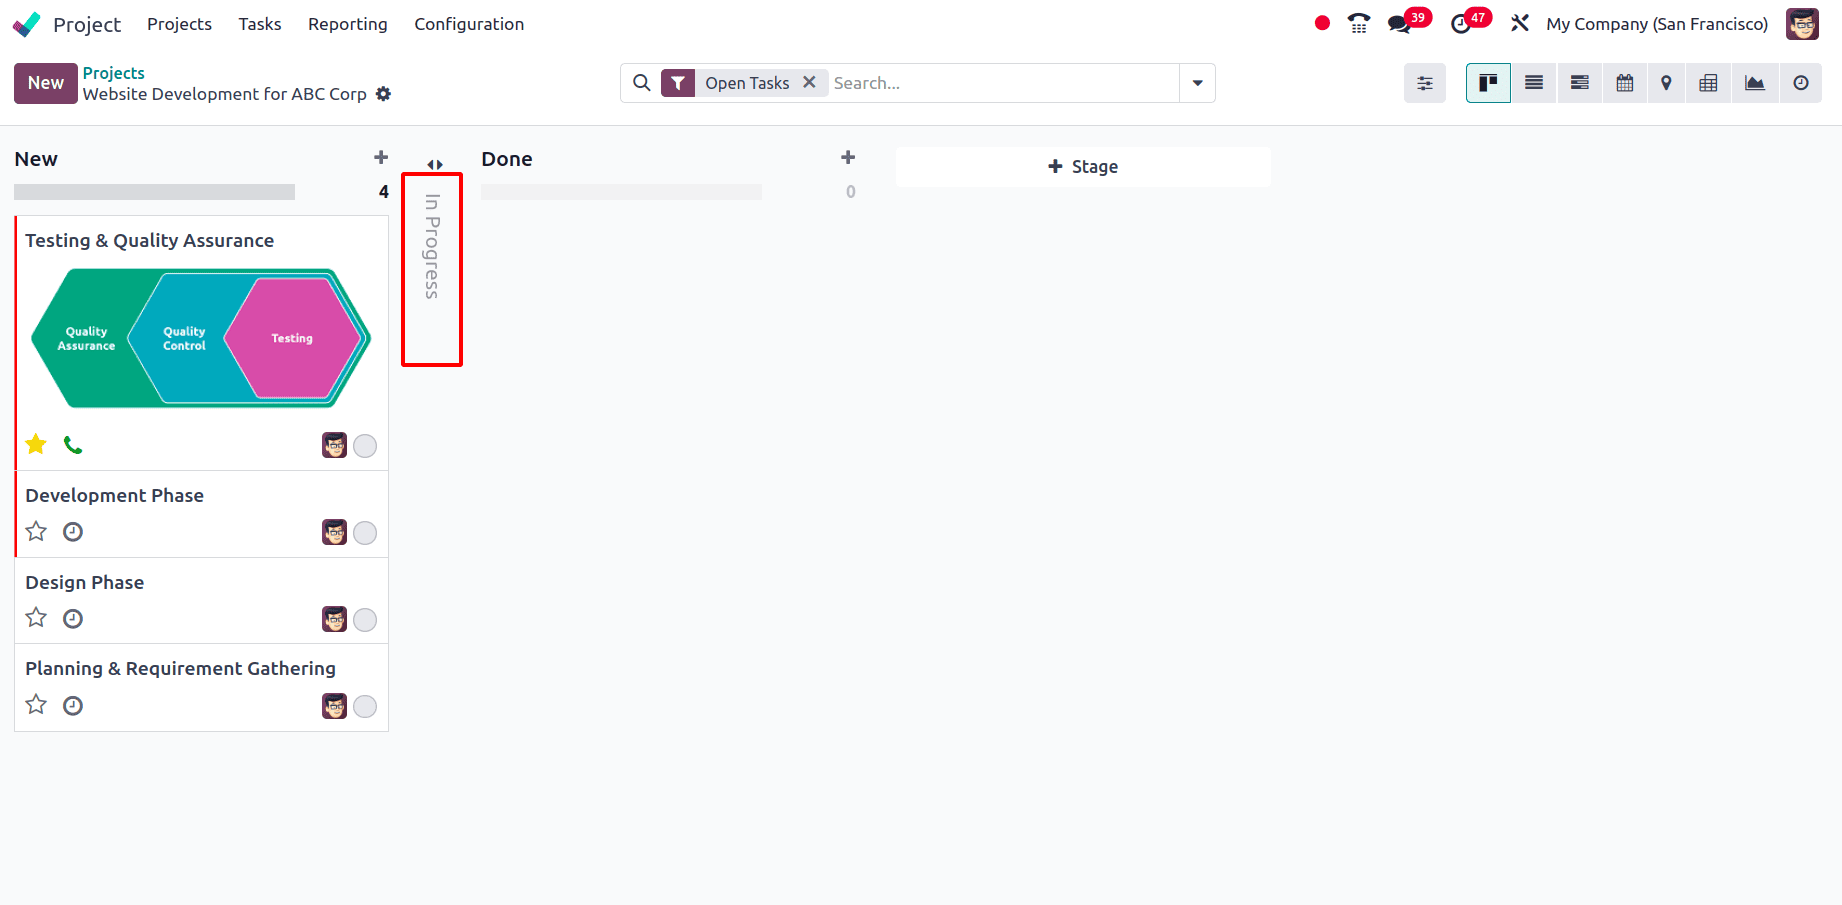
* Fold: The Fold option allows collapsing a stage in the Kanban view to hide completed stages. Click on the folded stage name to expand and view its tasks.
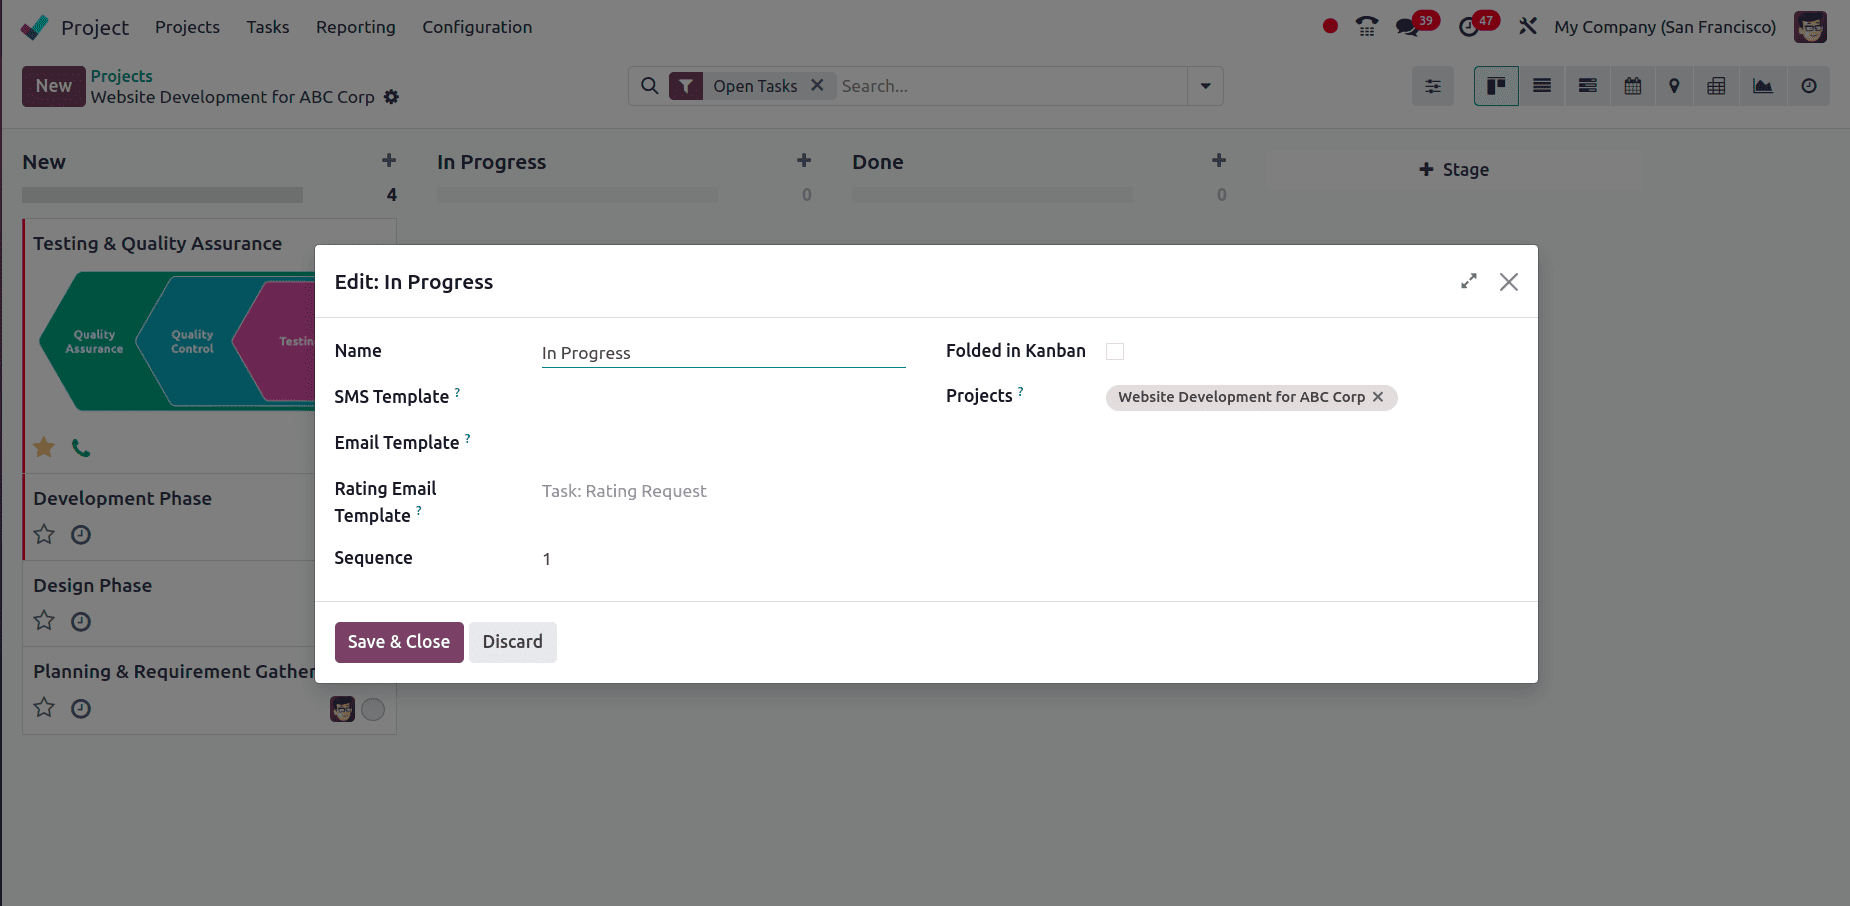
* Edit: The Edit option enables modifications to the project stage configuration. You can rename the stage, assign an Email Template and SMS Template to send notifications when a task reaches this stage, and enable the Folded in Kanban option to hide the stage in the Kanban view. Additionally, the Sequence can be set to define the stage’s position in the pipeline, and a company can be assigned in the Company field.
* Automations: The Automation option allows the creation of automation rules to trigger specific actions, such as updating records or setting up activities. Clicking on Automation opens a new page displaying pre-defined automation rules. To create a new rule, click the New button and configure the required conditions and actions.
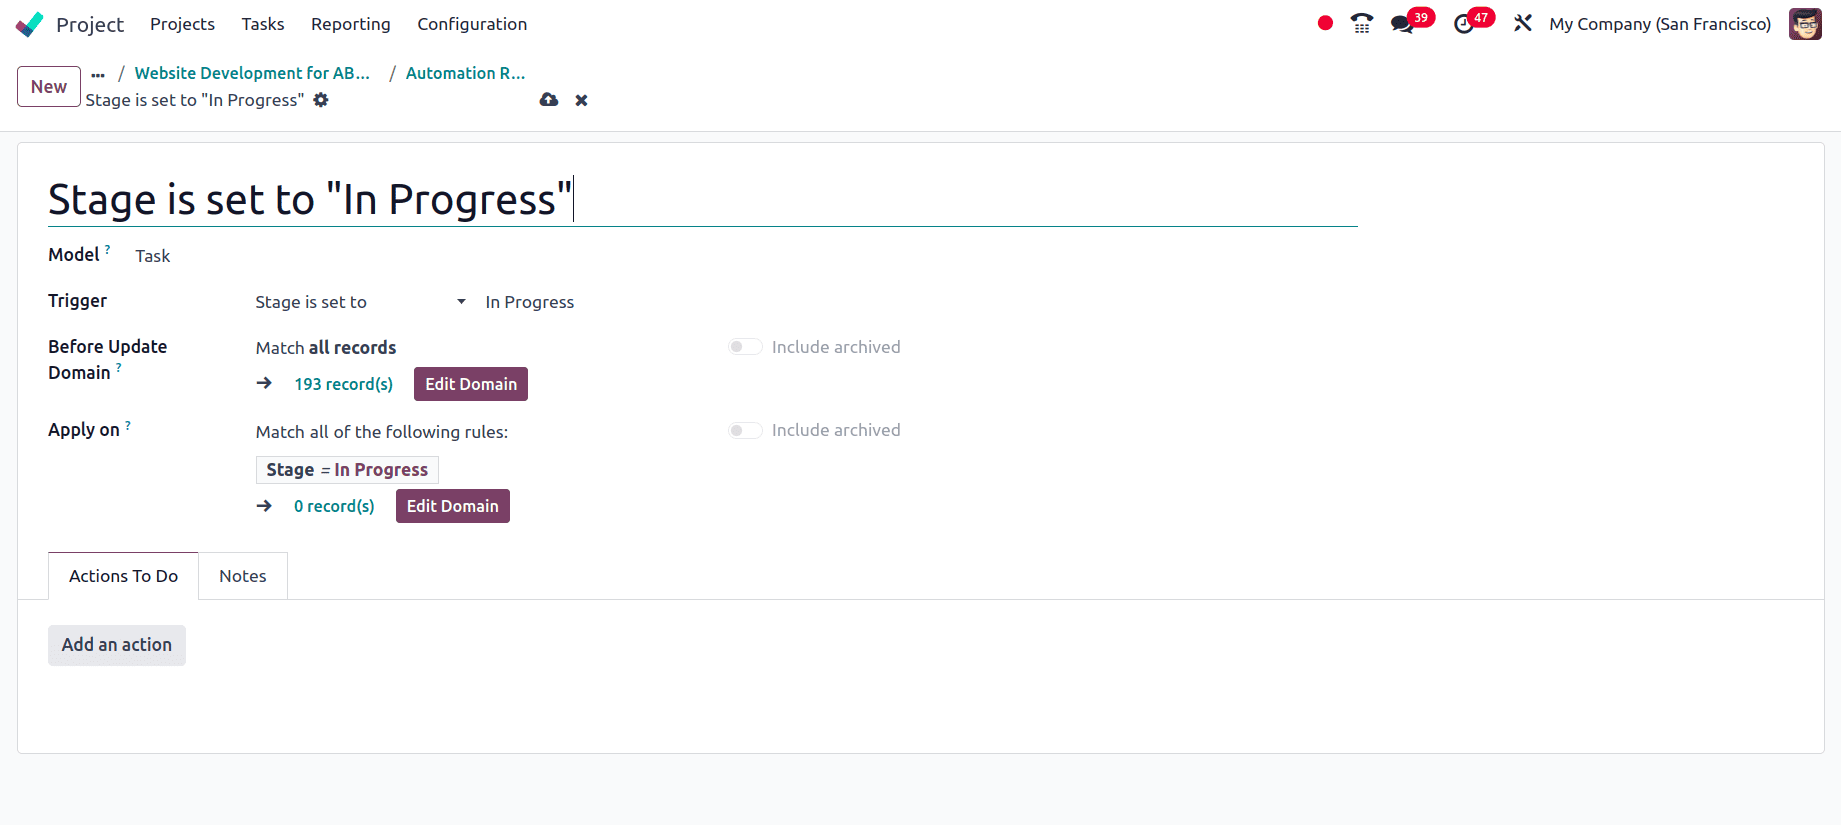
* Delete: The Delete option allows the removal of a project stage. Clicking Delete will prompt a confirmation pop-up. If there are active projects in the stage, they must either be deleted or archived before deleting the stage.
* Archive All: The Archive All option archives the stage along with all the tasks within it, effectively removing it from active views while retaining data for future reference.
* Unarchive All: The Unarchive All option restores an archived stage, making it and its tasks visible again in the project pipeline.
Now, to view the detailed view of the task, click on the task, and the detailed view appears.
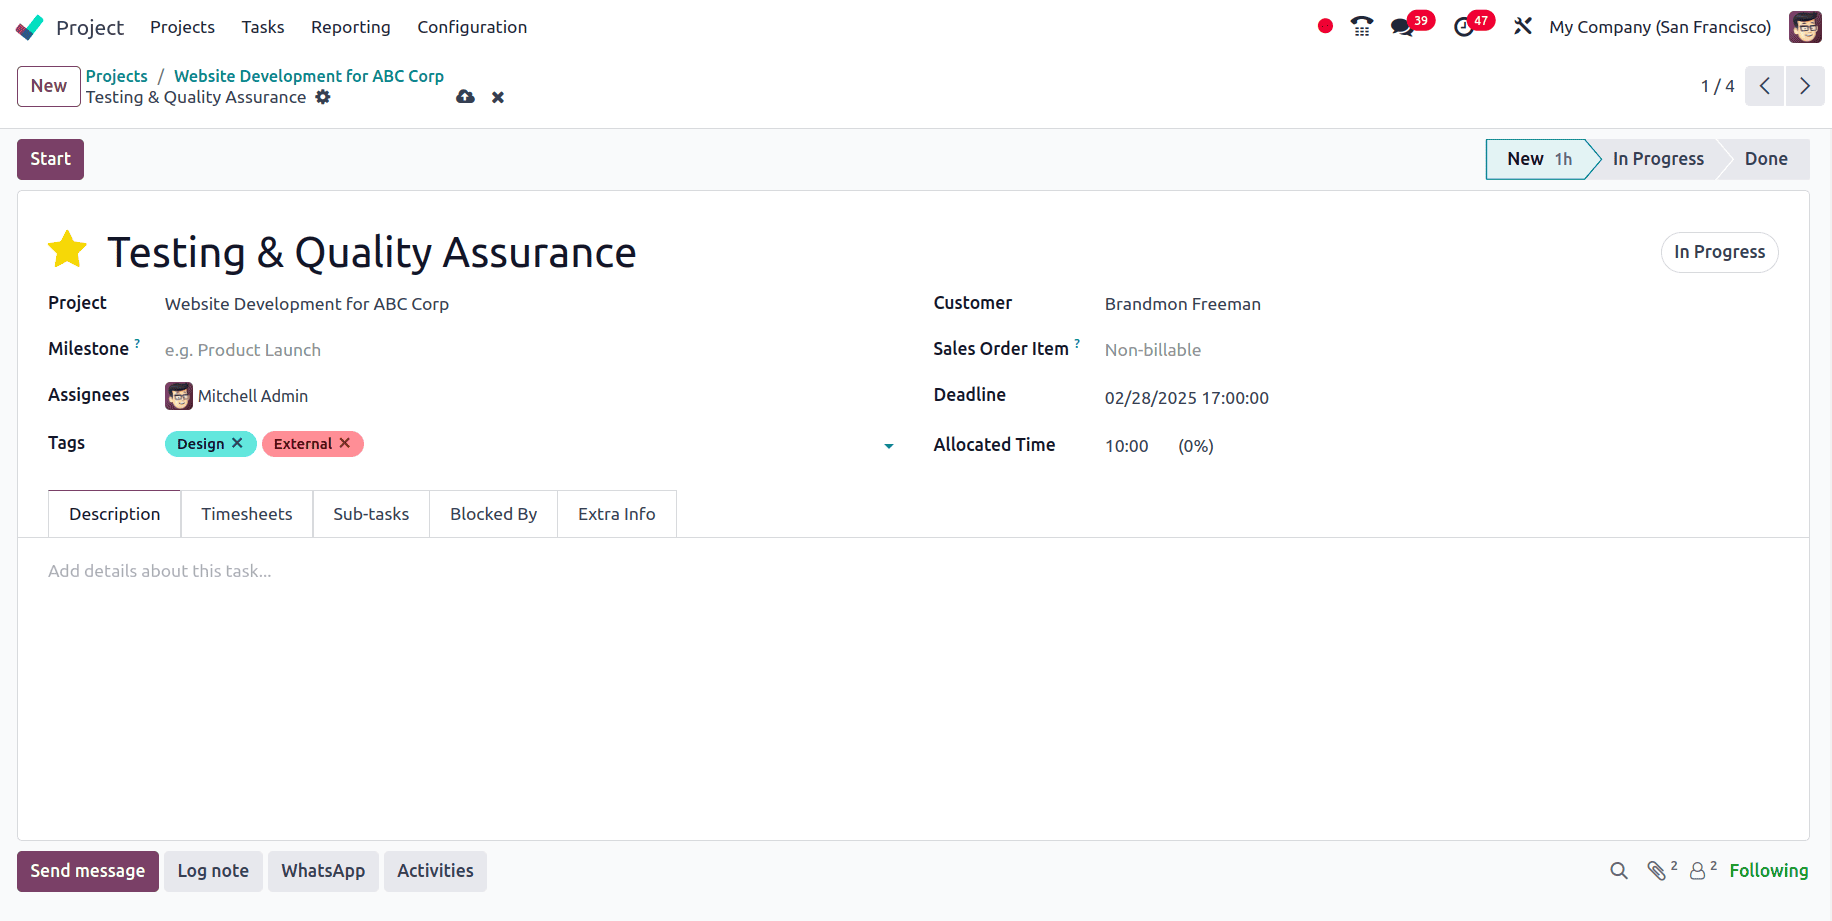
There are different fields here, such as:
* Name: Name of the task can be provided over here.
* Customer: The client or customer linked to the task. If it is a billable task, it can be billed to this customer. When a customer is added an extra field called Sale Order Item is also added where the associated sale order can be linked.
* Milestone: If any milestones have been defined for the project and if those milestone has to be associated with this task it can be provided over here.
* Deadline: The date by which the task should be completed.
* Assignees: The user or users responsible for completing this task can be given in this field.
* Allocated Time: The estimated time assigned to complete the task.
* Tags: Tags associated with the task. It helps to categorize tasks for better filtering and searching.
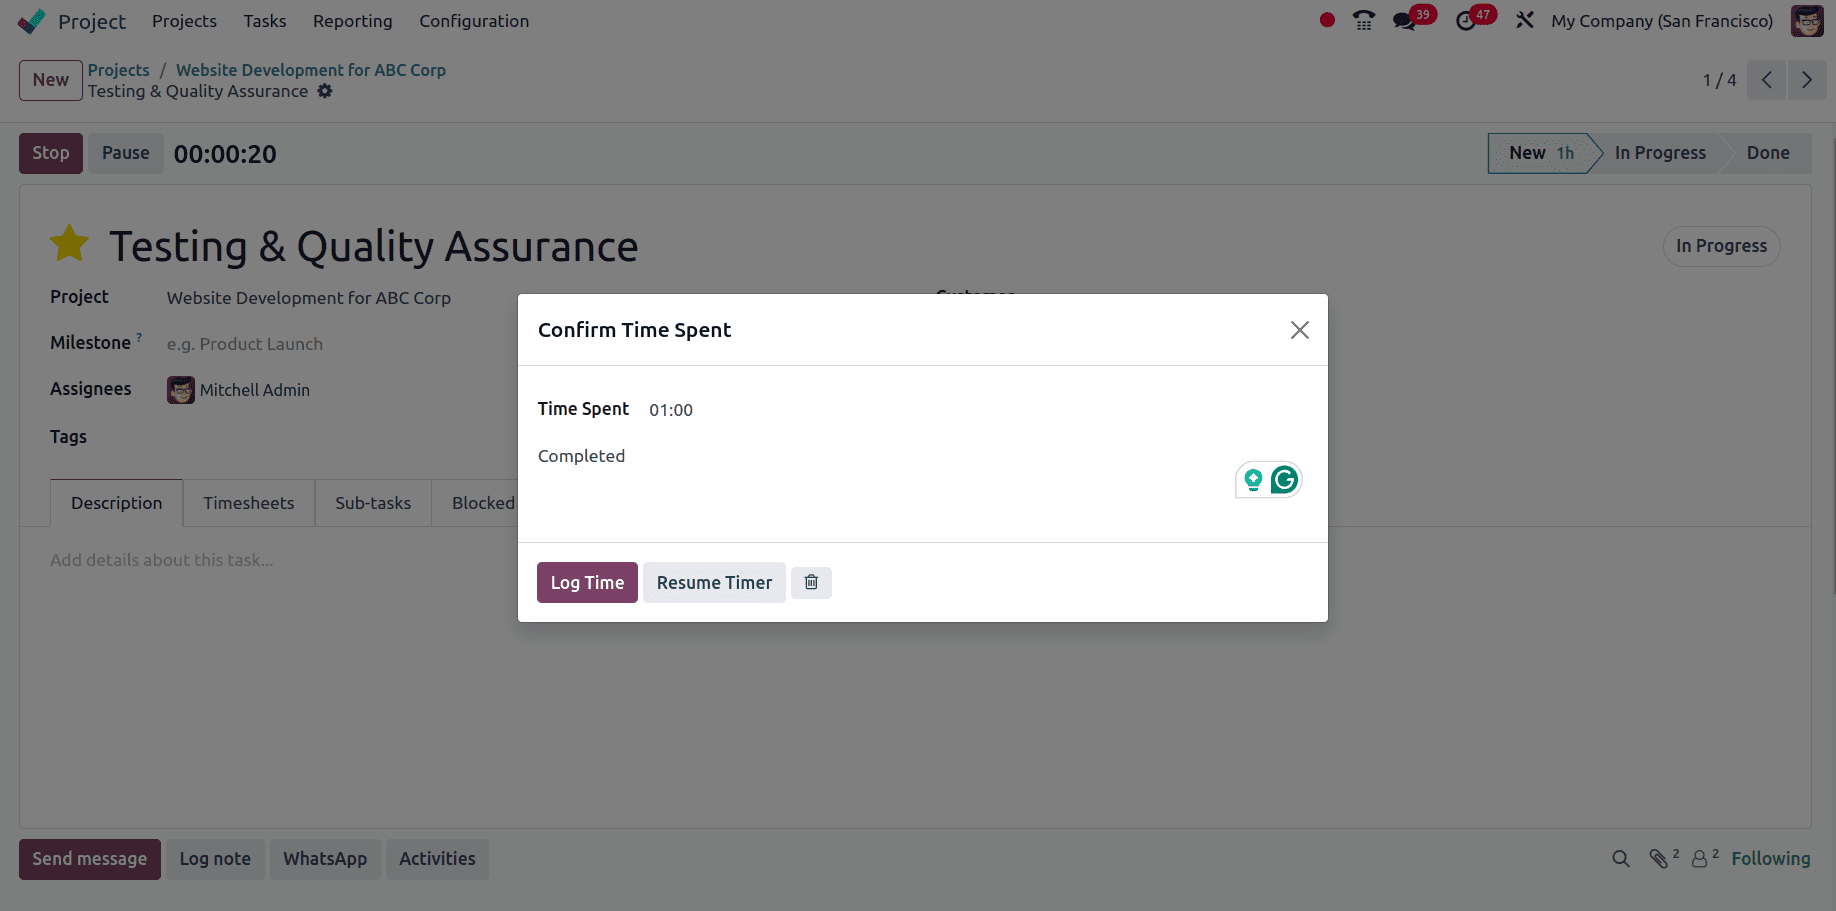
The Task Workflow & Status indicate the current stage of the task. The task stages that are added to the project can be seen, and the stage the task is currently in can also be viewed from here, whether it is New, In Progress, or Done. The Start button is used to start working on the task. It allows users to change the task status and begin tracking time. If the work has to be paused there is a Pause button, and when the work is done and the Stop button is clicked, a pop-up appears to Confirm the Time Spent. There a description can also be provided. If the time has to be logged in the timesheet, click on Log Time or else Resume Timer to resume the timer. And users can also delete the time that has been tracked by clicking on the delete icon.
There are different tabs available for the task, which helps to manage the tasks more easily.
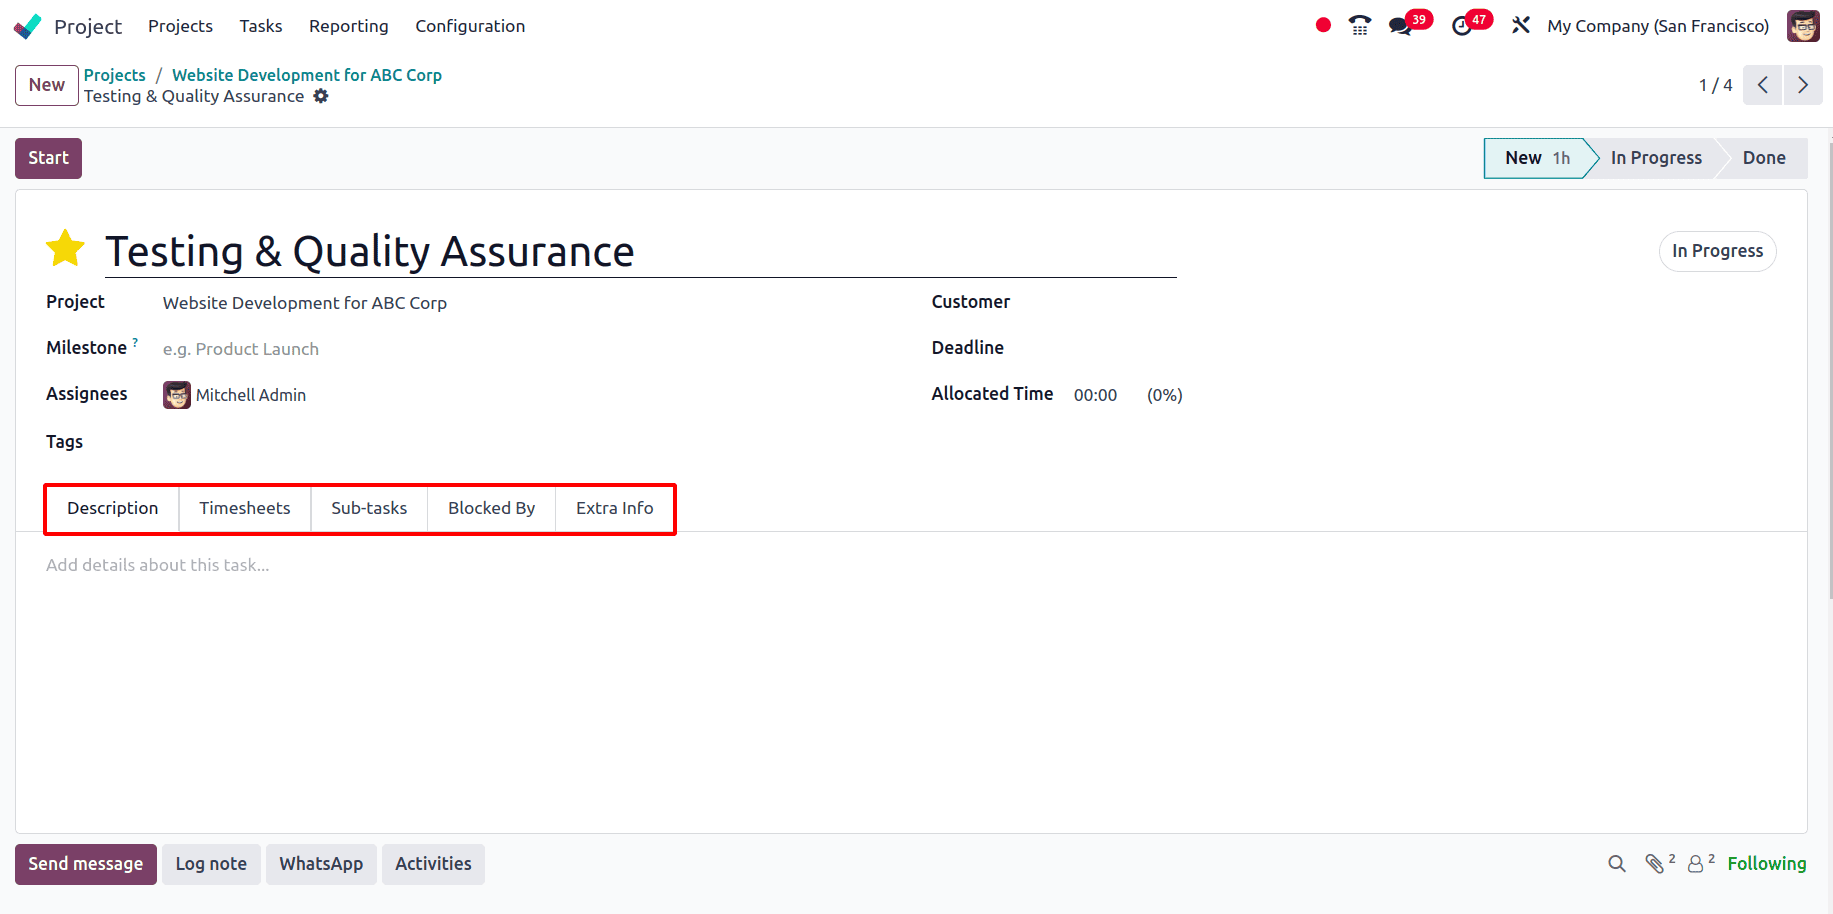
* Description: It is a text area for adding detailed information about the task. It also helps to document the task requirements, objectives, and instructions.
* Timesheets: Employees can log time spent on tasks. This ensures accurate work-hour tracking, which is crucial for project costing and client billing. Here, the date at which the time has to be logged and the employee who has worked should be added and then the time spent by the employee on this task can be provided in the Time Spent.

Since the Allocated time for this task has been defined as 10 hours and the time that has been logged for the task is given as 3 hours Odoo automatically calculates the Time Remaining as 7 hours.
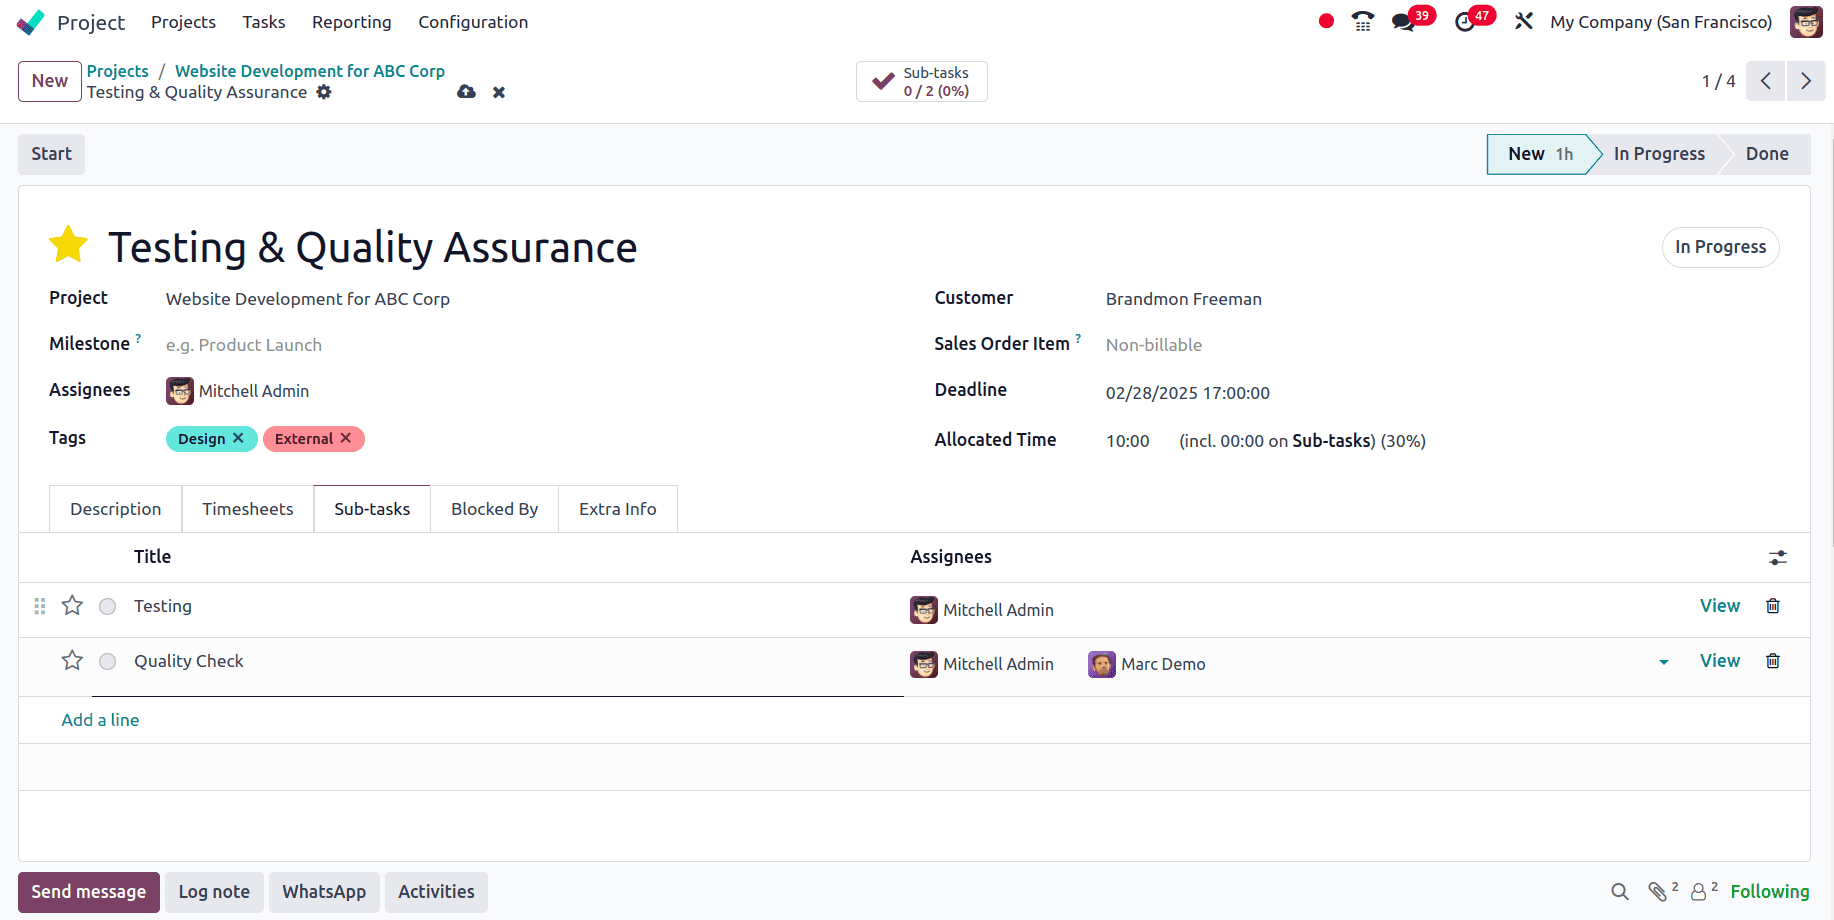
* SubTasks: Subtasks are used to break down large tasks into manageable units, allowing project managers to assign smaller tasks to different team members while maintaining overall control of the main task.
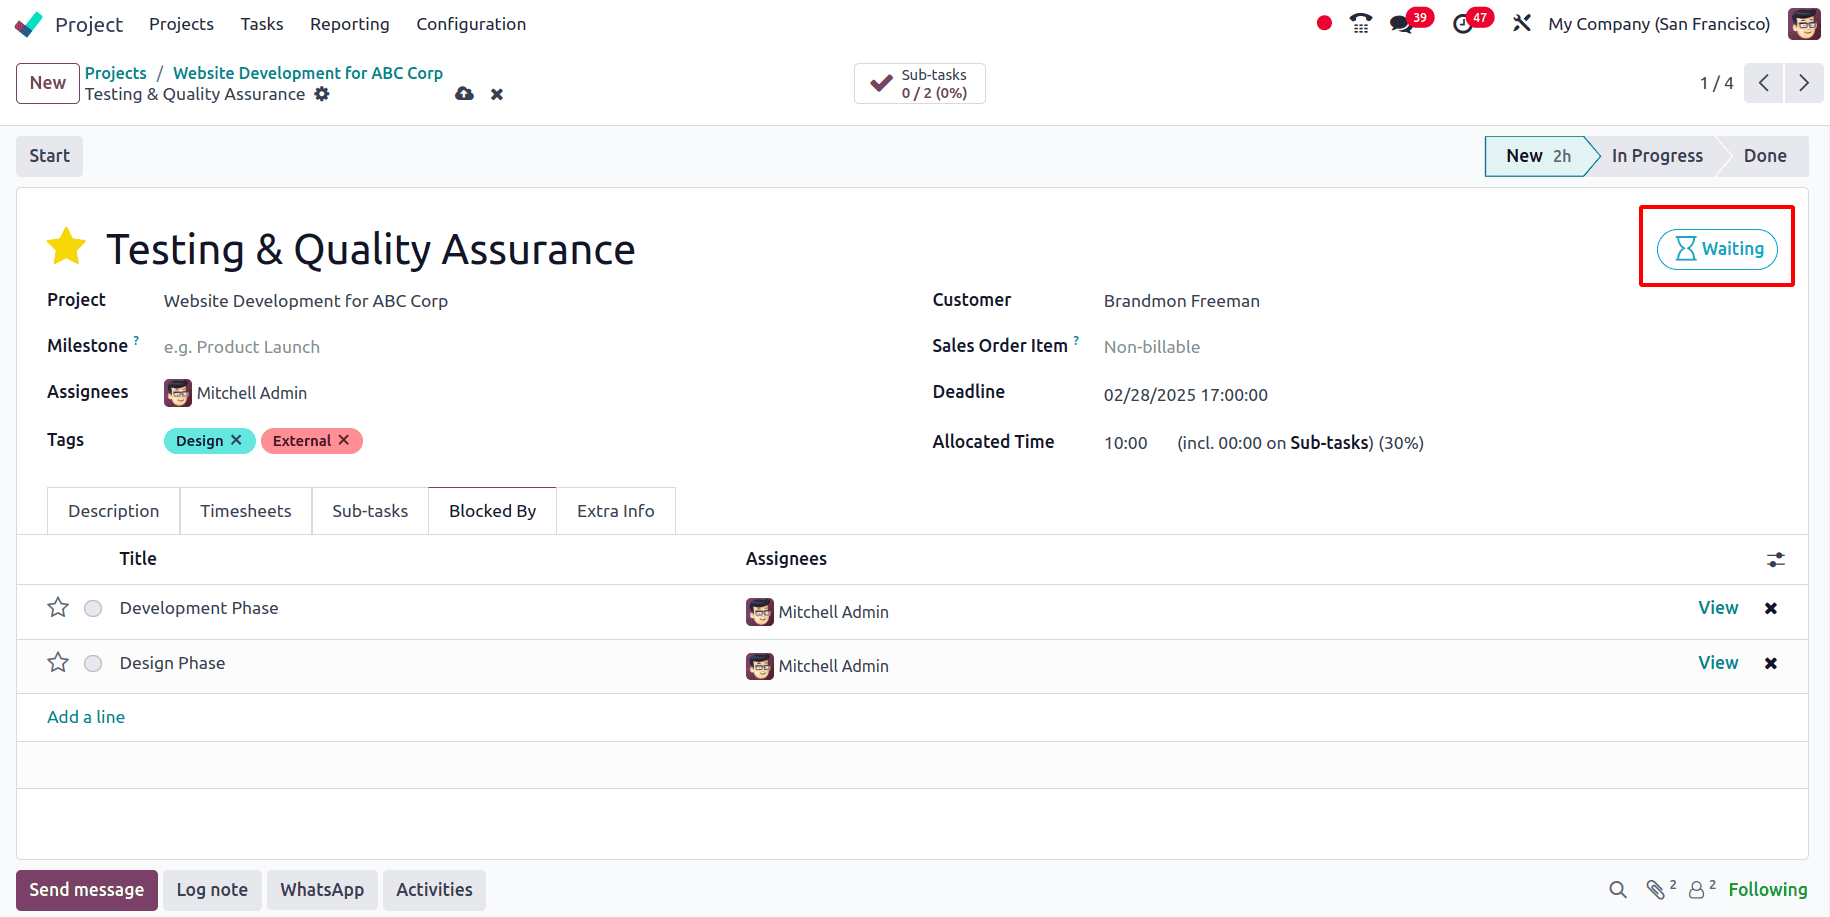
* Blocked By: In this tab the task dependencies can be defined, ensuring that certain tasks must be completed before others can begin. This feature is particularly useful for complex projects that require sequential execution. When a task has been blocked by other tasks, a waiting symbol appears for the task indicating that the task can only be executed once the dependent tasks are completed; until then, it will be in the waiting stage.
Extra Info: If any additional details relevant to the task have to be provided, it can be given here.
Also, for each task, there is a bulletin that helps to understand the state of the task.
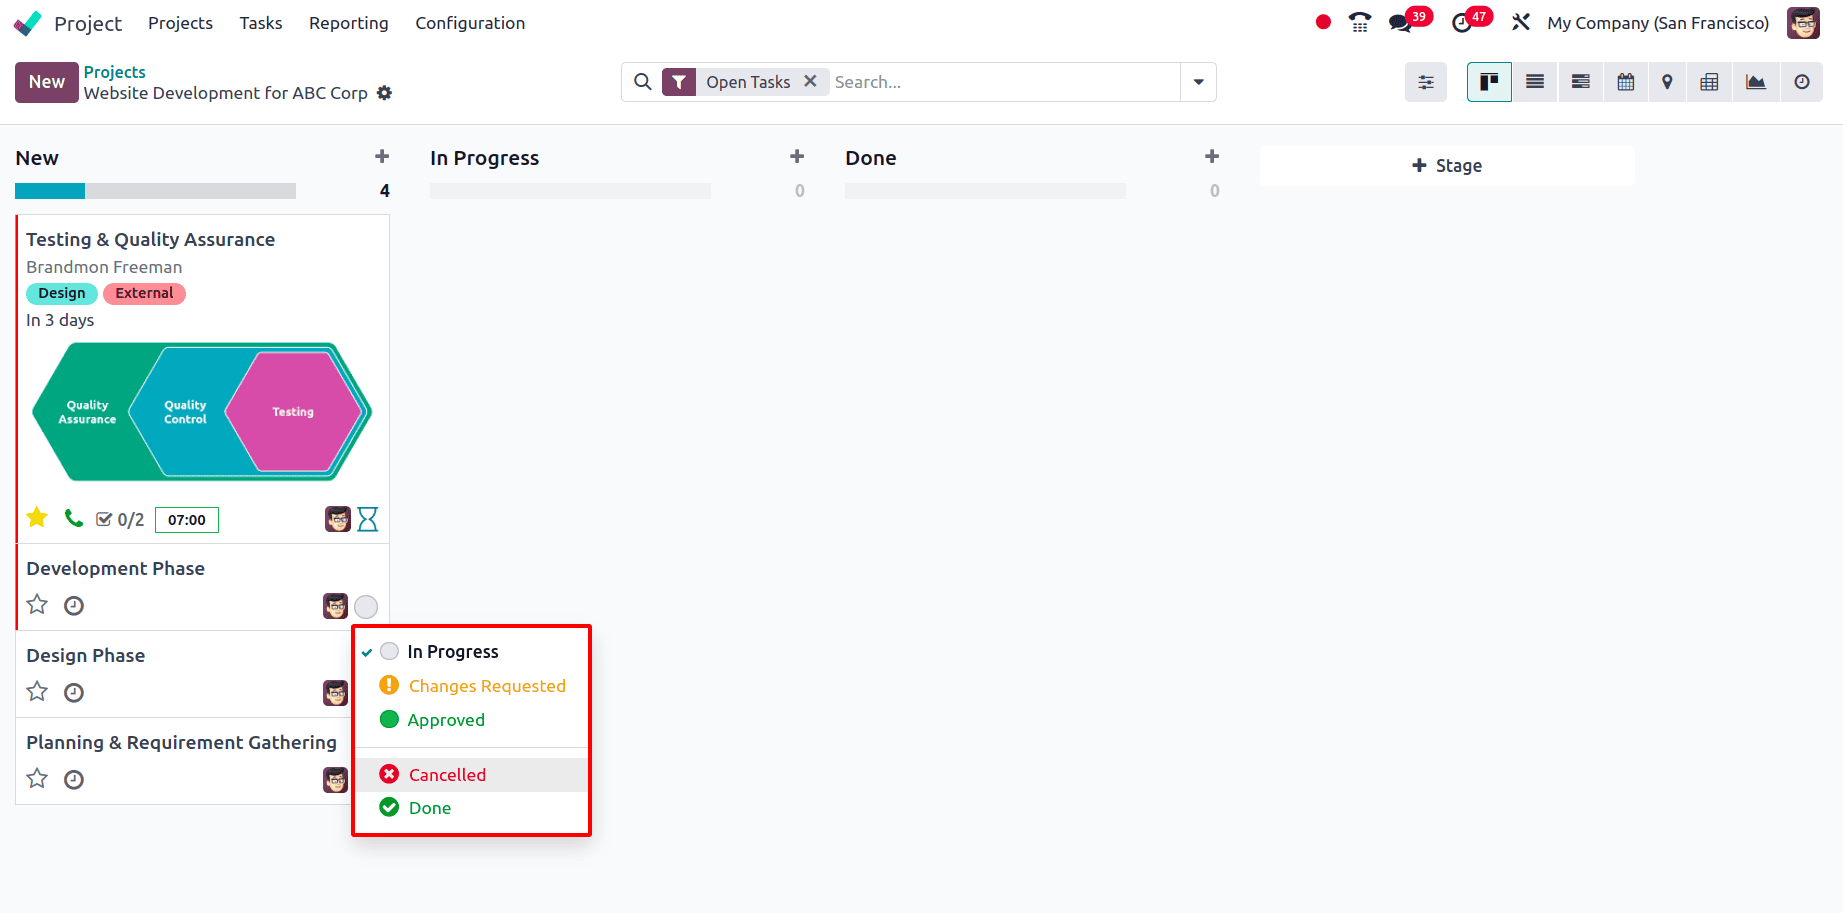
Different colors indicate different states of the task, such as:
* Grey: It indicates the task is on track and it is In progress.
* Yellow: This indicates that there are changes required for the task.
* Green: It indicated that the task has been approved.
* Red: It shows that the task has been canceled.
* Green with a Check mark: It shows that the task has been completed.
For each stage, there is a progress bar that helps to understand the state of the tasks that are in the stage.
So as discussed, Odoo provides different features that help to enhance task management within a project. By implementing Task Management in Odoo 18, companies can significantly improve team productivity, optimize resource allocation, and ensure successful project completion.
To read more about An Overview of Streamlining Task Management With Odoo 17 Project, refer to our blog An Overview of Streamlining Task Management With Odoo 17 Project.