Many companies offer meals and food items for their employees. This can be managed with the Lunch module in Odoo. For a Large scale industry, the number of employees is huge in number. So ordering food for them and managing it is tough work. This can be effortlessly managed by introducing the lunch management module.
Firstly install the Lunch module from Odoo Apps Store.

Managing and ordering different food items for employees is always a difficult and time-consuming job. The product categories, Company locations, etc. can be effectively managed with this module.
Adding Product Categories
One can create product categories under the lunch configuration.
Go To Lunch -> Configuration -> product Categories, Let’s create a new product category ‘Soup’.
Now add products. For that Go-To Lunch -> Configuration -> Products
While configuring a Product, add product category in which the product belongs to, add vendor who is providing this product, Price of the product and description about the product and then Save.
Alerts
In any case, if the employee forgets to order the meal. This will create a delay in ordering and thus delivery of the order too. So using the alert facility we can set a warning or alert in order to order food on time.
Go To Lunch -> Configuration -> Alerts
The alert display can be set to view the alert message either in App or Chat. Also, one can set alert messages and choose a location and set date and recurrency on days, Notification time, etc.
If you delay the ordering, a message will appear in the interface.
Under the configuration settings of the lunch, we can set a threshold value up to which employees can order food items on credit. To enable this feature Go-To Lunch -> Configuration -> Settings.
Under Lunch, you can see the field to enter the overdraft amount. Add an amount there so that employees can order food items for that additional amount.
The employees can order up to -20 rs/- without any restriction and beyond that amount, it will show warning messages like the account doesn't have enough money.
One can also create company locations. Go-To Lunch -> Configuration -> Locations.
Click on Save after entering the office location.
Creating Lunch order
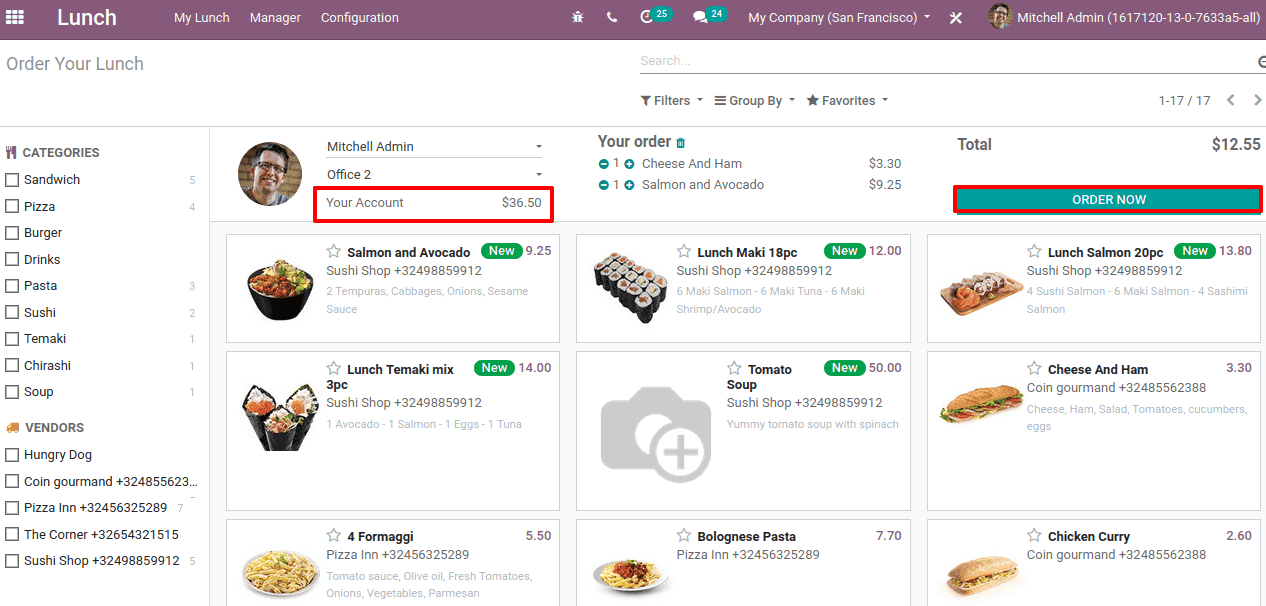
One can create lunch order through Lunch -> My Lunch -> New Order.

One can choose the products and click on ORDER NOW. Then you can see the status changed to order. The account balance of the employee will be changed according to the food items he ordered. Once it exceeds the threshold amount, a notification will arise.
You can check your previous orders by Lunch -> My Lunch -> My Order History.
Also, you can check your account by Lunch -> My Lunch -> My Account History.

You can find your orders and balance amount in your account.
After all the employees have ordered their food items, the manager can view the orders made by the employee and from which vendor the employees have ordered. Go to Lunch -> Manager -> Today’s Order.
When you order an item, it will reflect in ‘My orders’. Select the ordered item and click on ‘Lunch': receive meals or by clicking the green dialer option to confirm. Thus the order is received.

Once the ordered food items are received, the expense will be added to the employee account.

Control accounts manager is able to view as well as manage all the user accounts. Also, the manager can manage the vendors under vendor control.