Payment Terms are necessary information that must be included in the invoice to notify the customers when making the payment. Payment terms often allow Customers to plan their Payments easily and proceed with the purchases accordingly. At the same time, it will ensure you preserve proper cash flow in the business without clutters or payment lags.
This Blog will give you a detailed note on how to set up and use Payment Terms easily with Odoo 15
Customer invoices and Payment terms
You can access this feature from the Accounting module of Odoo. The option is available to configure under the Configuration tab of the Accounting module. In the module, click on the Payment Terms from the drop-down options, and Odoo will take you to the Payment terms page, as shown below.

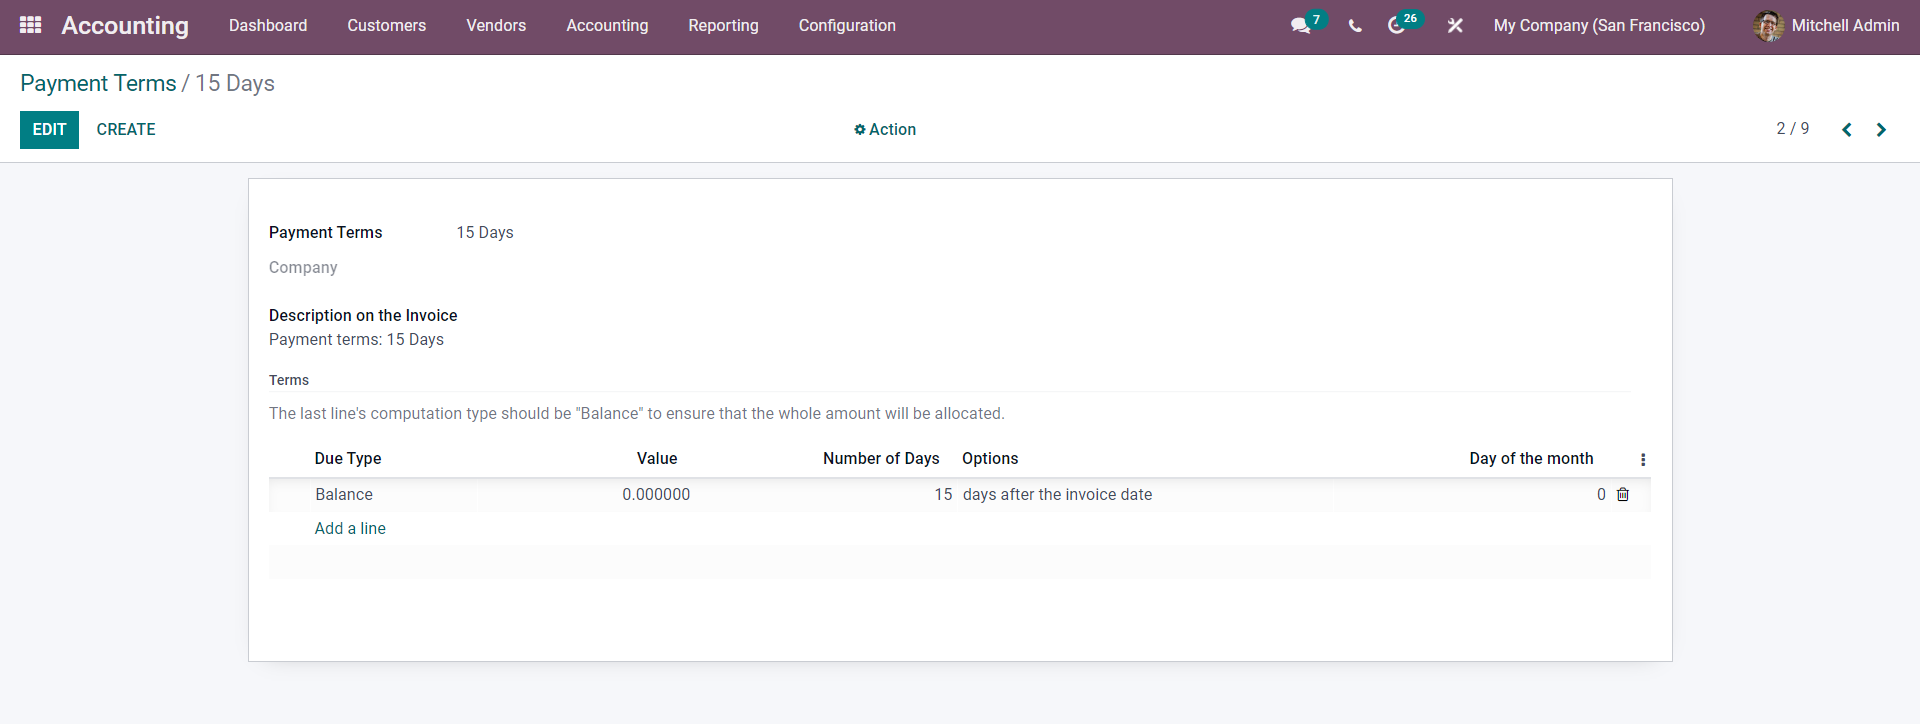
Odoo has a set of pre-installed Payment terms that you can use in the invoices. If you want to configure this, just click on the Payment term and use the Edit button to edit the selected payment term, as shown below.
If you want to create a new Payment Term, click on the Create button from the Payment Terms sections, and it will take you to a configuration page to make new Payment Terms, as shown below.
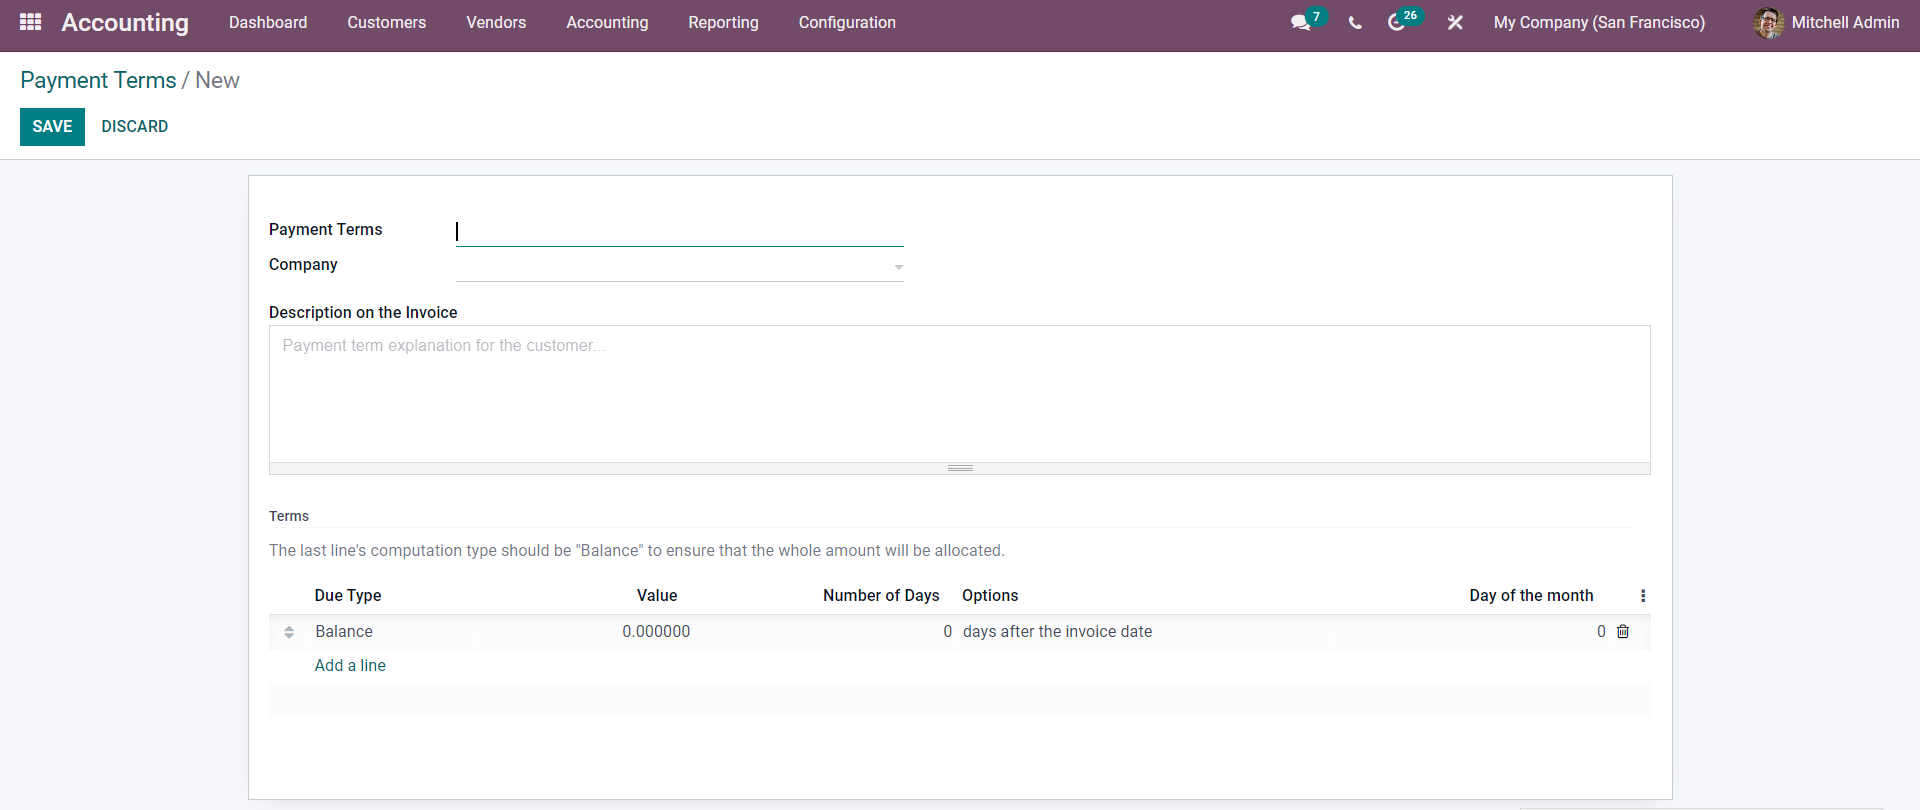
Here, the first step for setting up the Payment terms is to Name the Payment Term and choose the Company from the Company section or field.
Under the Description On the Invoice section, you can type in the Description on the Payment term. This will be shown in the invoice. So make it short and precise so that the customers can go through the payment terms at a single glance.
The next step after this is to create the Term type. For this, go to the bottom of the configuration section and click on the Add a line button as highlighted in the image given below.

Click on it, select it, and a configuration tab will open up as shown below to configure the Term Type.
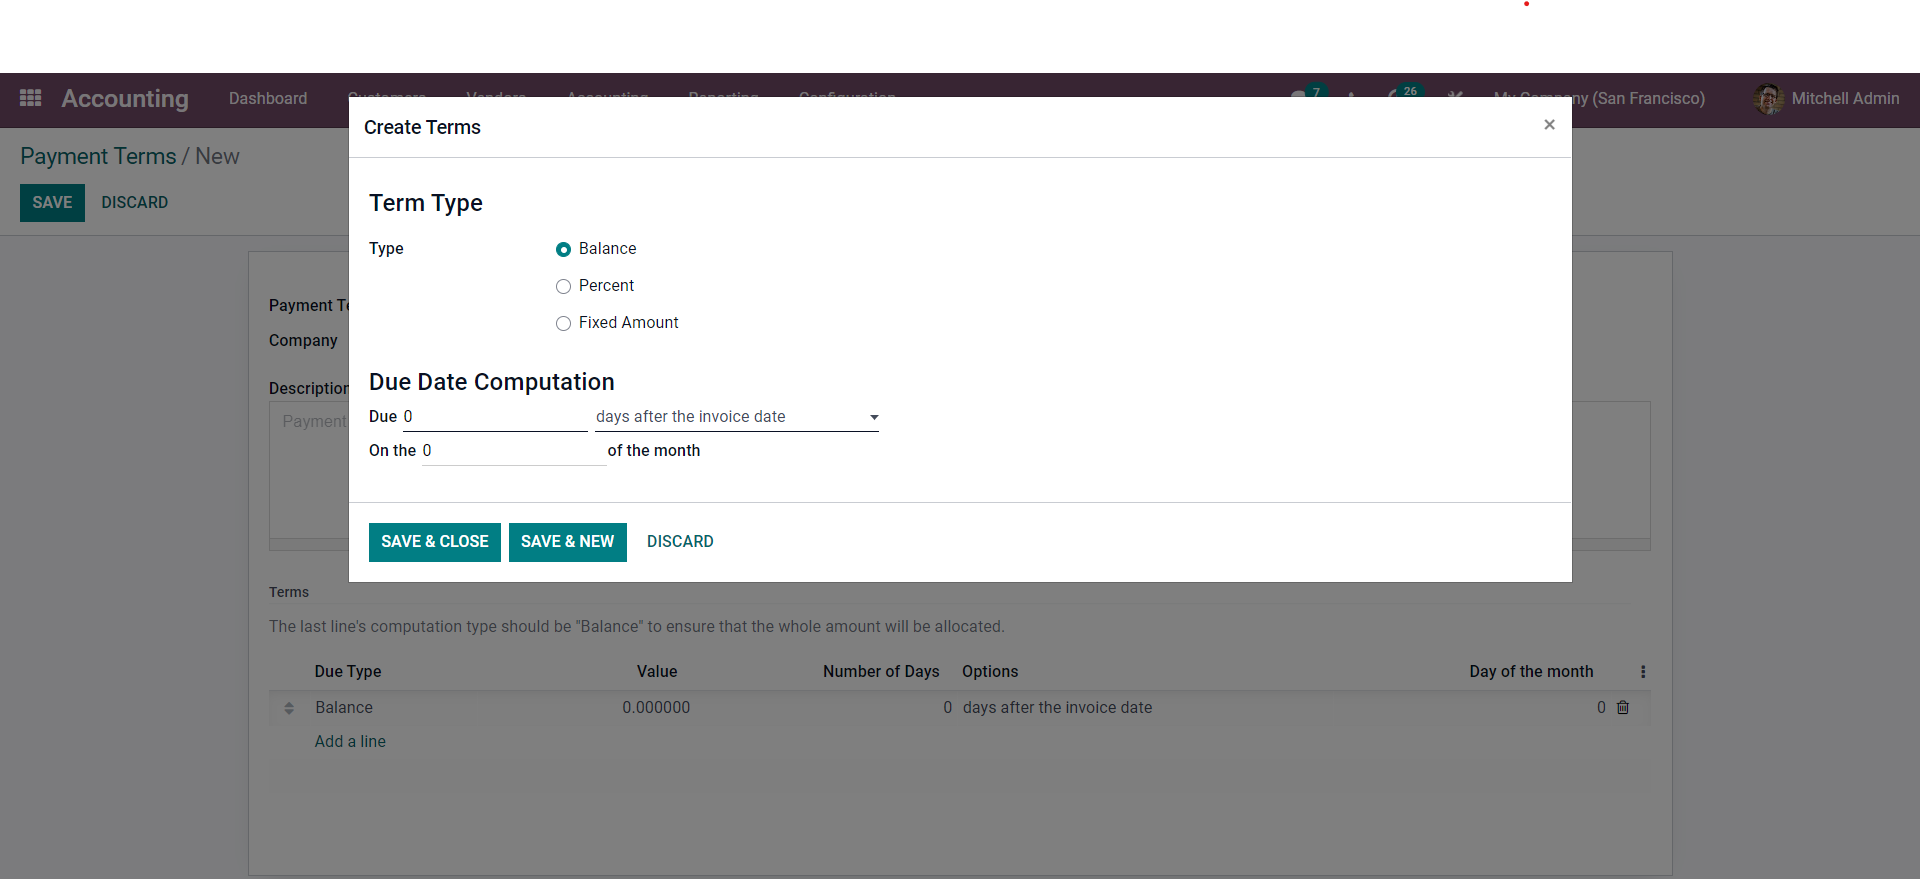
The first step over here is to set the Type. You can choose from Balance, Percent, or Fixed Amount. If you choose the Percent or the Fixed Amount, a configuration section will apply the amounts in percentage or amounts as shown below.
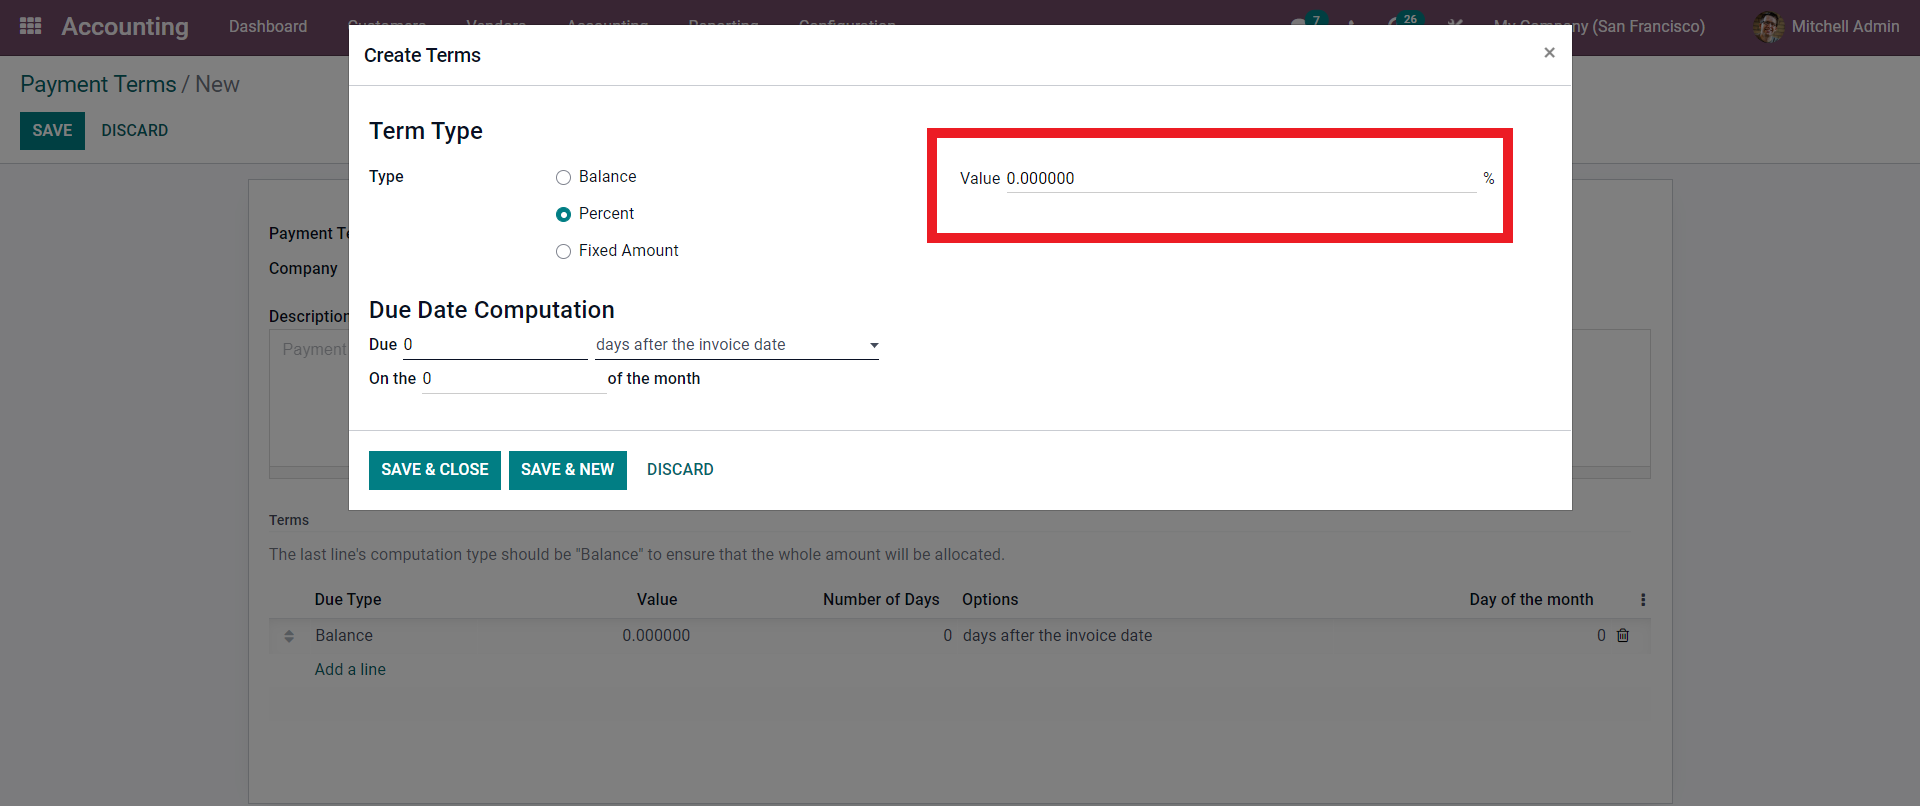
Enter the percentage here. After this, you can continue to the Due date Computation section. This is a space for due date computation. On the Due line, enter the number of Due days, and from the drop-down options, select the aspects on the period of the days as shown below.
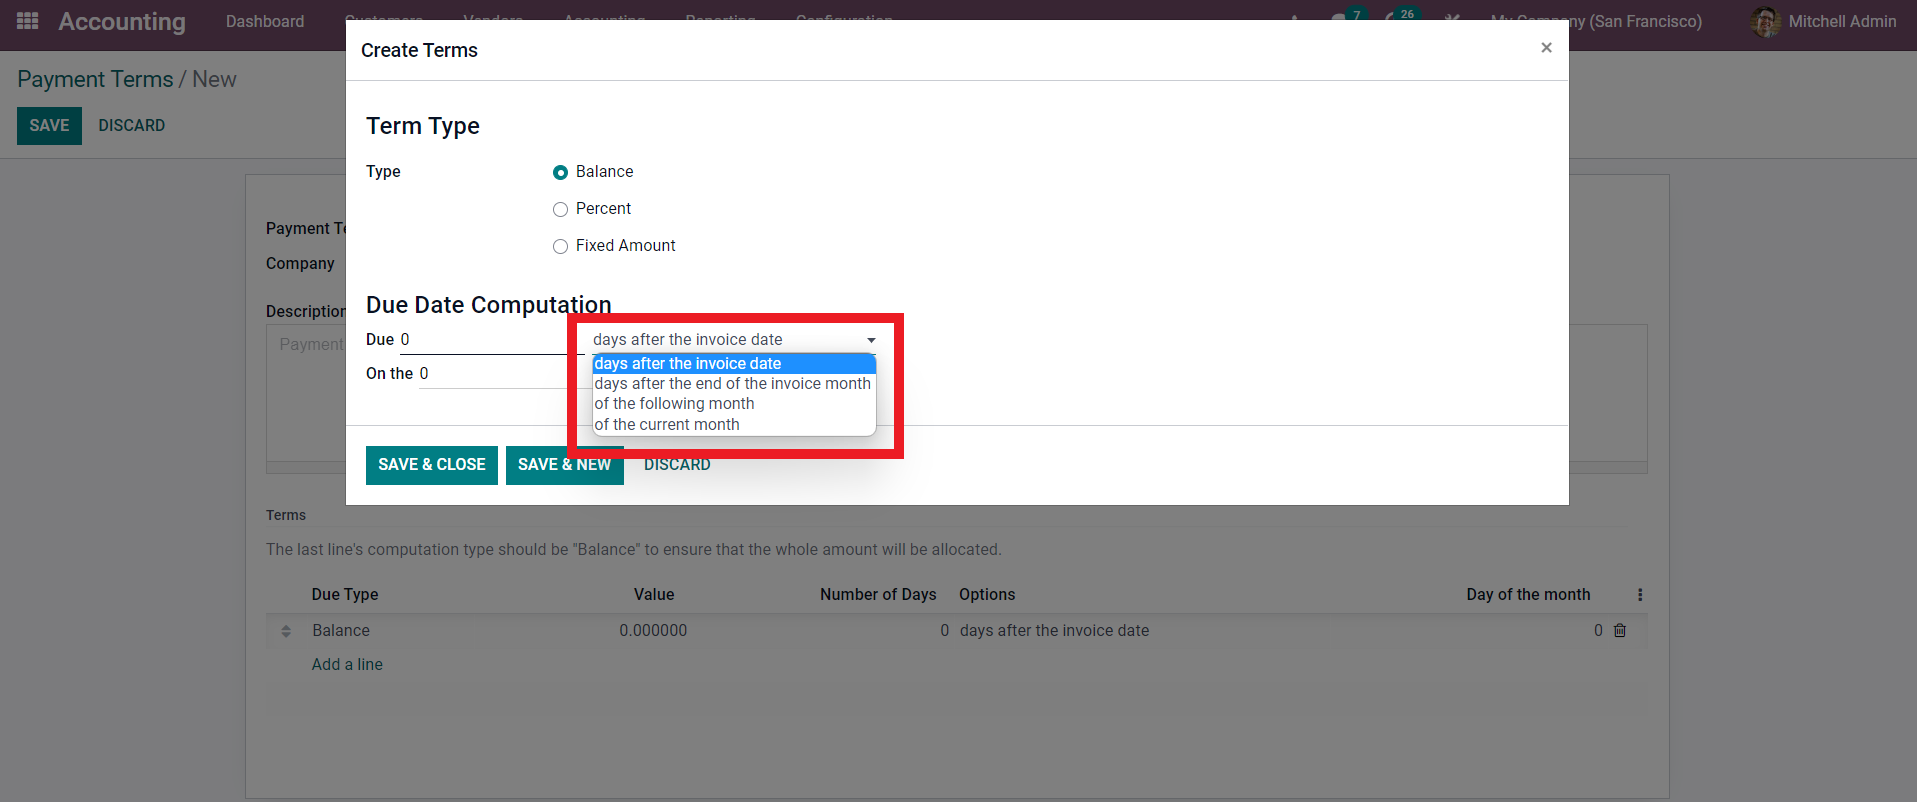
Choose from the options to apply it. After the configurations, click on the Save & Close button to close the configuration section, or if you want to continue creating a new payment term, click on the Save & New button. From the main configuration, the section clicks on the Save button to save the Payment Type. You can access the payment Type from the Payment Type list.
You can set up the Payment Terms individually for your customers. You can do this on customers concerning the nature of the business that you are doing with them. To configure this, go to the Customer tab and from the drop-down options, click on Customers. This will give you the list of your customers, as shown below.
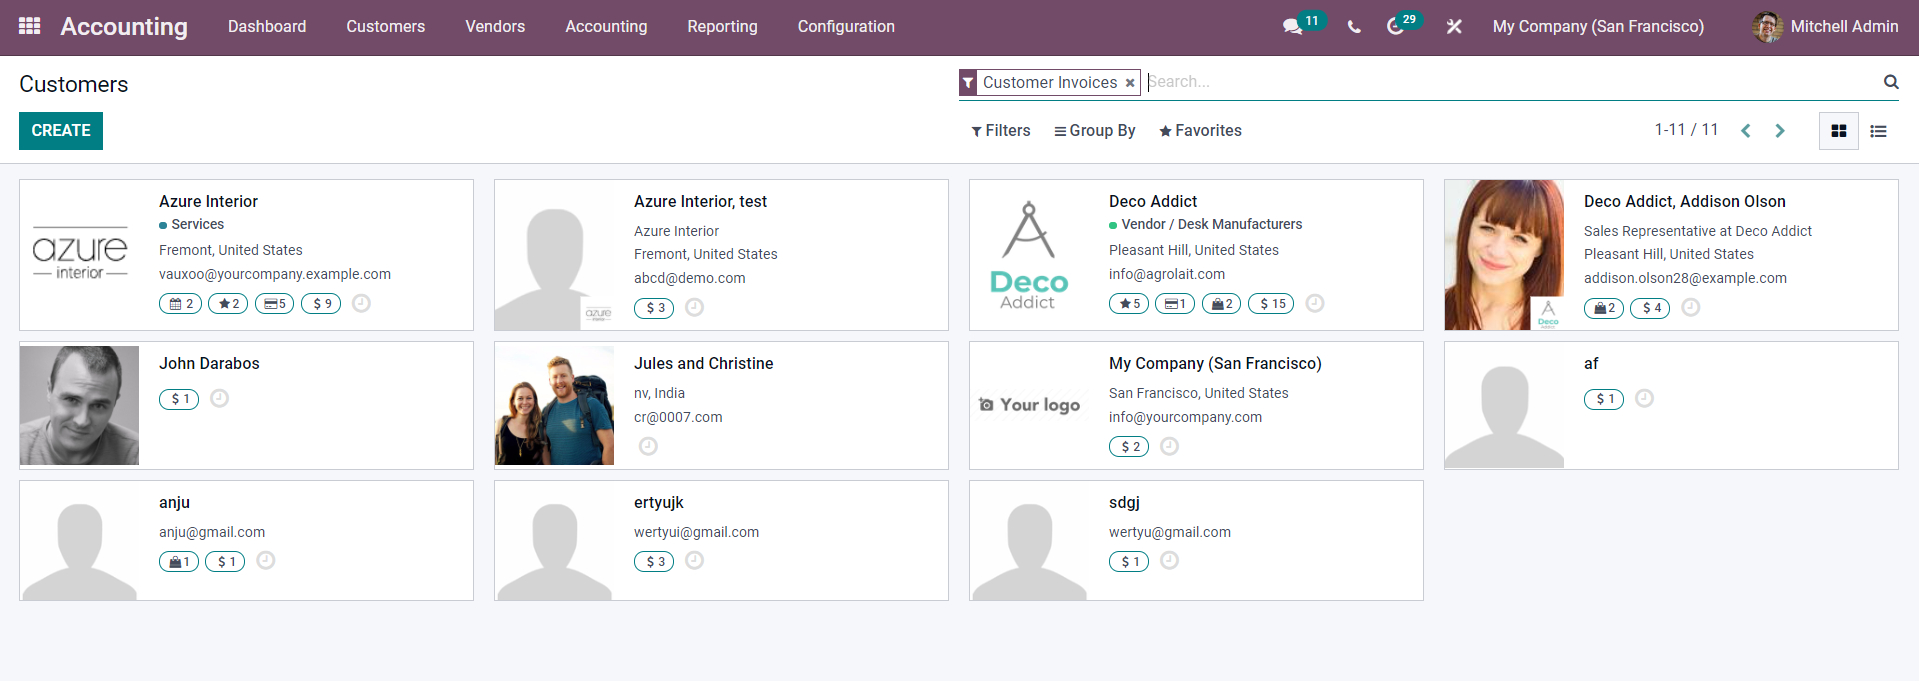
Click on the customer that you want to configure, and a page with all info on the customer will open up as shown below.
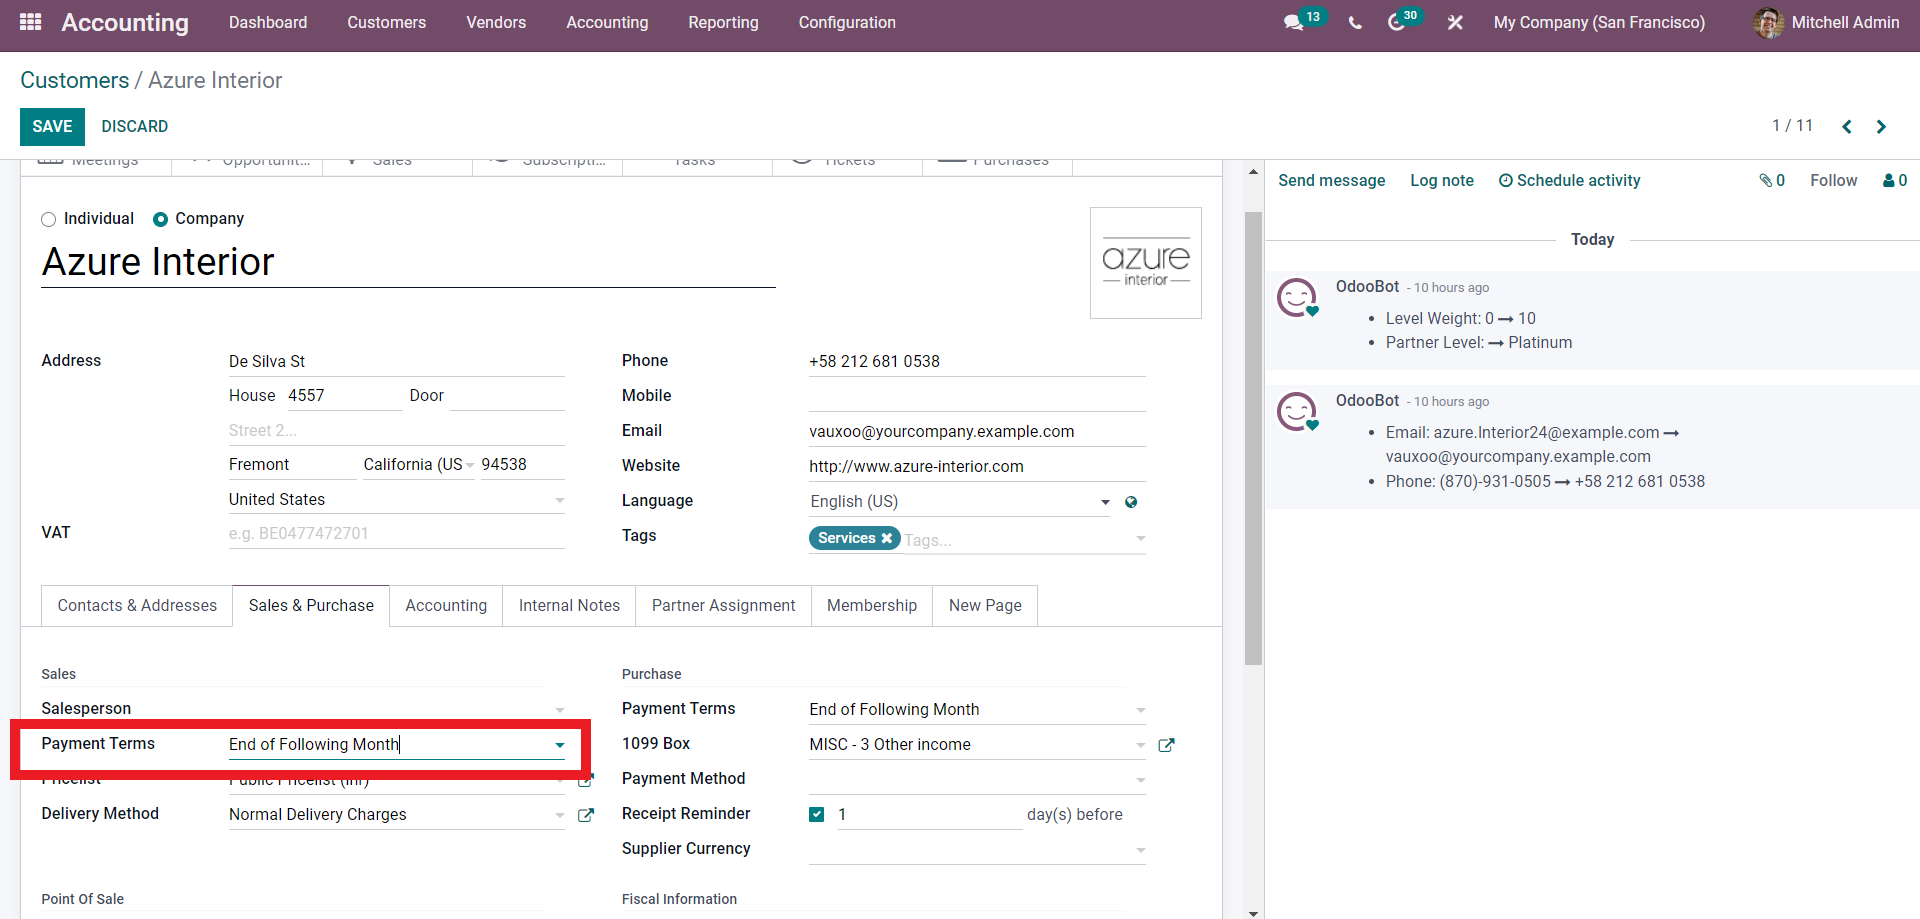
Here, under the Sales & Purchase tab, you can find the Payment Terms field. From the options, choose the Payment Terms. After the configurations, every new invoice you send to the customer will be automatically filled with the Payment Terms. For example, the Payment Term is set to ‘ End Of Following Month’ in the image given above. So let’s create an invoice for the configured customer.
Note that if you want more information on creating and managing invoices with the Accounting module, please refer to the How to send and manage Invoices section of this blog.
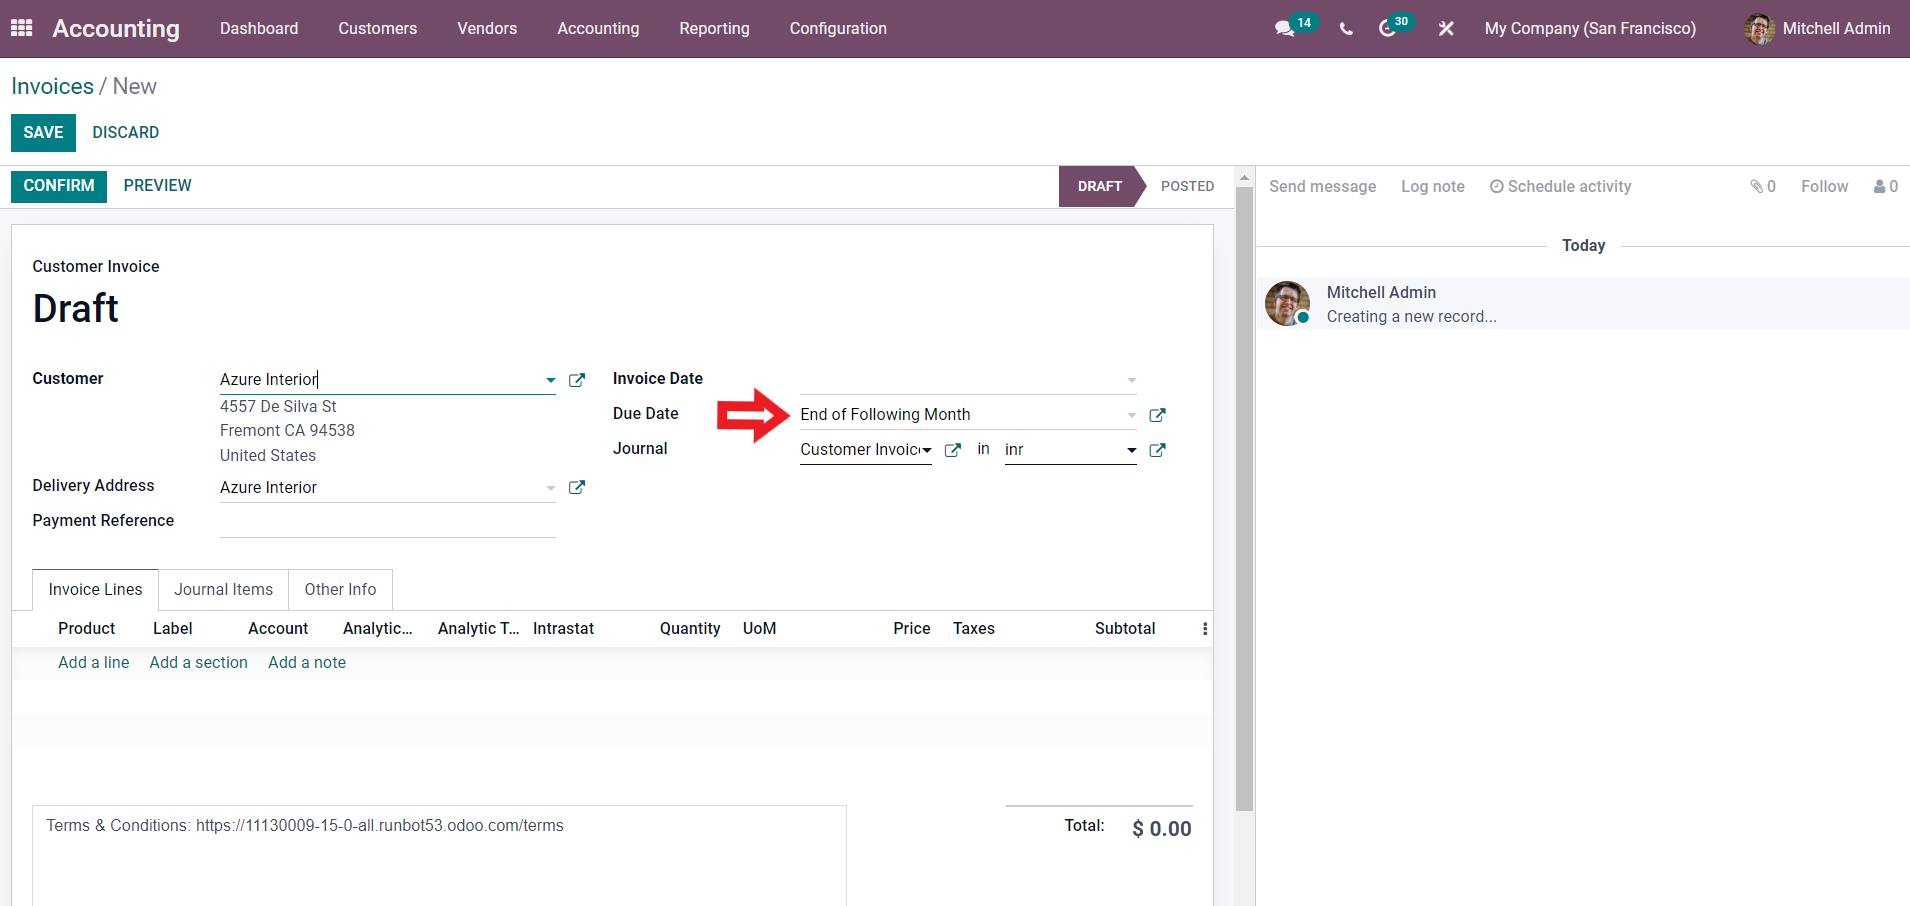
As soon as you add the customer in the Due date section, the Payment Term will be automatically added. If you want to change the Payment Term, you can click on the existing Payment Term and choose from the options below.
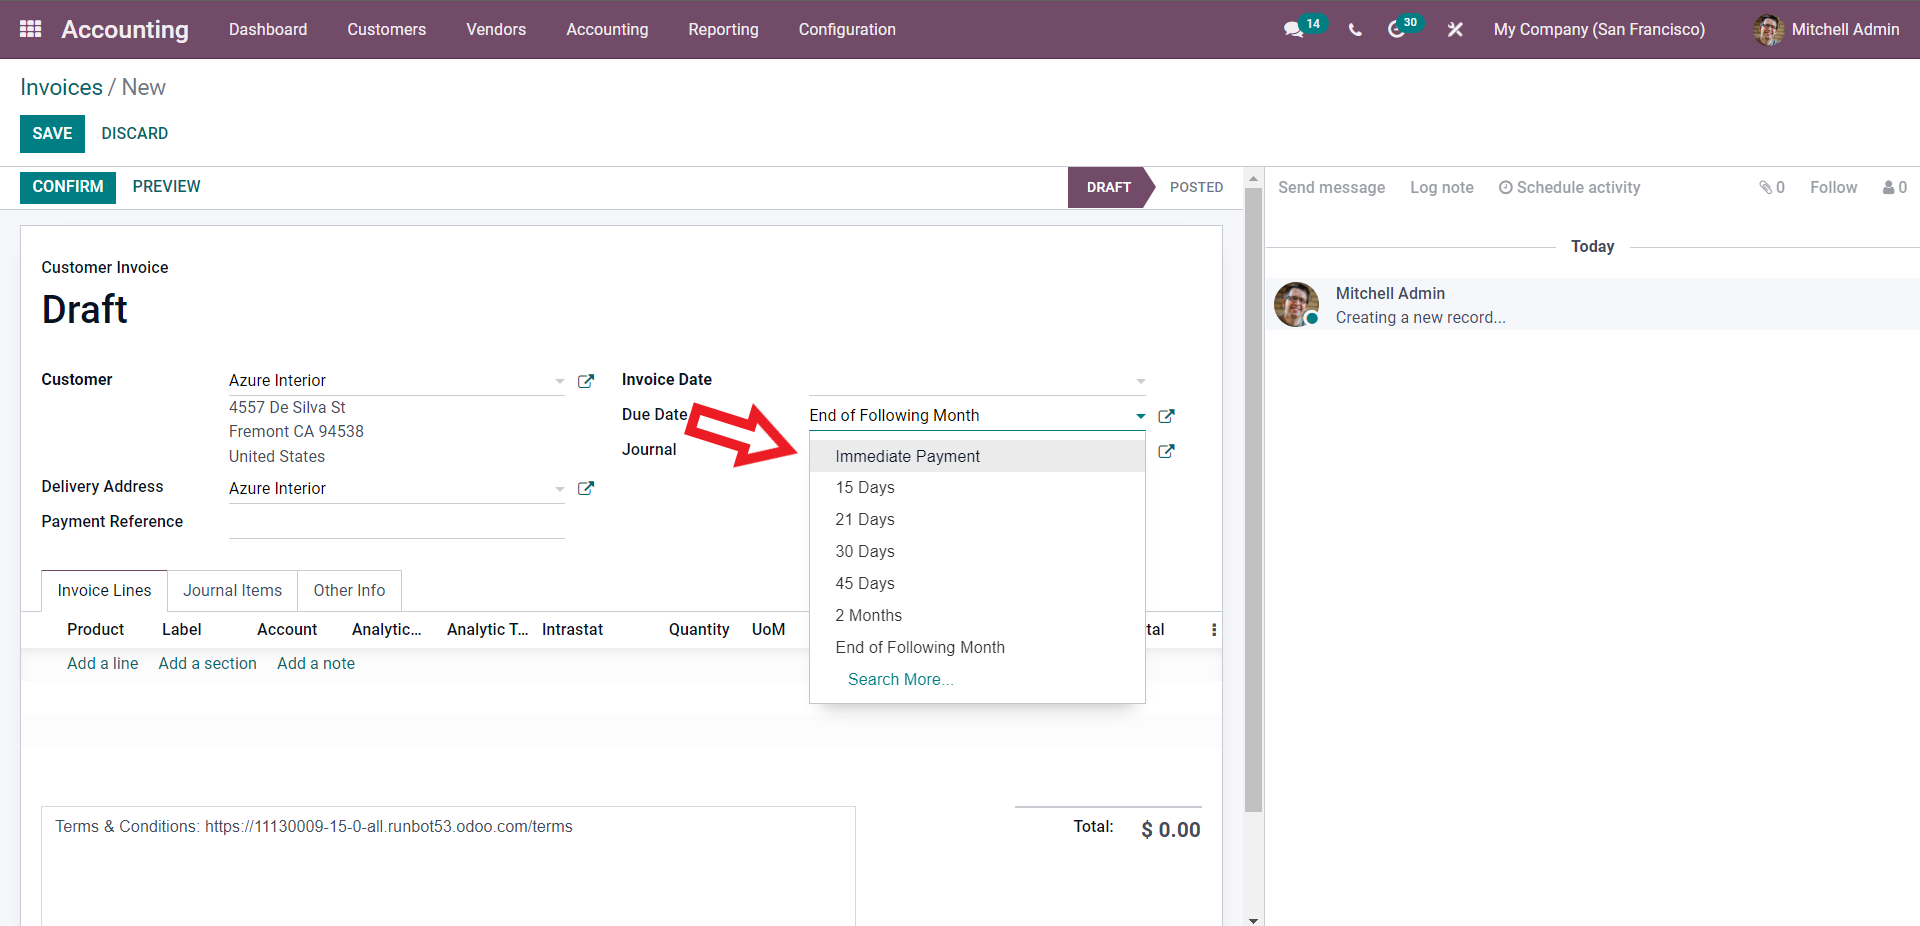
Similarly, if the customer is new, you can use the same method. From the invoice, select the Payment term.
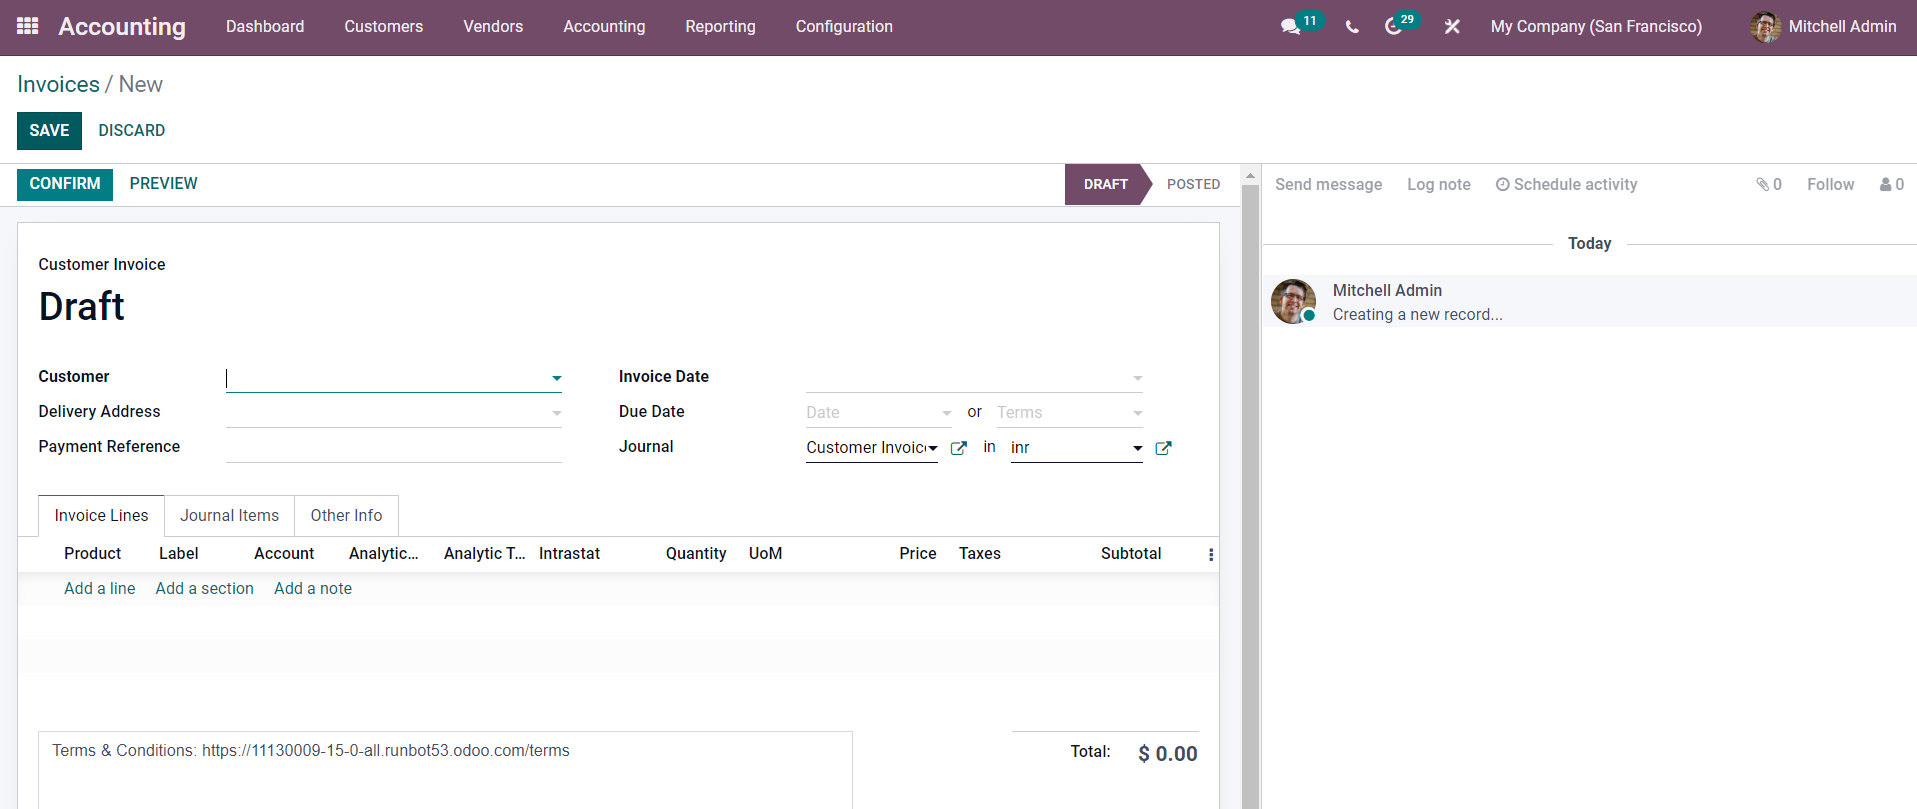
Enter the customer to whom you want to send the Invoice from the Customer field. Enter the Invoice date in the Invoice Date section. Note that you can do it from here as the customer is new and probably hasn’t been assigned the Payment Terms. So After entering the Invoice date in the Due date section, join the date, and in the Term field from the drop-down options, you can enter the Term as shown below.
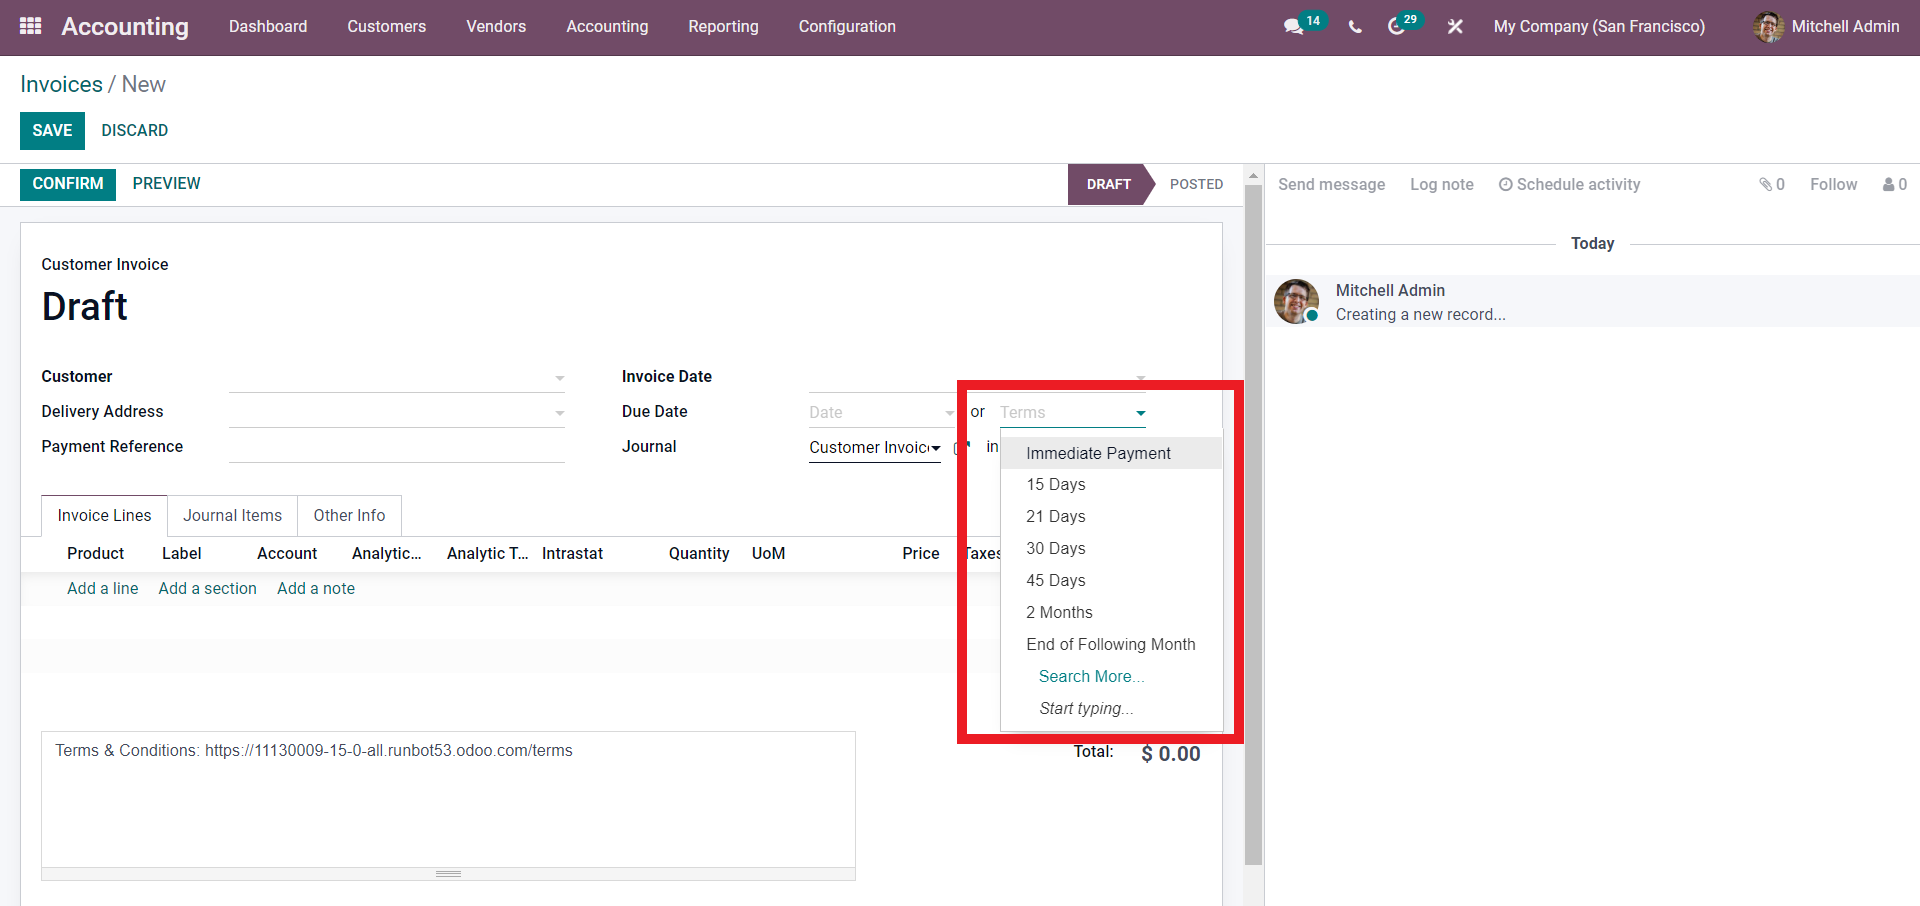
Click on the Search for more options if you can’t find the desired Payment Term. This will give you a list of Payment terms as shown below.
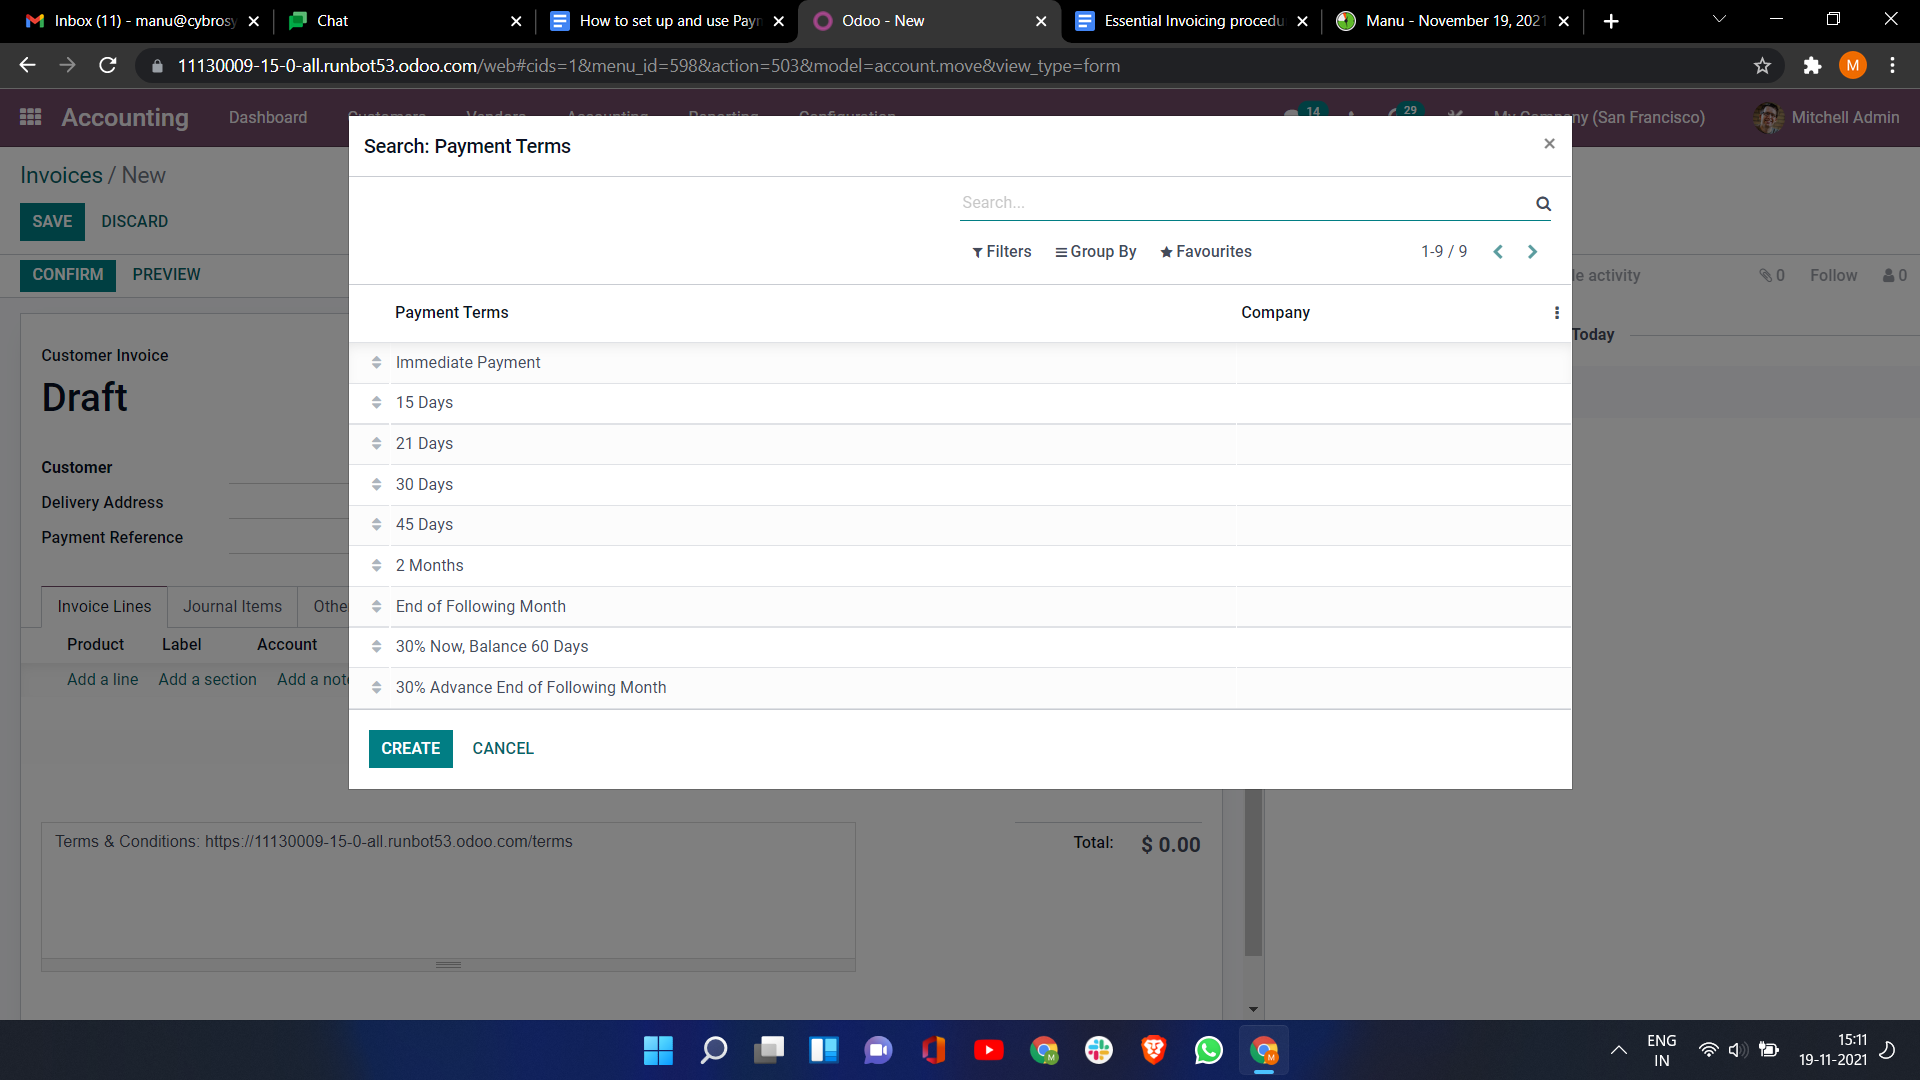
If you still can’t find the desired Payment Term, you can create it by clicking on the Create button. It will give you the Payment Terms configuration tab or page.
The Payment Terms feature is not unique to the Accounting module. It is available in all of the Modules in Odoo that require the assistance of Invoices. The Sales module uses the Payment terms along with the Invoices. It is effective in efficient invoice management. You can easily manage the Payment terms with the quotations and customers alike without any clutter, similar to the Accounting module.
Payment Terms with Quotations and Sales orders
You can use the Payments terms in Quotations to automatically define the specific Payment terms on all invoices generated from a Quotation. Similar to the Customer invoices that we have seen in the Accounting module; It is effortless to set up the payment terms in Quotations under the Odoo 15 Sales module.
Accounting module>Configuration>Payment Terms
For this, you have to finish the initial configurations on the Payment terms from the Accounting module as mentioned in the Customer invoices section of the blog. Define the Payment term for an individual customer from the Accounting module after the configurations; save the information and Open the Sales module. From the Sales; after module, create a new sales order by clicking on the Create button from the Dashboard of the Sales module as shown below.
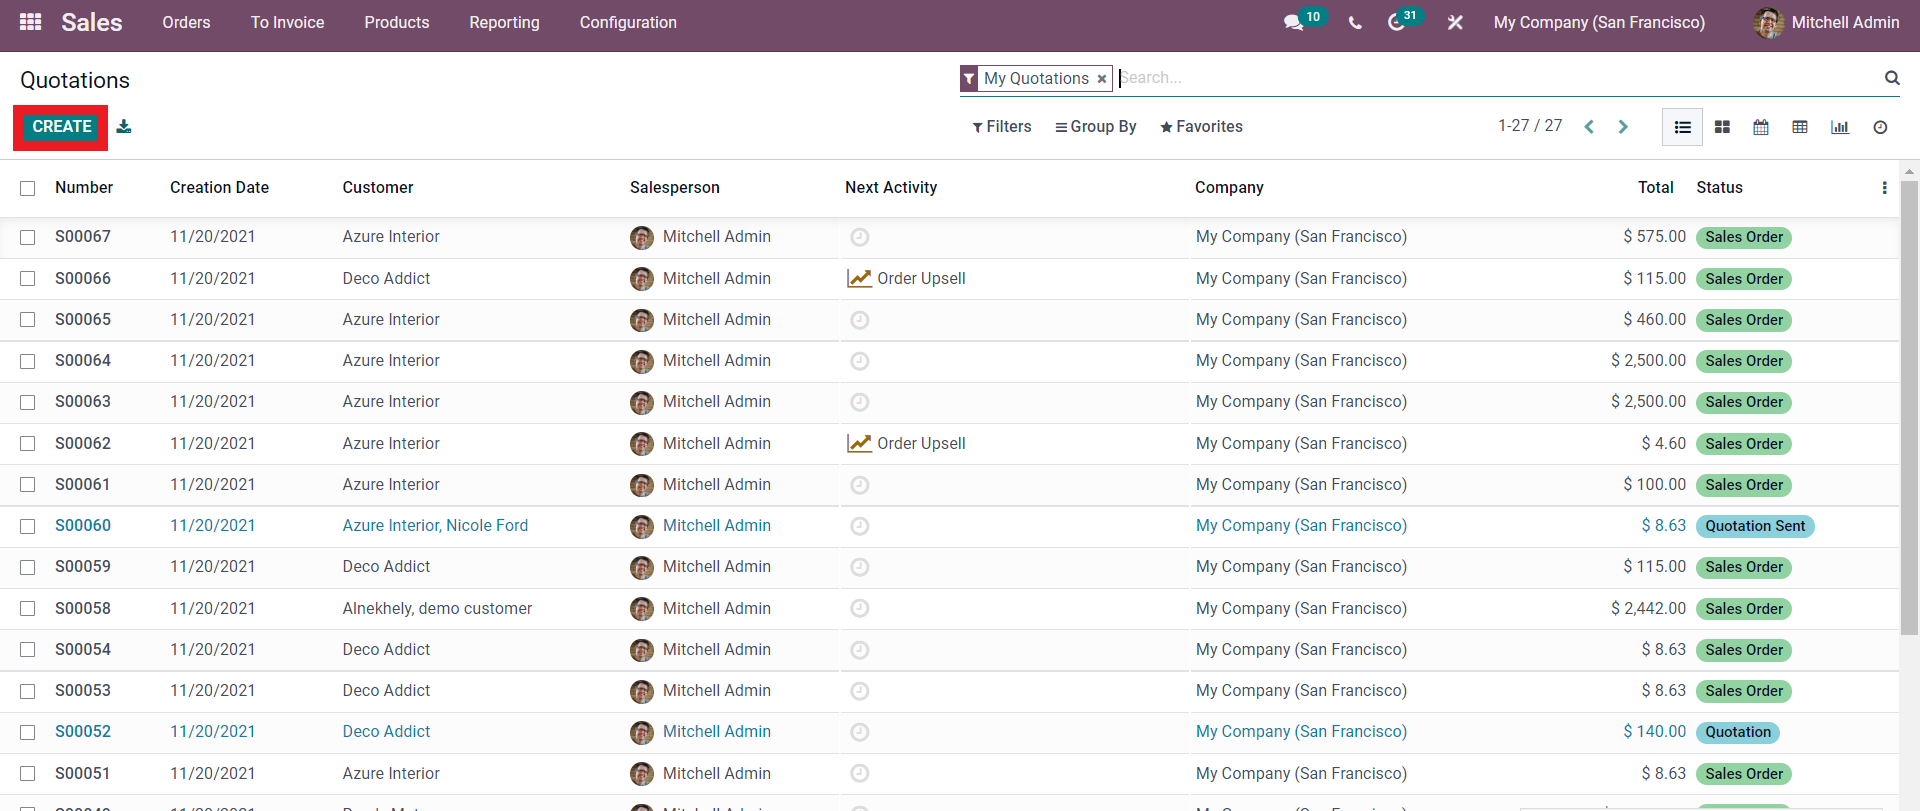
This will give you a configuration page as shown below to configure the Sales order.
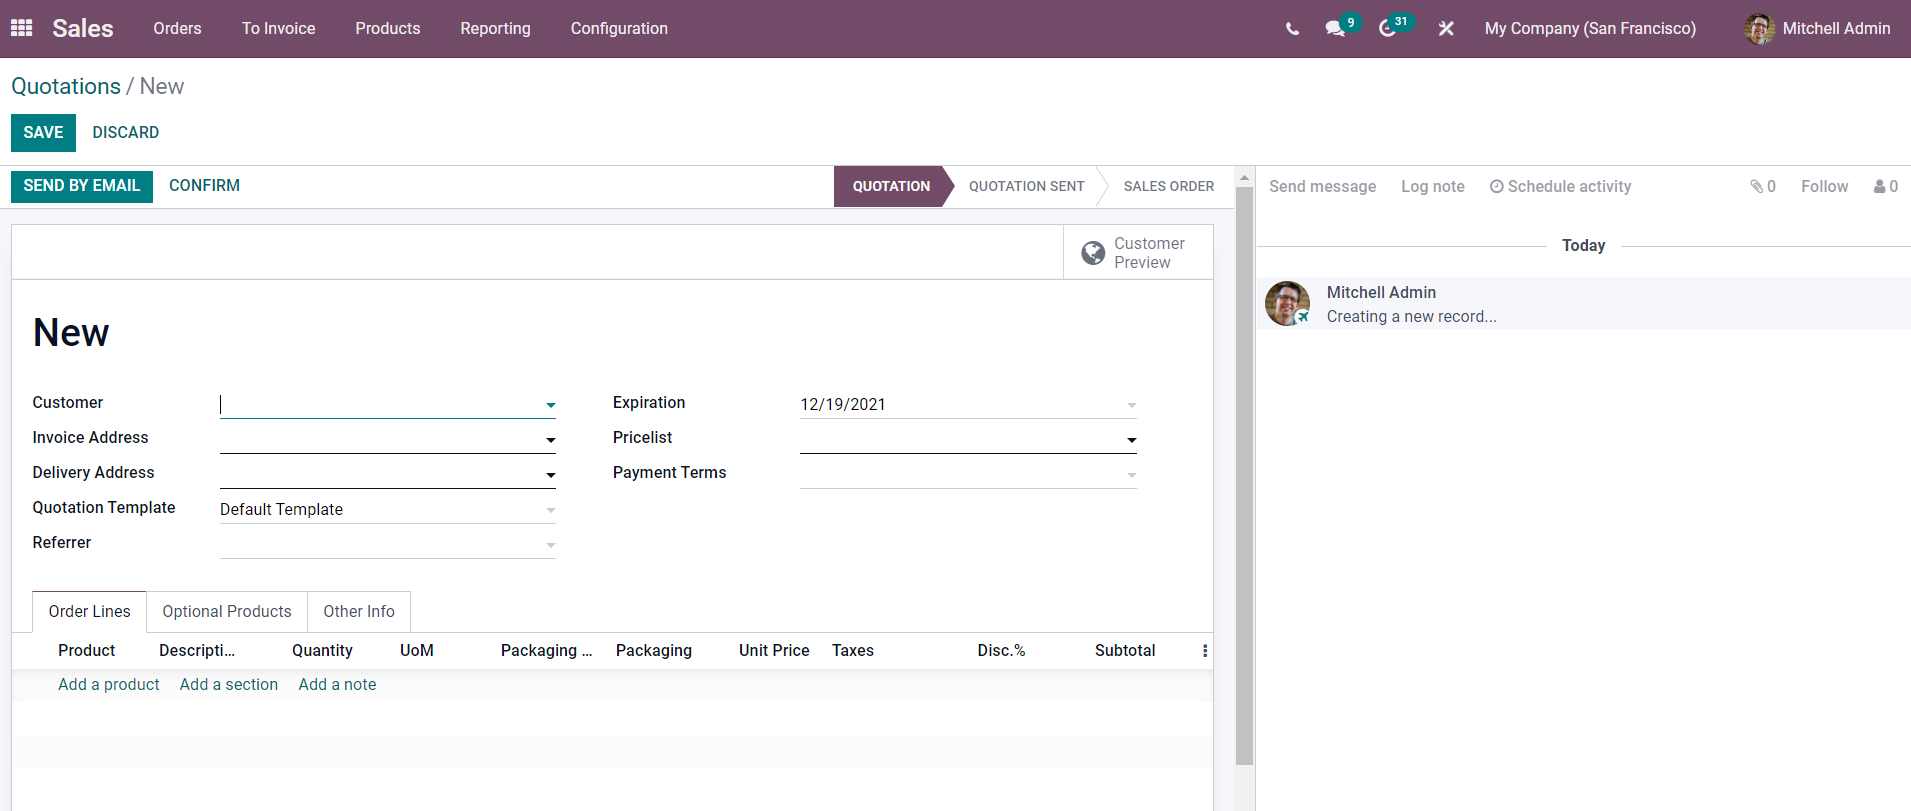
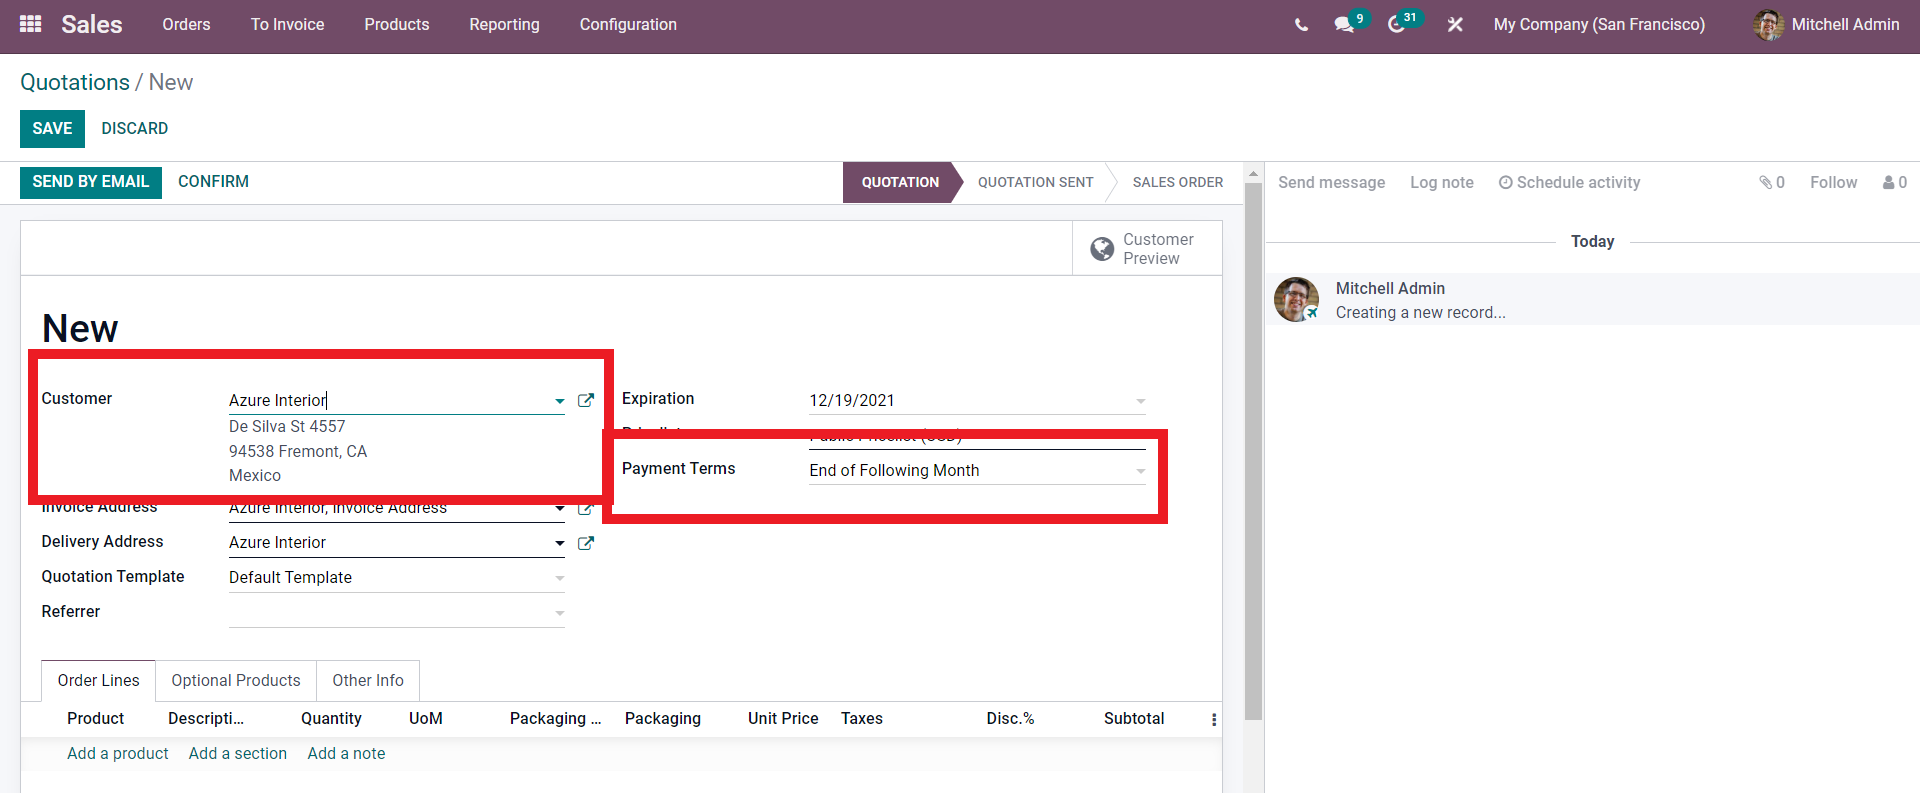
Add the customer, and the Payment Terms field will be automatically filled concerning the configurations you have given on the Accounting module shown below.
You can change the Payment Term by clicking on the Payment Term field and selecting from the drop-down list as shown below.
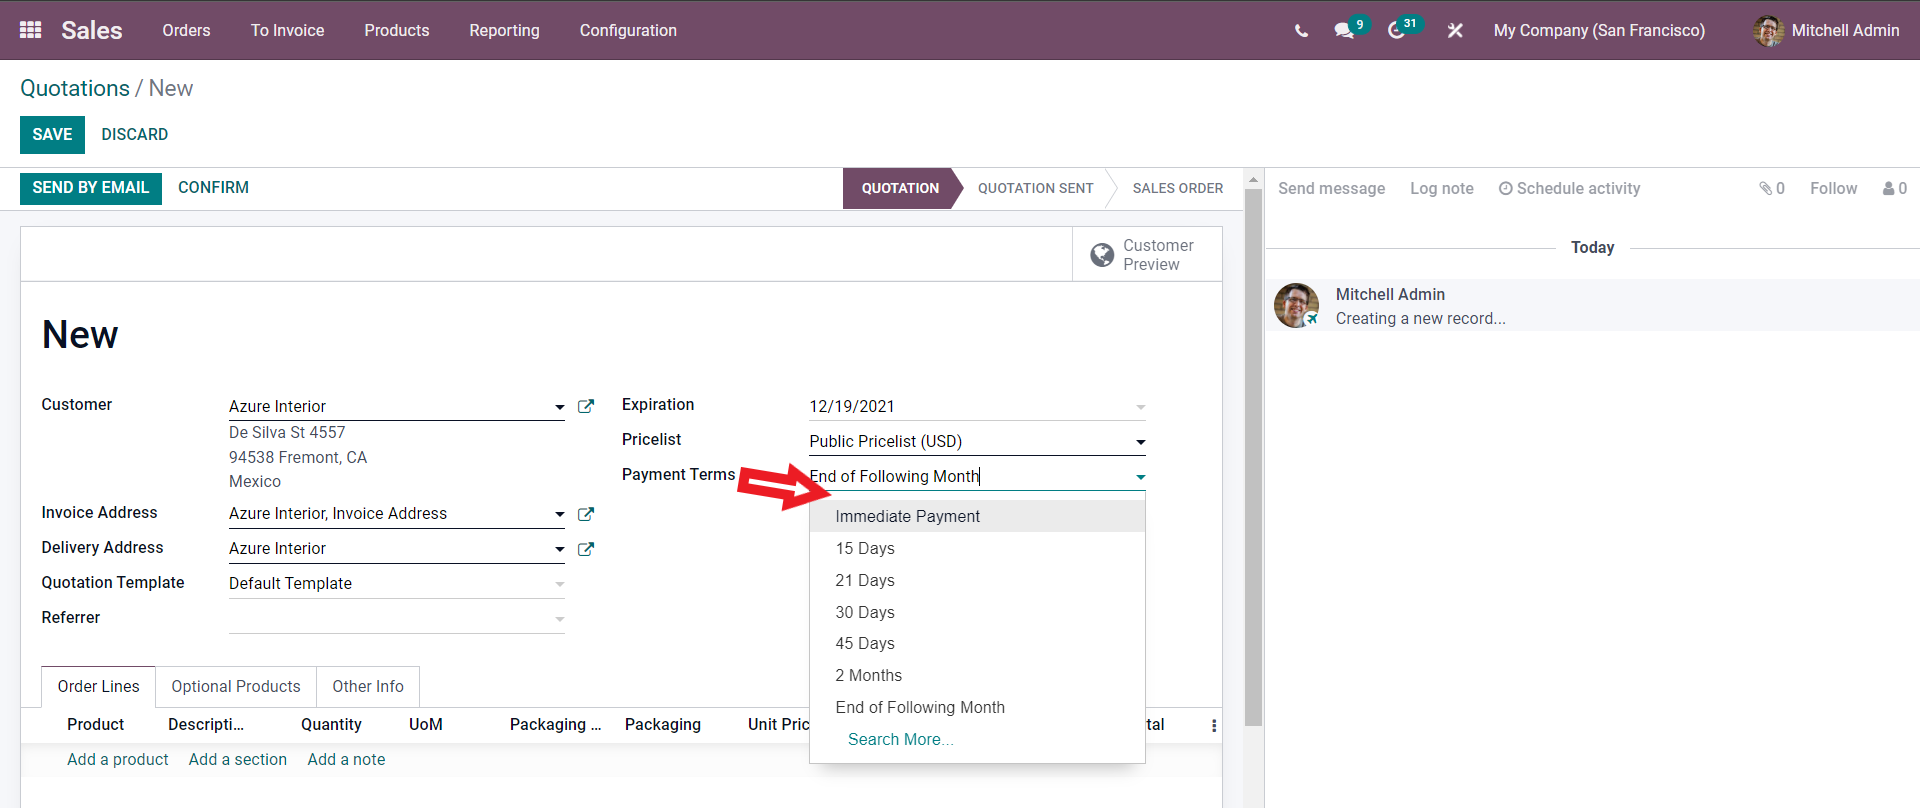
You can use the Search more option to search for more Payment terms after the configurations on the Sales Order. Click on the Confirm button to move to the next stage.
Validate the sales order and click on Create invoice to create the invoice. You can have a preview or draft view of the Invoice in the next stage, as shown below.
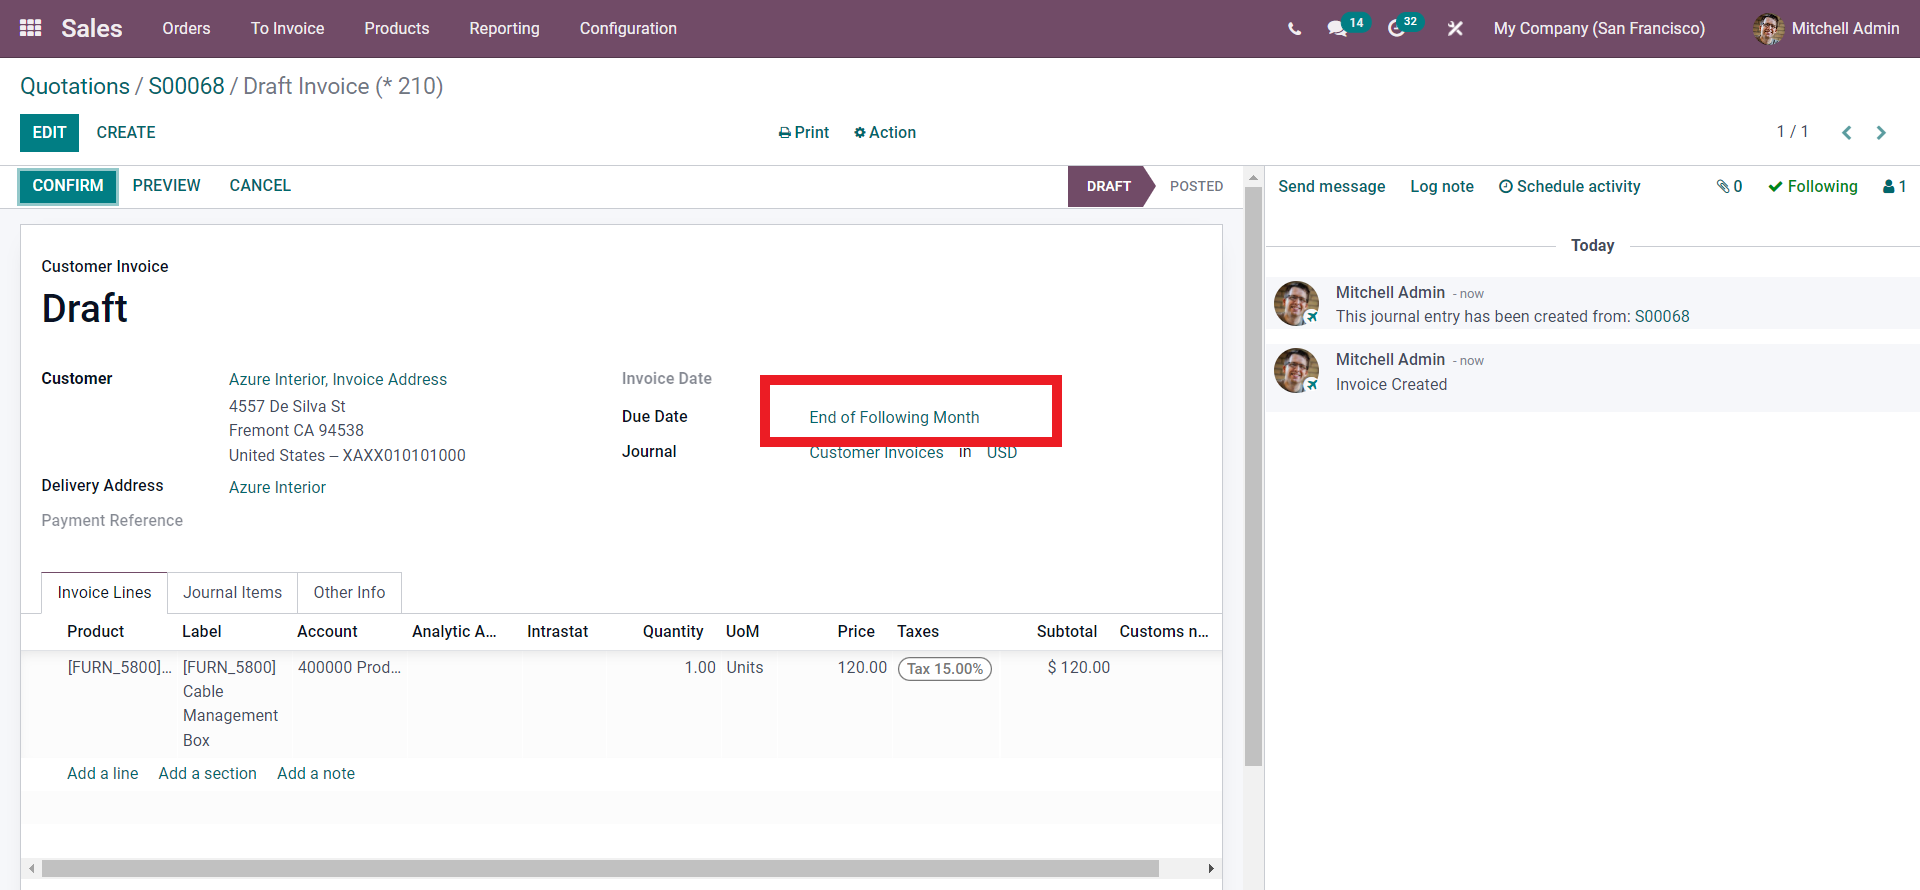
In the Draft invoice, the Due date section will provide the Payment Terms. Using the Payment Terms on Sales orders allows the customers and you to keep an active track of Installments in case of Vendor Bills. If you want to manage Vendor bills with several installments, order configurations can quickly execute Installments with the payment terms. Note that you don’t have to use the Payment Terms on Vendor bills all the time; for single Installments, you can use the Due date. The journal entries will also be kept concerning the Payments terms. Odoo takes every Due date into consideration and not just the Balance due date for improved data management efficiency, which will help smooth Reconciliation and Follow-up processes.