The Single Euro Payments Area (SEPA) is the unique payment integration area for bank transaction simplification designated in EURO by the European Union. It helps with the automation of bank wire transfers when payment orders are sent to the bank of your choice. SEPA provides support to the banks of 28 EU members, as well as Andorra, Iceland, and Norway. Through SEPA Direct debit, customers can easily collect future payments from the bank. Users can effectively pay bills using the SEPA by using Odoo ERP. The manager can create a SEPA file with bank transfers at the end of the day and submit it to the bank.
After banks have processed payments, we can import account statements into Odoo. You can simply set SEPA payment methods for consumers with the help of the Odoo 16 Accounting module. Let's examine how to use the SEPA direct debit capability to collect consumer payments. Enable Odoo 16 Accounting's SEPA Direct Debit capability.
To make payments over SEPA, a user must enable the SEPA direct debit feature from Odoo 16 Settings. You may access the Customer Payments area by selecting the Settings menu located beneath Configuration. As seen in the screenshot below, enable the SEPA Direct Debit (SDD) field to accept payments via the Euro SEPA service.
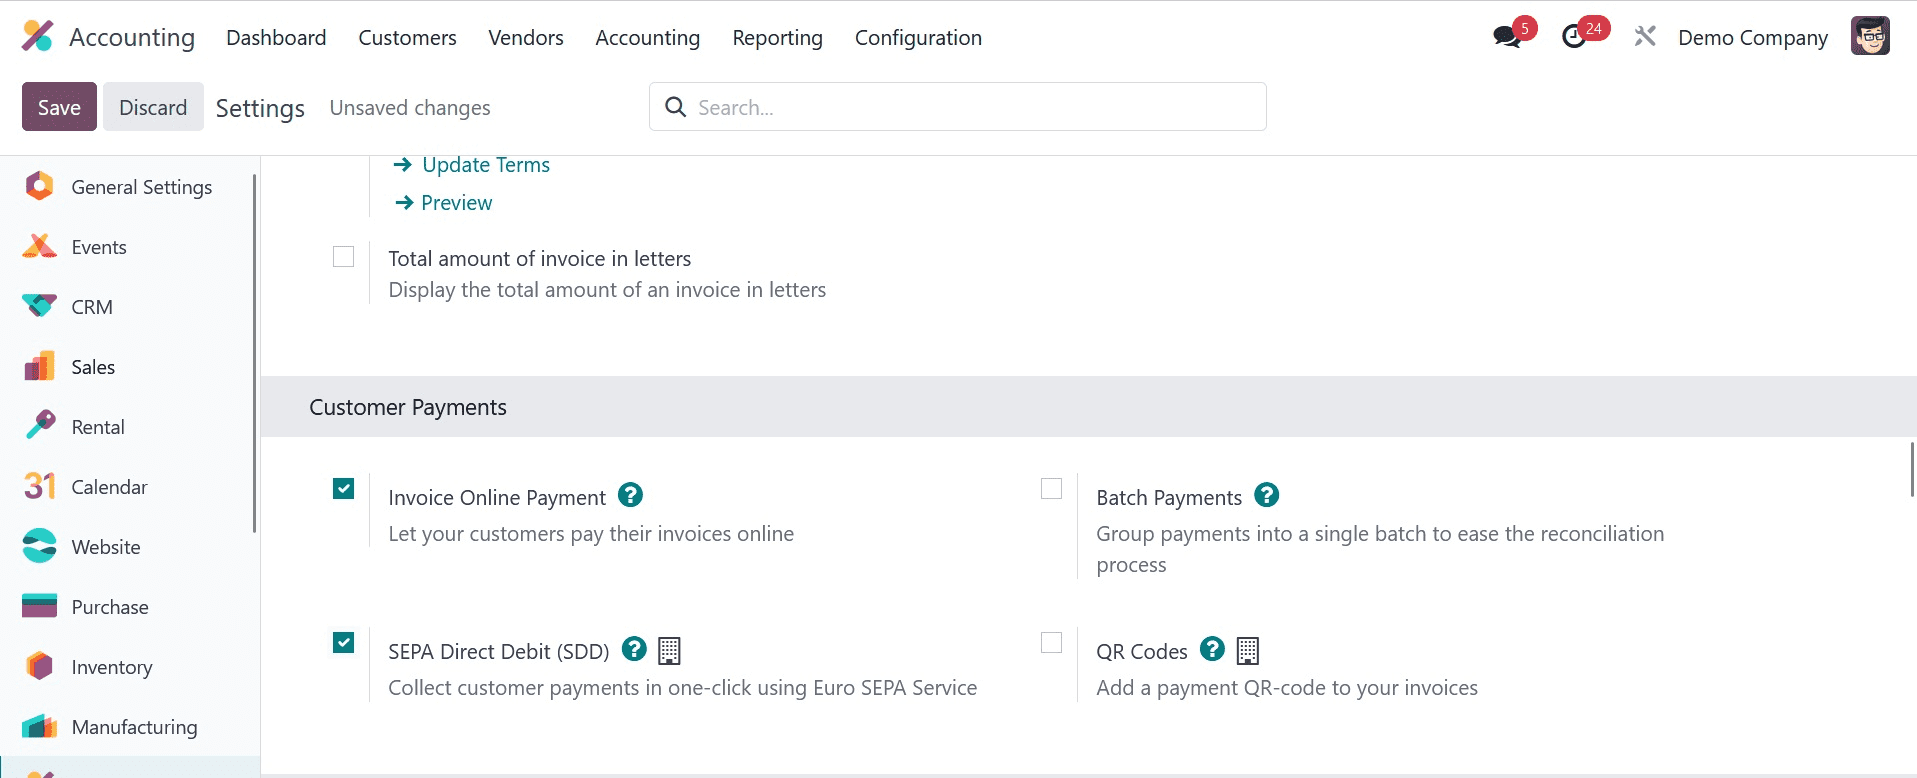
In the Creditor Identifier section, enter the number that your bank or institution gave. Later, to use the particular functionality in Odoo 17, click the SAVE button.
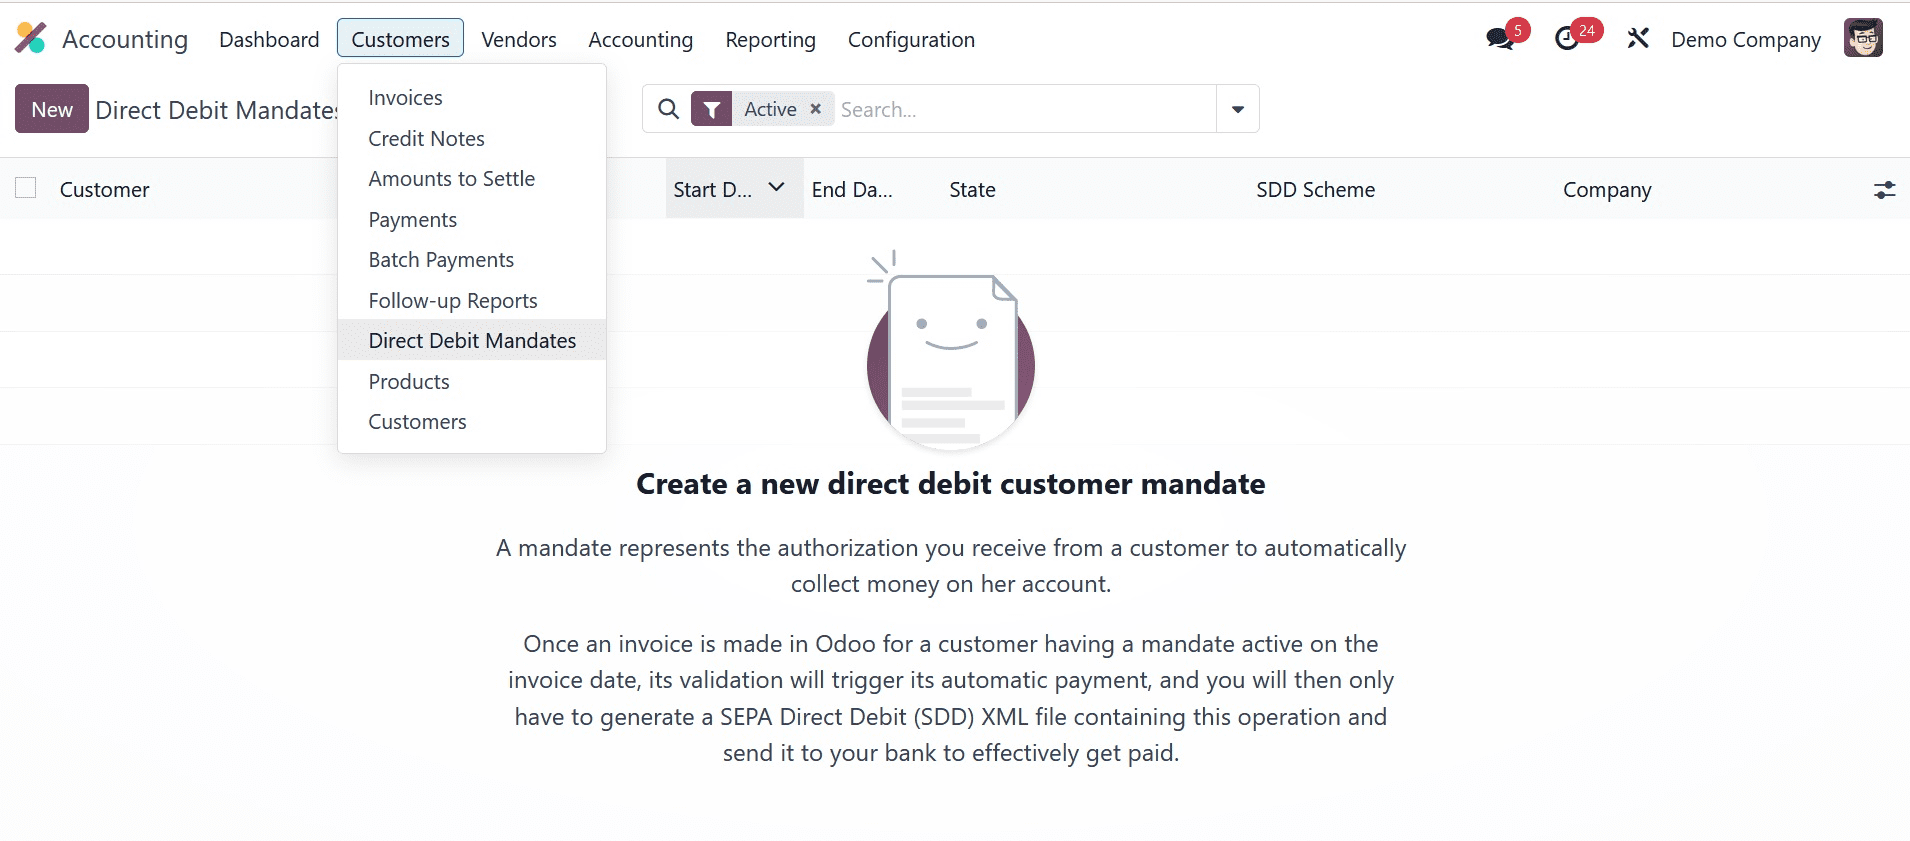
A mandate is when a customer permits money to be automatically deducted from their account. SEPA's direct debit mandate is reflected in the documents that clients sign authorizing money to be taken out of their bank accounts. Using the Odoo 17 Accounting module, creating a mandate for a customer is simple. As seen in the screenshot below, choose the Direct Debit Mandates from the Customer tab and click the New icon.
Select the customer in the Customer field whose payments are governed by a specific mandate in the new window. Afterward, as shown in the screenshot below, select the journal to receive SEPA direct debit payment for this mandate and set the customer's account to collect a price within the IBAN box.
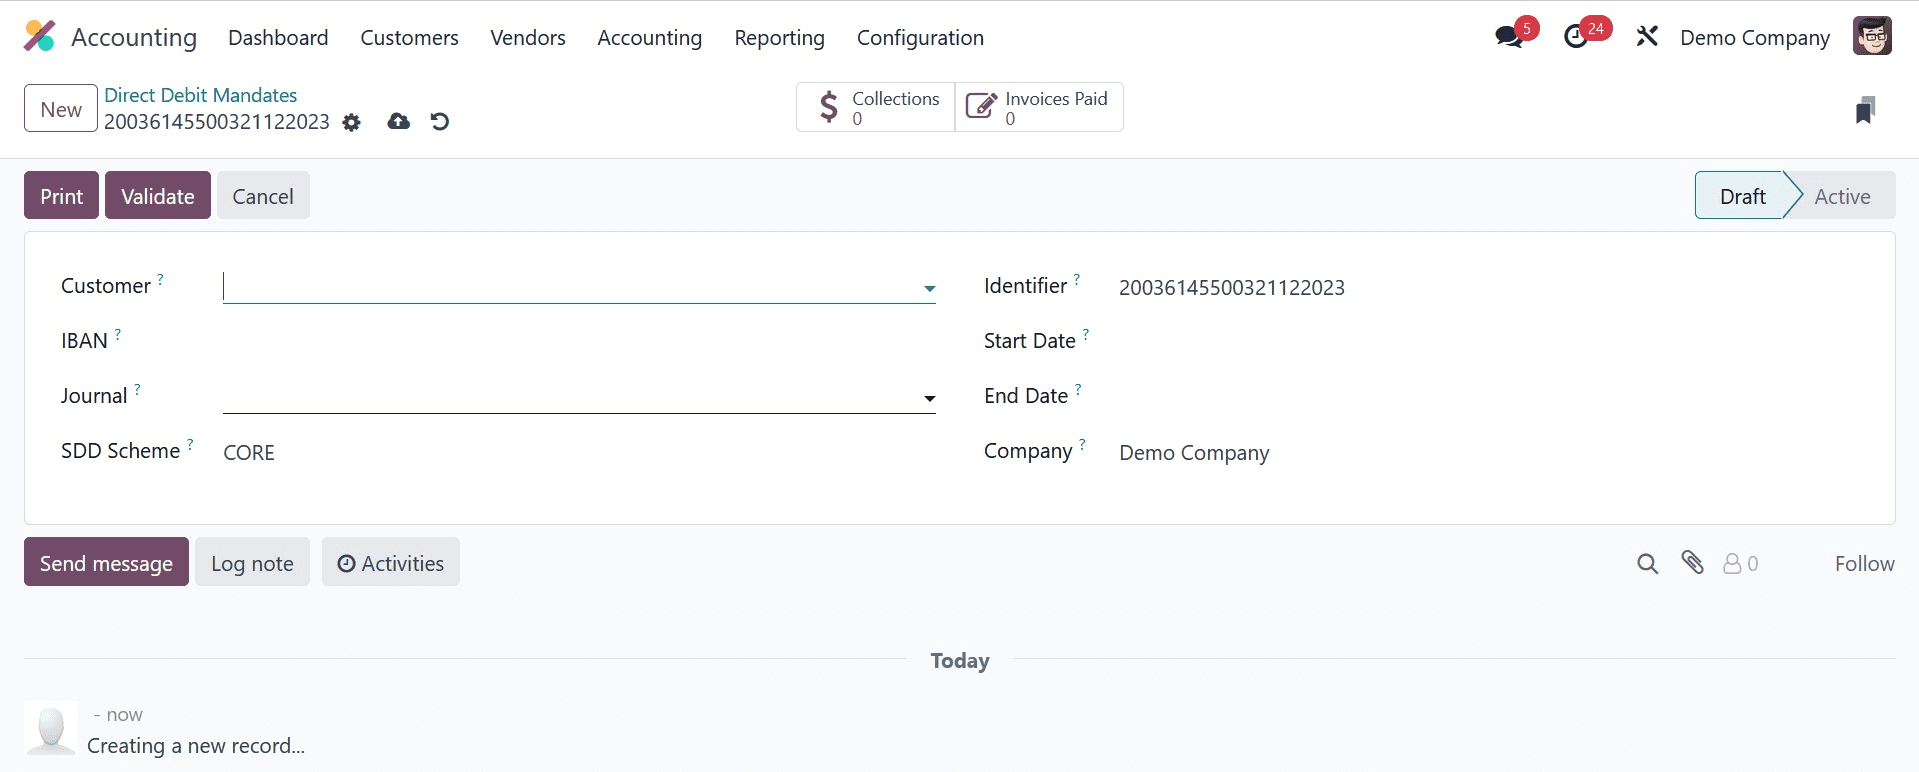
There are two parts to the SDD Scheme: CORE and B2B, which is an optional program for company payers. As shown in the screenshot below, we applied a unique identifier for the mandate and chose the CORE option under the SDD scheme.

In the Start Day field, provide the day the mandate was used, along with your company's information. You need to email the document to your customer after storing the details and printing it by clicking the PRINT icon.

As soon as the client or customer signs the mandate, users can attach it to the conversation. The mandate can then be easily validated, and it can be closed or revoked at any moment.
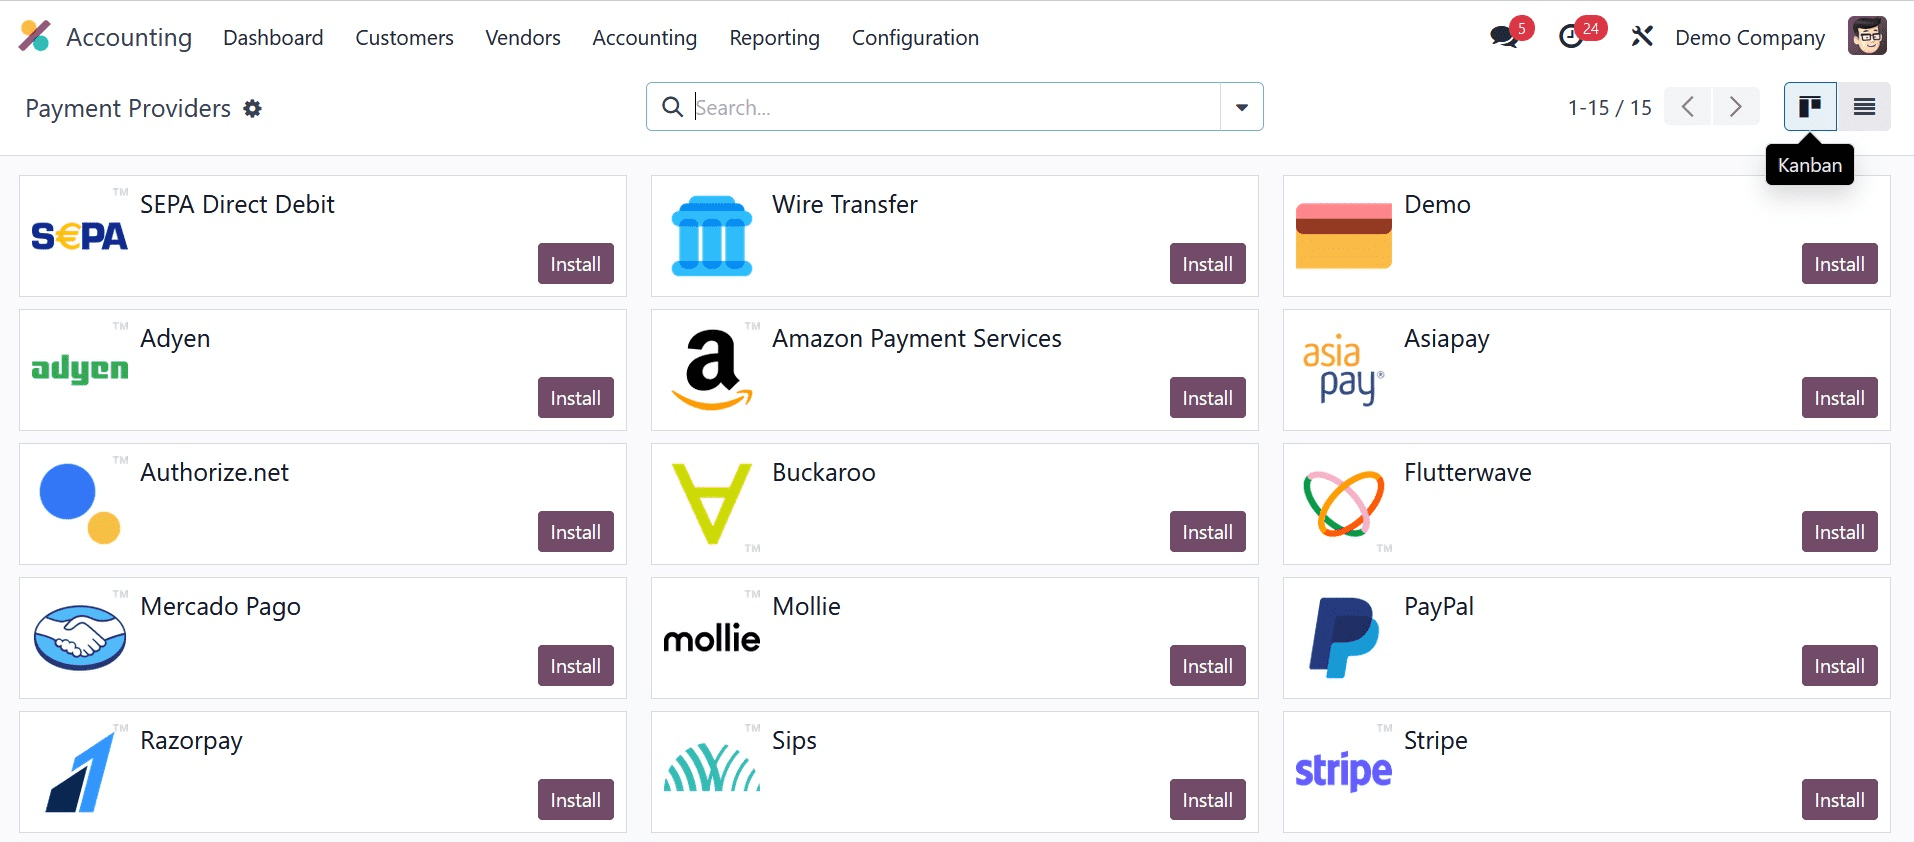
After SDD is activated as a payment provider, we can set up SEPA direct debit as the payment option in eCommerce or the customer portal. Select the Payment Providers option located beneath the Configuration tab's Payments section. Before you reaching the new page, a list of all payment sources becomes available. In the Kanban view, click the SEPA Direct Debit Payment Provider, as indicated in the screenshot below.
The code and name of a payment provider are visible to the user on the opened page. As seen in the screenshot below, you can activate SEPA Direct Debit by selecting the Enabled option in the State field.
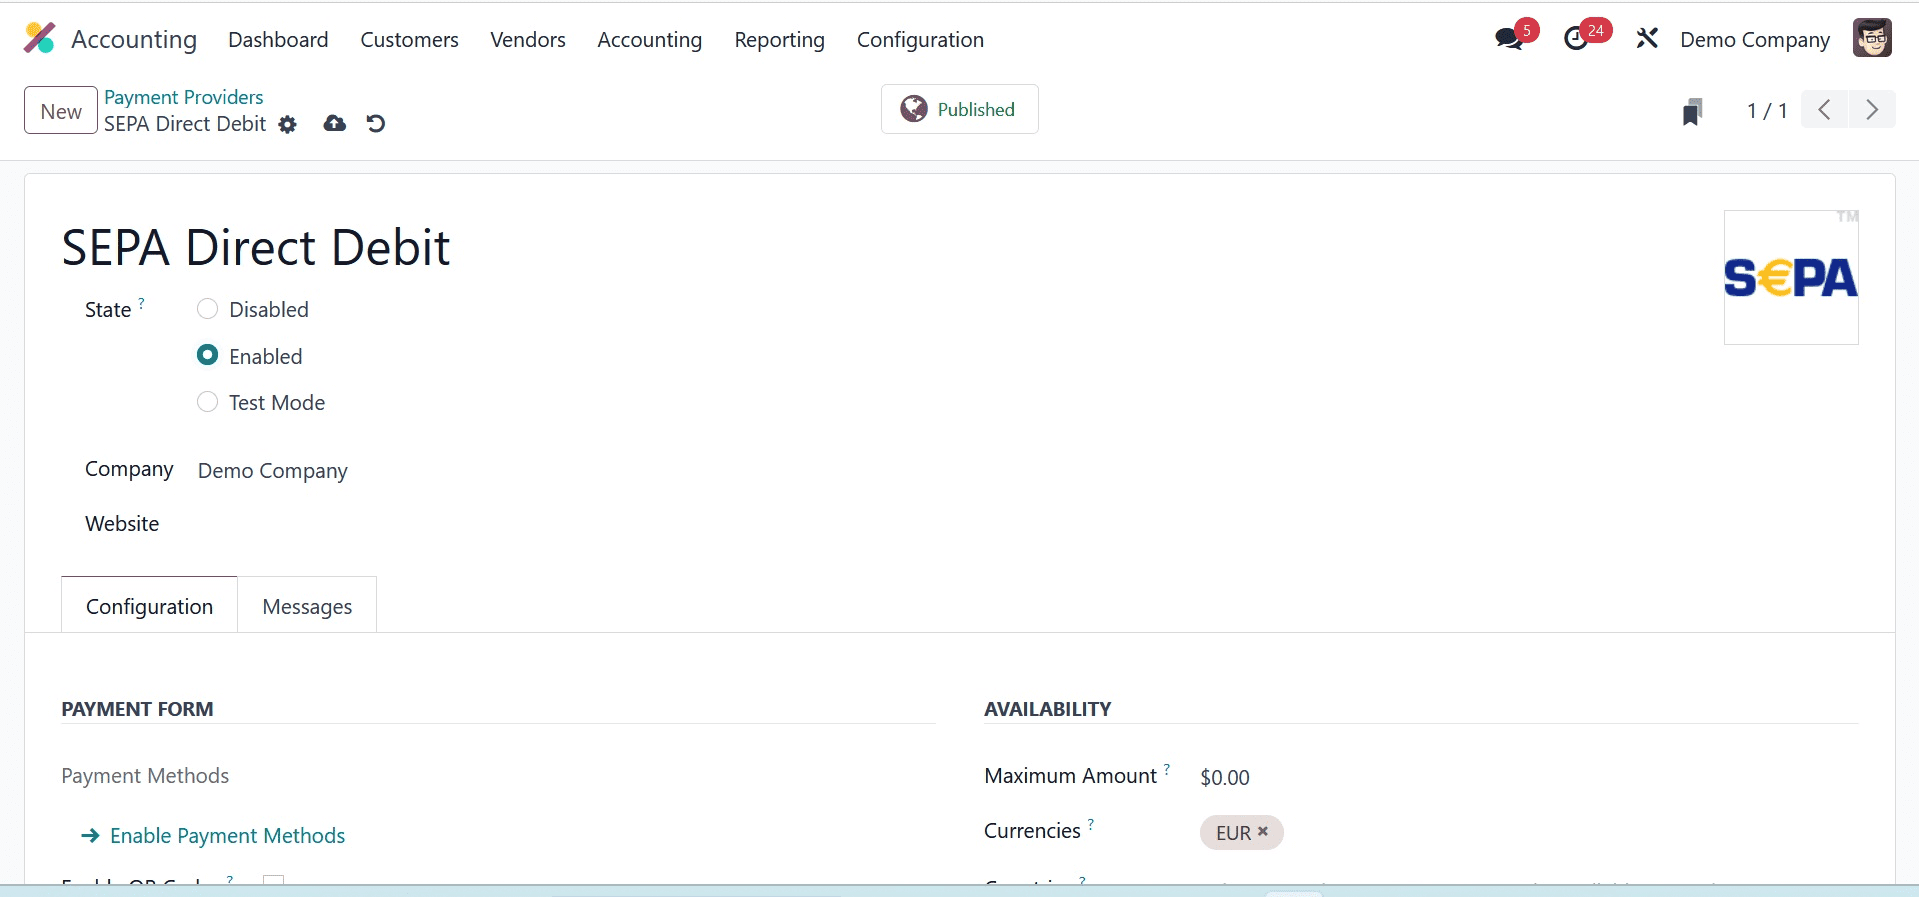
You can apply the customer provider's description in the Displayed as the area underneath the PAYMENT FORM section, which is located beneath the Configuration tab. Additionally, beneath the Maximum Amount, the user can specify the maximum payment amount that is eligible for SEPA Direct Debit. If the space is left empty, the SEPA payment provider will apply fees.
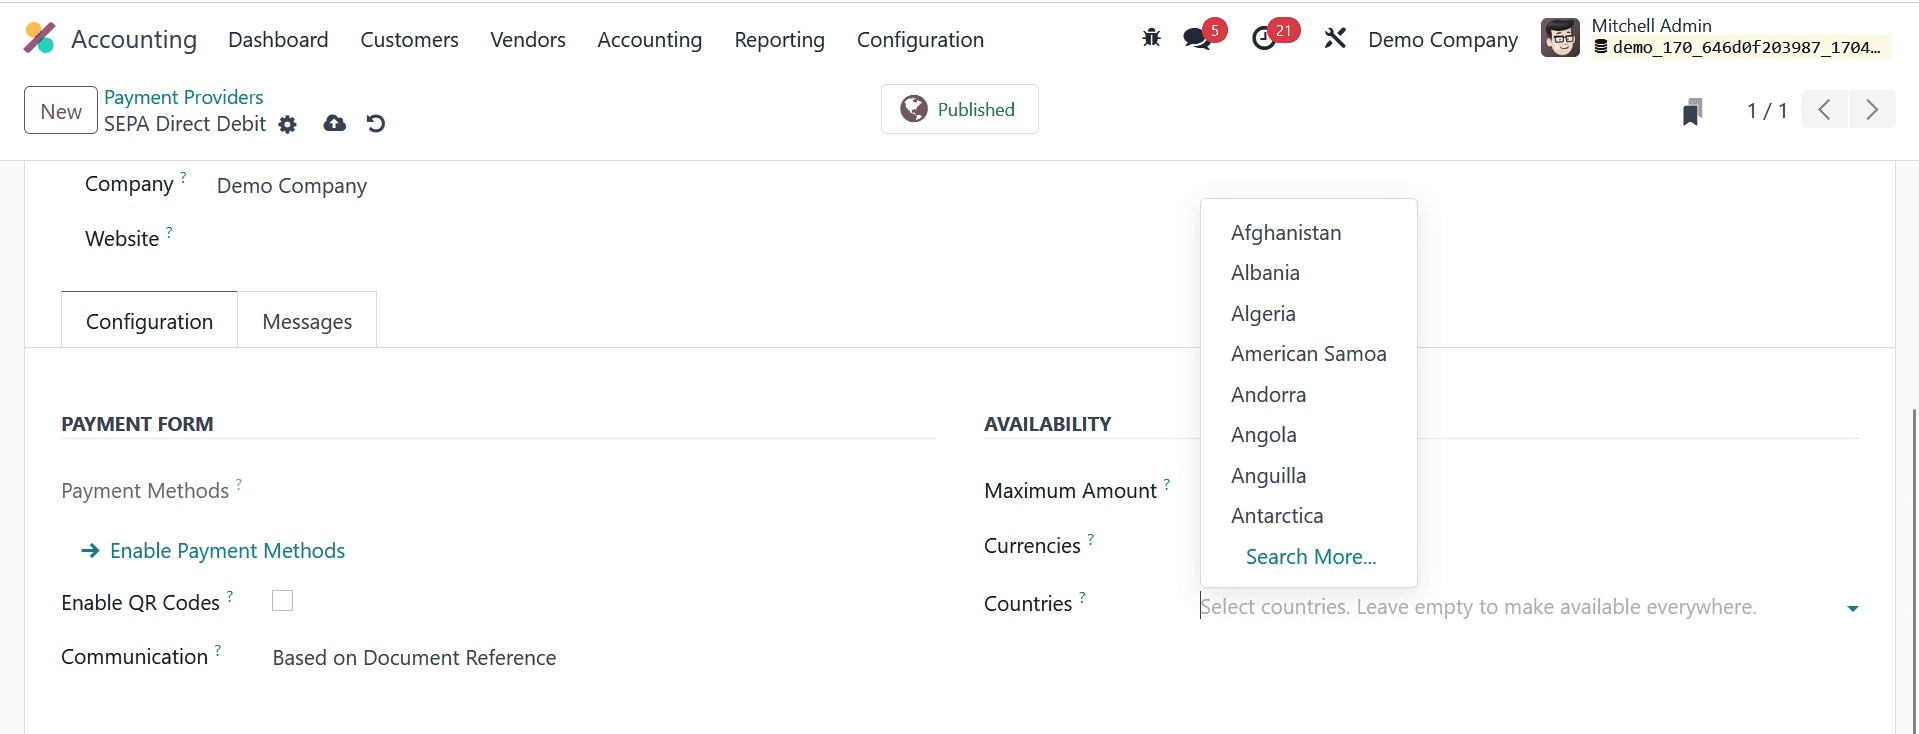
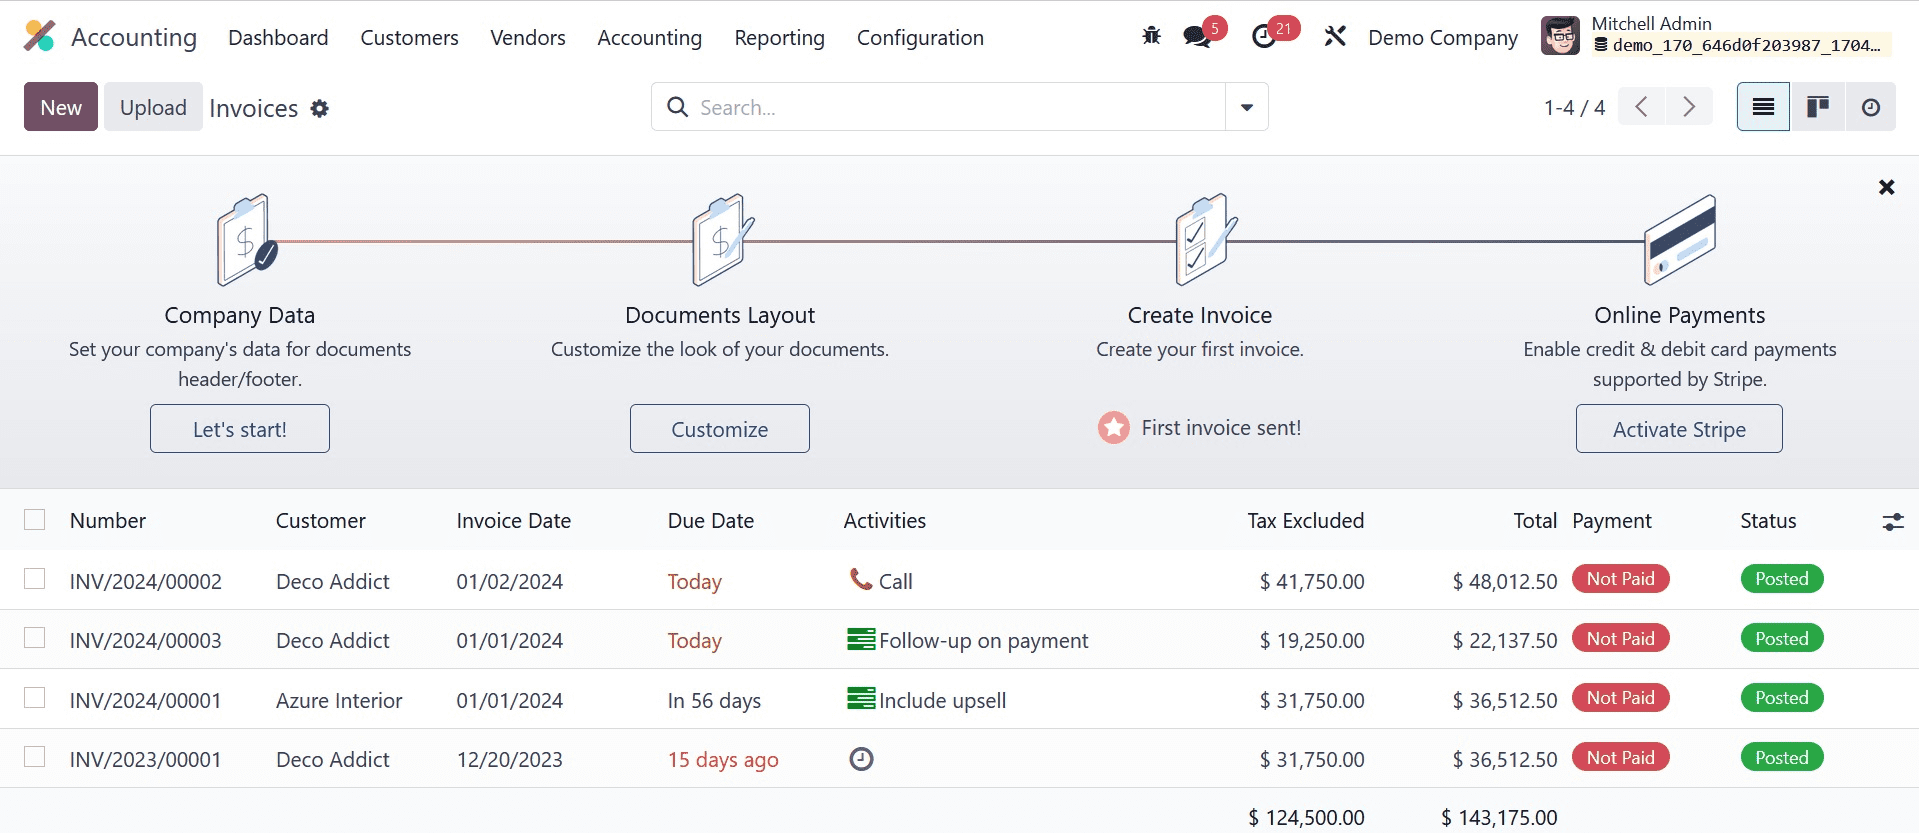
The user can list all of the nations that are relevant to a certain payment provider in the nation's box. Next, we'll look at how you use SEPA to settle a customer invoice. A user can view a record of every produced invoice by selecting the Invoices menu under the Customers tab. To create a new invoice for a customer, click the NEW button, as seen in the screenshot below.
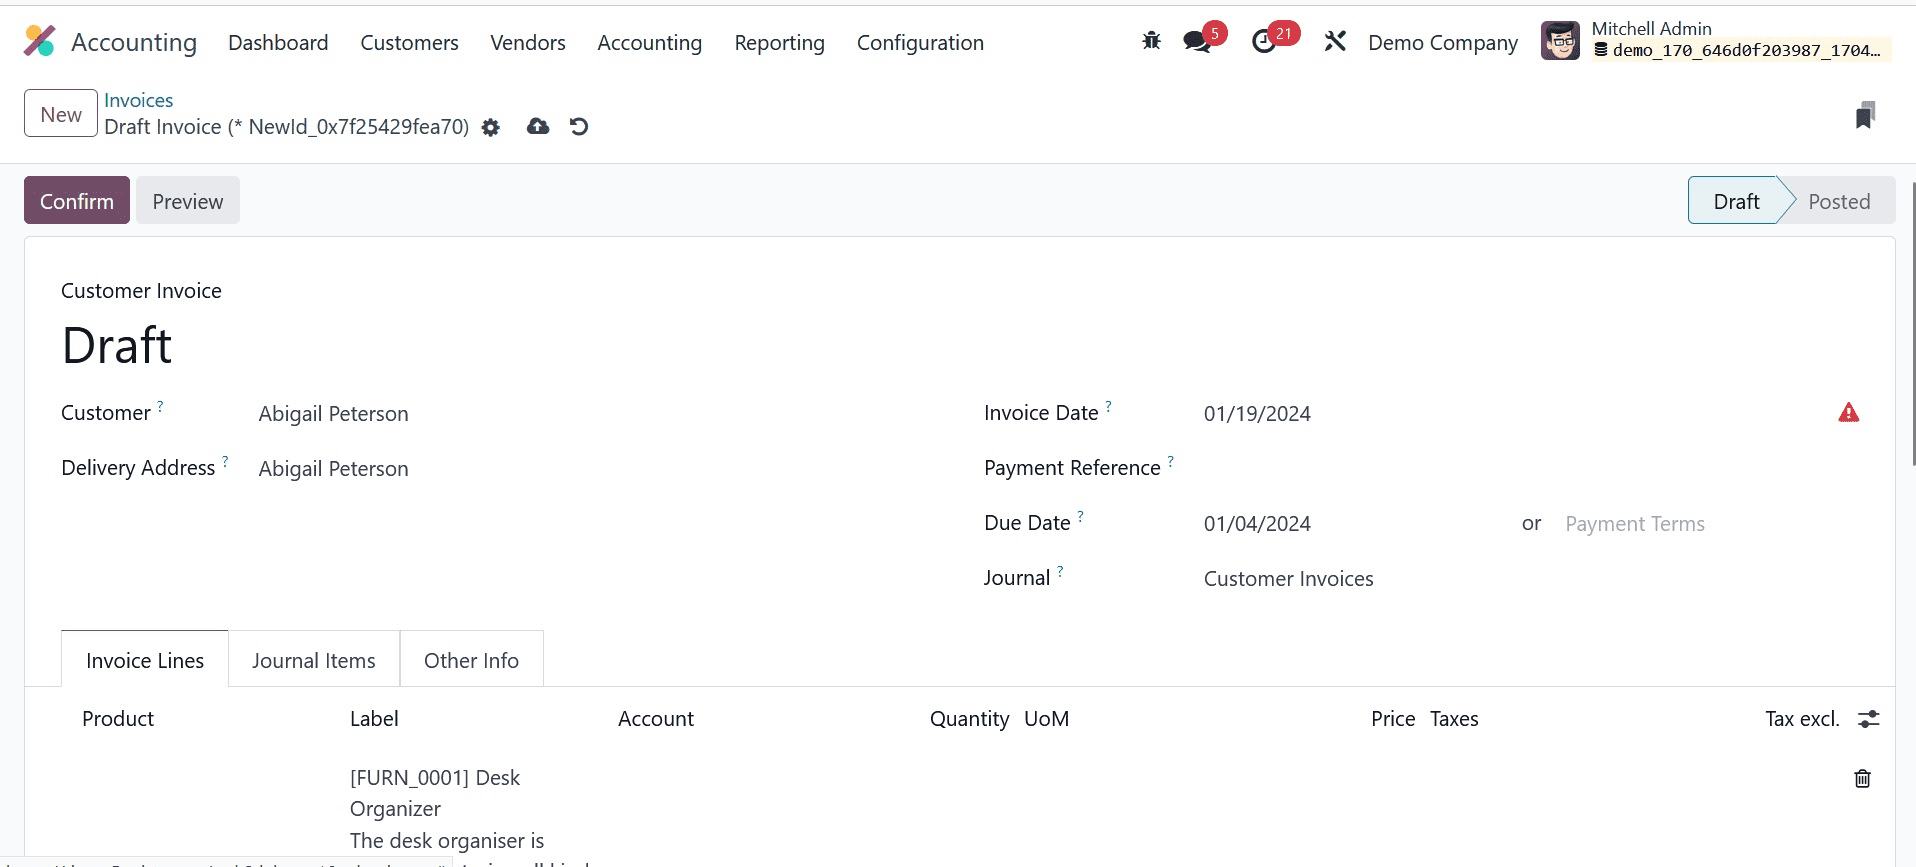
Choose your customer and enter the Delivery Address for the customer invoice on the open page. Then, as shown in the screenshot below, you need to apply the Invoice Date, Journal, and Due Date for your particular invoice.

Click Add a line, then select your product below the Invoice Lines tab. As seen in the screenshot below, we select one quantity of Ply Layer and click the CONFIRM icon.
Following approval, the stage was moved from DRAFT to POSTED. By selecting the REGISTER PAYMENT option on the Invoices page, we may move forward with paying a client invoice.

Select your Journal as the Bank while using the Register Payment method. As seen in the screenshot below, users can choose to pay for client bills using the created SEPA Direct Debit.

Once the required information has been entered, click the CREATE PAYMENT icon. The Invoices pane will display an IN PAYMENT icon once the payment has been completed.
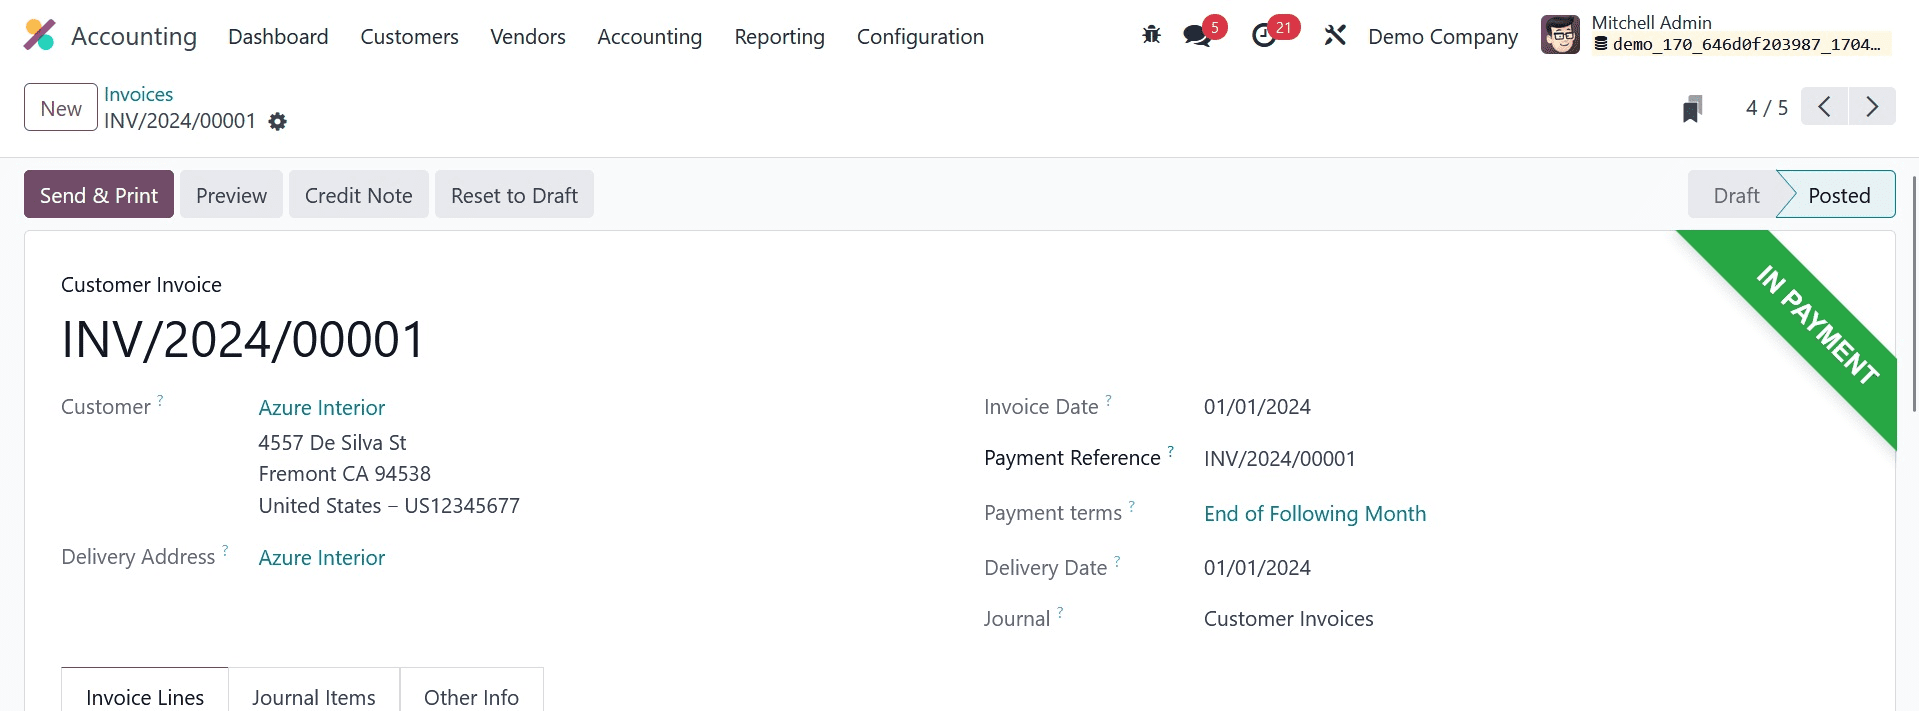
Consequently, it's easy to use SEPA Direct Debit to make payments within Odoo 17. The Odoo 17 Accounting module's reporting capability allows a business to evaluate invoices. Users can see a graphical version of the Invoice Analysis menu, which is accessible through the Reports tab. The user may examine the line chart in the graph view with the invoice date on the X-axis and the untaxed total amount on the Y-axis, as demonstrated in the example below.
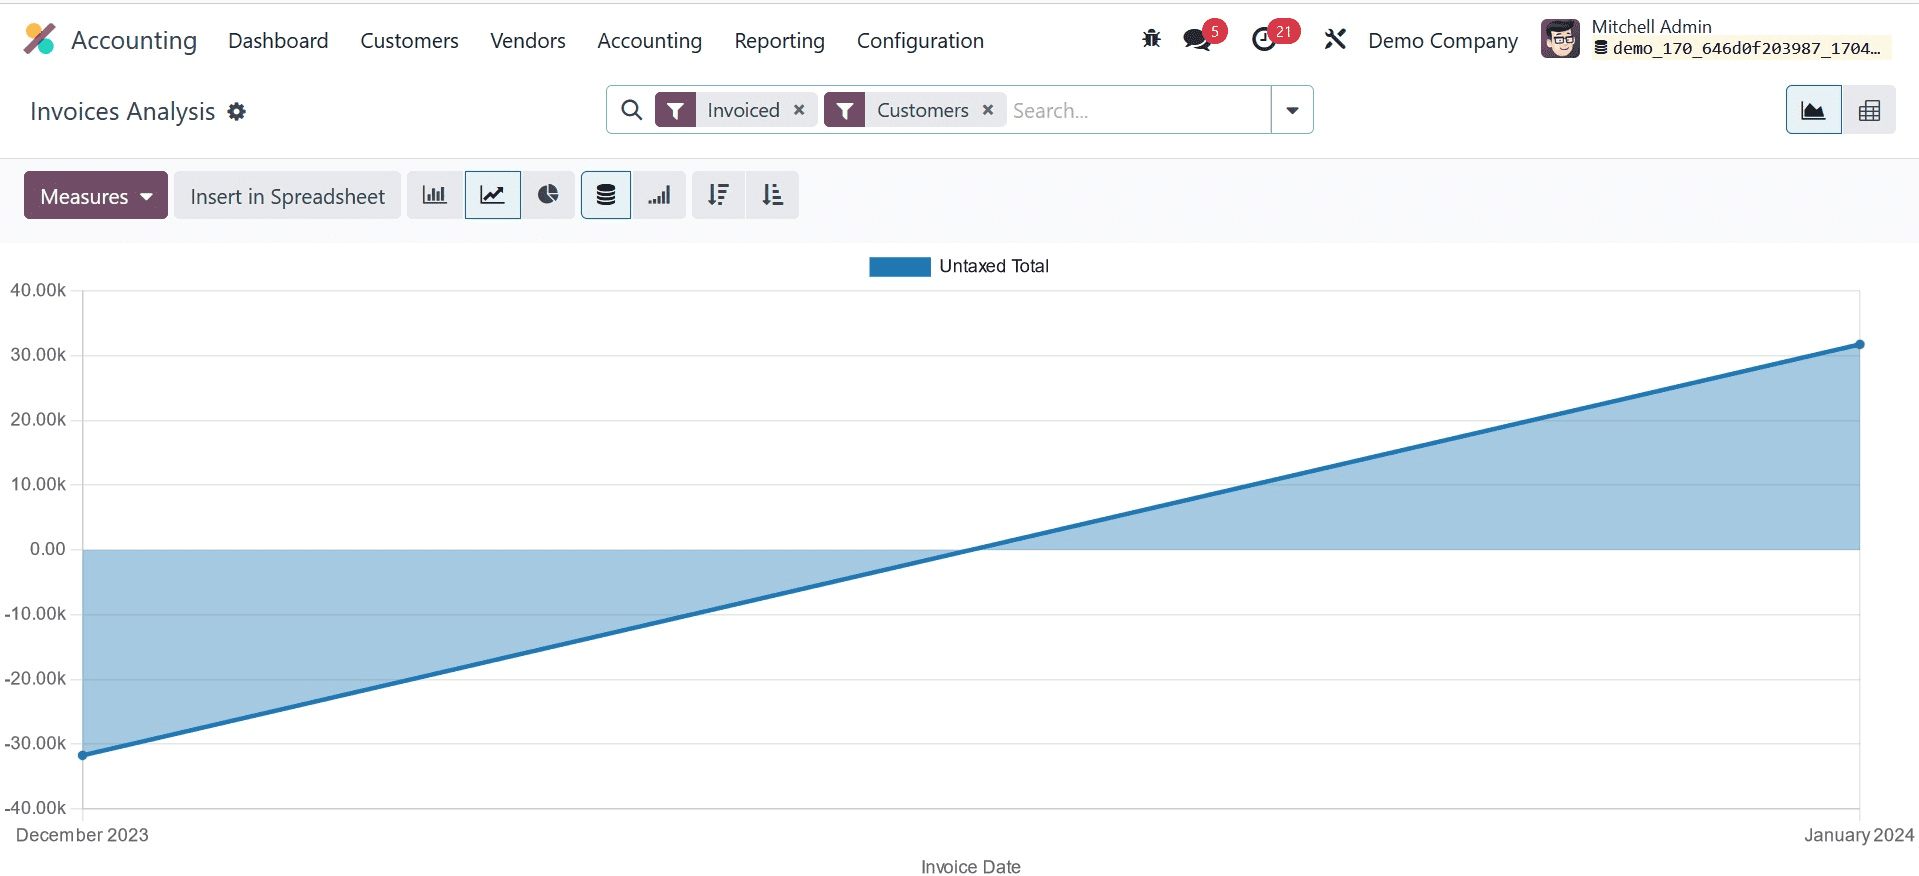
By selecting the MEASURE icon, users can apply various values to the graph, as seen in the screenshot above. The reporting tool in Odoo 17 allows us to assess the performance of customer invoices.
With Odoo ERP support, a company's SEPA Direct Debit payment transaction is simplified. Managing customer invoice transactions with the SEPA payment provider is a simple process. Using the Odoo ERP software, a business can customize transaction areas for clients or customers.