Odoo serves as a potent instrument for overseeing Point of Sale (PoS) transactions within retail and hospitality industries. Digital invoices provide improved tracking, organization, professionalism, customer satisfaction, and financial insights. They enable clear record-keeping of transactions, centralized organization of client information, and foster trust. Analyzing invoicing data offers valuable insights into revenue streams, customer behavior, and business performance. The system offers a user-centric approach, allowing businesses to select customers or create new profiles during transactions easily. The invoicing process is designed for efficiency, with users generating invoices with just a few clicks and printing them directly from the PoS interface.
In today's retail landscape, efficient invoicing is crucial for maintaining smooth transactions and keeping customers satisfied. Businesses may expedite their invoicing procedure and guarantee precision and professionalism with each transaction by utilizing Odoo Point of Sale (PoS). Let's delve into the ins and outs of managing invoices with Odoo PoS.
Issuing Invoices
One of the key features of Odoo PoS is its ability to issue and print invoices for registered customers upon payment. These invoices serve as official records of transactions and are seamlessly integrated into the corresponding accounting journals, providing a comprehensive view of financial activities.
To configure the default journals used for orders and invoices, navigate to the Odoo POS Settings window and access the Accounting section. Then, we can choose the point-of-sale journals from the Default Journals area of the Accounting tab.
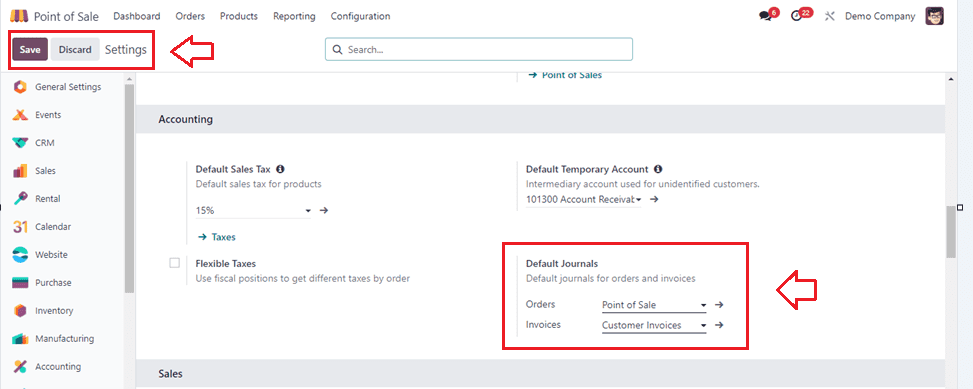
You can see the Orders as Point of Sale and Invoices as Customer Invoices from the above screenshot.
Invoicing a Customer
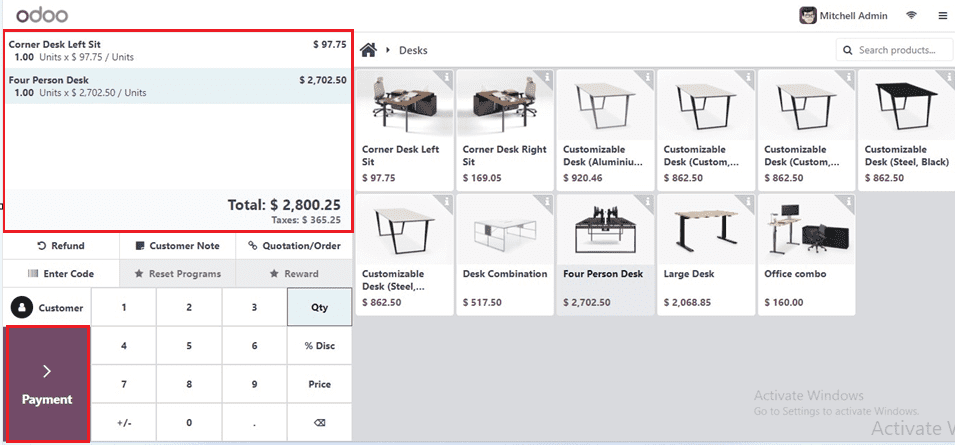
After saving the settings, we can create a sample order from an existing shop session and choose the products. Then proceed with the payments procedure using the Payments button.
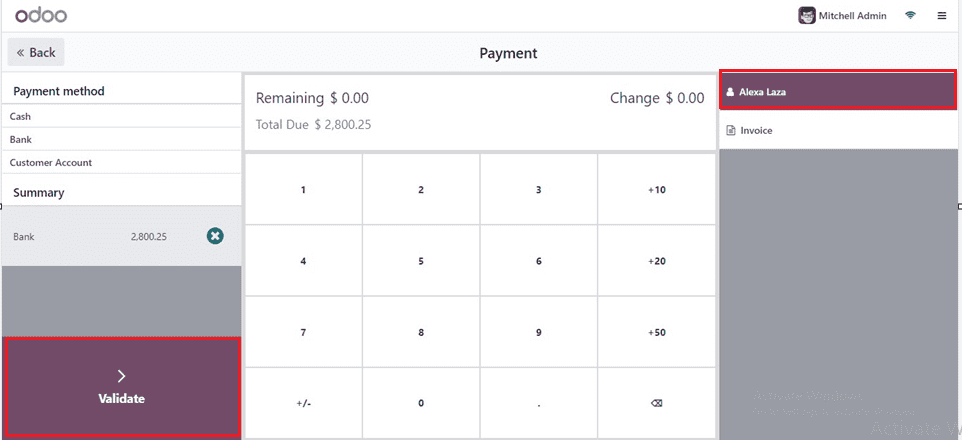
When processing a payment, simply click on "Invoice" below the customer's name to generate an invoice for the order. Select the desired payment method, validate the transaction, and voila! The invoice is automatically created and ready for download or printing. IImportantly, an invoice can be dispatched only after selecting a customer.
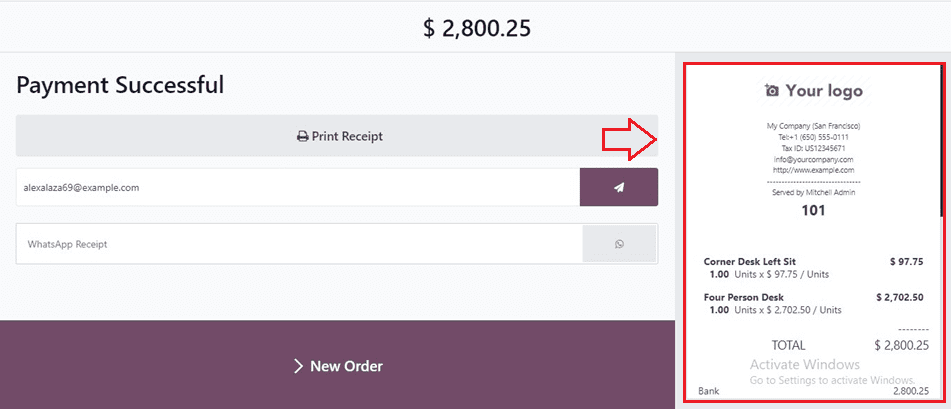
After validating the invoice, we can see the invoice from the right side of the window as shown below.
Retrieving Invoices
Easily access all past invoiced orders through the POS dashboard. Navigate to the Point of Sale Orders section from the Orders menu to view a comprehensive list of transactions.
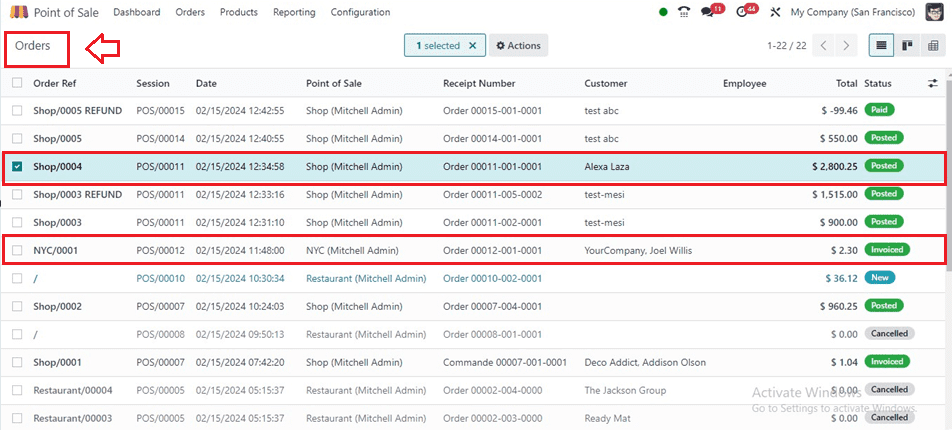
Invoiced orders are identifiable by the "Invoiced" status in the Status column. To retrieve an invoice, simply select the desired order and click on "Invoice" within the order form.
Configuring Invoice Specifics
To configure various invoice features in Odoo's Point of Sale module, begin by navigating to the Point of Sale section in the Configuration Settings window. Once there, select the specific Point of Sale you wish to enable invoicing. Within the configuration options for that Point of Sale, locate the Bills & Receipts section. Here, enable the invoicing option and designate the appropriate journal for invoice creation from the ‘Automatic Receipt Printing’ option This straightforward process ensures that invoices are seamlessly integrated into your Point of Sale transactions, providing a comprehensive record of sales activities.
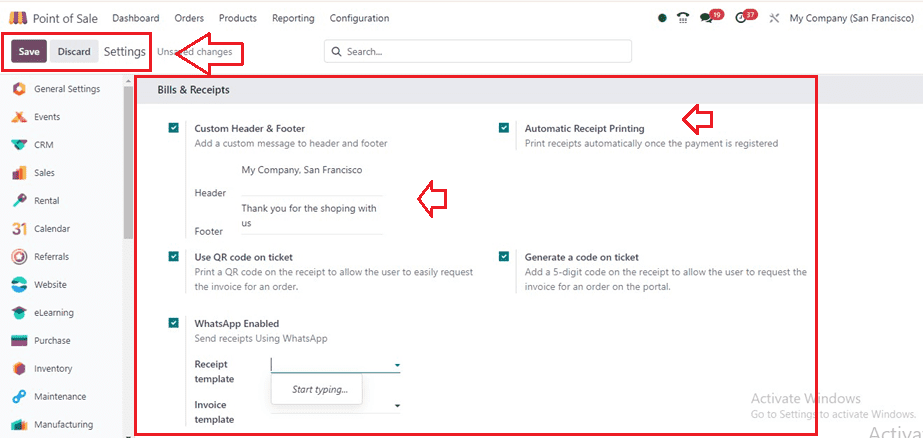
Invoice Headers and Footers
To change the Header and Footer parts of the invoices your business generates, turn on the Custom Header & Footer section. Here, I've changed the invoice header to show the name of the business merely, and I've added a little thank-you note to the footer.
Checking the Invoice Header and Footer
Initiating a shop session from the Dashboard window allows us to create a randomly selected sample POS order and confirm the display of Invoice Headers and Footer.
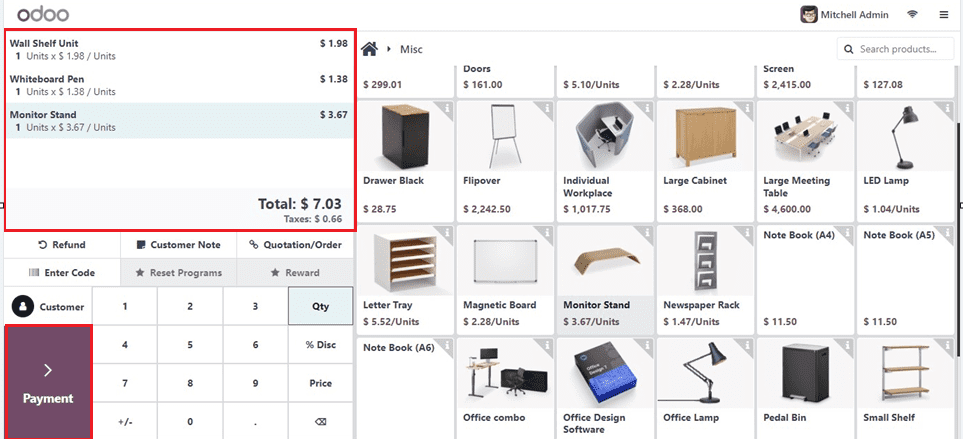
Upon finishing the order, initiate the payment process by selecting the Payments button. This action will direct you to the Payments window, where you can select payment methods, add tips, and input customer details, as depicted in the screenshot below.
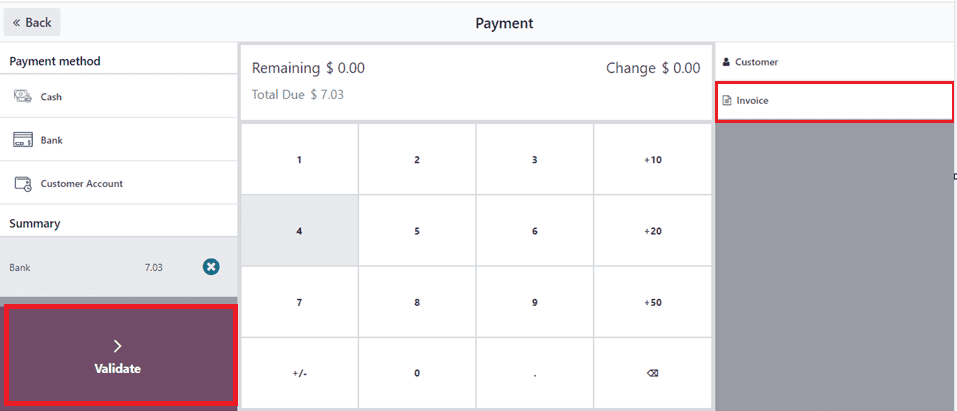
The next step is validating the payment using the Validate button. This action will complete the payment, and the invoice will be generated.
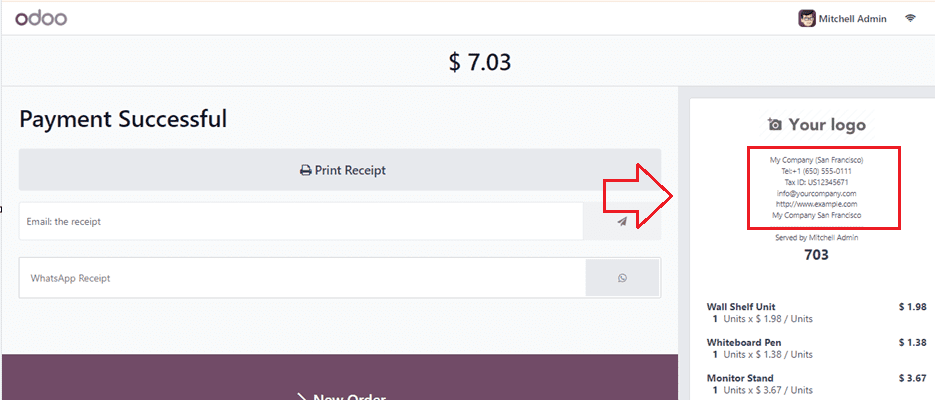
So, while getting the invoice after a successful order and payment completion, we can see this Header and Footer inside the invoice, as shown in the screenshots provided below.

QR Codes on Tickets
Customers may scan the QR code displayed on their receipt to get an invoice, for increased convenience. Upon scanning, customers are prompted to fill in their billing information, generating a downloadable invoice. To enable QR codes on receipts, navigate to the Configuration Settings window and enable "Use QR code on the ticket."
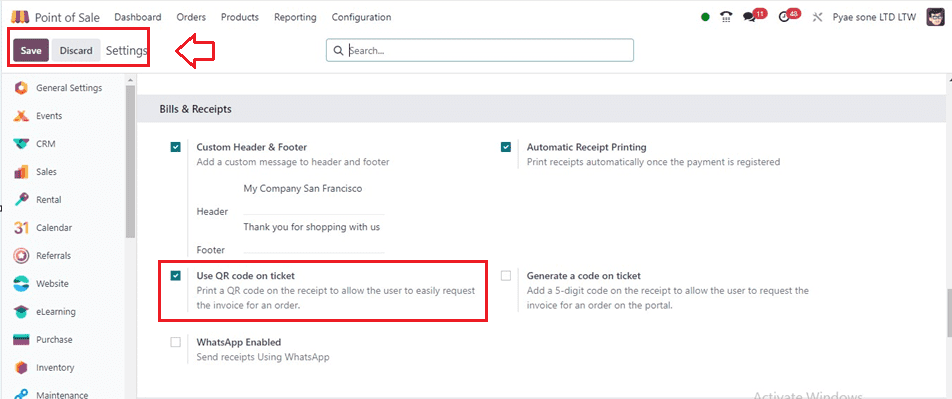
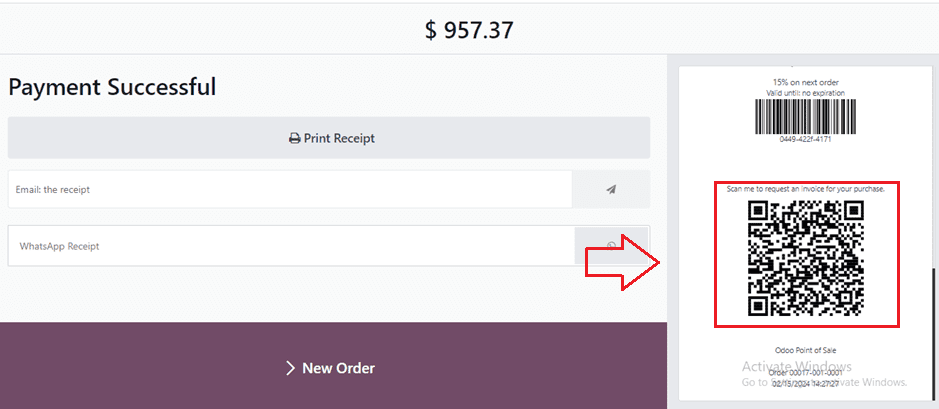
Activate the function, Save the settings, and let’s go to an ordering session generate the payments, and check the invoice to see the QR Codes inside the invoice bill, as illustrated in the screenshot below.
In conclusion, mastering invoicing with Odoo Point of Sale empowers businesses to maintain efficient transactions, provide professional documentation, and enhance customer satisfaction.
The application saves time, ensures accuracy and transparency, and is ideal for modern restaurants, trendy retail stores, and other smart companies using a Point-Of-Sale system. Odoo's invoicing capabilities enable efficient customer service while maintaining control over financial records.