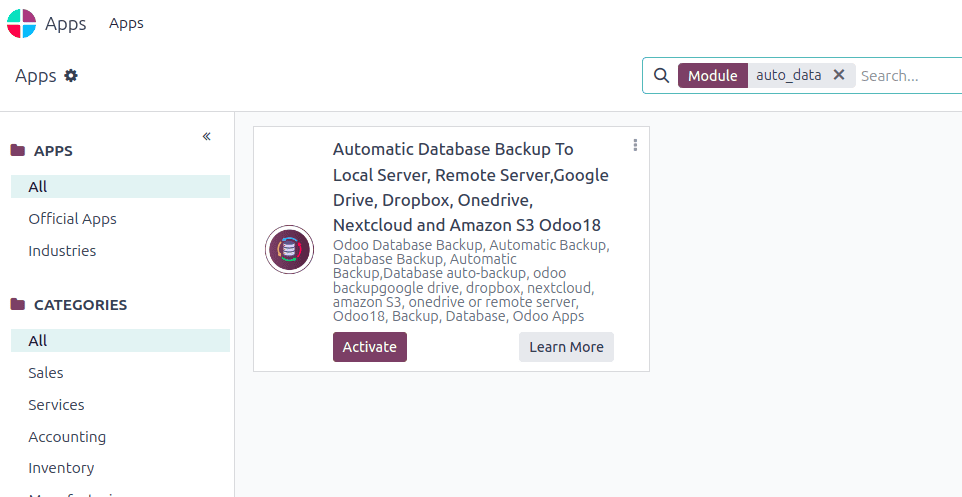
The Automatic Database Backup module for Odoo 18 is designed to automate the process of backing up your Odoo databases. This module offers flexibility by allowing backups to be stored in various locations, including local servers, remote servers, and popular cloud storage services such as Google Drive, Dropbox, OneDrive, Nextcloud, and Amazon S3.
Key Features
* Automated Backups: Schedule regular backups of your databases to ensure data safety without manual intervention.
* Redundancy Management: Automatically remove old backups to optimize storage utilization.
* Notifications: Receive alerts on the success or failure of backup operations, keeping you informed about the status of your data protection measures.
* Flexible Storage Options: Choose from multiple storage destinations, including local and remote servers, as well as various cloud platforms.
* Backup Frequency: Specify Backup Destination and Frequency. Choose how often the backup should run: daily, weekly, or monthly.
Setting Up the Automatic Database Backup Module
1. Installation of External Dependencies
Before installing the module, ensure that the necessary Python packages are installed:
pip install dropbox
pip install pyncclient
pip install nextcloud-api-wrapper
pip install boto3
pip install paramiko
2. Module Installation
After installing the dependencies, proceed to install the Automatic Database Backup module in your Odoo environment.
3. Configuration
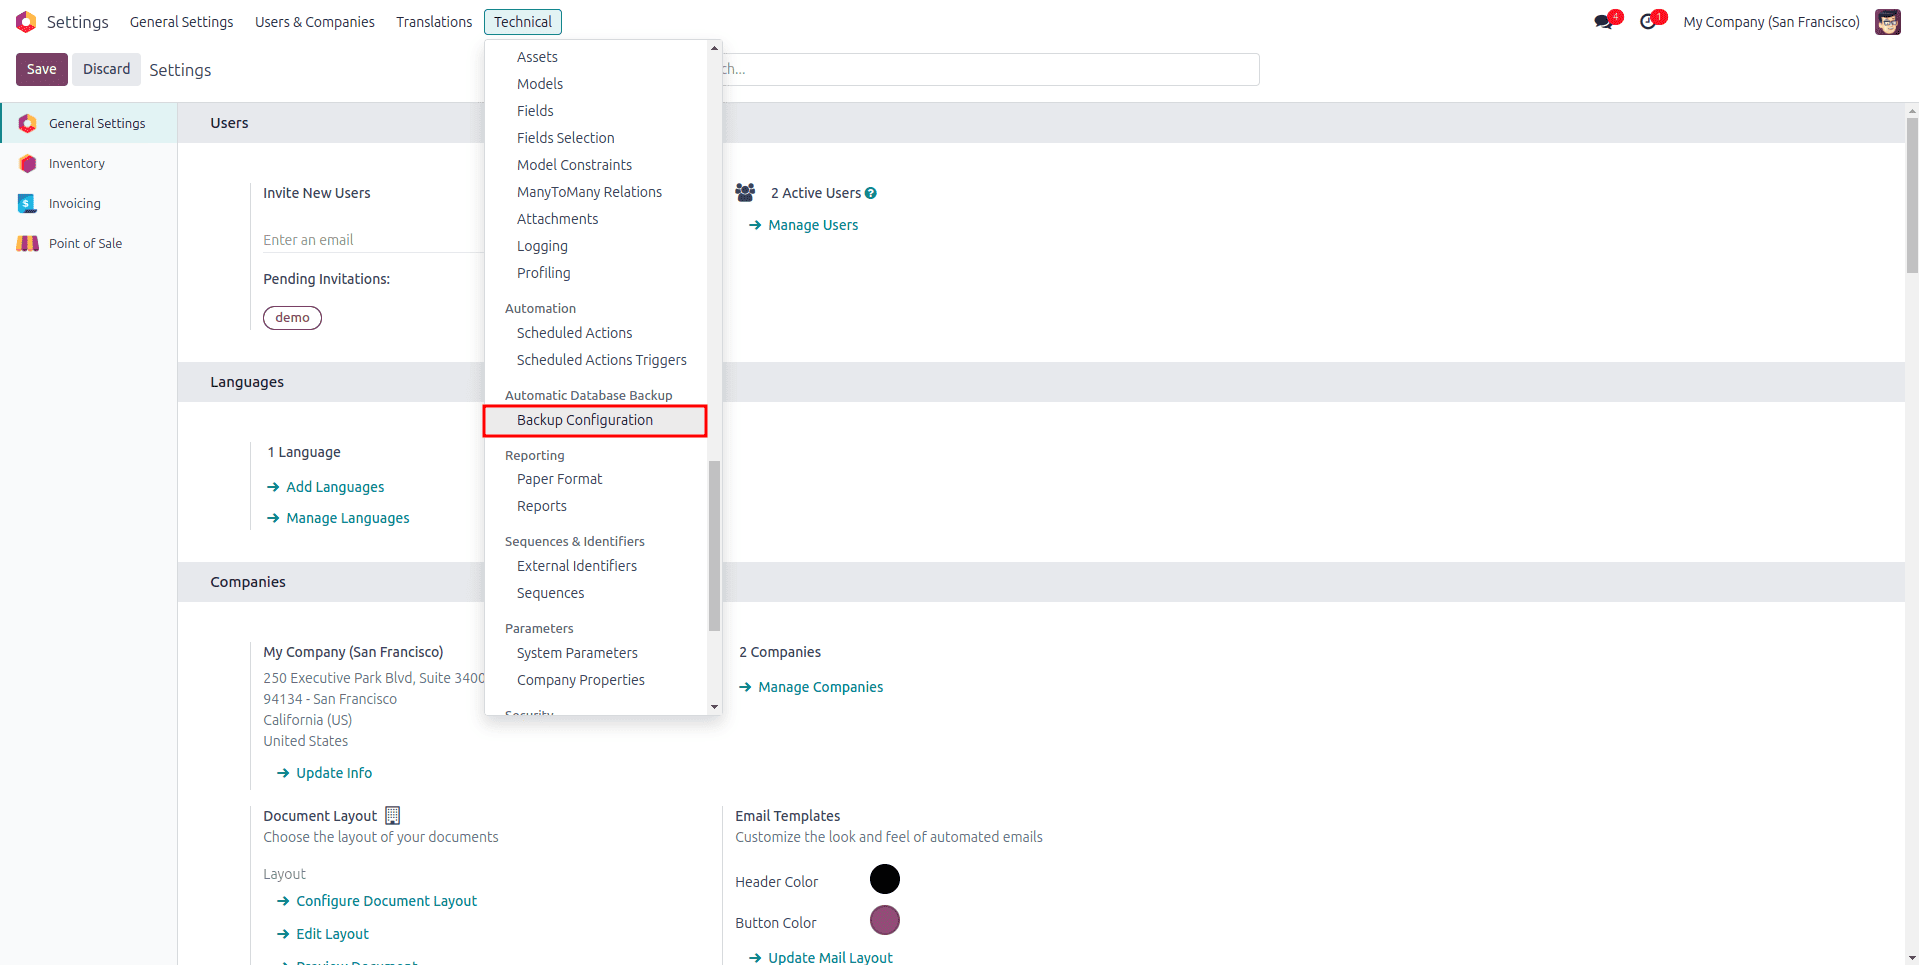
a. Access Backup Configuration: Navigate to Settings > Technical > Backup Configuration to set up your backup preferences.
b. Create a New Backup Configuration: Click on "Create" and fill in the necessary details:
* Database Name: Specify the name of the database you wish to back up.
* Master Password: Enter the master password for your Odoo instance.
* Backup Destination: Choose your preferred backup destination from the available options.
* Backup Directory Path: Provide the path to the directory where backups will be stored. If the directory does not exist, it will be created automatically.
* Backup Frequency: Specify Backup Destination and Frequency. Choose how often the backup should run: daily, weekly, or monthly.
* Notify User: Enable notify user option, and select a user to notify. An email notification will be sent to the selected user on backup success and failure.
* Remove Old Backups: Enable auto remove option; specify the number of days to remove backups.
* Backup Format: Select whether the backup should be stored. Whether ZIP or Dump format.
Configuring Backup to Different Destinations
The Automatic Database Backup module supports integration with various storage services. Below are general steps to configure backups for each supported platform:
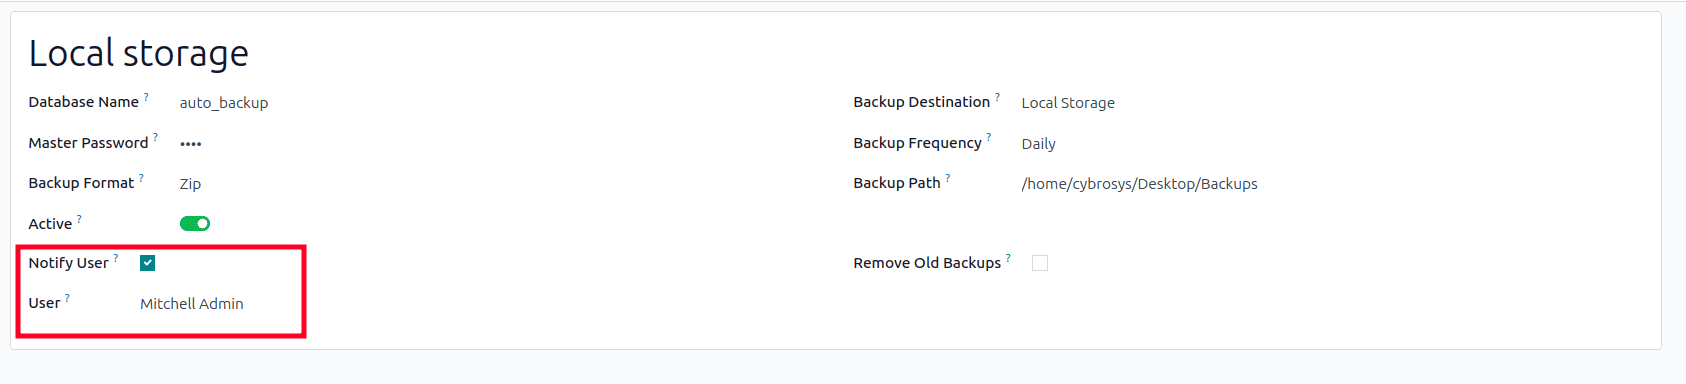
Local Server:
To have backup in your local server. Select the backup destination as Local Storage and give the backup path as the path to your required location where you need to store the backup file.

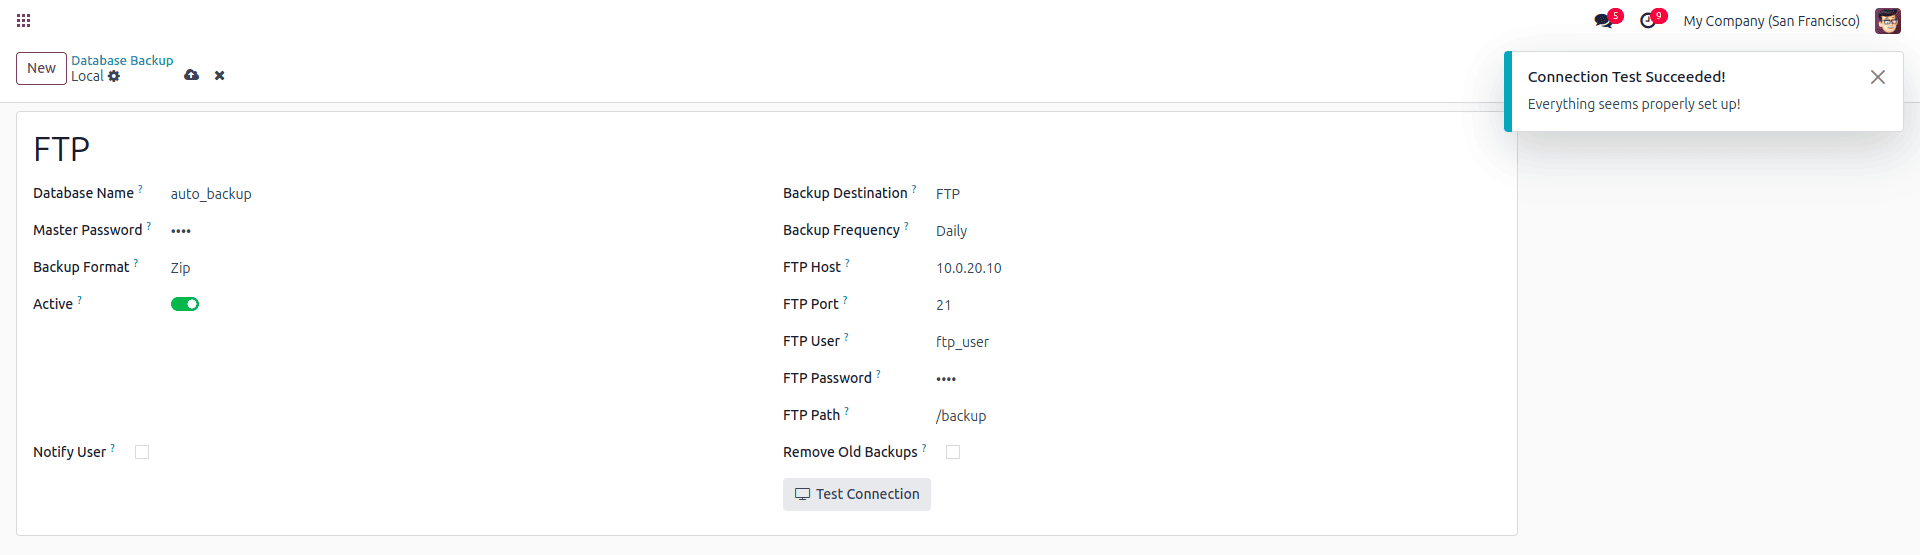
FTP Server:
To configure backups to an FTP server:
* Select FTP as the backup destination.
* Enter the FTP Host, Port, User, and Password.
* Provide the FTP Path where backups should be stored.
* Test the connection to ensure proper setup.
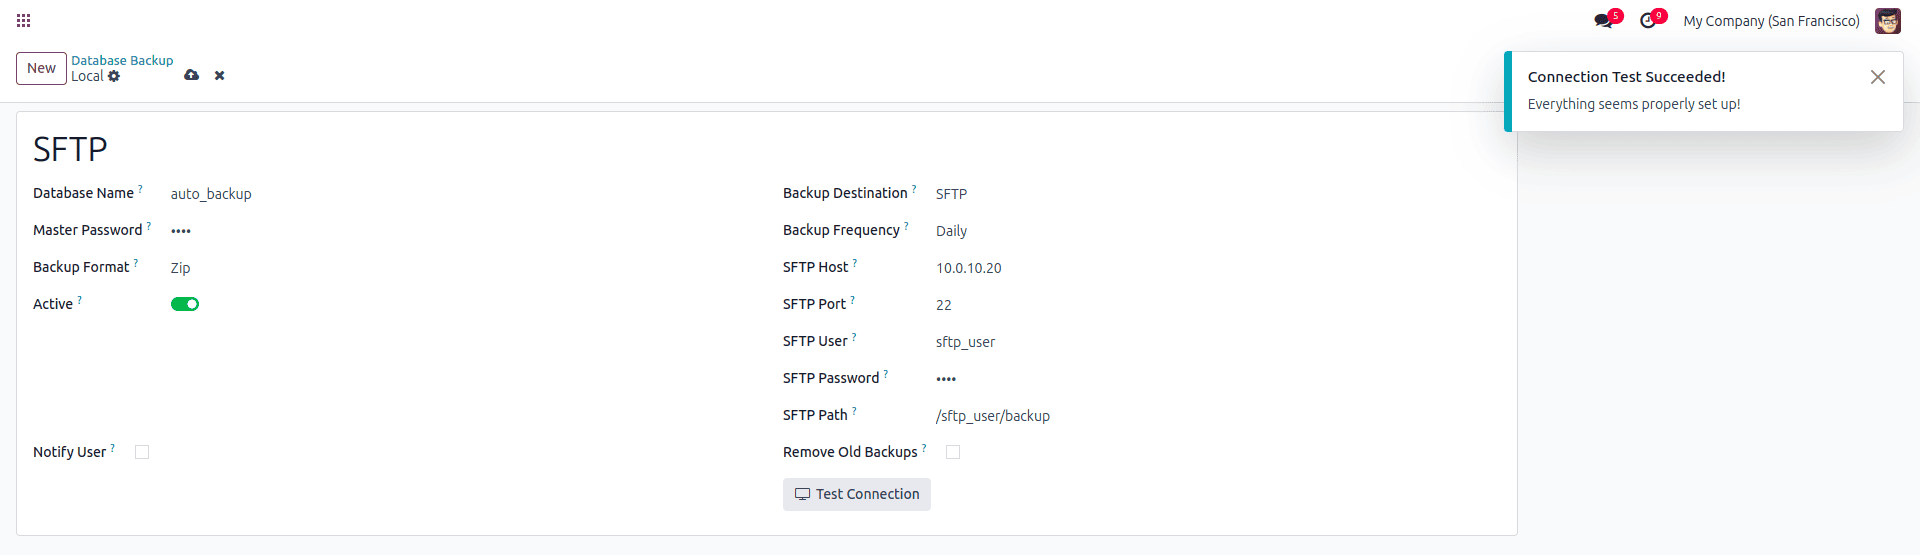
SFTP Server:
To configure backups to an SFTP server:
* Select SFTP as the backup destination.
* Enter the FTP Host, Port, User, and Password.
* Provide the FTP Path where backups should be stored.
* Test the connection to ensure proper setup.
Google Drive :
To configure backups to Google Drive:
Step 1: Create a Google API Project
* Log in to the Google Cloud Console and create a new project.
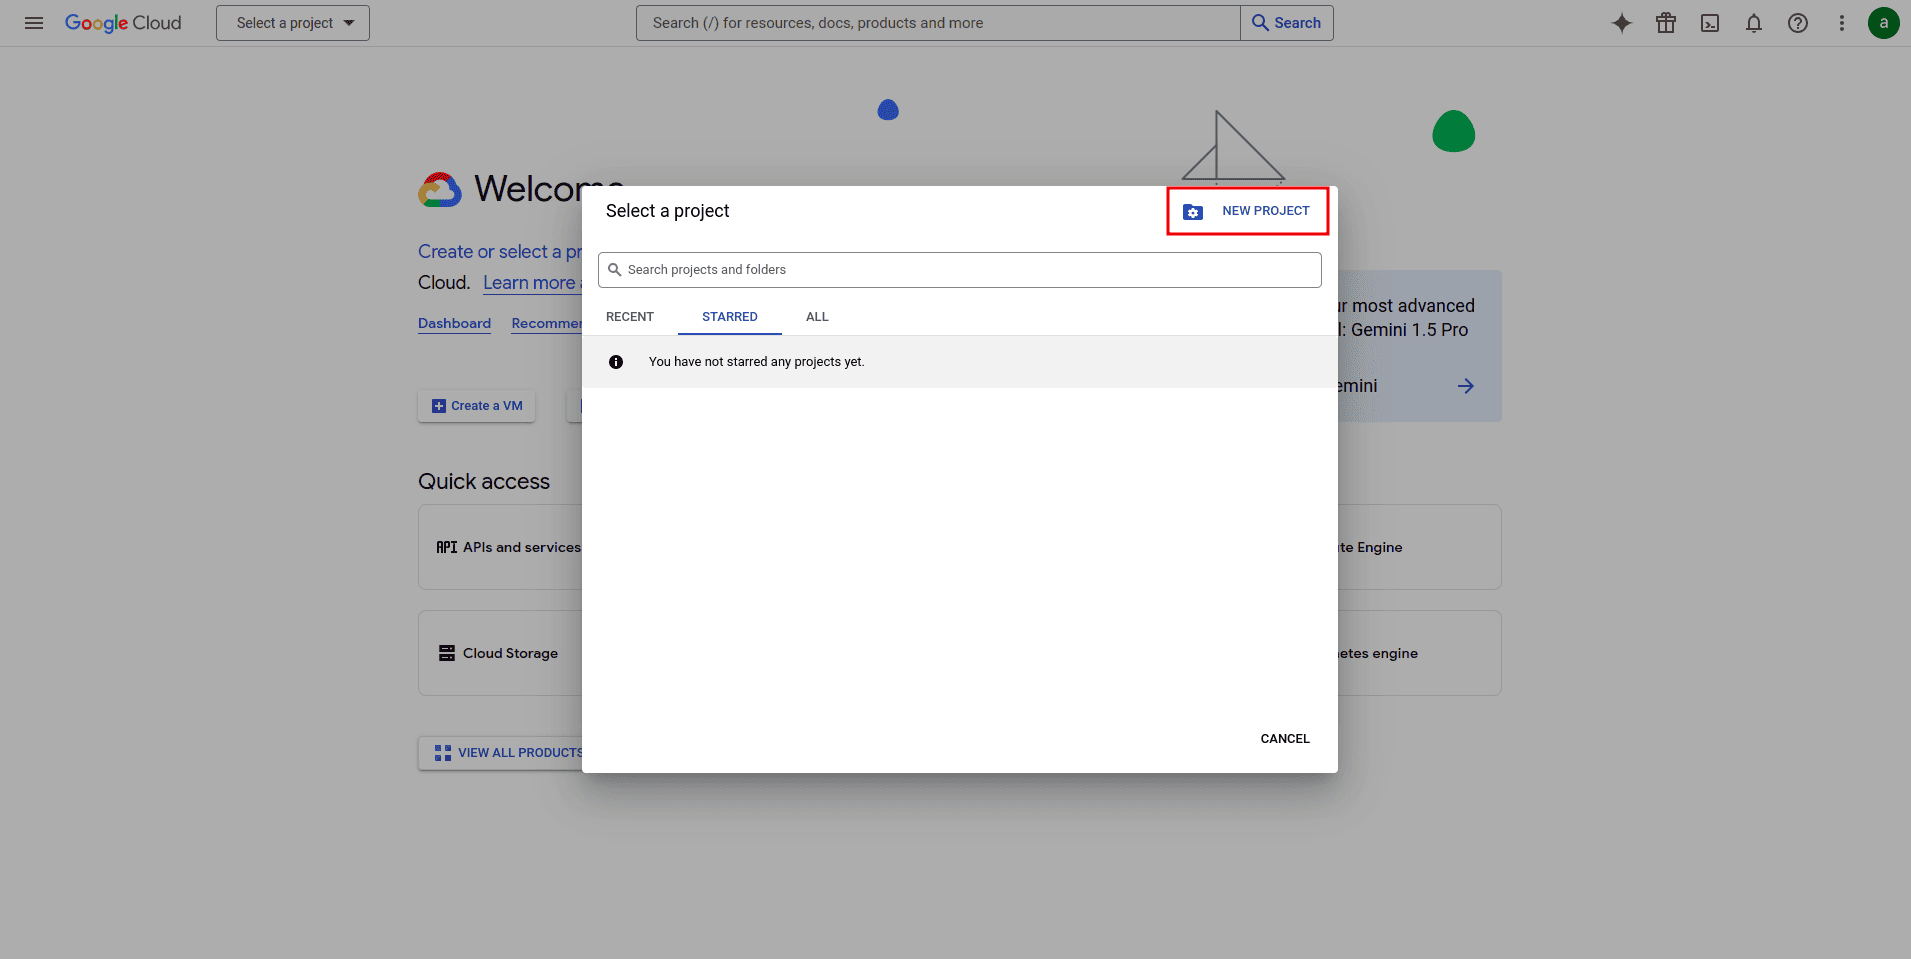
* Enable the Google Drive API.
Step 2: Create Credentials
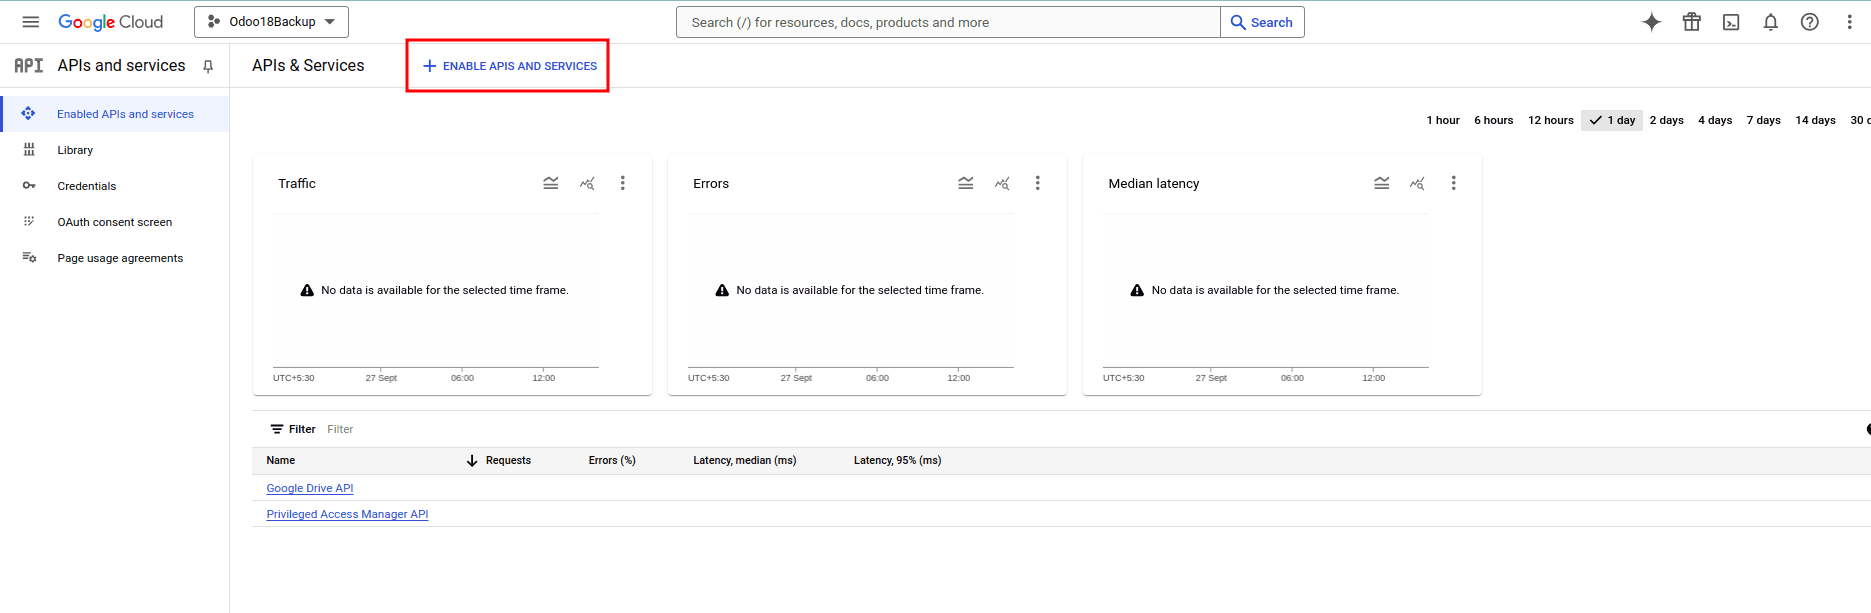
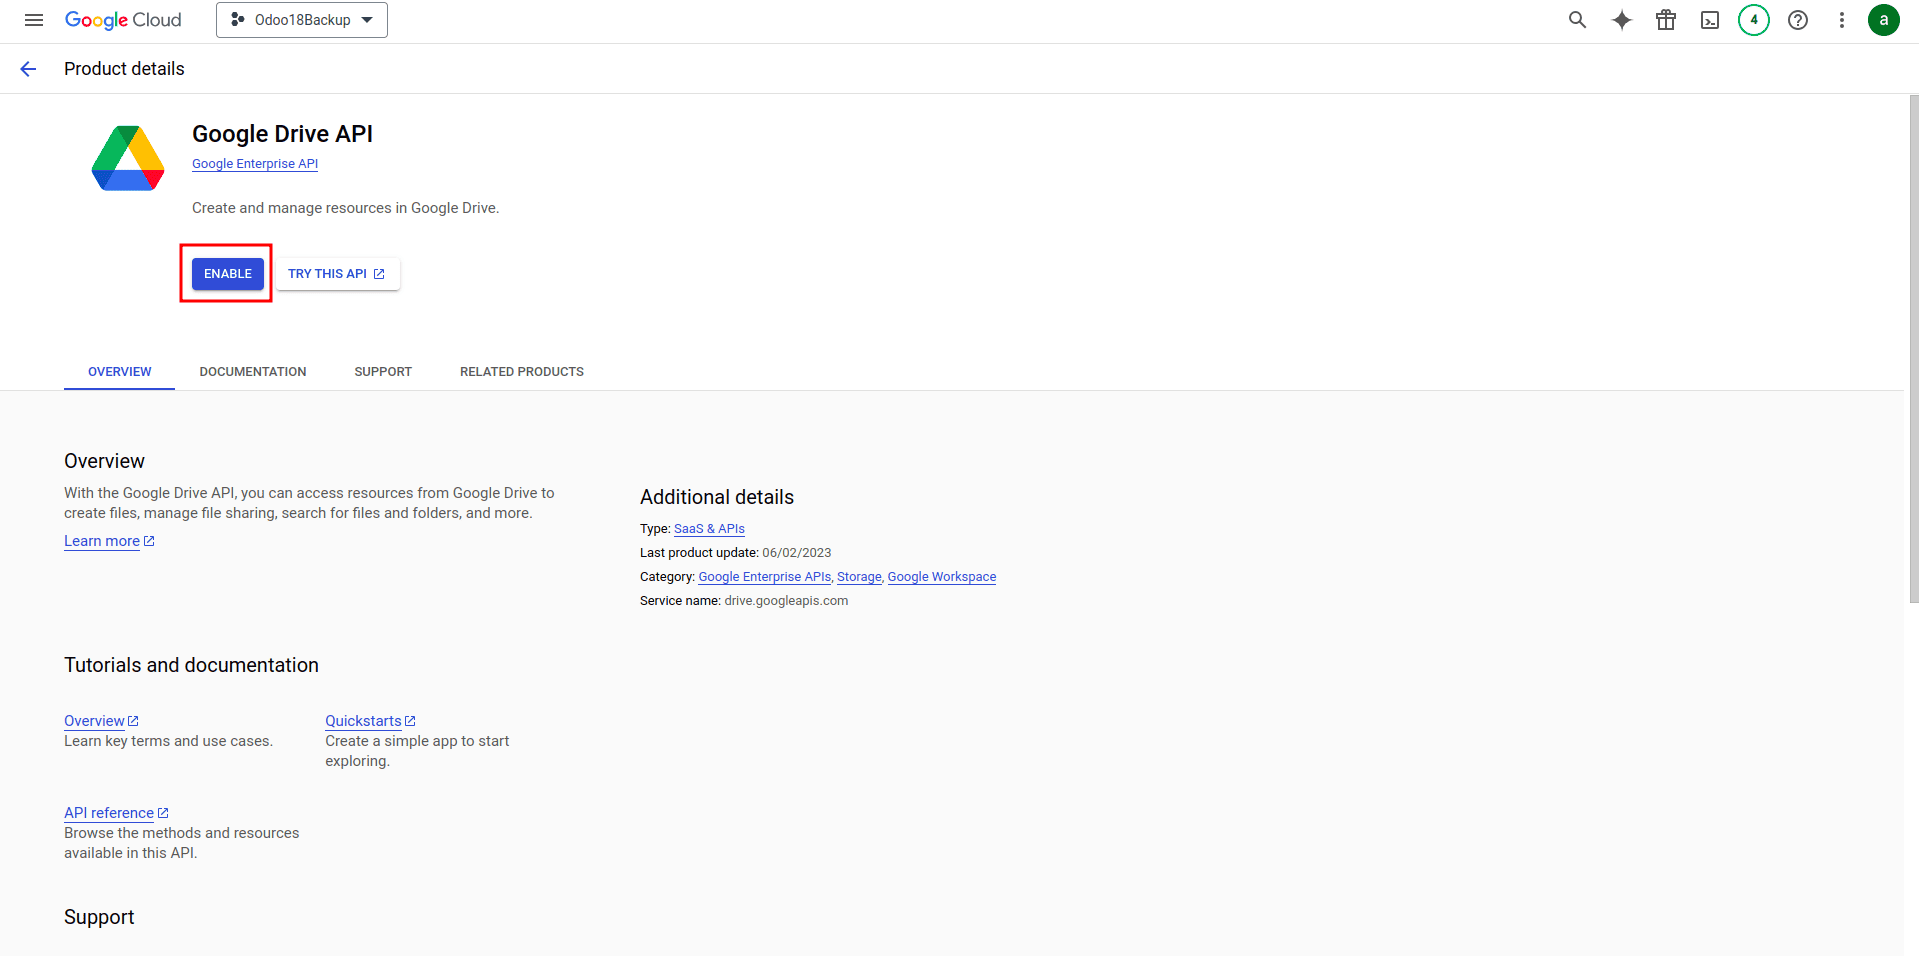
* Navigate to Enable API and Services from the project dashboard.

* Enable Google Drive API.
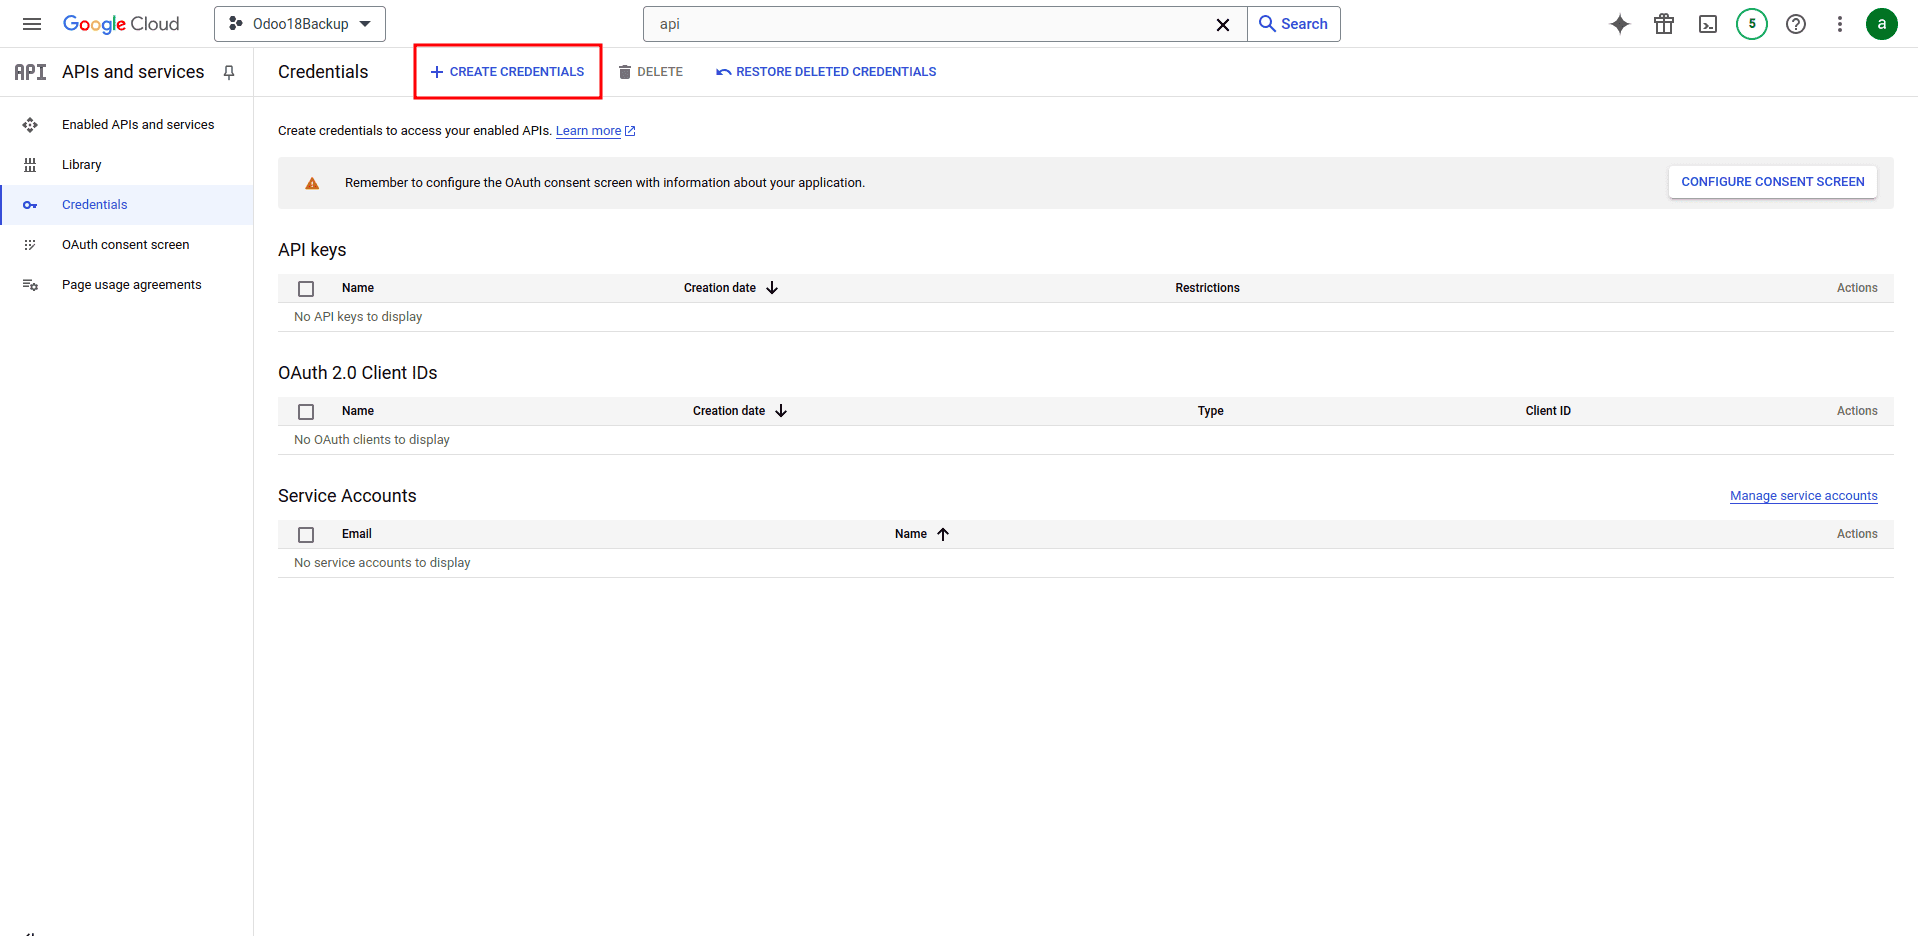
* Go to Credentials and create new credentials by selecting OAuth Client ID.
Step 3: Configure Authorized Redirect URI
* Select Application Type as Web Application.
* Under Authorized JavaScript Origins, add your company’s Odoo URL.
* Under Authorized Redirect URIs, add your Odoo URL followed by /google_drive/authentication.
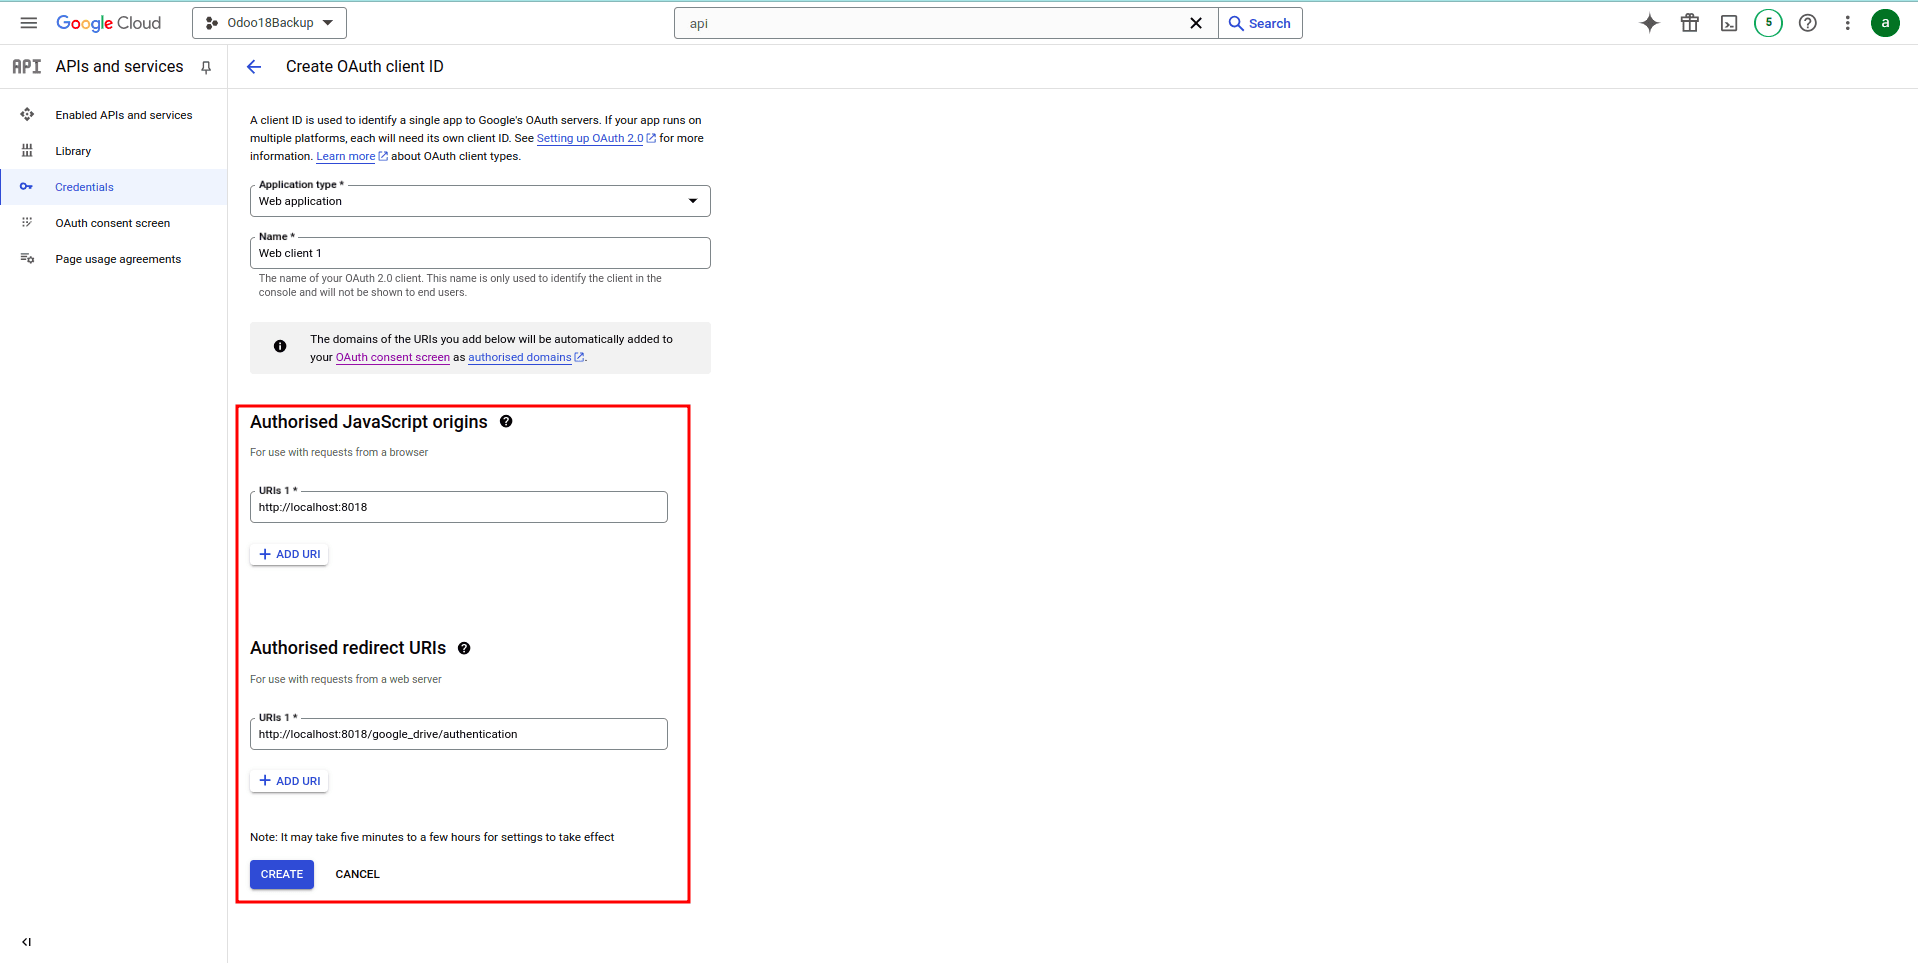
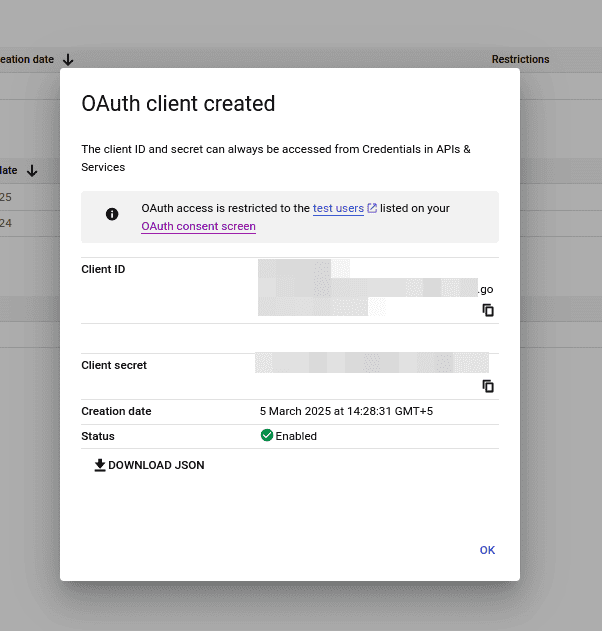
* After completing the steps, a Client ID and Client Secret will be generated—copy these credentials.
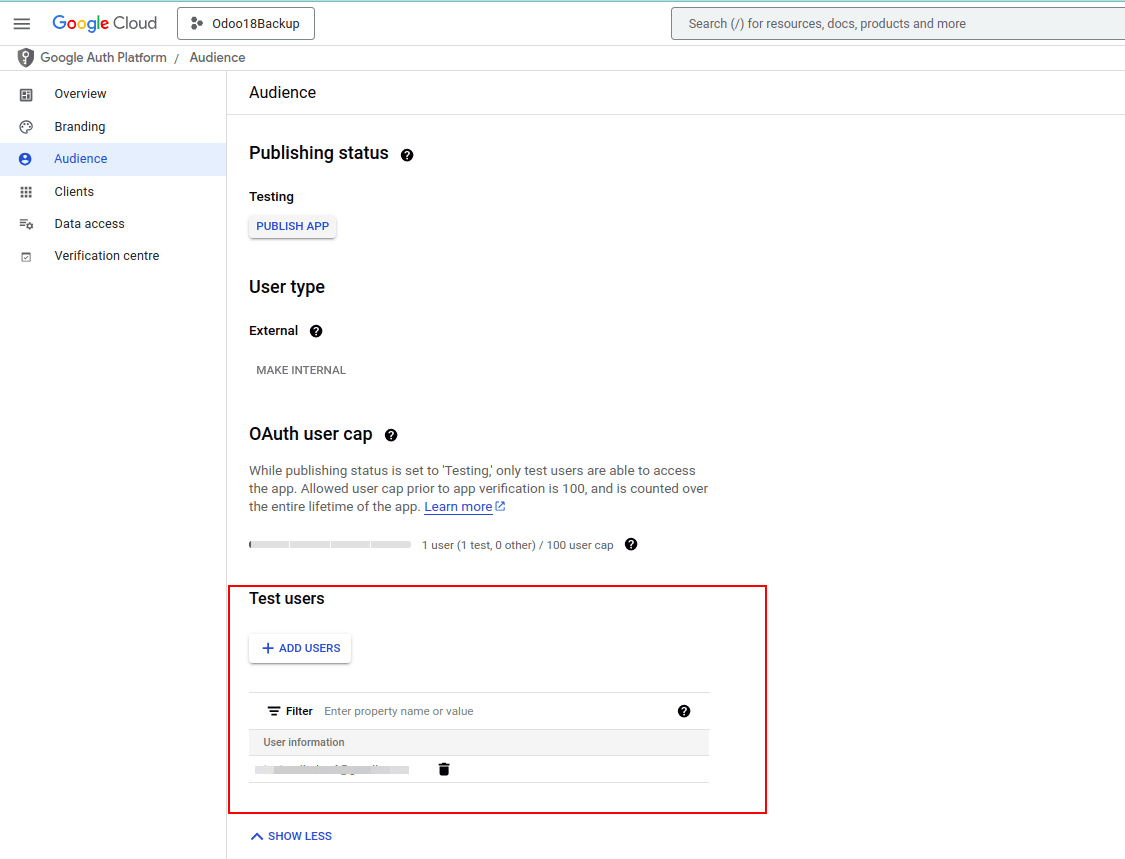
* After this, open the OAuth consent screen and, under Audience, add the current login email as a Test User to allow access to the app, or complete the app publishing process.
Step 4: Configure Odoo Backup Settings
* Enter the Client ID and Client Secret in the respective fields within the Odoo Backup Configuration.
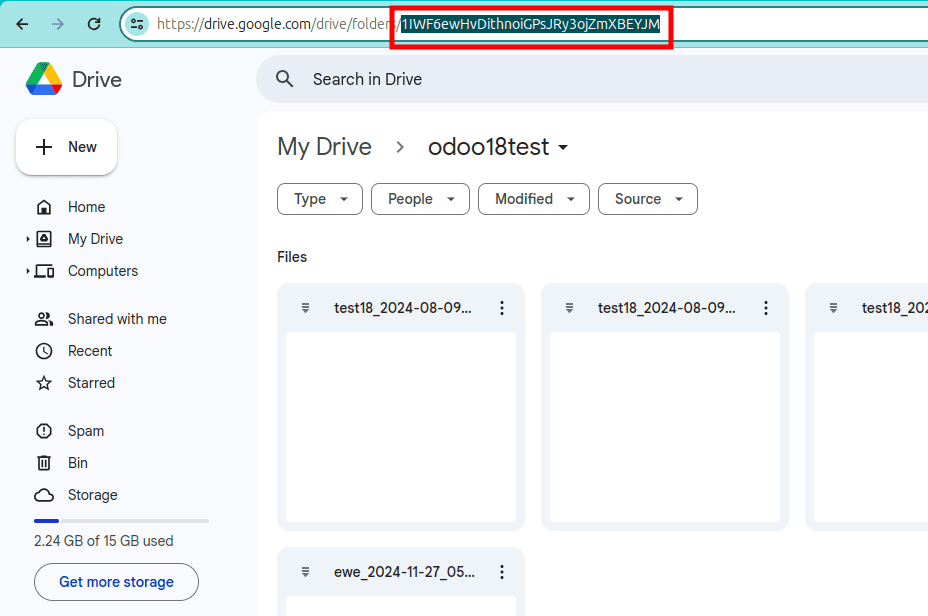
* Enter the Drive folder id from the folder url.
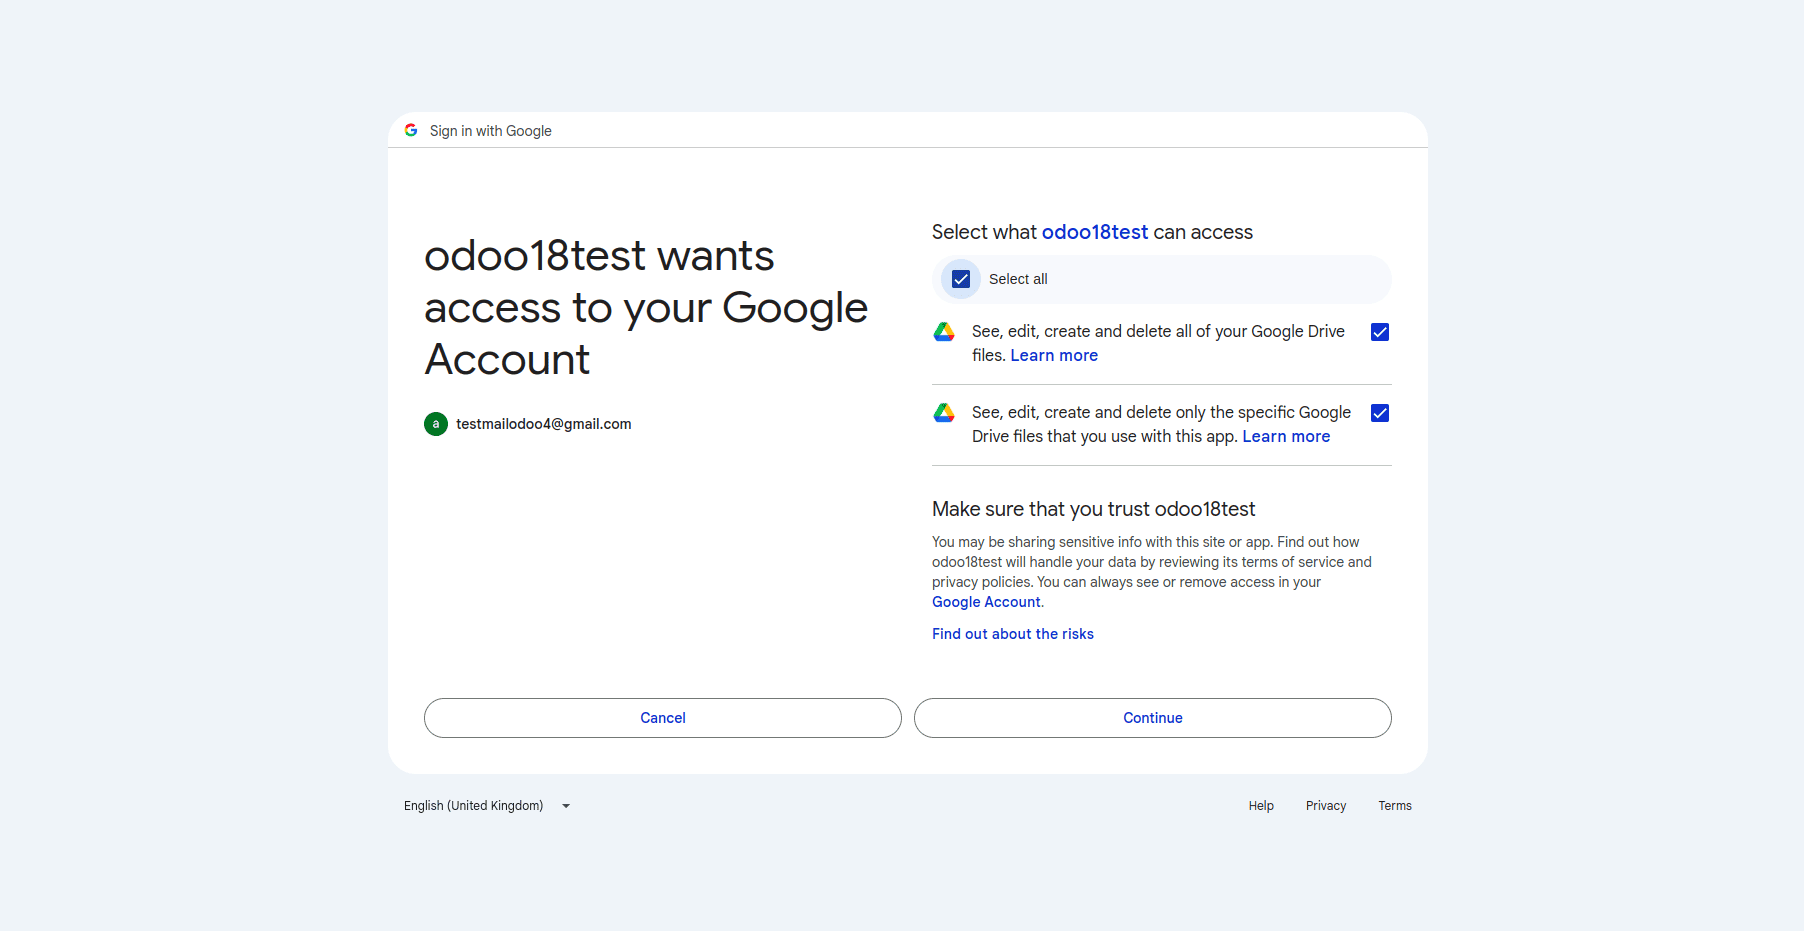
* After configuration, click on Setup Token, which will redirect you to an authorization page.
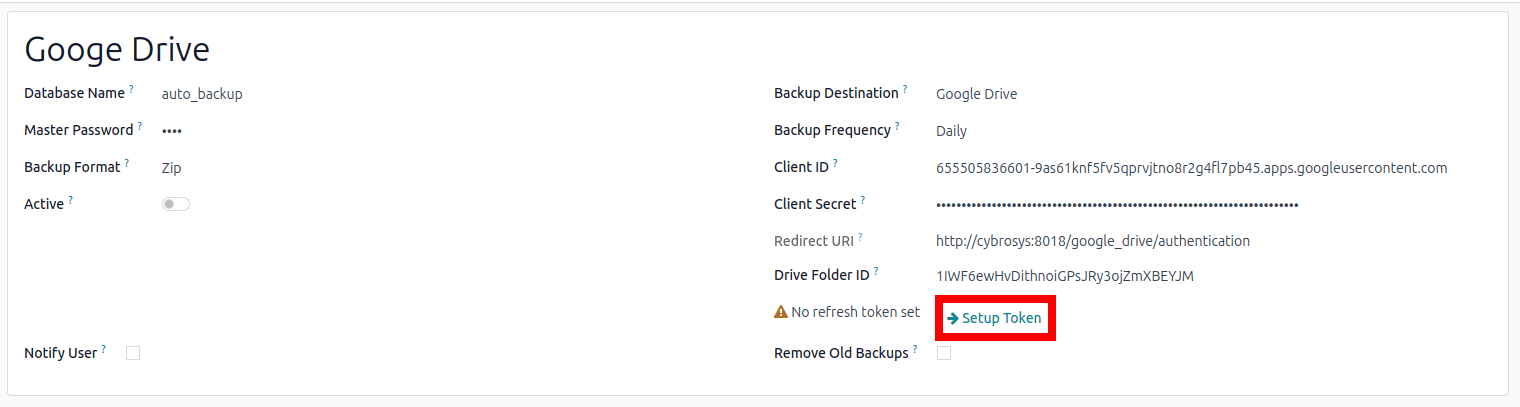
* Grant access and continue.
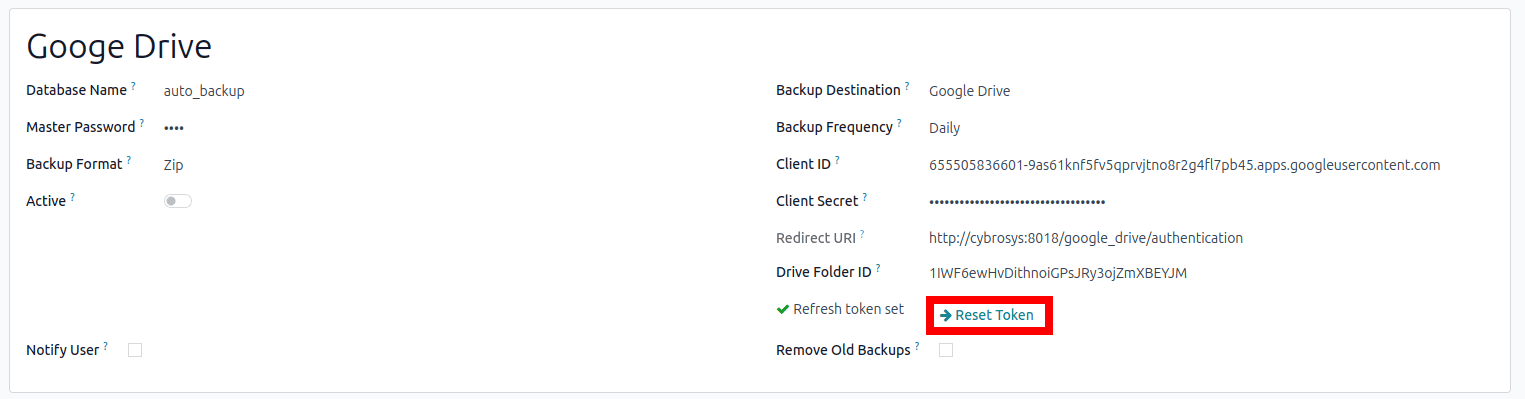
* Once the token is generated, backups will be uploaded to Google Drive as scheduled.
* A Reset Token button will be available—clicking it will refresh the token if needed.
Dropbox :
To create a new App Key and Secret Key, follow these steps in the Dropbox Developers App Console:
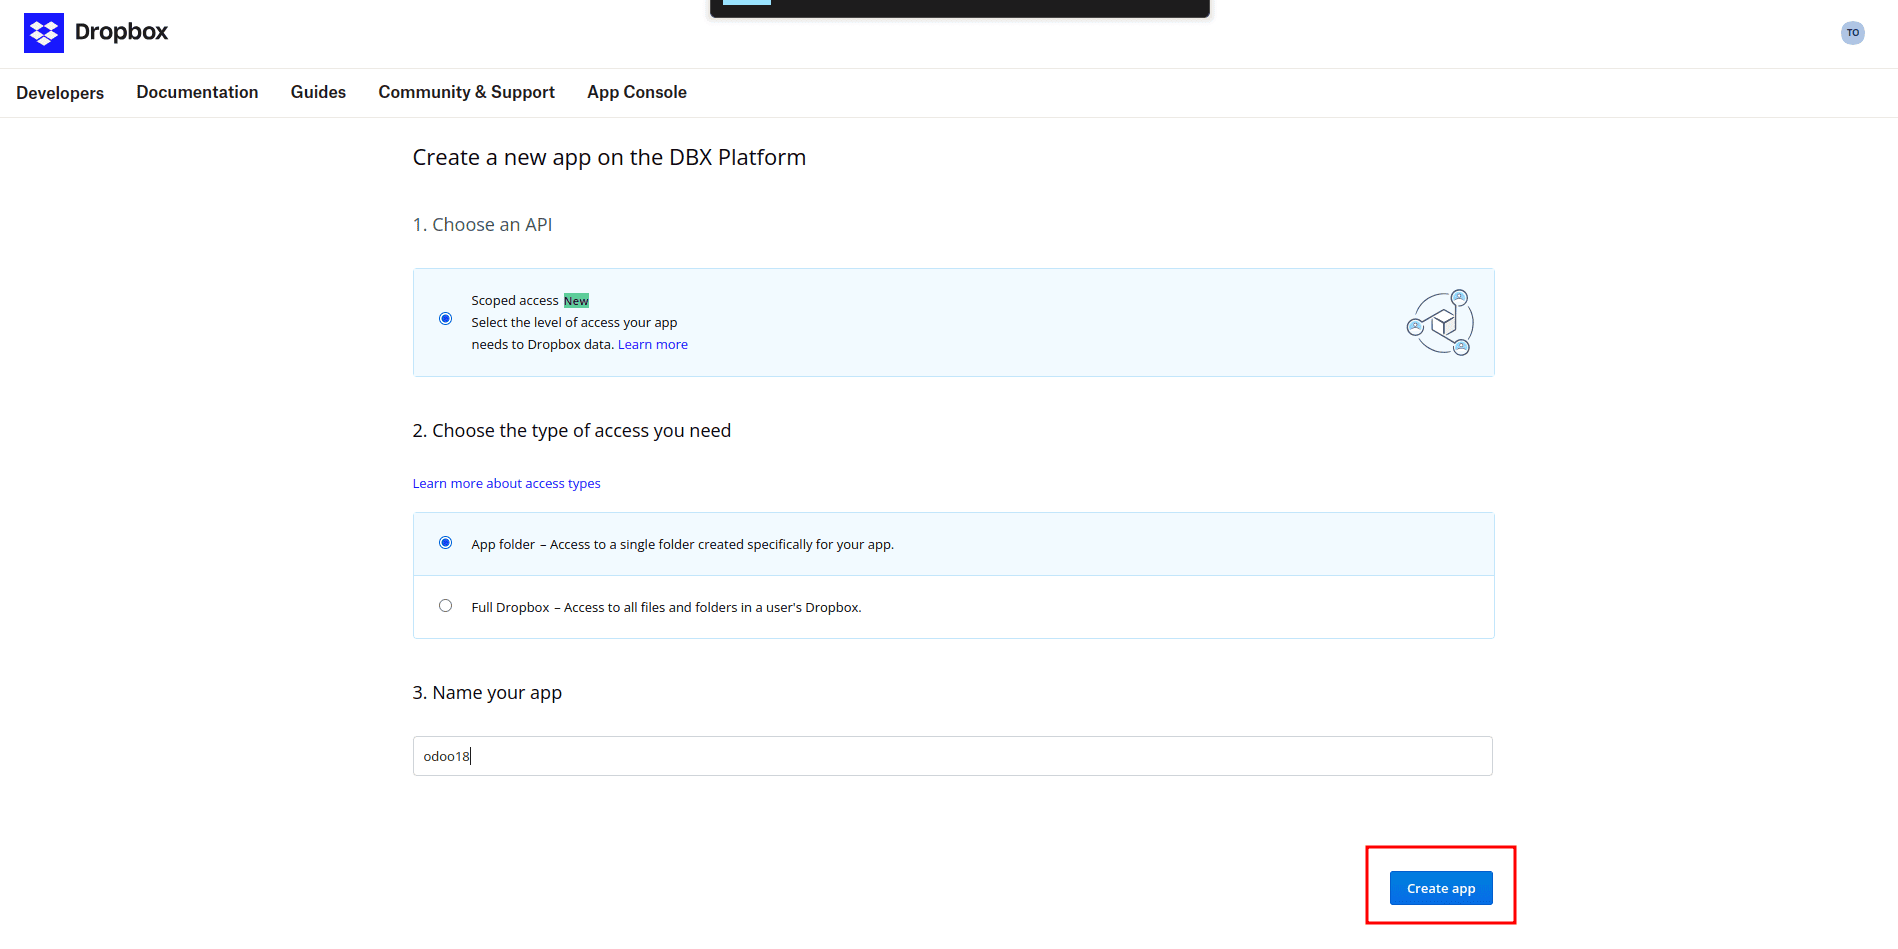
Step 1: Create a New App
Navigate to the Dropbox Developers App Console and create a new app.
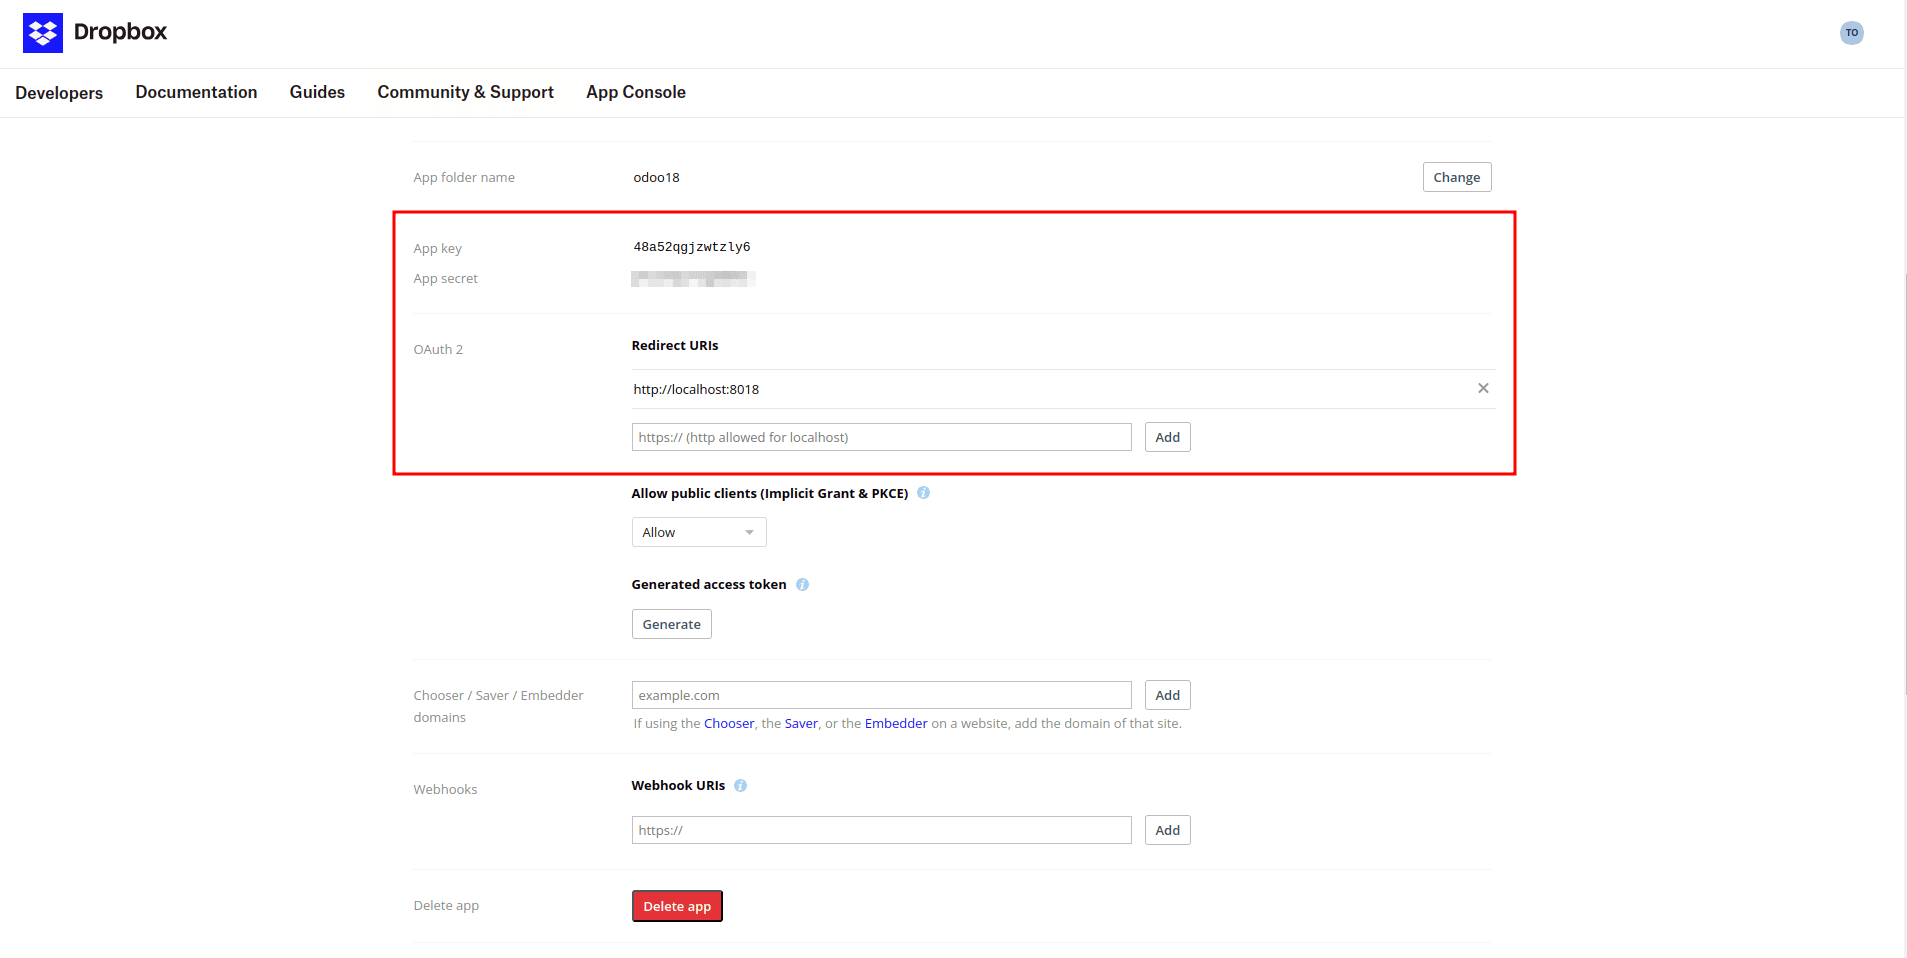
Step 2: Retrieve App Key and Secret.
Once the app is created, you will receive the App Key and App Secret, as shown in the screenshot.
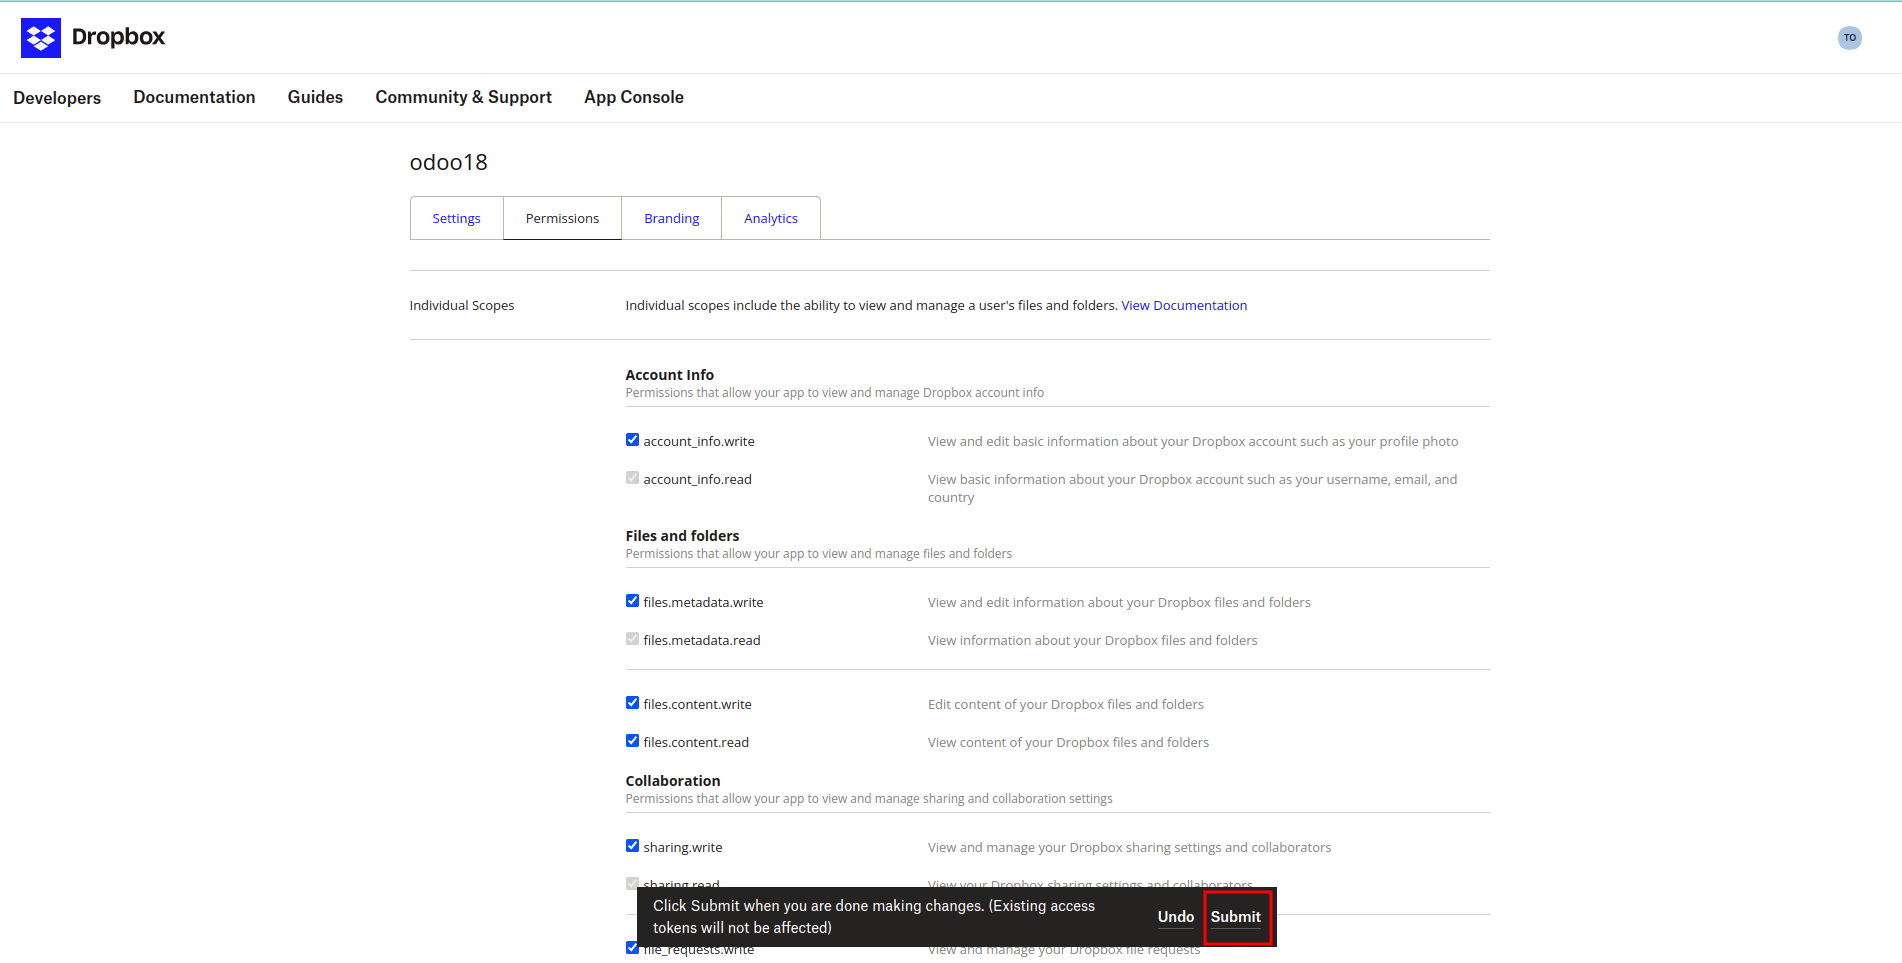
Step 3: Set Permissions.
Choose your app's permissions and click submit to save the changes.
Step 4: Configure Backup in Odoo
* In Odoo, go to Backup Configuration and choose Dropbox as the backup destination.
* Enter the App Key, App Secret, and Dropbox Folder Name (same as the folder name in Dropbox).
* Click on Setup Token to generate the token.

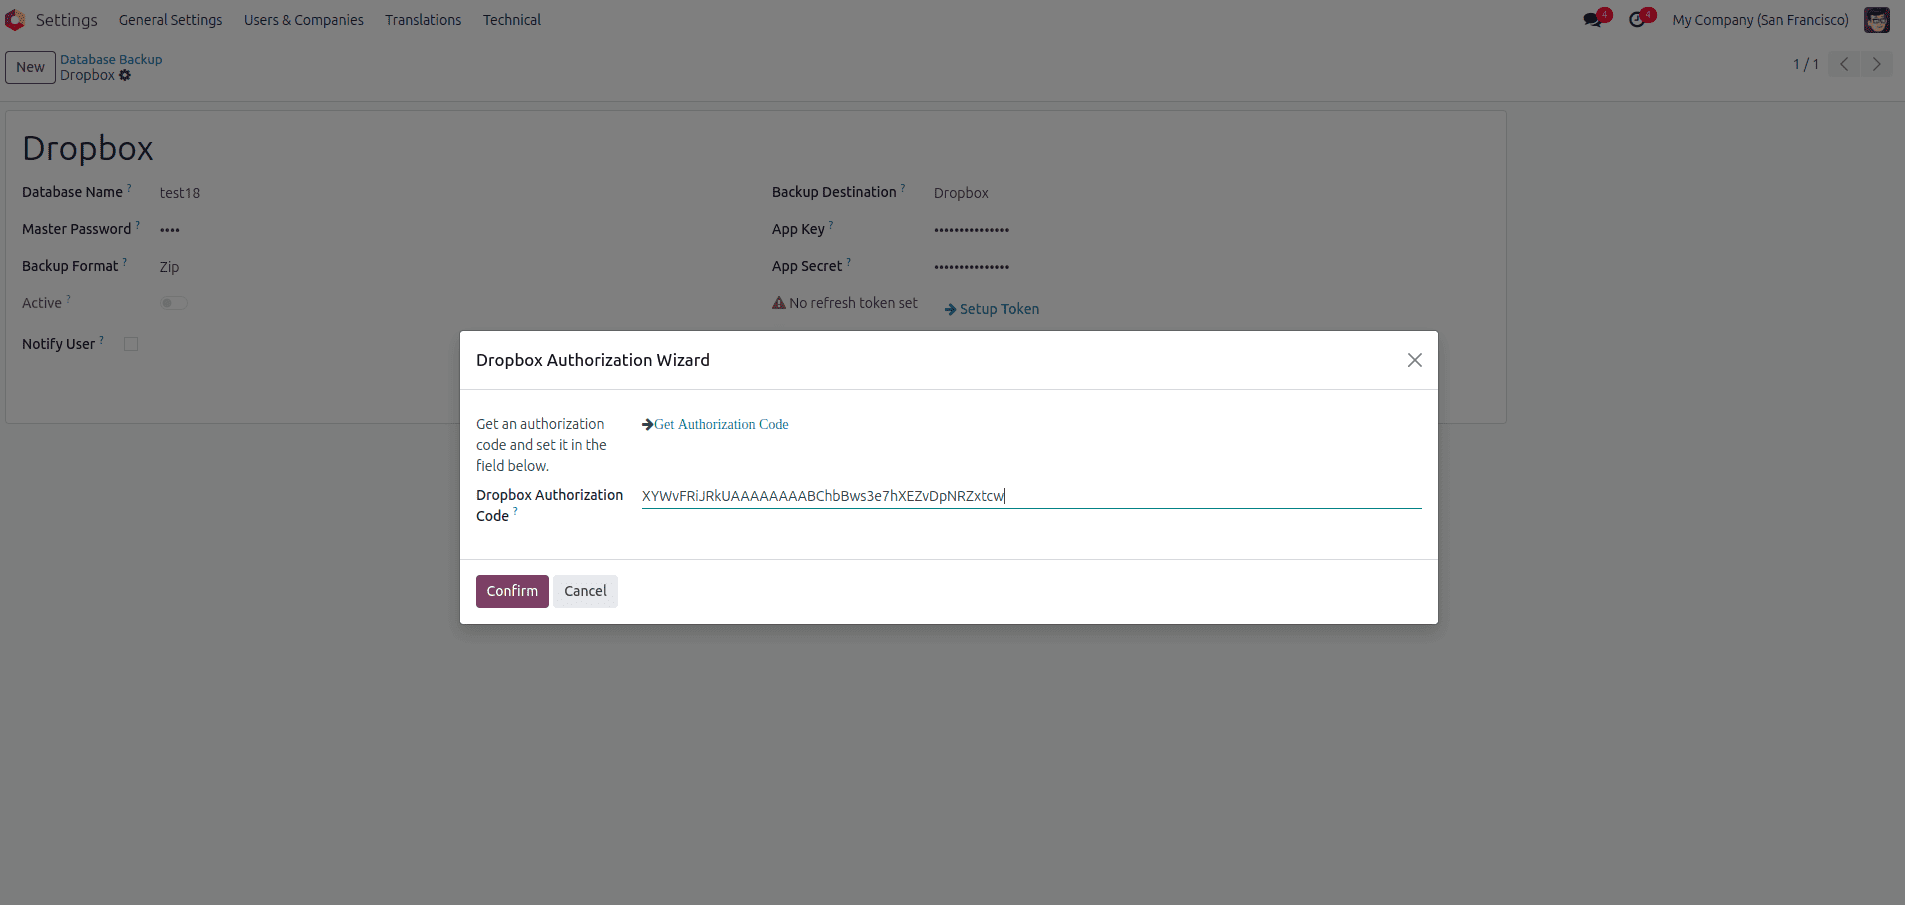
Step 5: Get the Authorization Code
Click on Get Authorization Code and paste the generated code into the Dropbox Authorization Code field in the wizard.
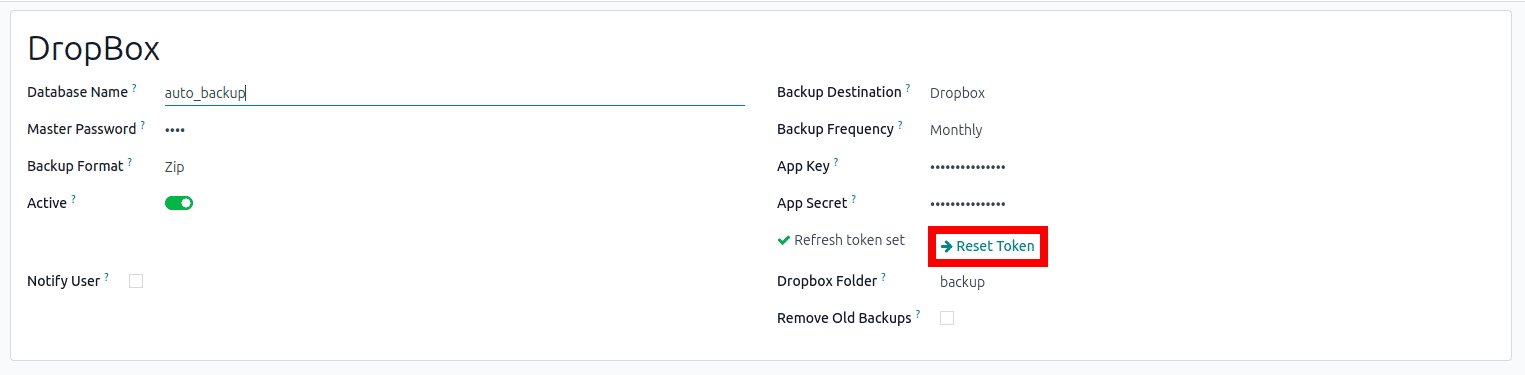
Step 6: Reset Refresh Token (If Required)
If needed, click Reset Token to refresh the authentication token.
OneDrive :
To configure your Odoo backup to store files on OneDrive, follow these steps:
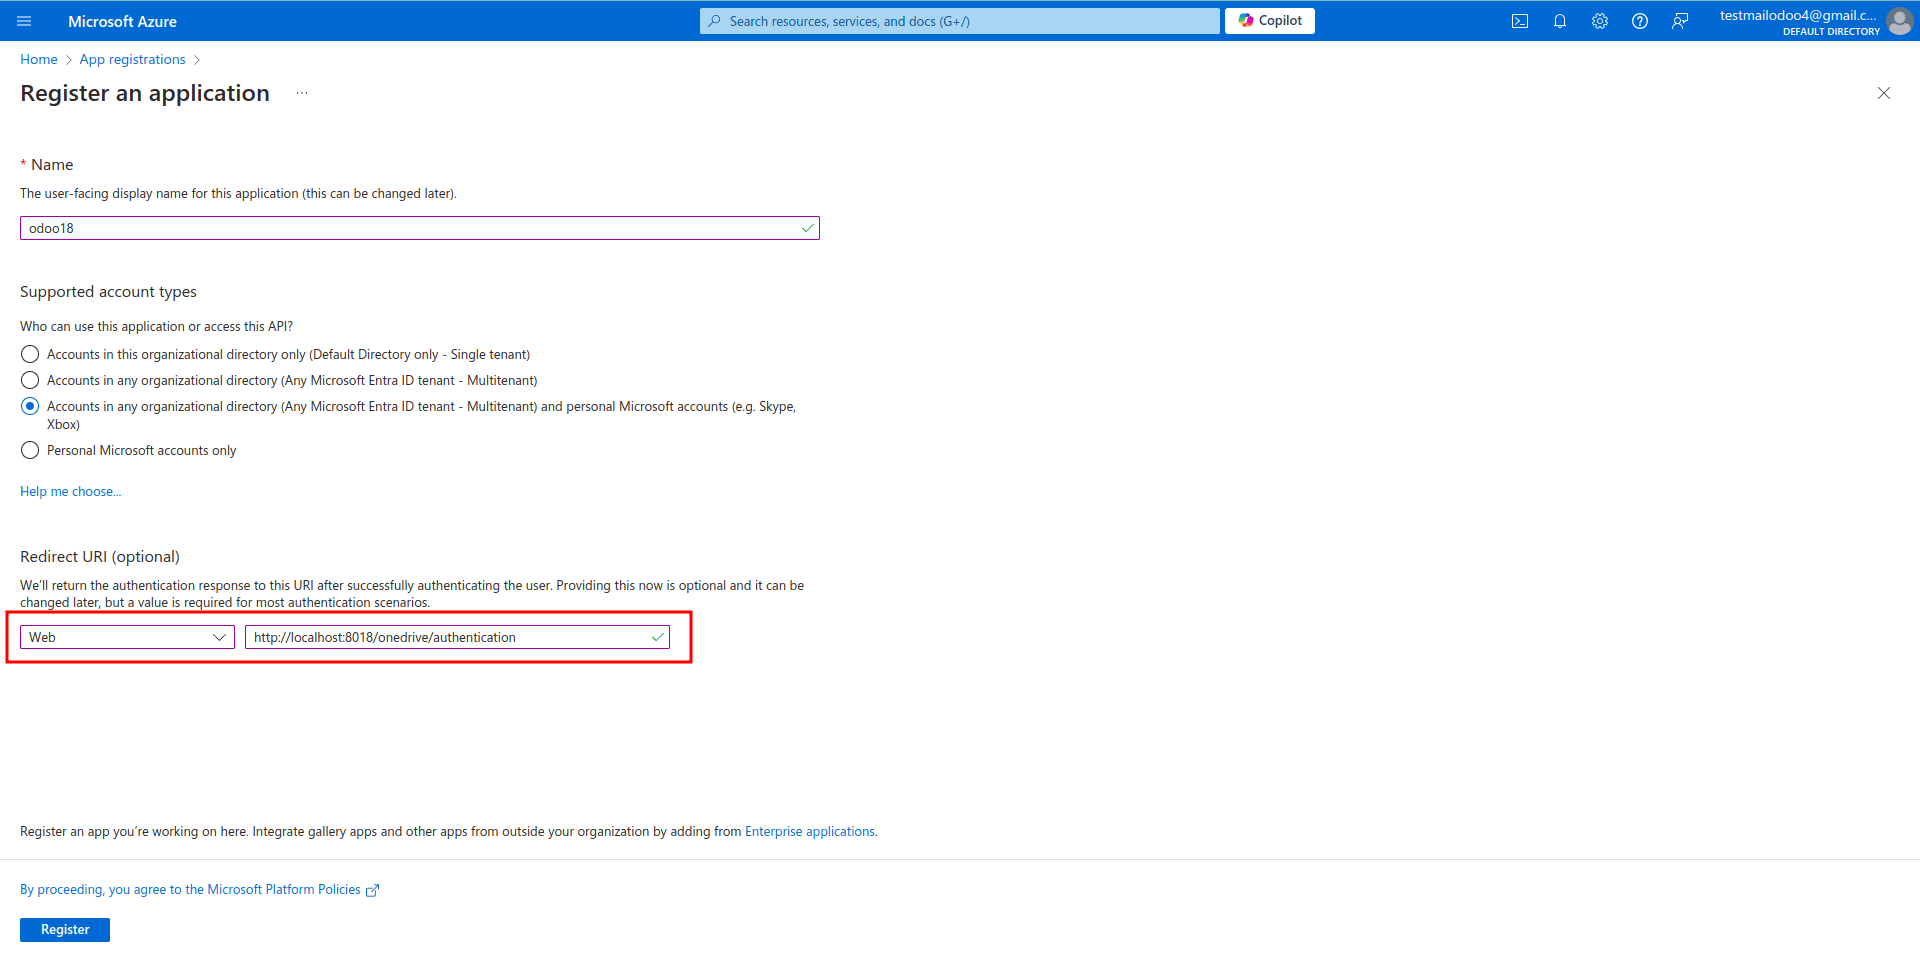
Step 1: Register a New App in Microsoft Azure
* Go to the Microsoft Azure Portal and register a new app.
* For Redirect URI restrictions, enter your Odoo database URI followed by /onedrive/authentication.
Example: https://your-odoo-instance.com/onedrive/authentication
Step 2: Obtain Credentials
* Copy the Client ID and generate a Client Credentials from the registered app.
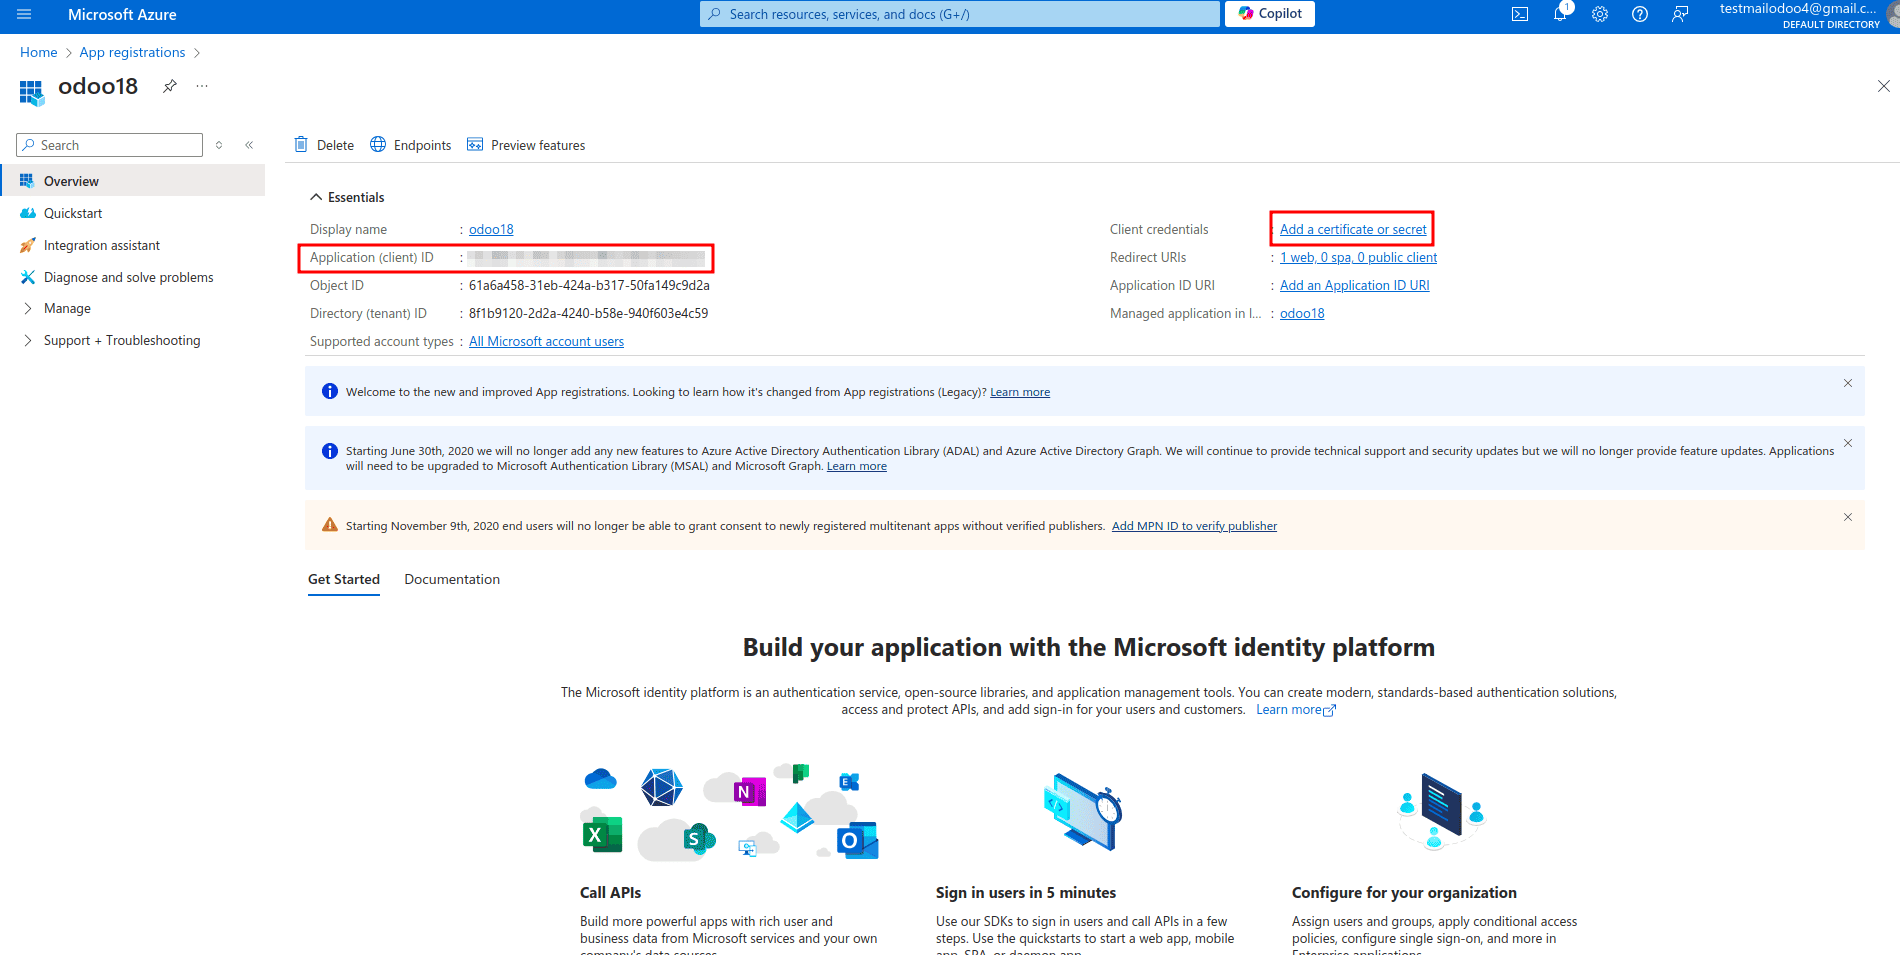
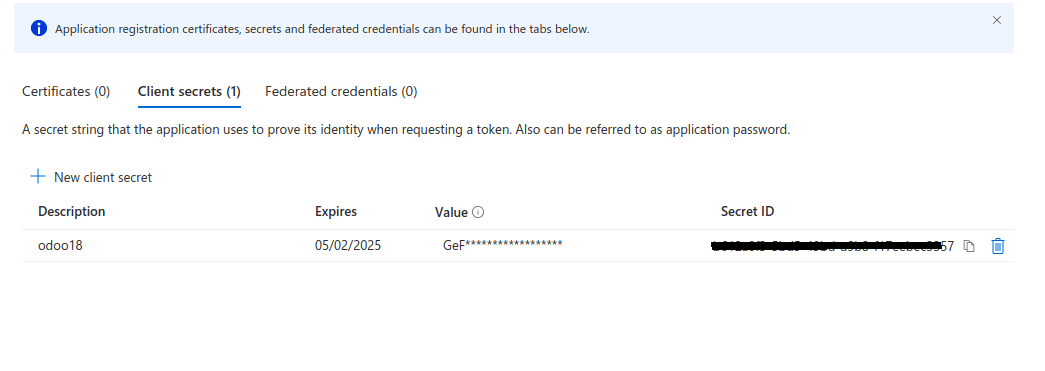
* Get the client secret:
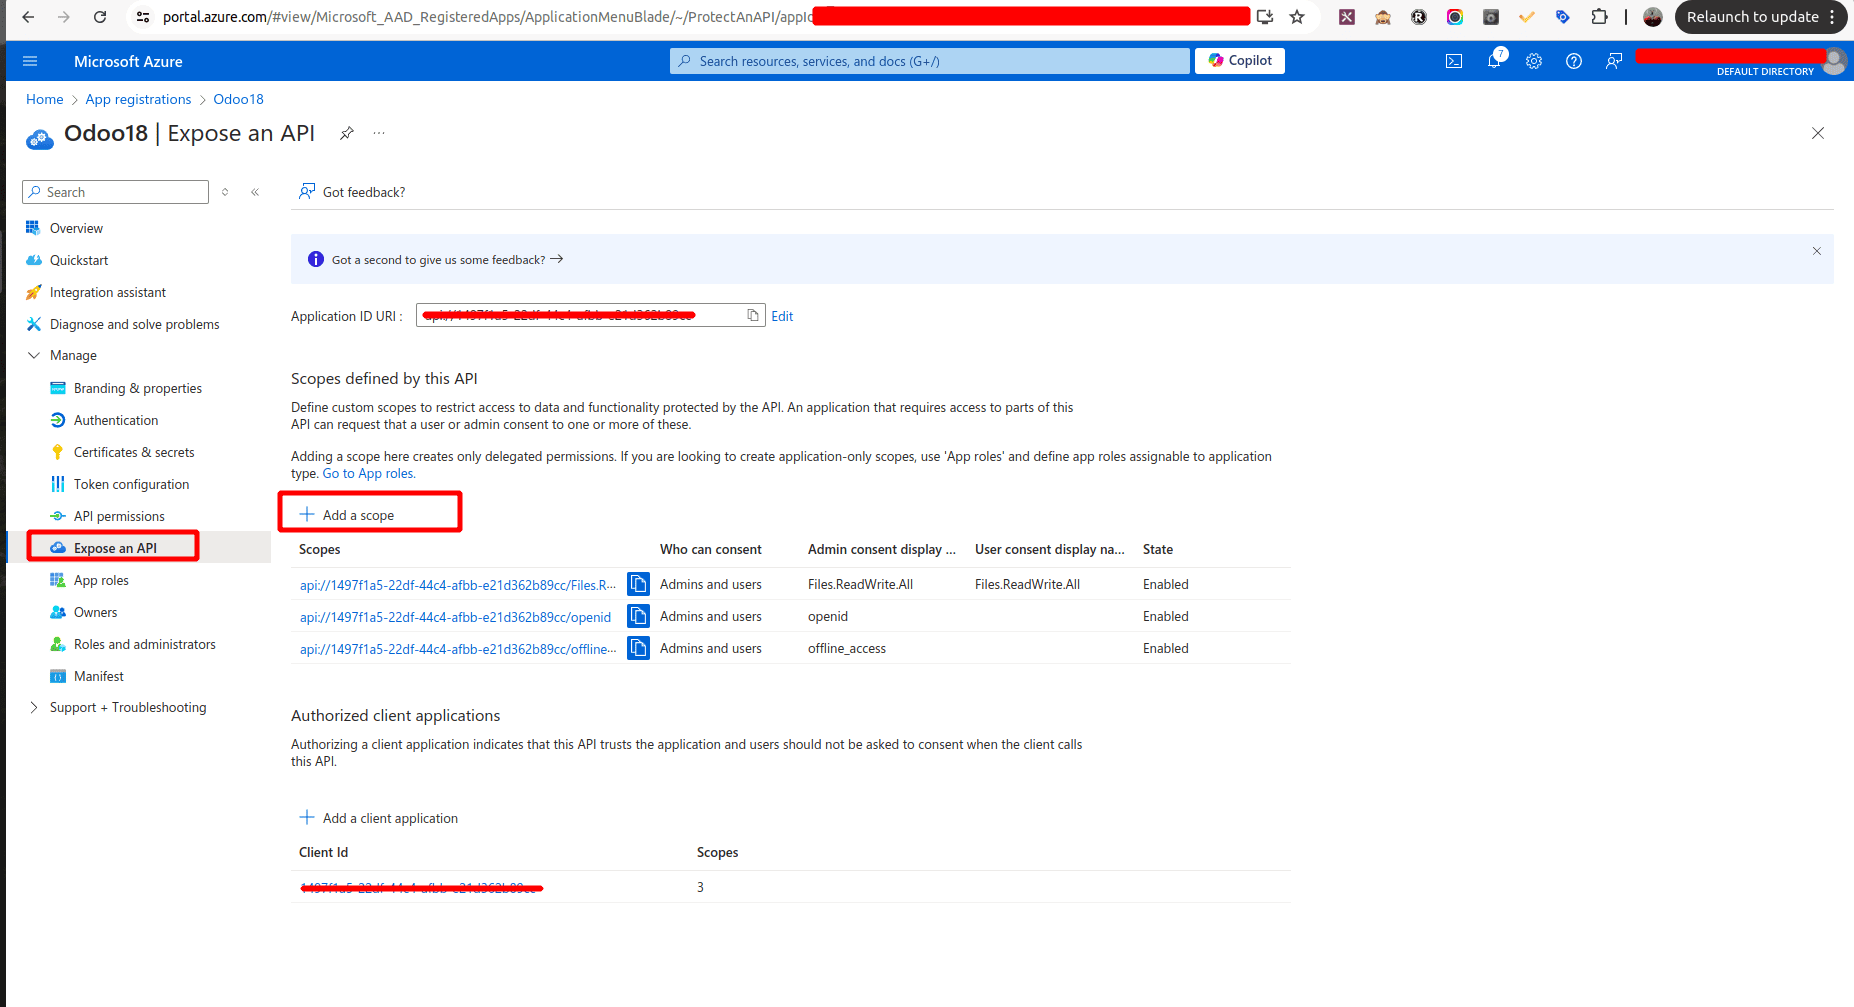
Step 3: Set Permissions
* In the Expose an API section, add the required Scopes for the app to access OneDrive as in the example below.
a. Offline_access
b. openid
c. Files.ReadWrite.All
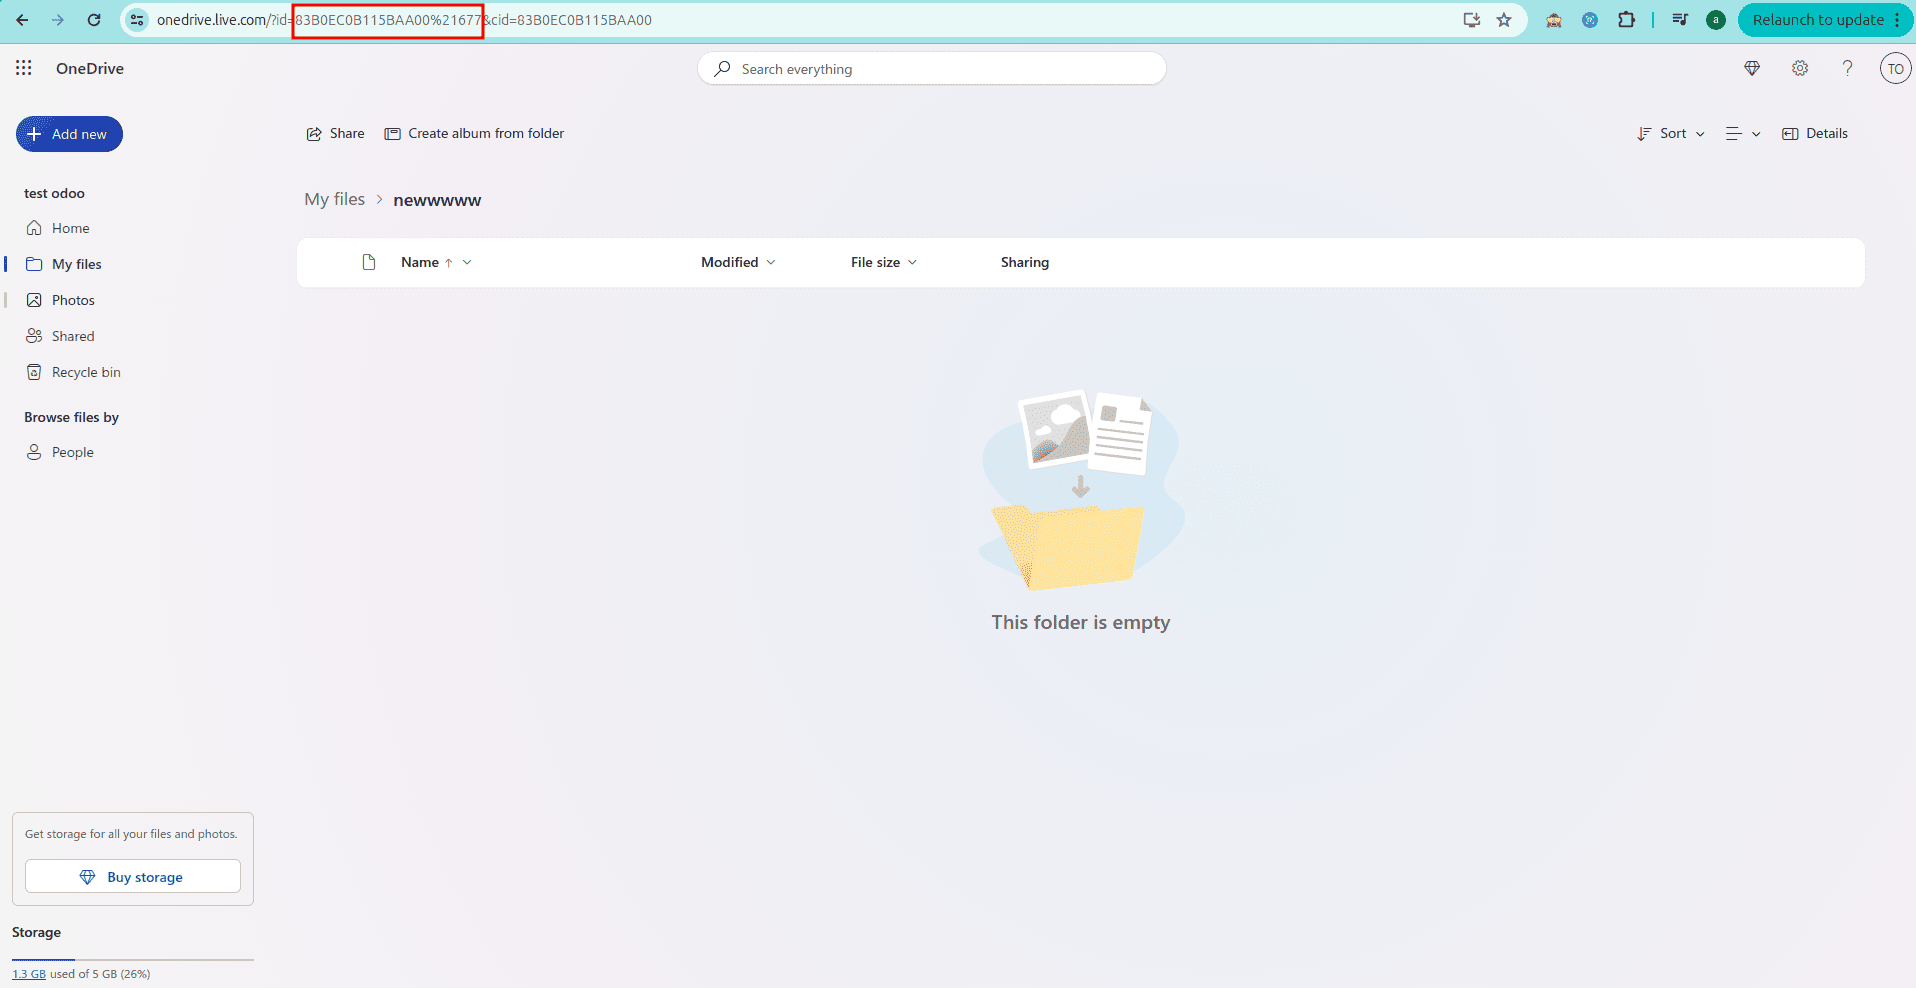
Step 4: Retrieve OneDrive Folder ID
* Get the OneDrive Folder ID from the folder url in the onedrive where you want to store backup files.
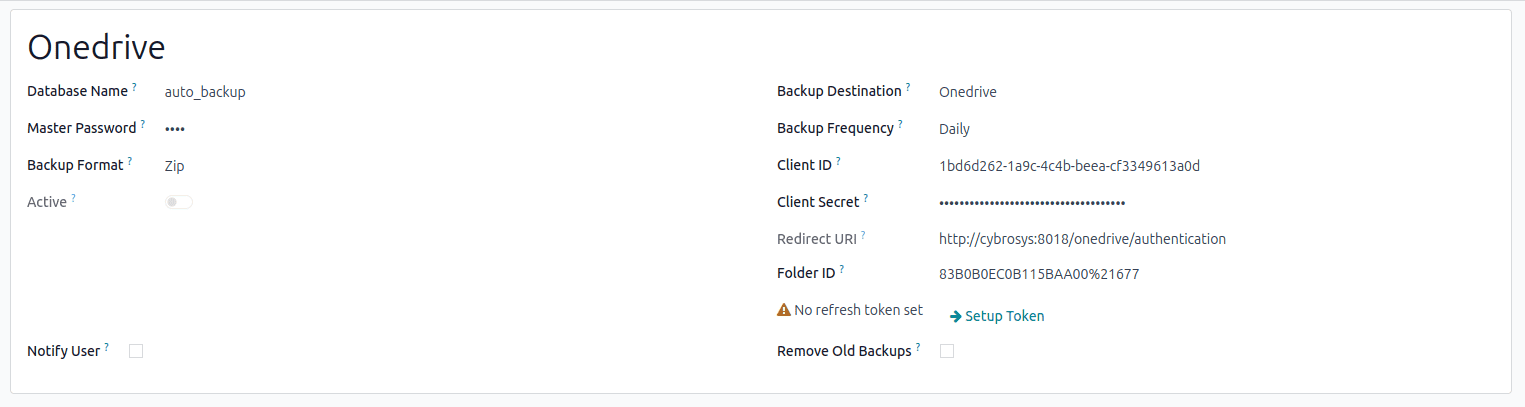
Step 5: Configure Backup in Odoo
* In Backup Configuration, select OneDrive as the backup destination.
* Enter the App Key, App Secret, and OneDrive Folder ID.

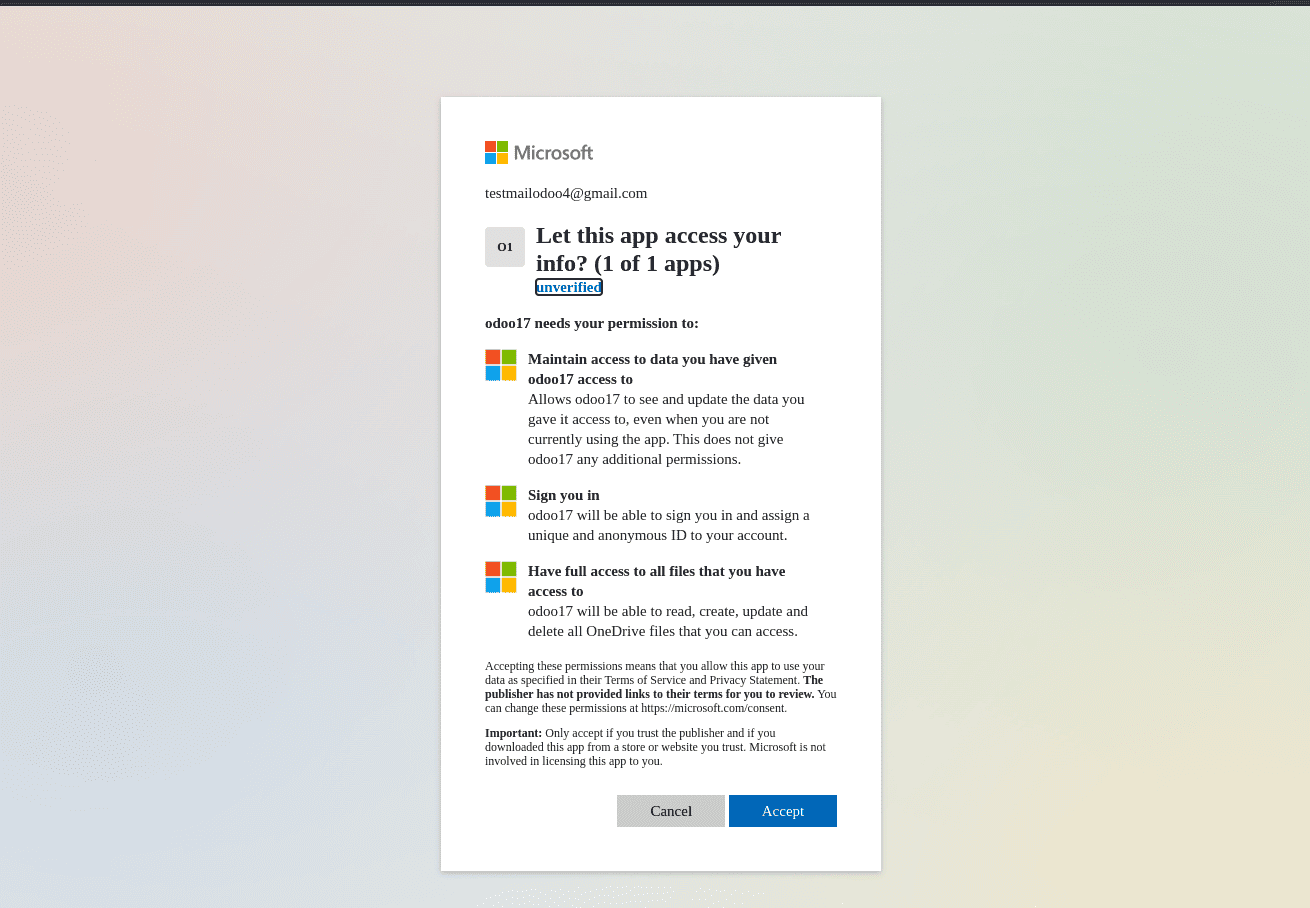
Step 6: Authenticate & Generate Token
* Click on Setup Token to initiate authentication.
* You will be redirected to an authorization page—grant the necessary permissions.
Nexclod :
To configure your Odoo backup to store files on nexcloud:
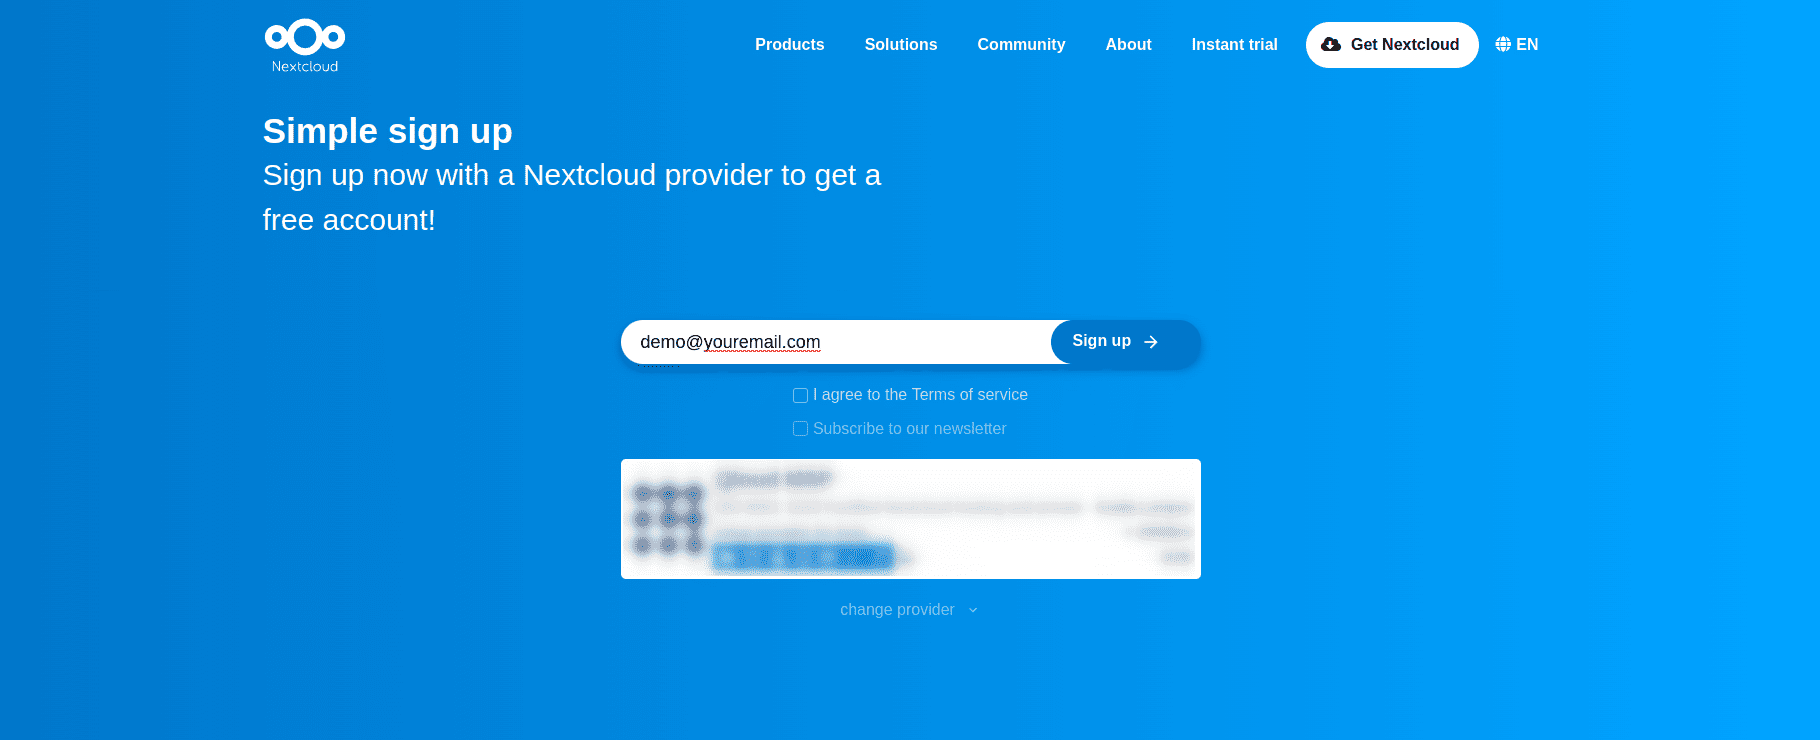
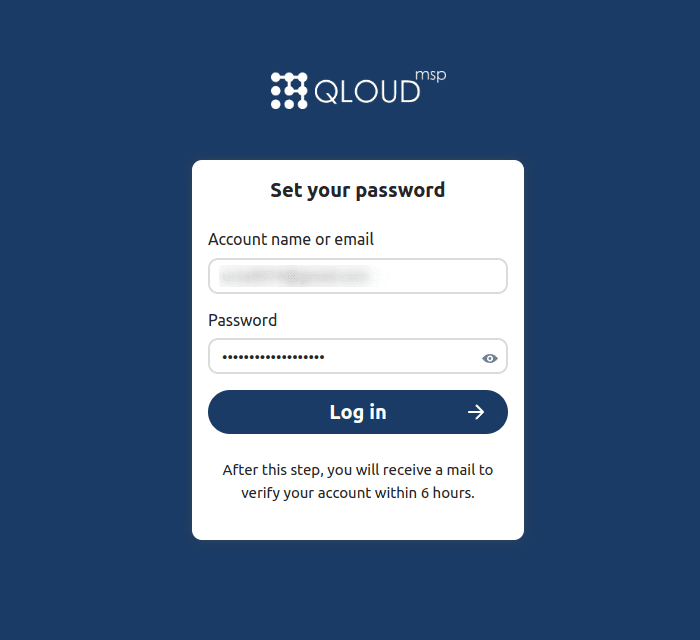
Step 1: Create a NextCloud Account:
* Visit NextCloud Sign-Up.
* Enter your email address and click Sign Up.
Step 2: Log in to NextCloud
* After signing up, you will be redirected to a login page.
* Enter your email and password to access your account.
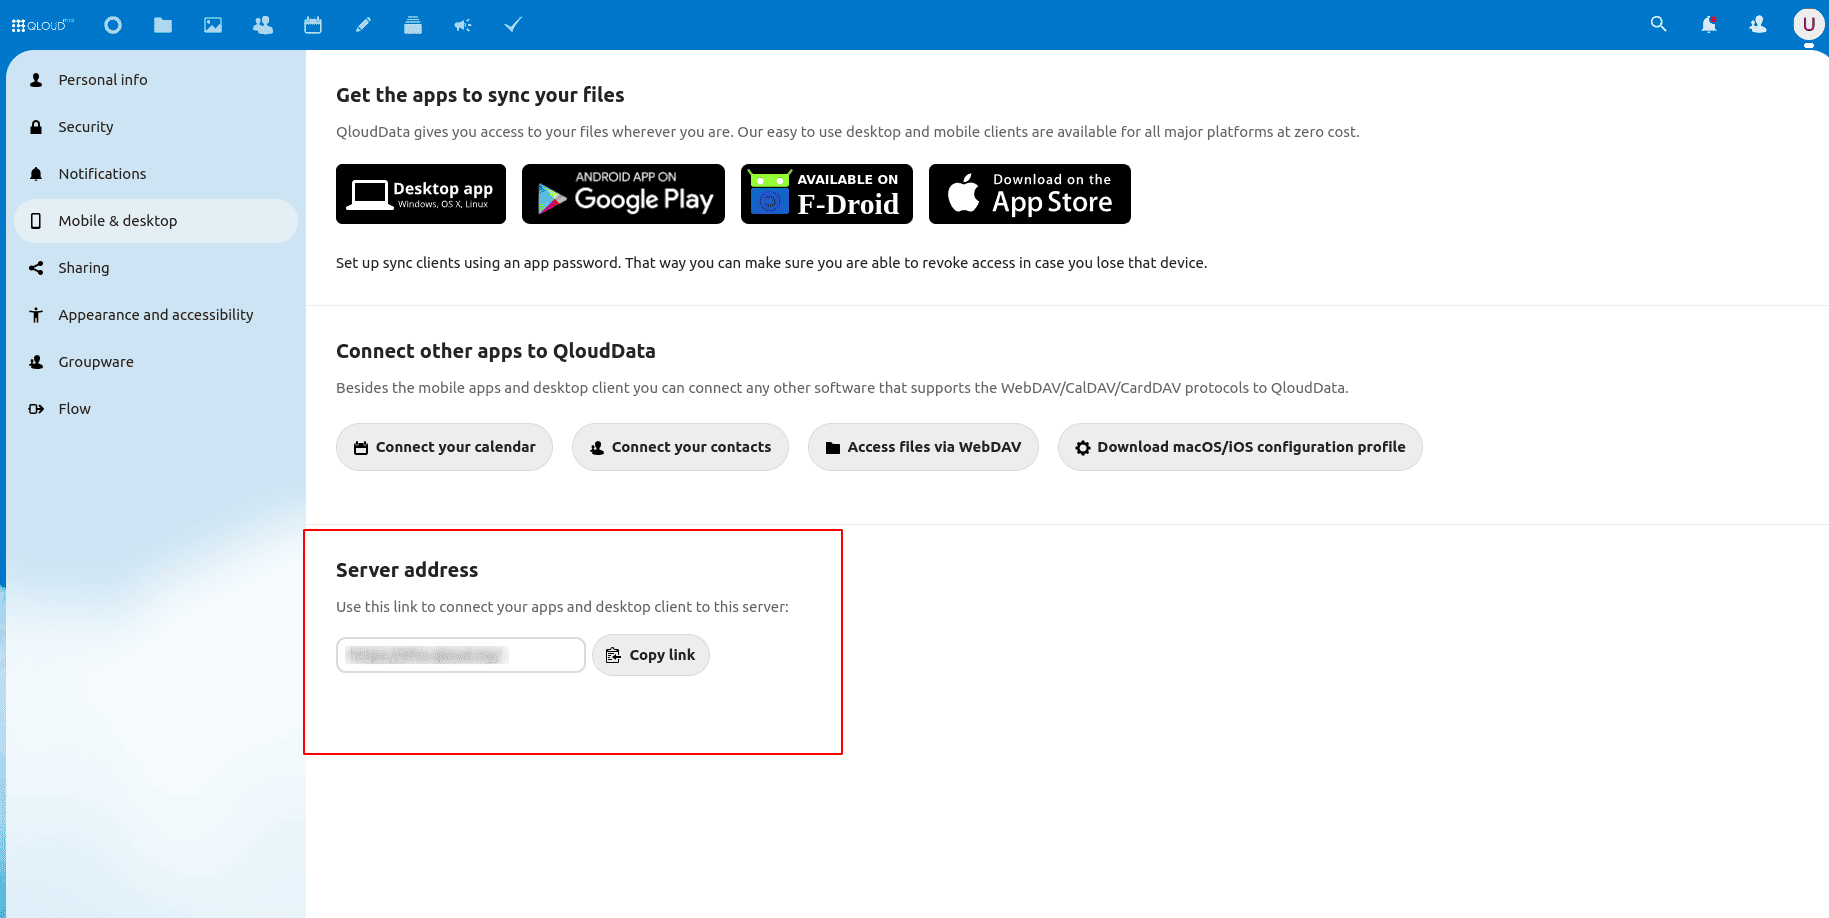
Step 3: Retrieve Your NextCloud Domain
* Go to Settings in NextCloud.
* Click on Mobile & Desktop.
* Locate the Server Address, copy the link, and paste it as your Domain Name in Odoo.
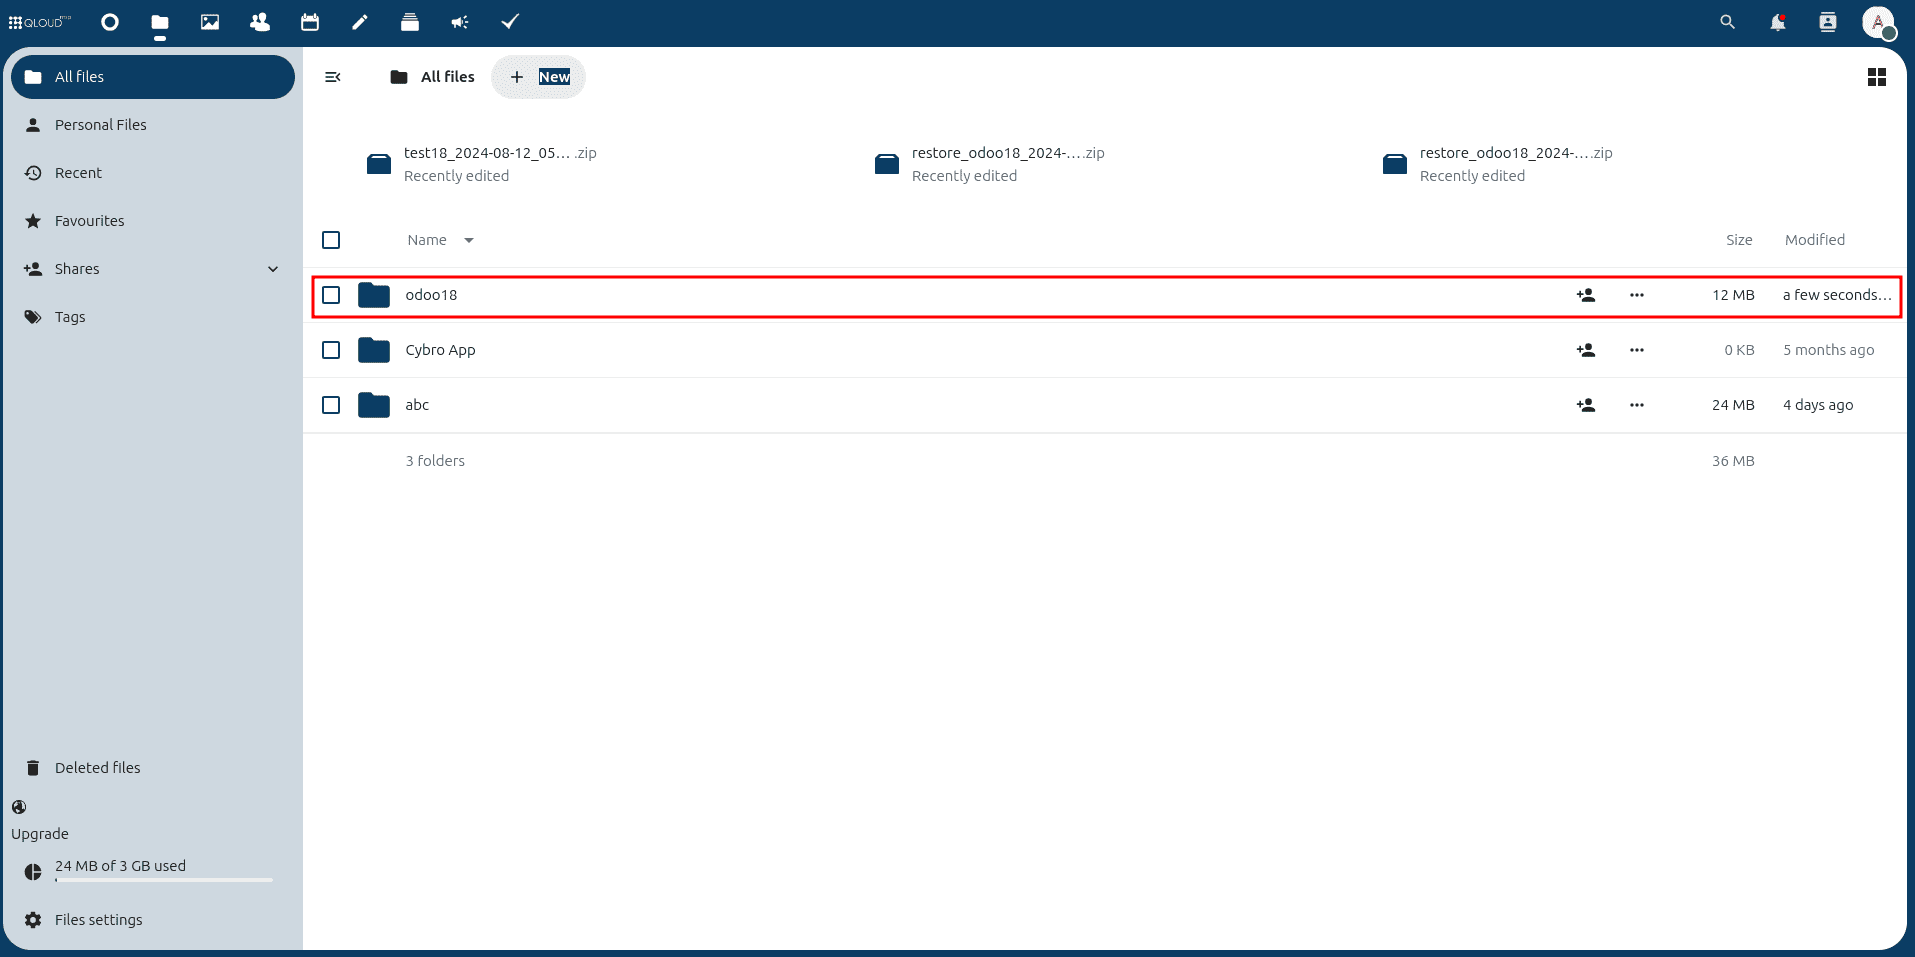
Step 4: Configure Backup in Odoo
* Select NextCloud as the backup destination.
* Enter the following details:
a. Domain Name (retrieved in Step 3)
b. Username
c. Password
d. Folder Name (where the backup will be stored)
* Test the Connection

Backups will be created in the folder as per the backup frequency.
Amazon S3:
To configure Amazon S3 as your backup destination, follow these steps:
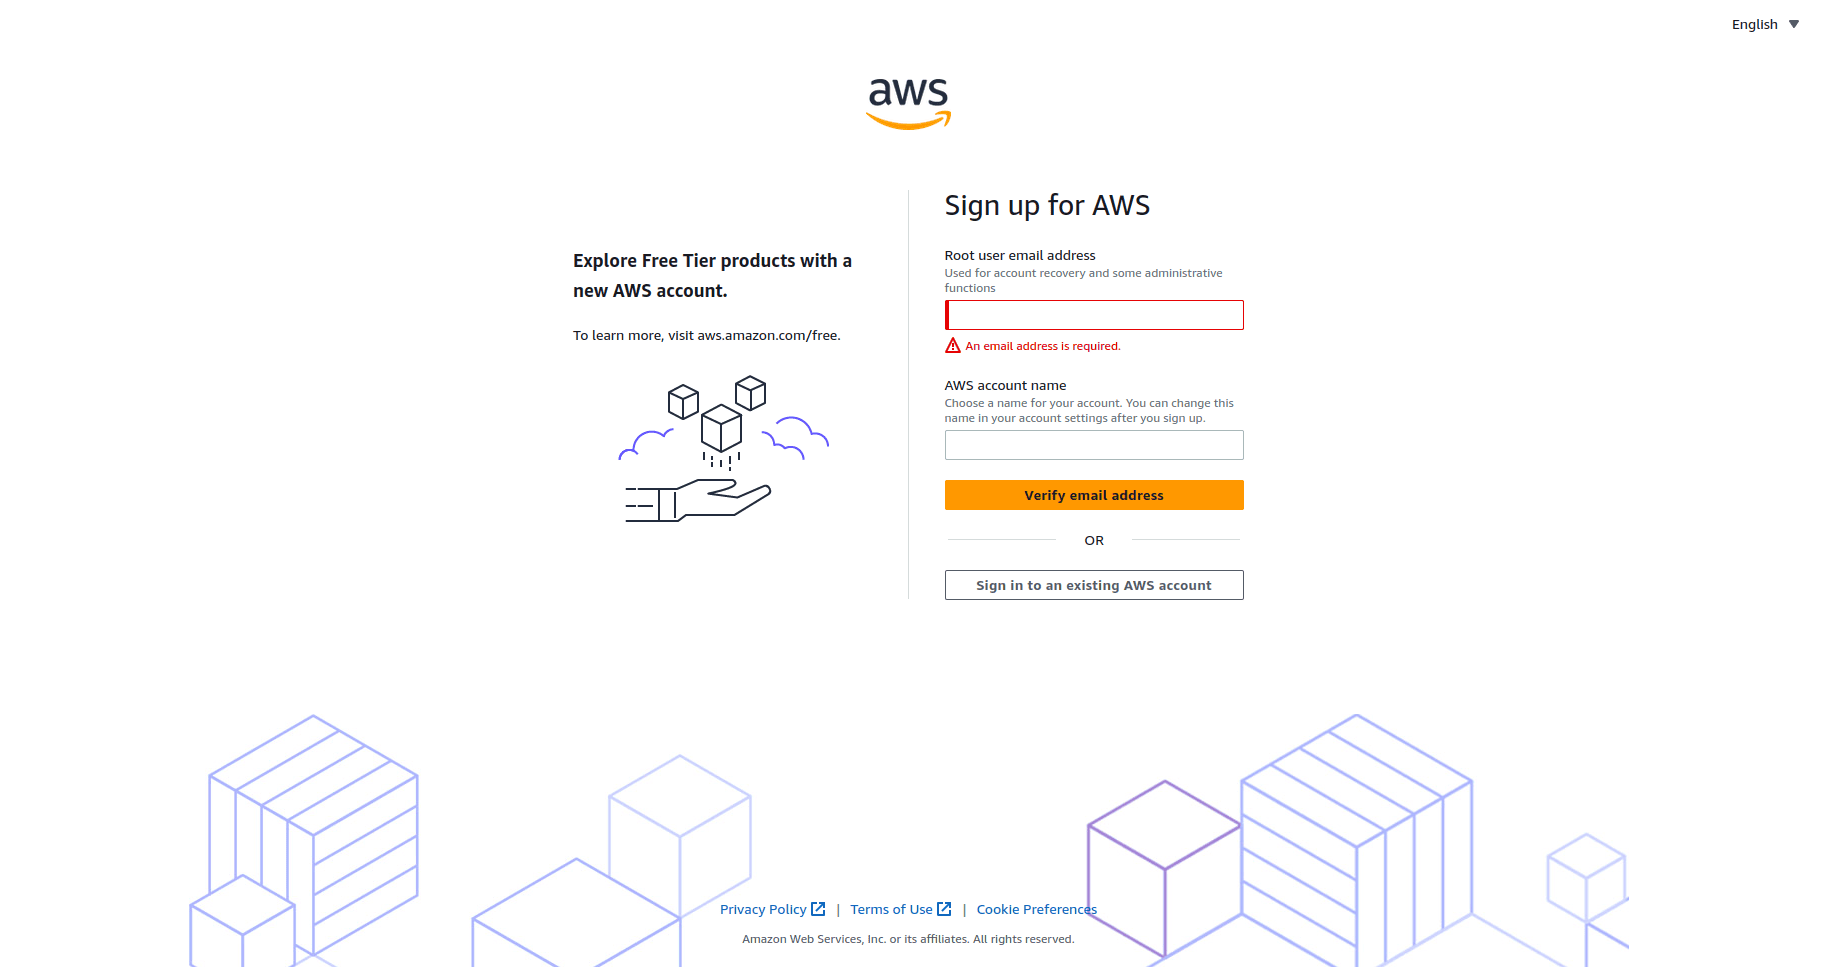
Step 1: Create an Amazon S3 Account:
* Go to Amazon S3 Sign-Up.
* Enter your email address and complete the sign-up process.
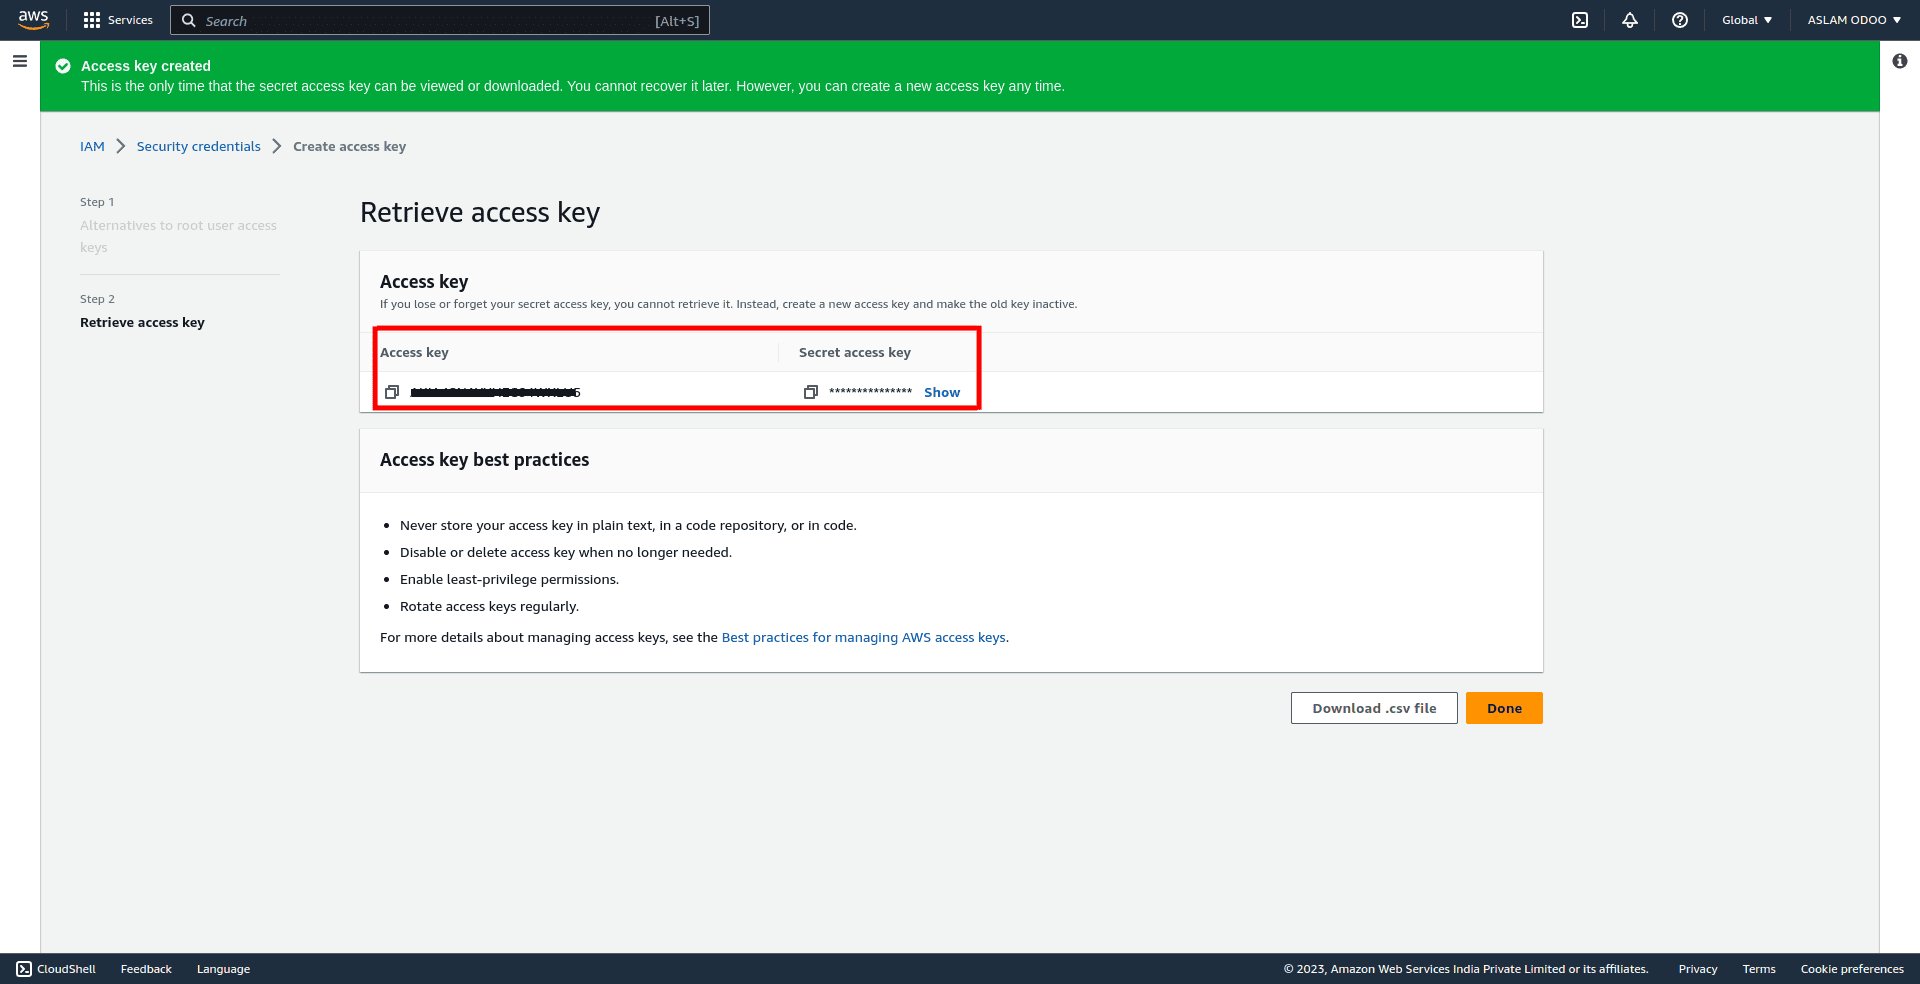
Step 2: Generate Access Keys
* After creating your account, navigate to Account Security Credentials.
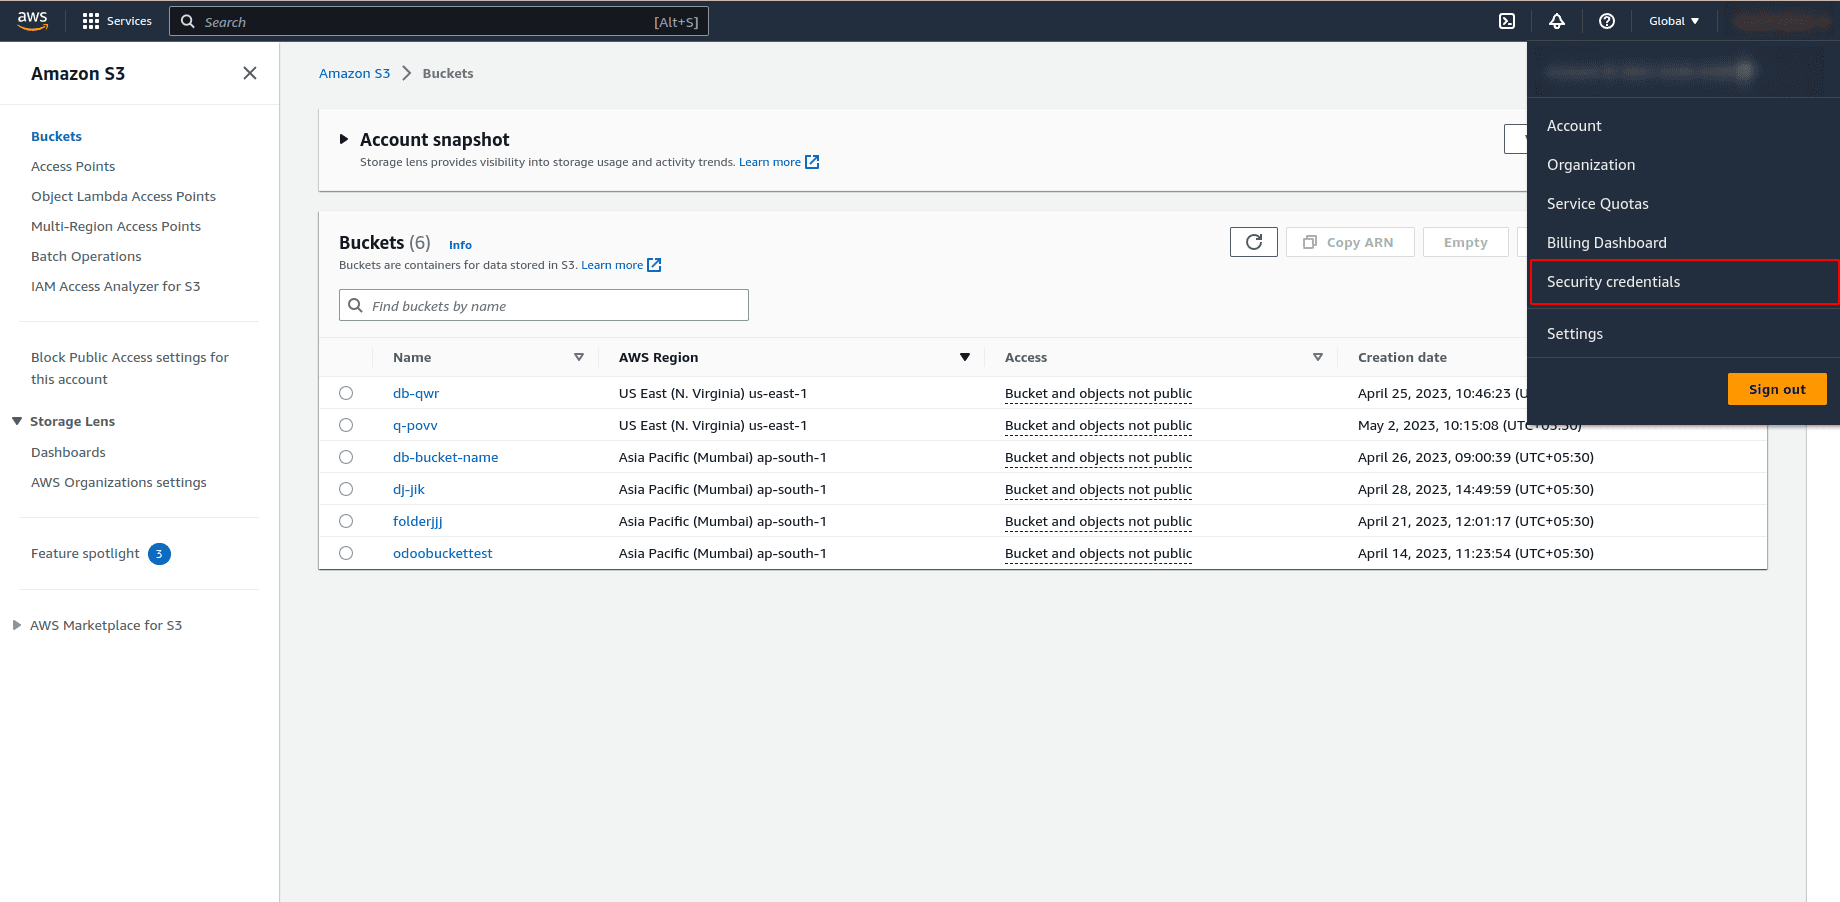
* Go to Access Keys and create a new access key.

* Copy the Access Key and Secret Key for later use.
Step 3: Create an S3 Bucket
* In the AWS Management Console, click on Services (top-right).
* Navigate to Storage > S3.
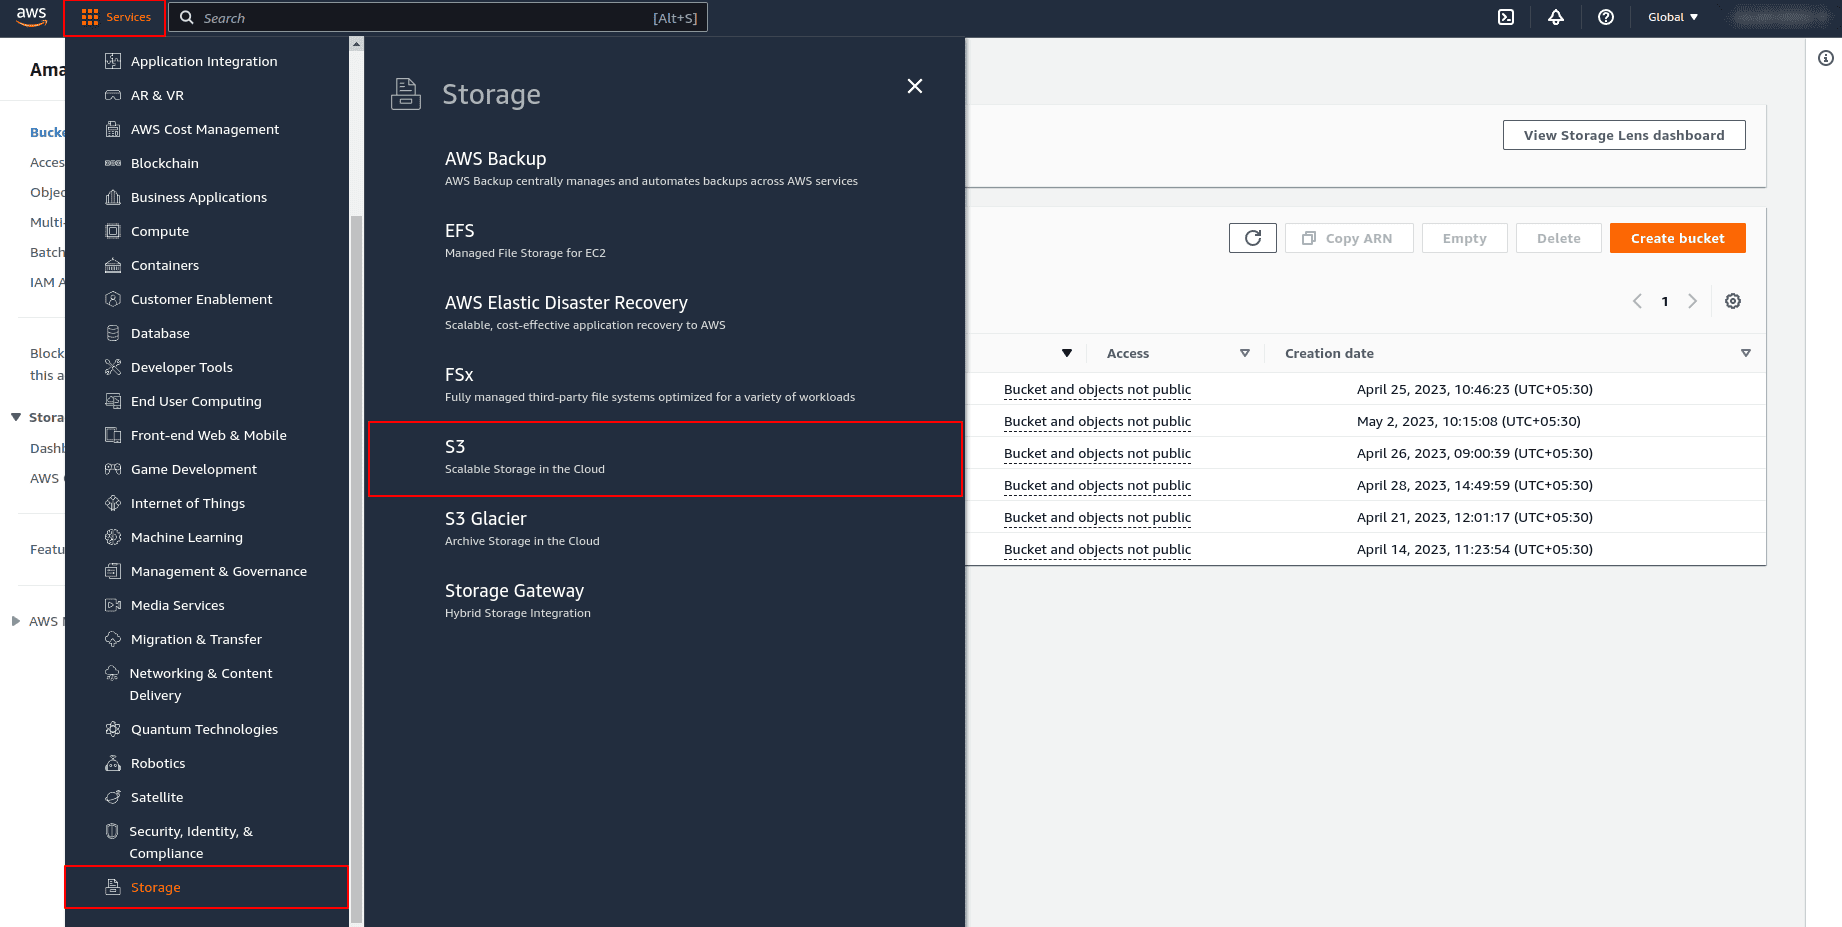
* Click on Create Bucket.
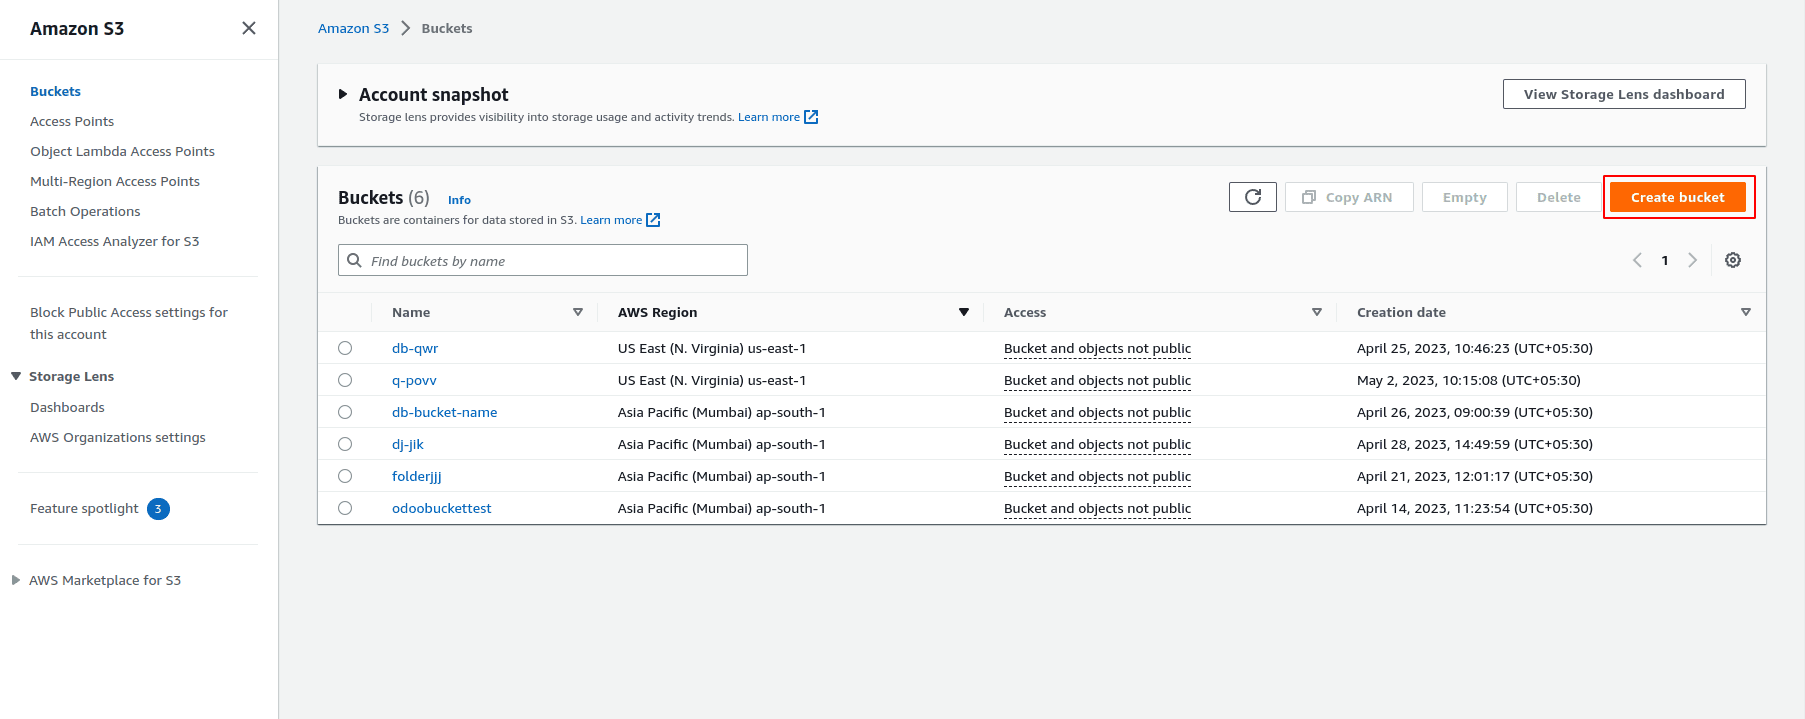
* Follow the naming rules and select the region where you want to store backups.
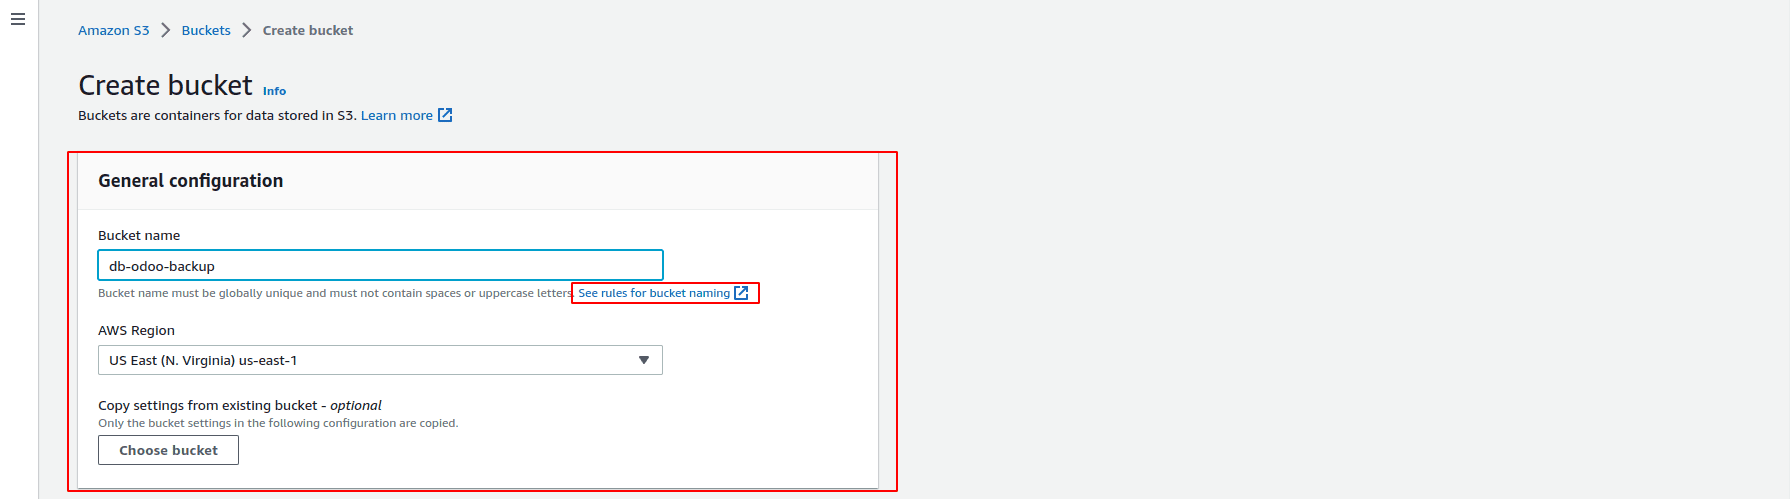
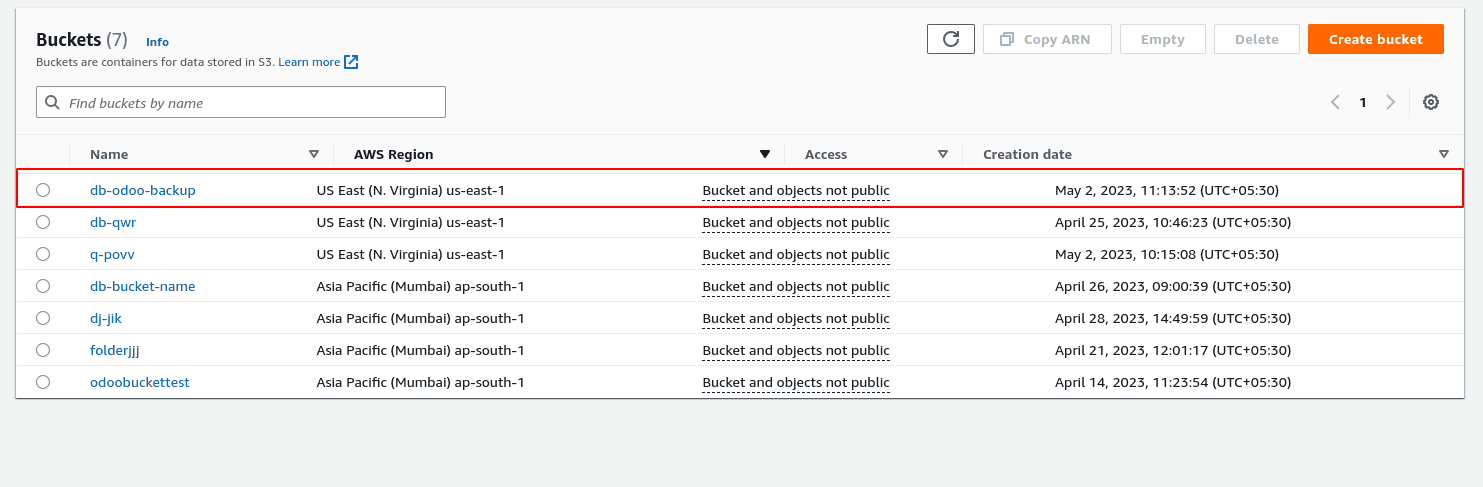
* Click Create Bucket to complete the setup, and you will see the Bucket Folder as shown in the screenshot.
Step 4: Configure Backup in Odoo
* In Backup Configuration, select Amazon S3 as the backup destination.
* Enter the following details:
a. Amazon S3 Access Key
b. Amazon S3 Secret Key
c. Bucket Name (the bucket you created in Step 3)
d. File Name (folder name where the backup will be stored inside the bucket)
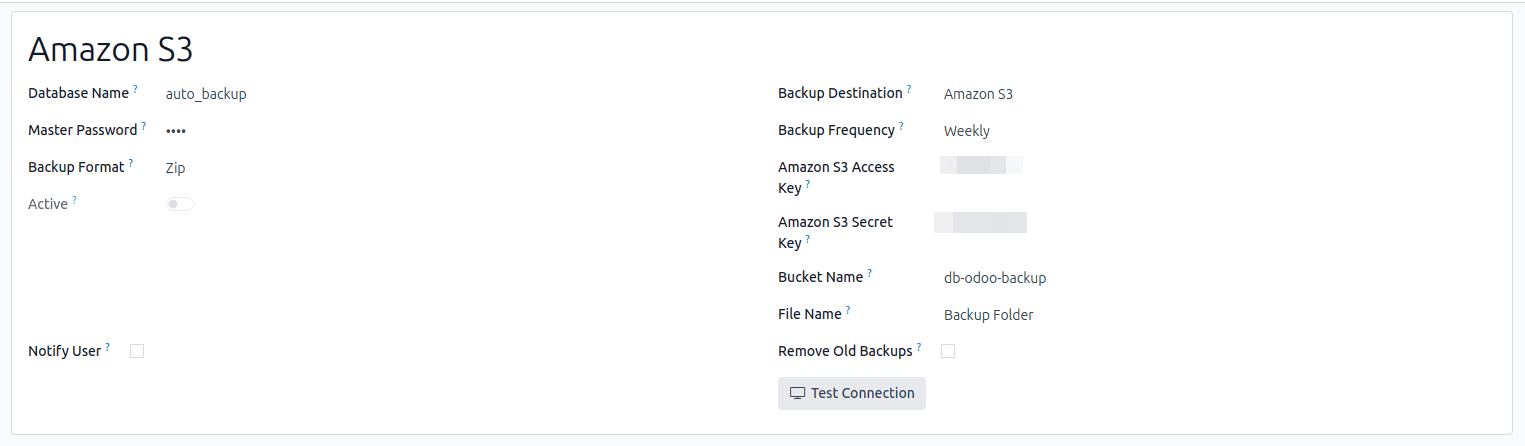
Step 5: Test Connection
* Click on the Test Connection button to verify the setup.
Automatically Remove Old Backups.
Enabling the auto-remove option for backups ensures that old backup files are automatically deleted after a specified number of days. This helps in managing storage efficiently, preventing unnecessary disk space consumption, and ensuring that only relevant backups are retained.

Notify the user of the success or failure of backup generation
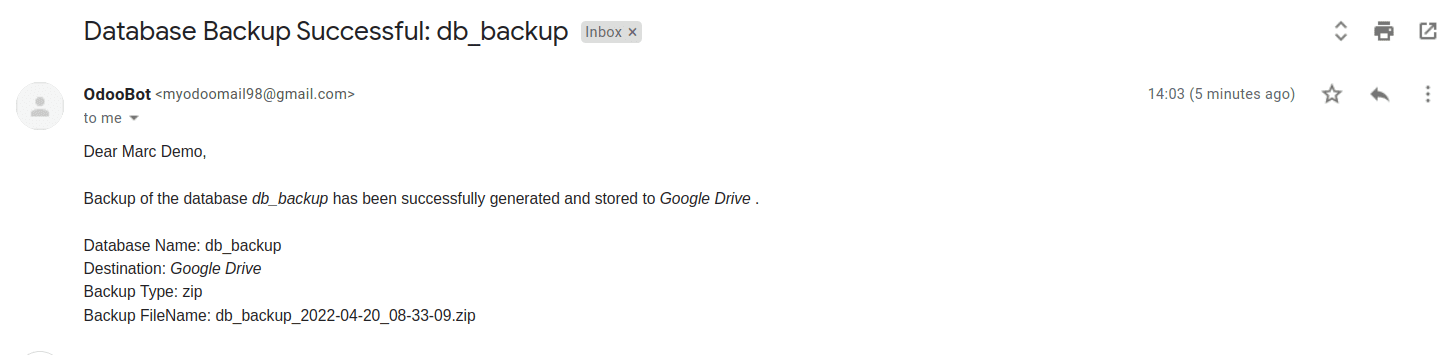
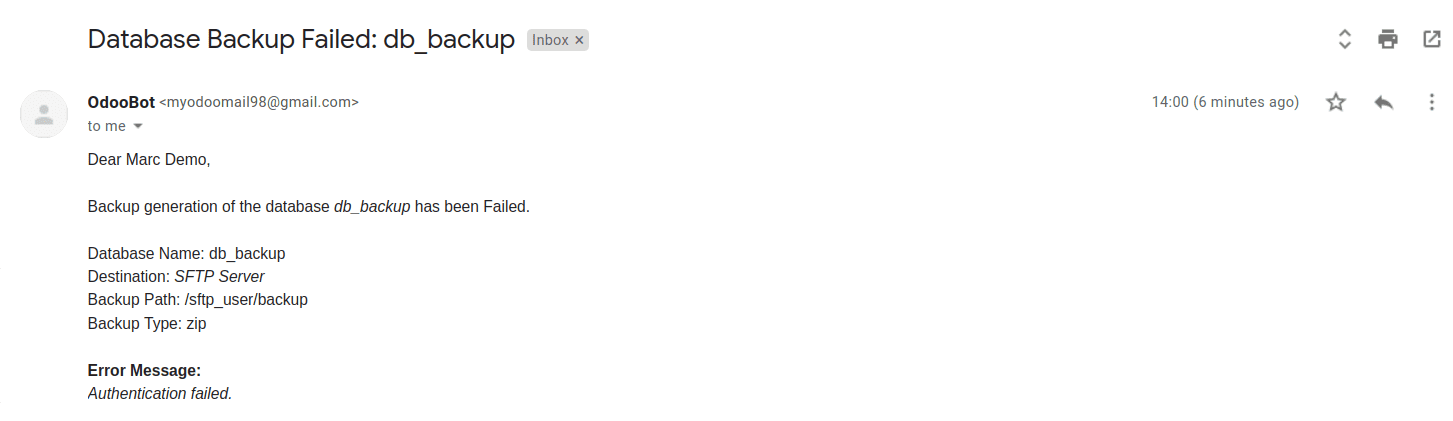
Enabling the notify user option ensures that a selected user receives email alerts whenever a backup operation succeeds or fails. This helps in real-time monitoring of backup processes, allowing administrators to take immediate action in case of failures.
* Successful Backup Notification Email:
* Failed Backup Notification Email:
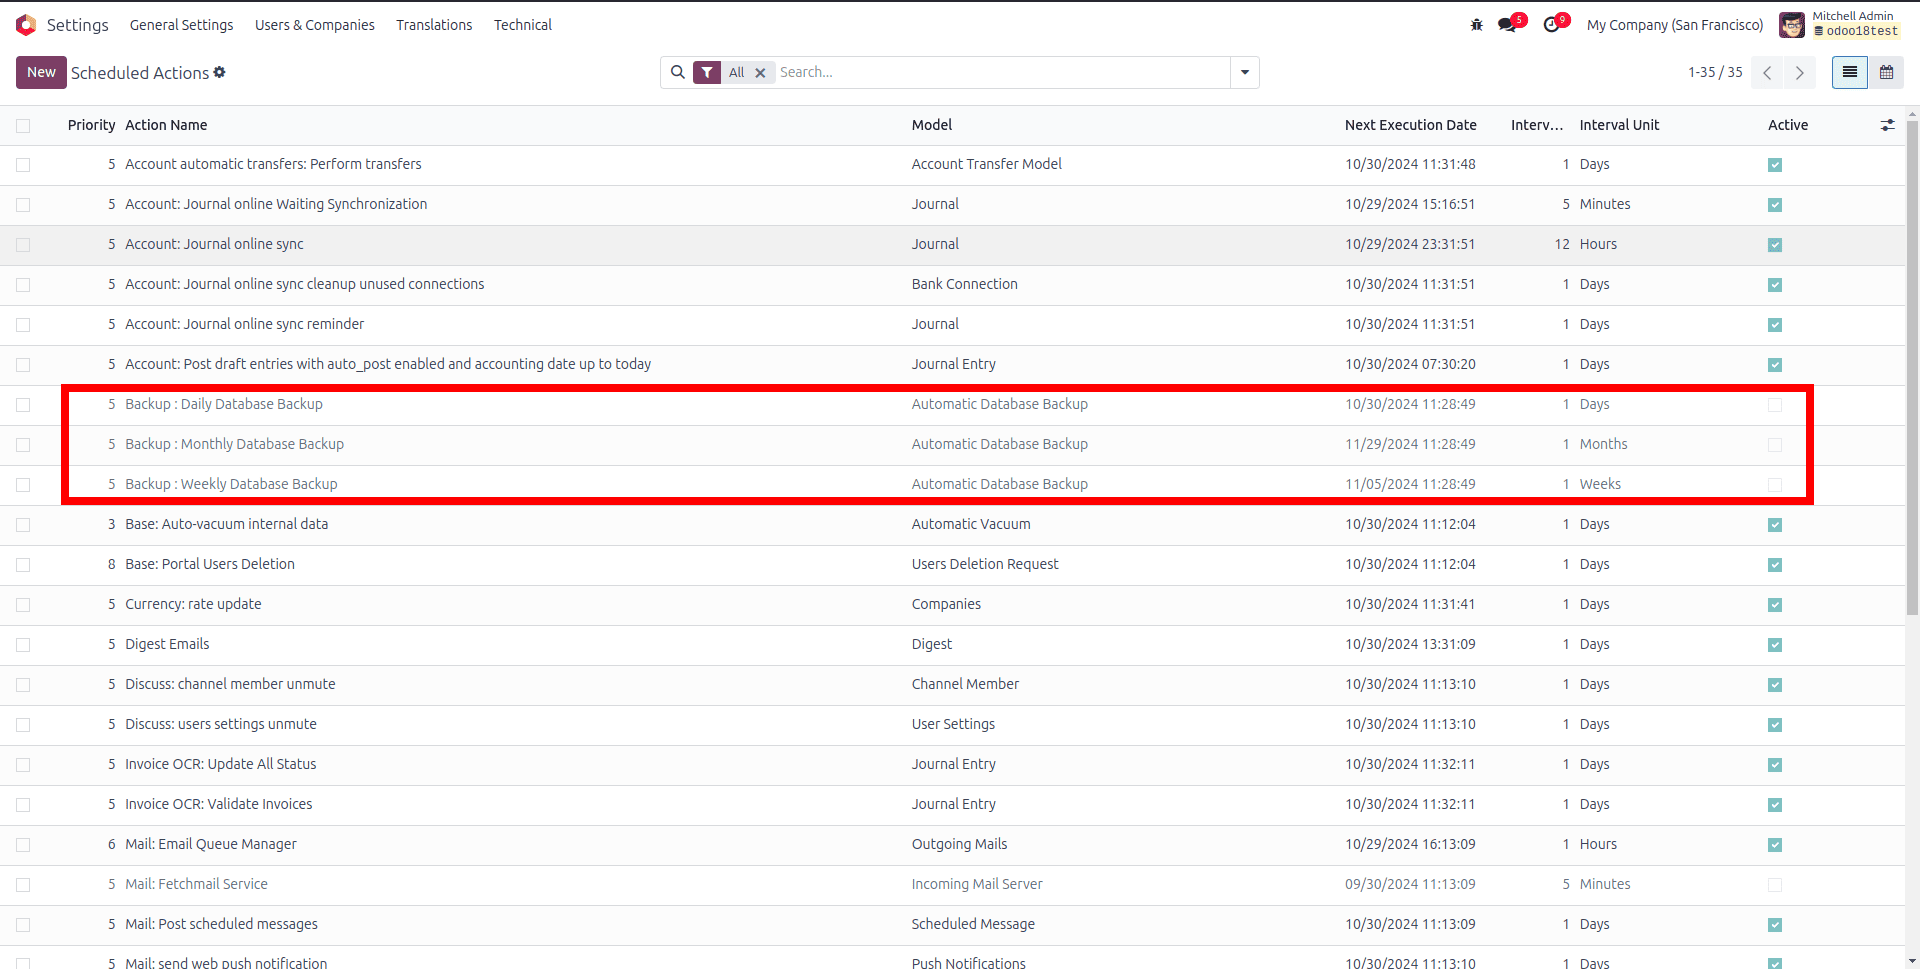
Scheduled Actions for Automatic Database Backup
Three scheduled actions will be configured to run the backup process at your specified location based on the following intervals:
* Daily Backup – Runs every day to ensure up-to-date data recovery.
* Weekly Backup – Runs once a week for periodic data protection.
* Monthly Backup – Runs once a month to maintain long-term backup retention.
Enable the scheduled actions to execute backups as per the defined backup frequency in your configuration, ensuring reliable and automated data protection.
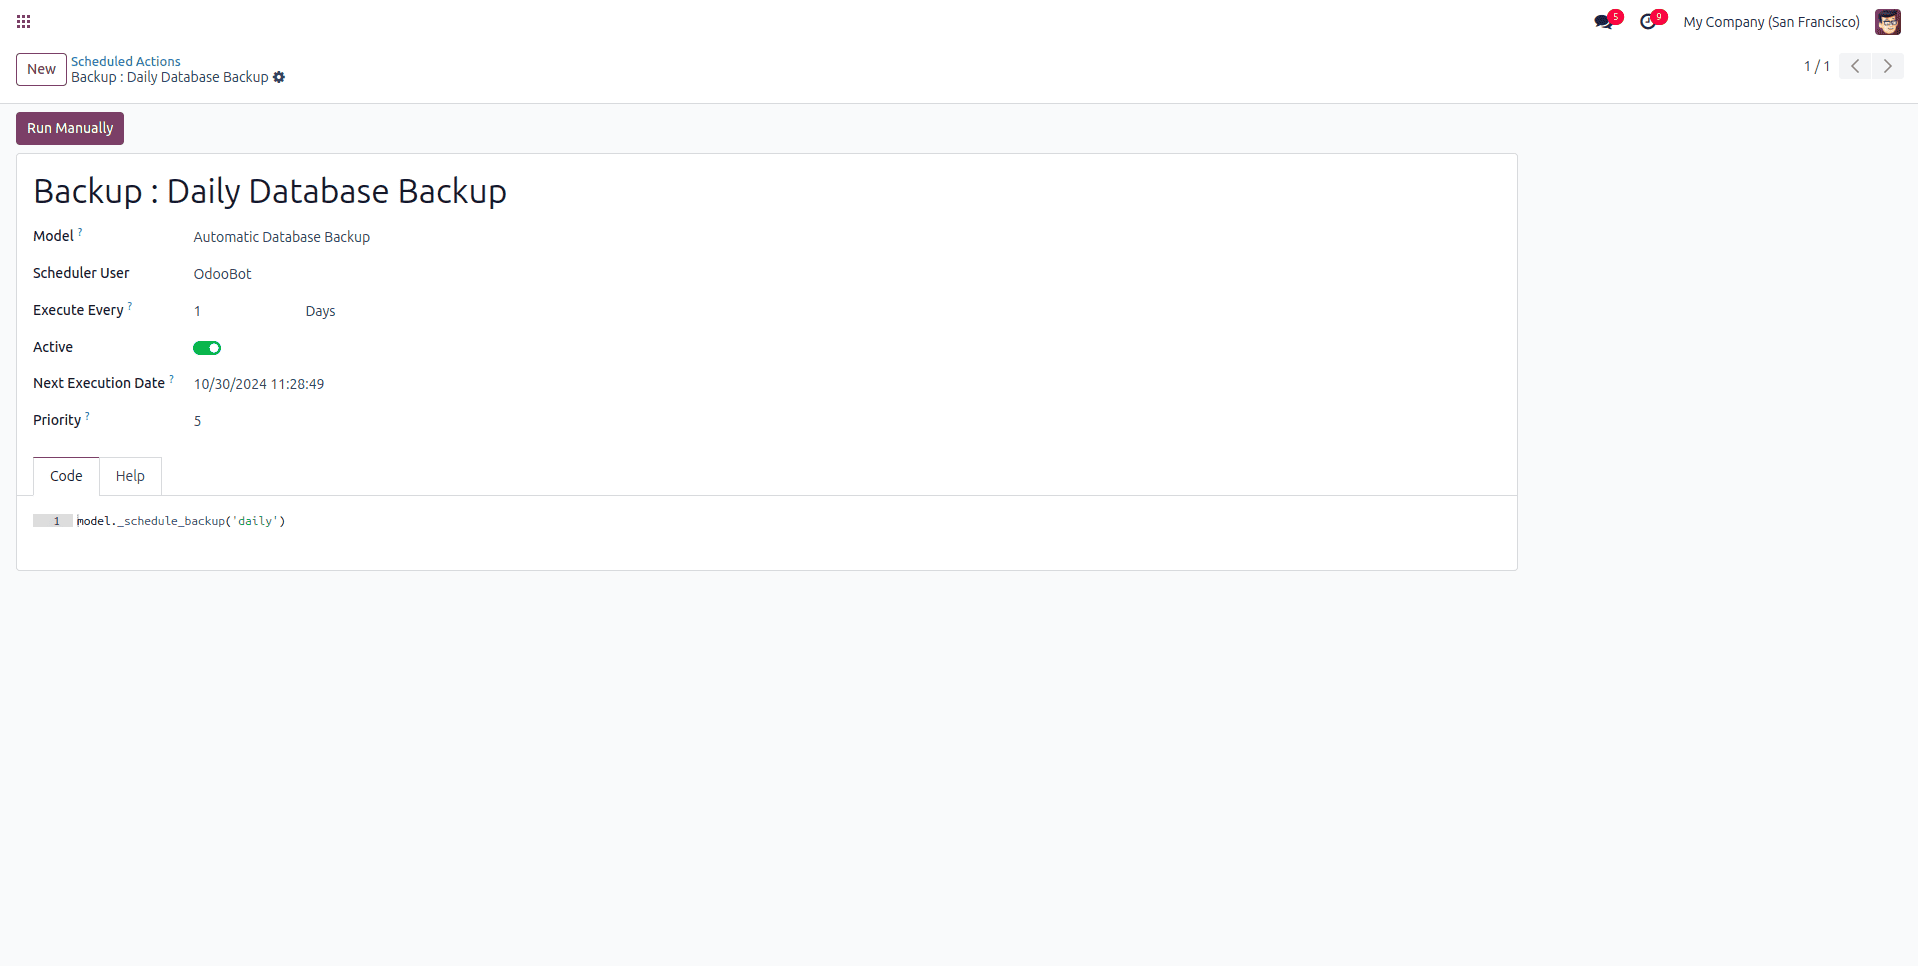
Select the scheduled action with the desired frequency.
Activate the scheduled action to run automatically. Click 'Run Manually' to execute it now.
The Automatic Database Backup module for Odoo 18 ensures seamless and reliable backup management by automating the backup process across multiple storage destinations. With support for local servers, remote servers, and cloud services like Google Drive, Dropbox, OneDrive, Nextcloud, and Amazon S3, businesses can safeguard their critical data efficiently.
This module enhances data security, storage optimization, and disaster recovery readiness by enabling scheduled backups (daily, weekly, and monthly), automatic old backup removal, and real-time notifications. Whether you are an enterprise or a small business, this feature-rich solution ensures that your Odoo database remains protected, minimizing the risk of data loss and downtime.
Implementing this module will give you peace of mind, knowing that your backups are automated, secure, and easily accessible whenever needed.
To read more about How Database Population Works in Odoo 17, refer to our blog How Database Population Works in Odoo 17.