As Odoo continues to evolve, the latest release, Odoo 18, introduces new features that make ERP implementation smoother and more powerful. For developers and integrators working with custom modules, loading demo data is an essential step that allows for realistic testing, training, and showcasing module functionalities. Demo data can provide a “live” feeling for the application before real data is populated, which is invaluable during development and client demonstrations.
In this article, we’ll explore how to load demo data in Odoo 18 using two common methods: XML and CSV files. This guide will walk you through creating both types of demo data, linking them to your modules, and verifying their implementation in Odoo 18.
Why Use Demo Data?
Demo data plays a crucial role in ERP development by providing:
* Test Records: For validating module functionality before deployment.
* Training Resources: To help end-users understand how the module works with sample data.
* Showcasing Features: Essential for presentations or client demonstrations.
Method 1: Loading Demo Data Using XML Files
XML files offer a powerful and flexible way to define structured demo data, especially when working with complex records. Here’s a step-by-step guide.
Step 1: Set Up a Demo Folder
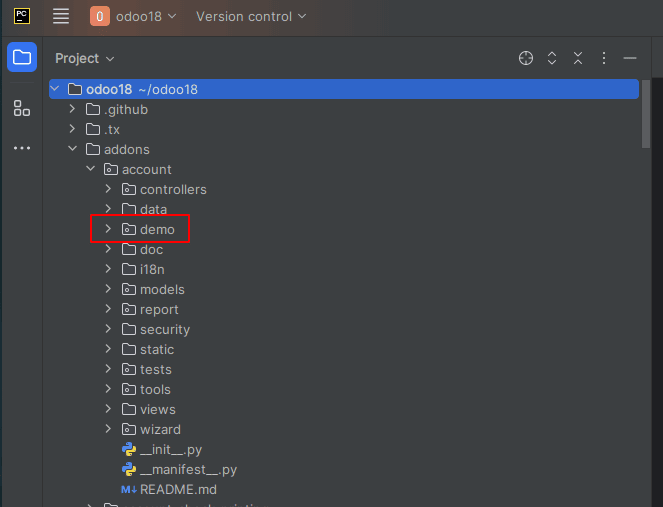
1. In your module directory, create a folder named demo. This folder will store all XML files containing your demo data.

Step 2: Create an XML File with Demo Data
Inside the demo folder, create an XML file. For this example, let’s name it hr_department_demo.xml. Here, we’ll define a sample employee record within the hr.department model.
<?xml version="1.0" encoding="utf-8"?>
<odoo>
<data noupdate="1">
   <!--Department-->
   <record id="dep_management" model="hr.department">
       <field name="name">Management</field>
       <field name="color" eval="5"/>
   </record>
</data>
</odoo>
Explanation:
* Record ID: Unique identifier for the record.
* Model: Specifies the Odoo model (hr.department in this case).
* Fields: Define the fields for the department, such as name and color.
* noupdate="1": Ensures that this data is only loaded during the initial module installation.
Step 3: Link XML File in Manifest
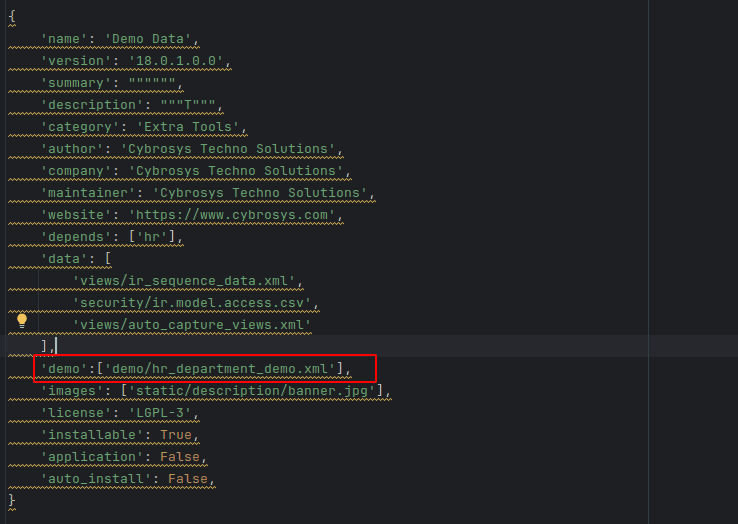
To load the XML file, add its path to the demo key in your module’s __manifest__.py file:

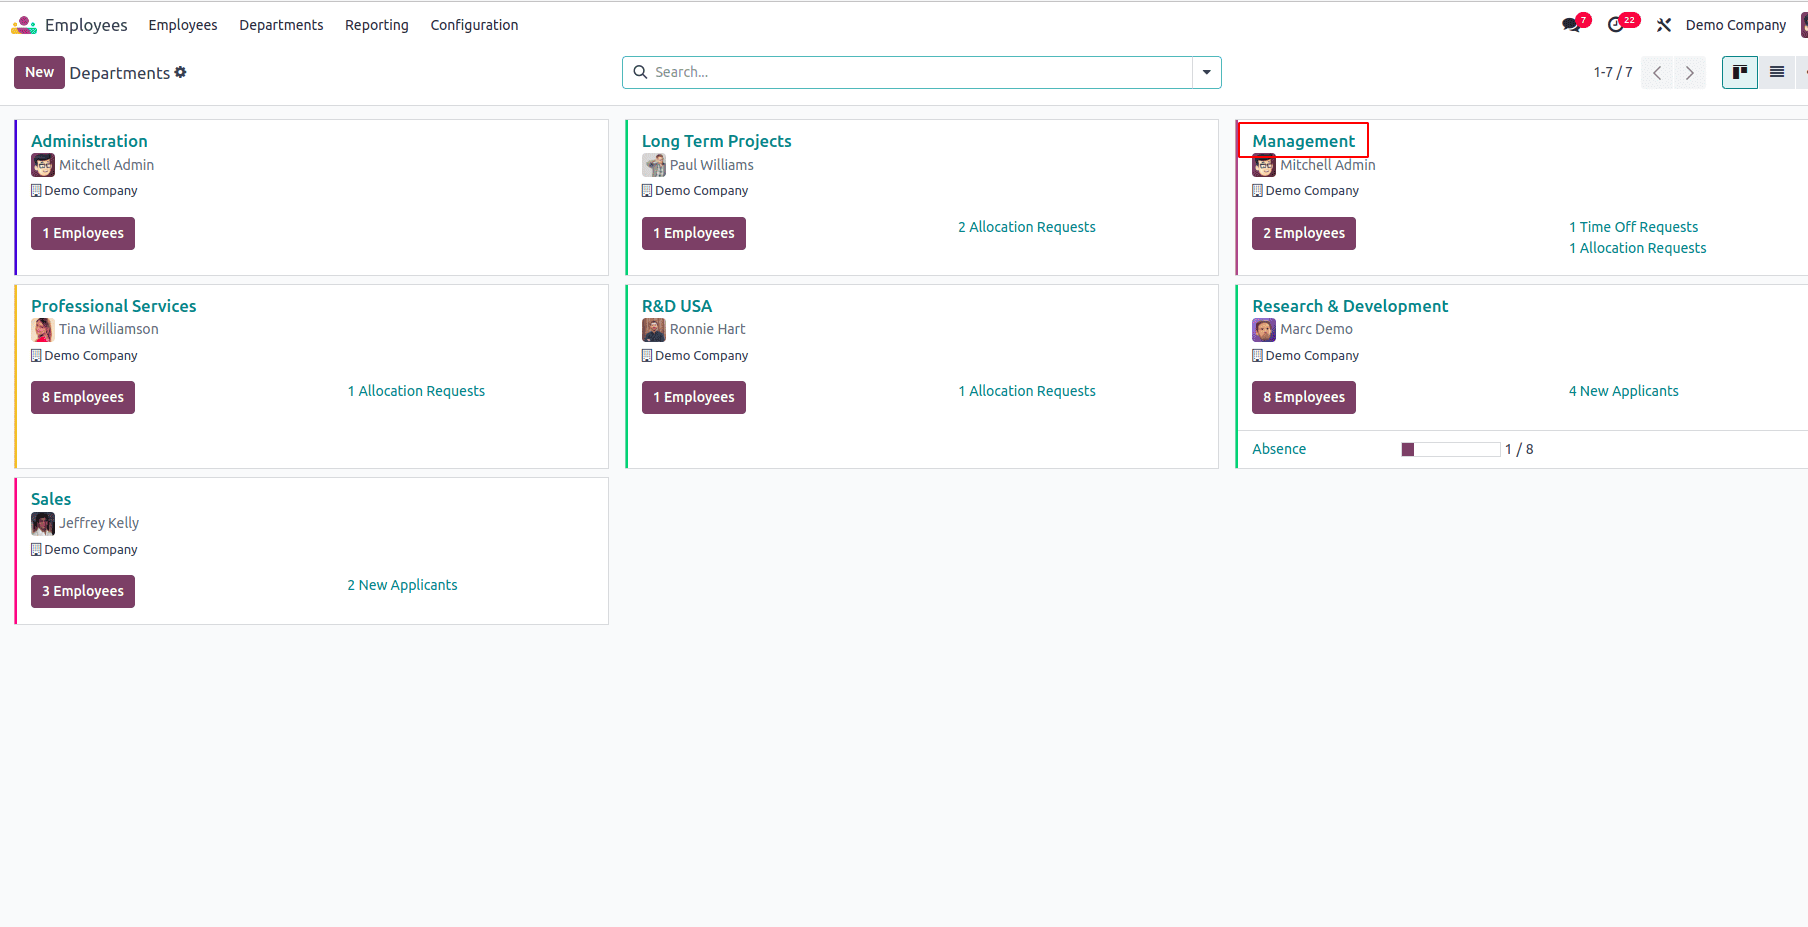
Go to Employees > Departments in the Odoo backend to confirm that your demo department (Management) has been successfully added.

Method 2: Loading Demo Data Using CSV Files
For large volumes of simple data, CSV files are a practical alternative. CSV files allow you to quickly generate records in a concise format, especially useful when you need numerous entries for the same model.
Create a CSV File
Create a CSV file (e.g., currency_demo.csv) in the data folder of your module. This CSV file should include columns for the id, name, l10n_cl_currency_code, and l10n_cl_short_name fields.
Here’s an example of what the CSV file could look like:
id,l10n_cl_currency_code,l10n_cl_short_name
base.AED,139,DIRHAM
base.ARS,1,PESO
base.AUD,36,DOLAR AUST
base.BOB,4,BOLIVIANO
base.BRL,5,CRUZEIRO REAL
base.CAD,6,DOLAR CAN
base.CHF,82,FRANCO SZ
base.CLP,200,PESO CL
Explanation of Columns
* id: The unique identifier for each record. This should be prefixed with a module name or namespace, like base. (e.g., base.AED).
* name: The name of the currency (e.g., "Dirham" for AED, "Peso" for ARS).
* l10n_cl_currency_code: A custom field for the currency code, as per your requirements.
* l10n_cl_short_name: A custom field for the currency’s short name or abbreviation.
Loading demo data in Odoo 18 using XML and CSV files is a powerful way to test, demonstrate, and train users on your custom modules. By following the steps above, you’ll be able to populate your Odoo database with relevant sample data, enhancing the ERP experience for your users. Whether you choose XML for structured data or CSV for simple, high-volume entries, demo data empowers you to showcase your module’s potential effectively.
To read more about How to Load Demo Data in Odoo 17, refer to our blog How to Load Demo Data in Odoo 17.