Generally, people use the Odoo installer kit to install Odoo on Windows systems. However, developers face lots of issues when customizing Odoo using the installer kit.
This blog will assist you in properly installing Odoo on Windows.
There are six basic steps to installing Odoo on Windows.
1)Installation of Python.
2)Installation of PostgreSQL.
3)Installation of Visual Studio.
4)Installation of PyCharm.
5)Download Odoo from github
6)Setting up Odoo Development Environment.
Python installation
Installing Python on a Windows computer is a relatively simple process.
Before installing Python, check whether your system already has it or not. This blog recommends a Python version between 3.8 and 3.10 for supporting the latest Odoo development.
To check if Python is installed on your Windows computer, you can follow these steps:
*Open a Command Prompt window by clicking on the Start button and typing "cmd" in the search box. Then, click on "Command Prompt" in the search results.
*In the Command Prompt window, type "python --version" (without the quotes) and press Enter.
*If Python is installed on your computer, the version number will be displayed. For example, "Python 3.8.2" or "Python 3.10.1"
If you get an error message or the version number is not displayed, it means that Python is not installed on your computer. In that case, here are the steps you can follow to install Python on your Windows machine:
Visit the official Python website at https://www.python.org/downloads/.
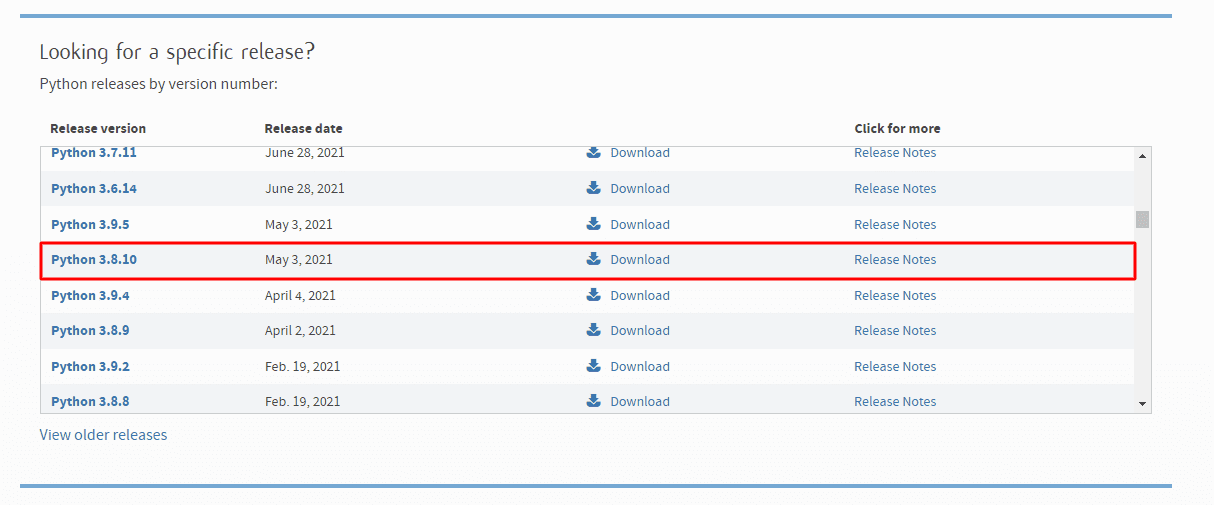
Scroll down the page, and you can see a session that contains all the releases of Python. From there, choose version 3.8.10.
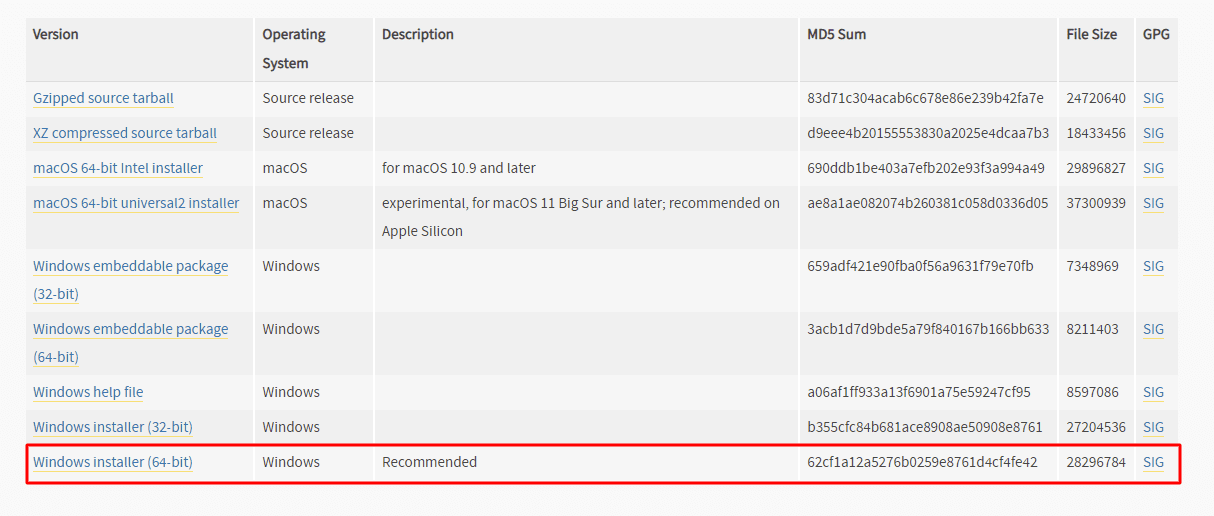
After choosing the installation package, you can see multiple types of installable files. From there, choose the Windows installer (64-bit).
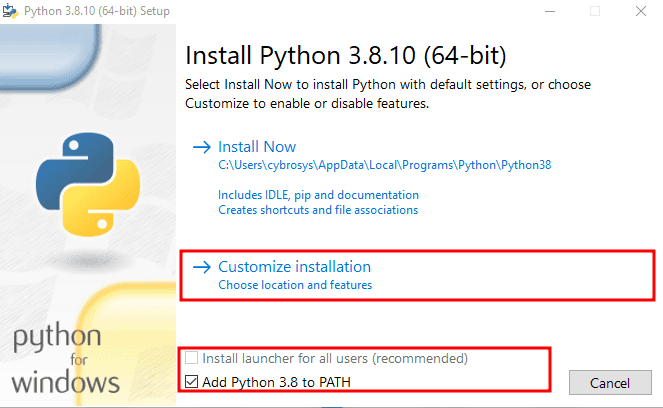
Once the download is complete, run the installer program.
In the installer, check two check boxes near the cancel button and choose "Customize Installation" to continue the installation process.
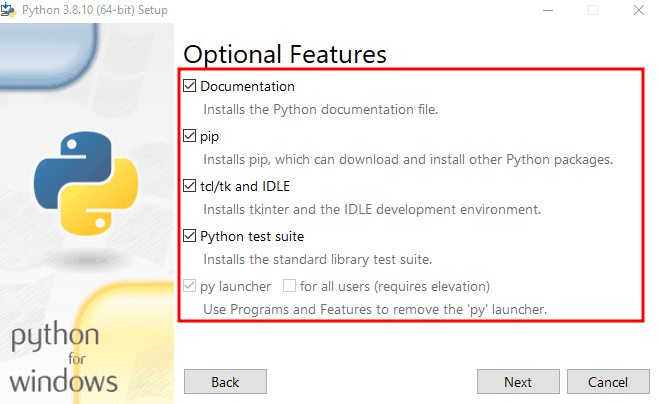
On the "Optional Features" screen, check all the checkboxes for installing Python installation pager tools.
On the "Advanced Options" screen, check the first five check boxes and set a customized installation location path.
This blog recommends choosing a path that is easily accessible by the developer, so the developer can easily access Python packages for further modifications.
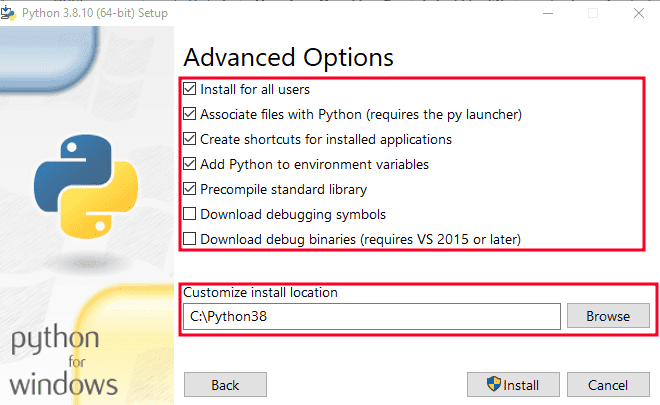
Click "Install" to begin the installation process.
PostgreSQL installation
Odoo uses Postgresql as a database for storing the data. When you install Postgresql, you also need to install the pgadmin4 application. This application helps to visualize the PostgreSQL database and its structures very clearly.
Before installing PostgreSQL, check whether your system already has it or not. This blog recommends a PostgreSQL version between 12.13 for supporting the latest Odoo development.
To check if PostgreSQL is installed on your Windows computer, you can follow these steps:
*Open the Windows Start menu and search for "pgAdmin." pgAdmin is the graphical user interface that is installed with PostgreSQL.
*If pgAdmin is installed, it should appear in the search results. Click on it to open it.
*Once pgAdmin is open, you should see a "Servers" section on the left-hand side. Click on the arrow to expand it. There, you should see a server listed in the "Servers" section. The name of the server is typically "PostgreSQL," followed by the version number. For example, "PostgreSQL 12.13".
*Your system has a higher version of PostgreSQL; that's also fine for development. does not degrade it to version 12.13. but your system has a lesser version; please upgrade it.
*Double-click on the server to connect to it. If the connection is successful, you should see a list of databases on the right-hand side.
If you do not see a server listed in pgAdmin, it is likely that PostgreSQL is not installed on your Windows machine. In that case, you may need to install it using the steps I provided earlier.
*Visit the official PostgreSQL at
https://www.enterprisedb.com/downloads/postgres-postgresql-downloads
Scroll down the page and you can see all versions of postgres listed over there, choose the windows x86-64 installation package of postgres 12.13.
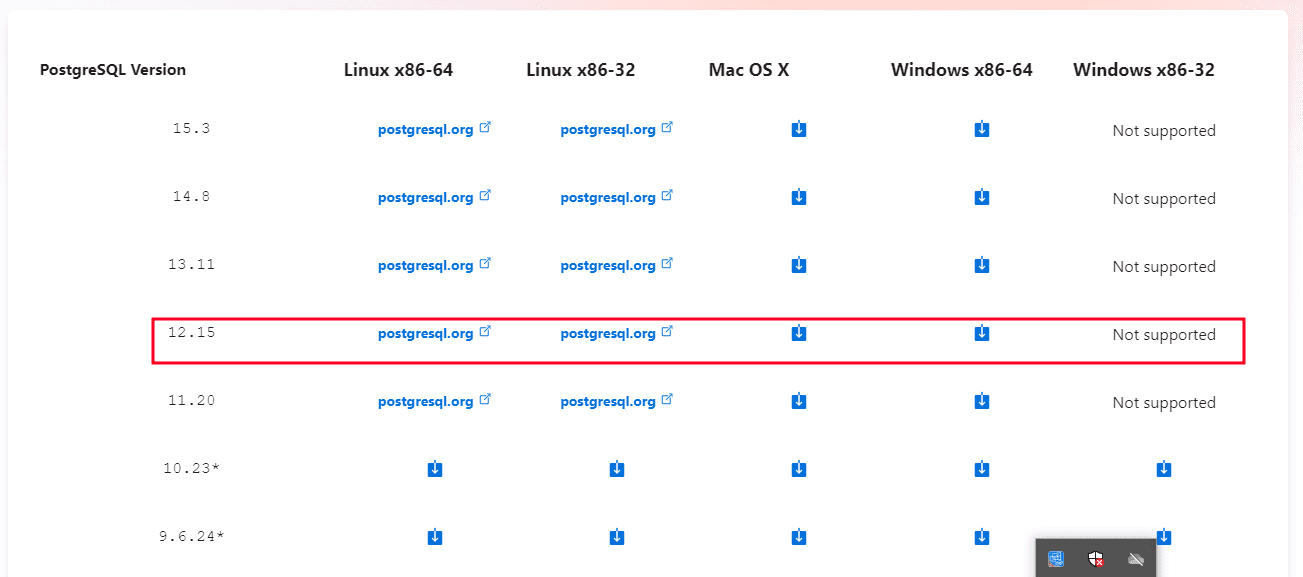
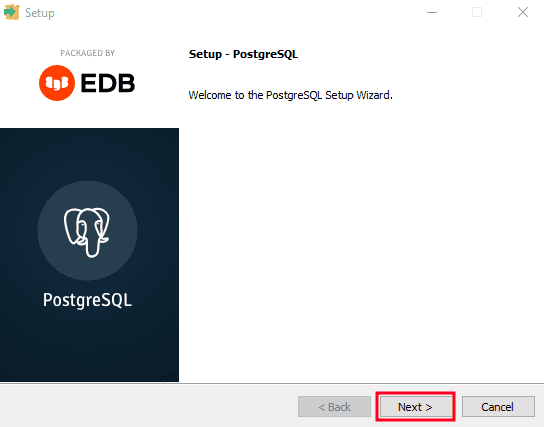
Once the download is complete, run the installer program and Click the Next button to continue the installation.
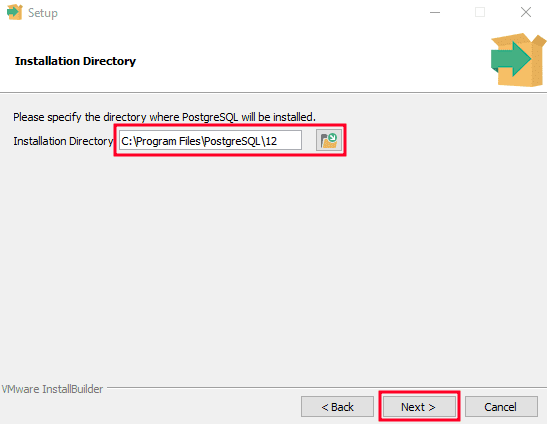
Choose the installation directory to install Postgres on the Windows system.Blog suggesting the directory that Postgres suggested by default.
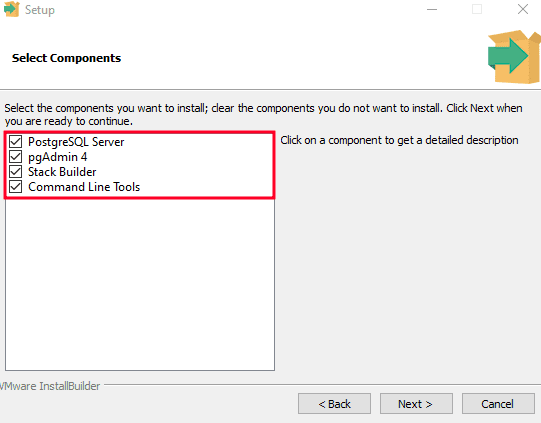
Select all the checkboxes and click Next.
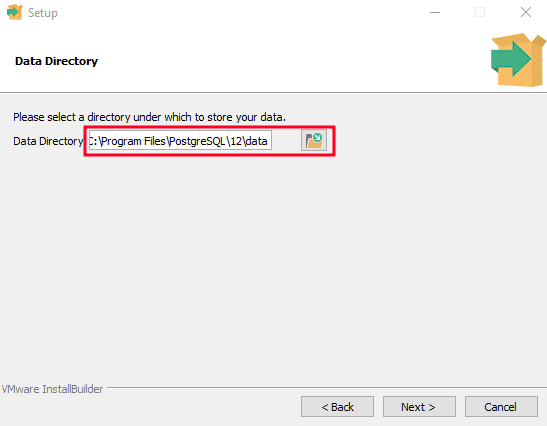
Choose the data directory to store all Postgres data on the Windows system. Blog suggesting the directory that Postgres suggested by default.
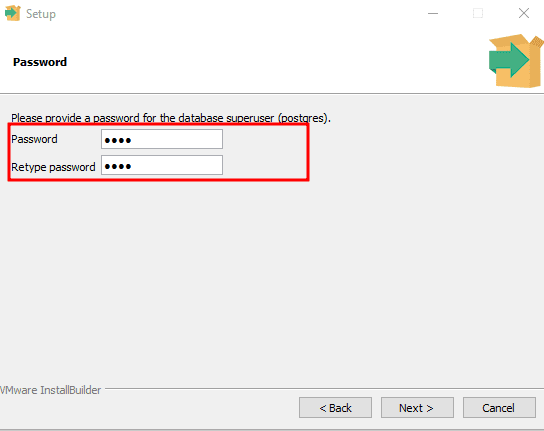
Set a password for the superuser.
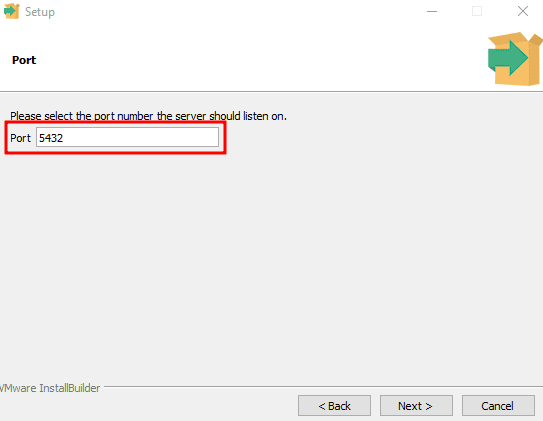
Set a port number for postgres server. Blog suggesting the port number that Postgres suggested by default.
Set the locale as default and complete the installation.
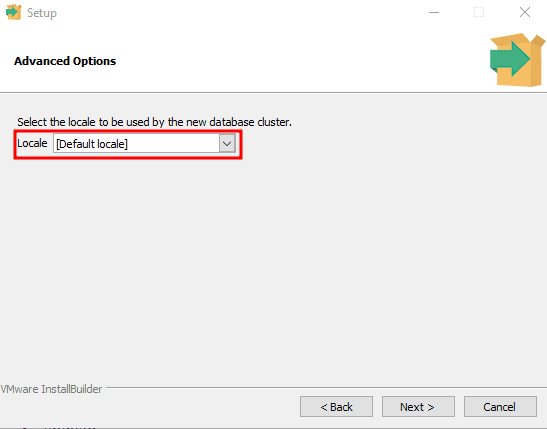
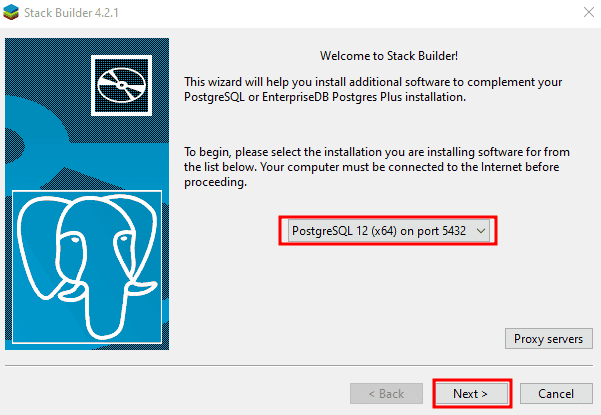
After the installation is complete, you will see a wizard for setting up Postgres' packages. Select PostgreSQL 12 on port 5432 and click Next.
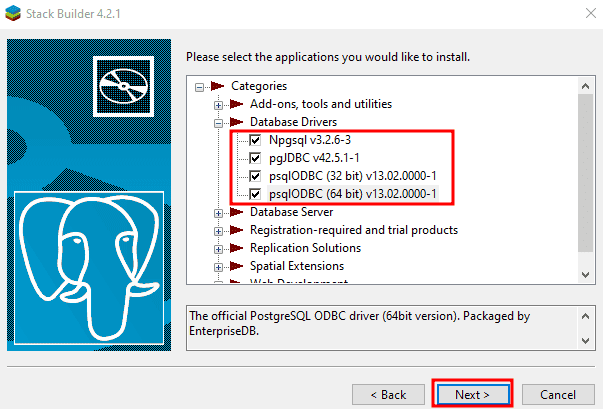
Select Database Drivers, click Next, and then complete the installation of all drivers.
After completing the installation, search for pgAdmin4 and open the application.
When pgadmin4 opens, it asks to set a password, which helps secure pgadmin4.
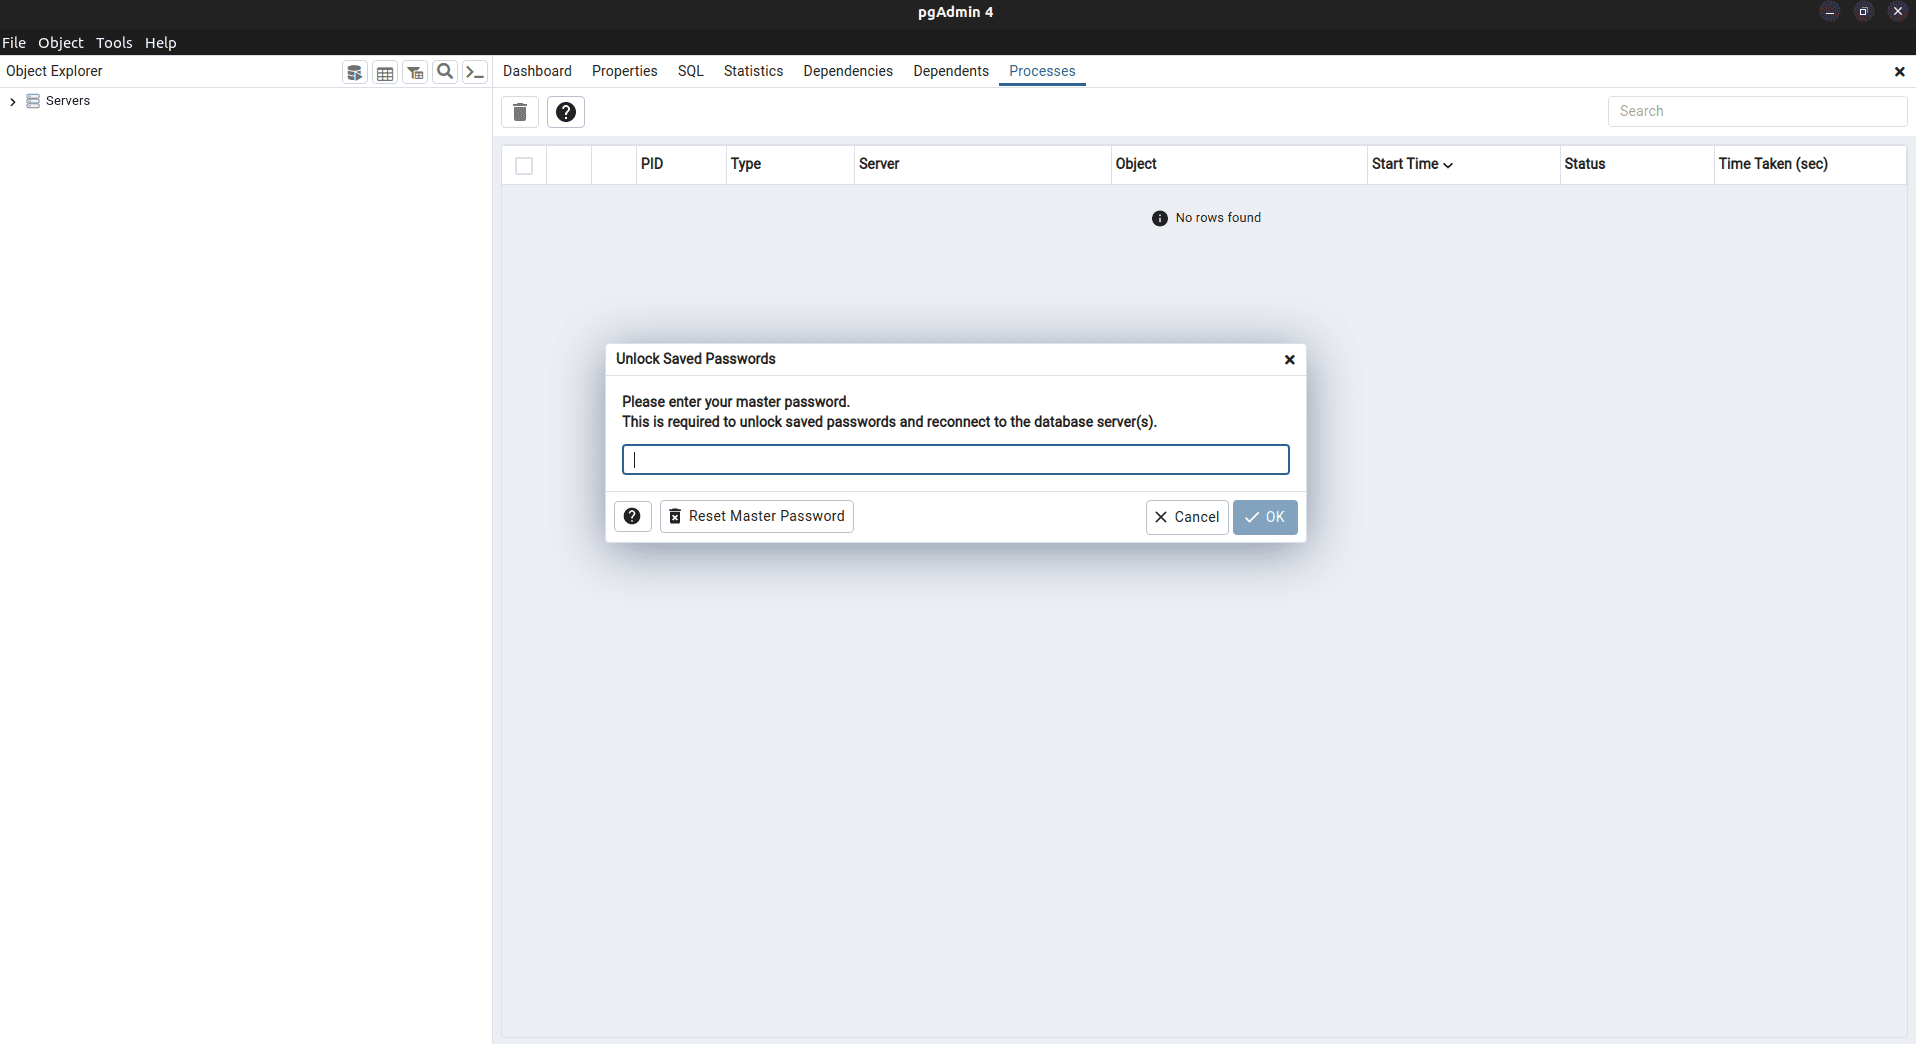
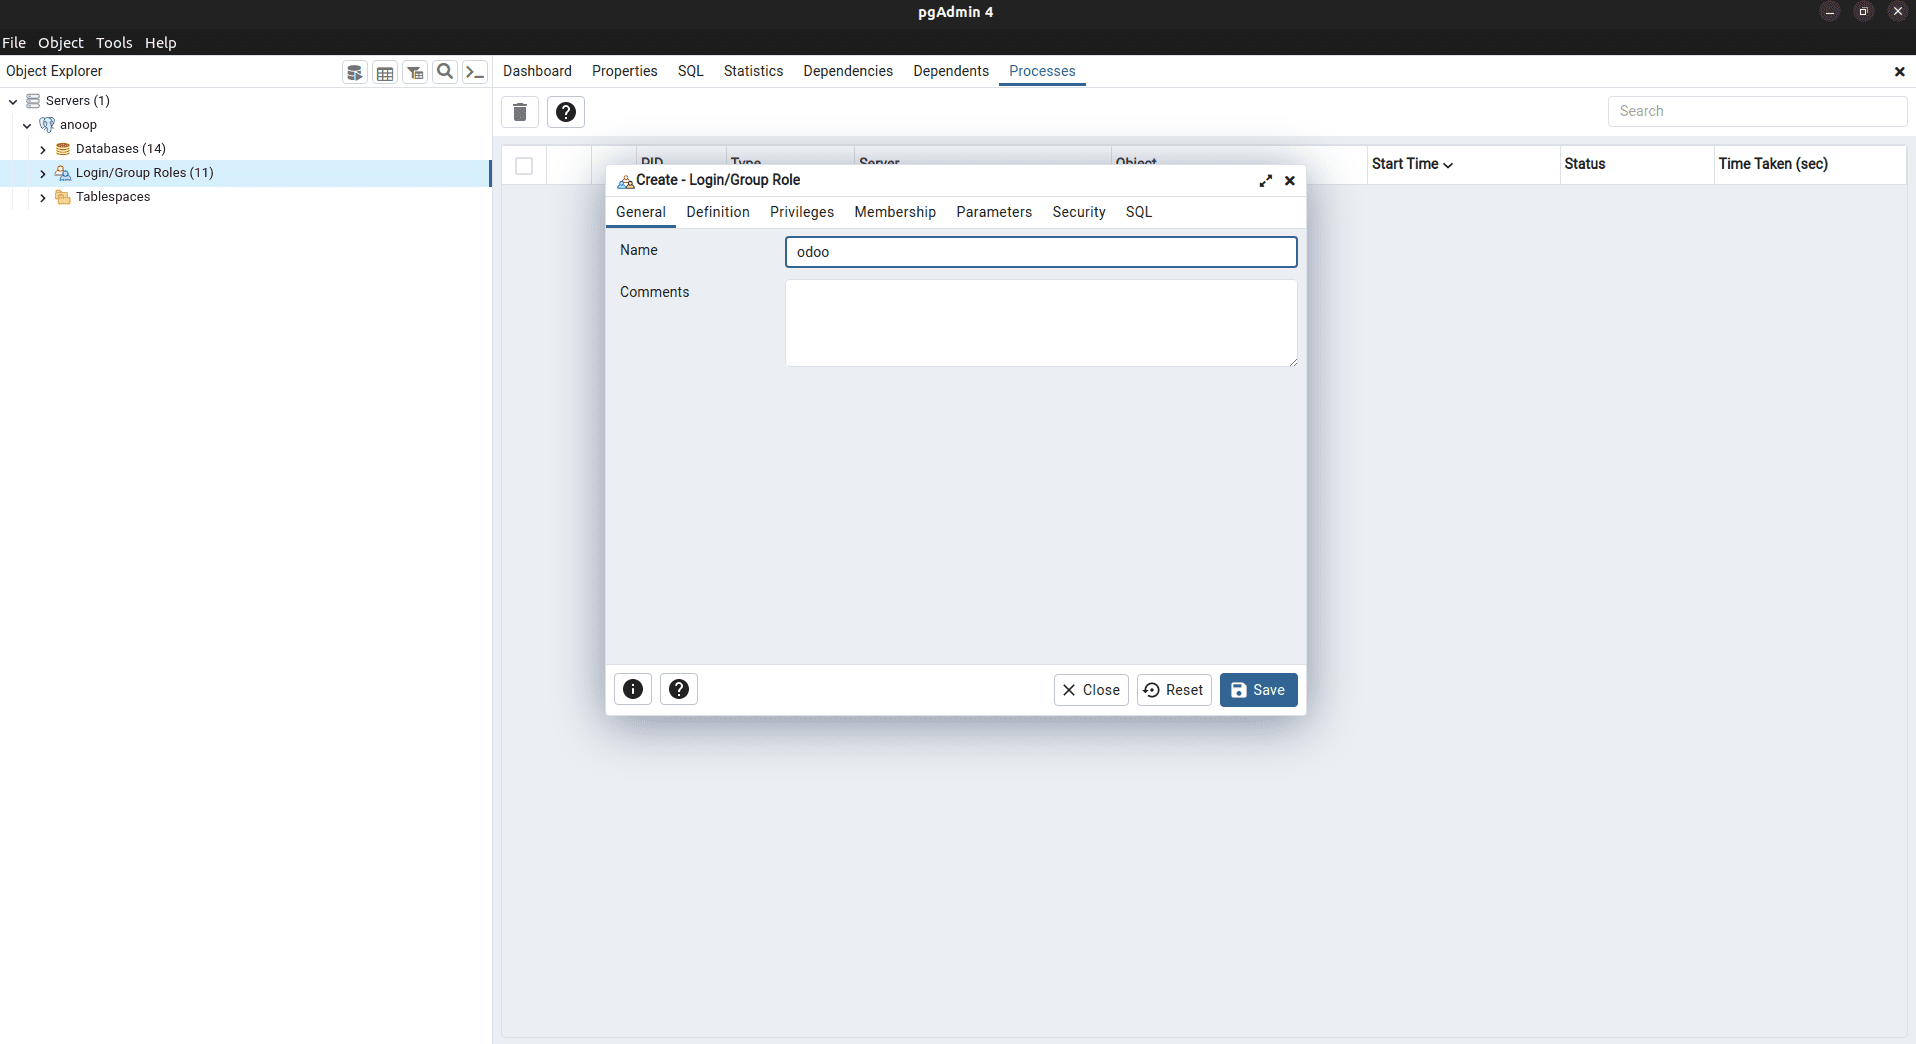
Next, we need to create a new superuser for post-progress.
Expand the "Servers" section on the left-hand side. Click on the arrow to expand it. There, you should see the option "Login/Group Rules".
Right-click the option and choose Create new user.
Add a new name for the user
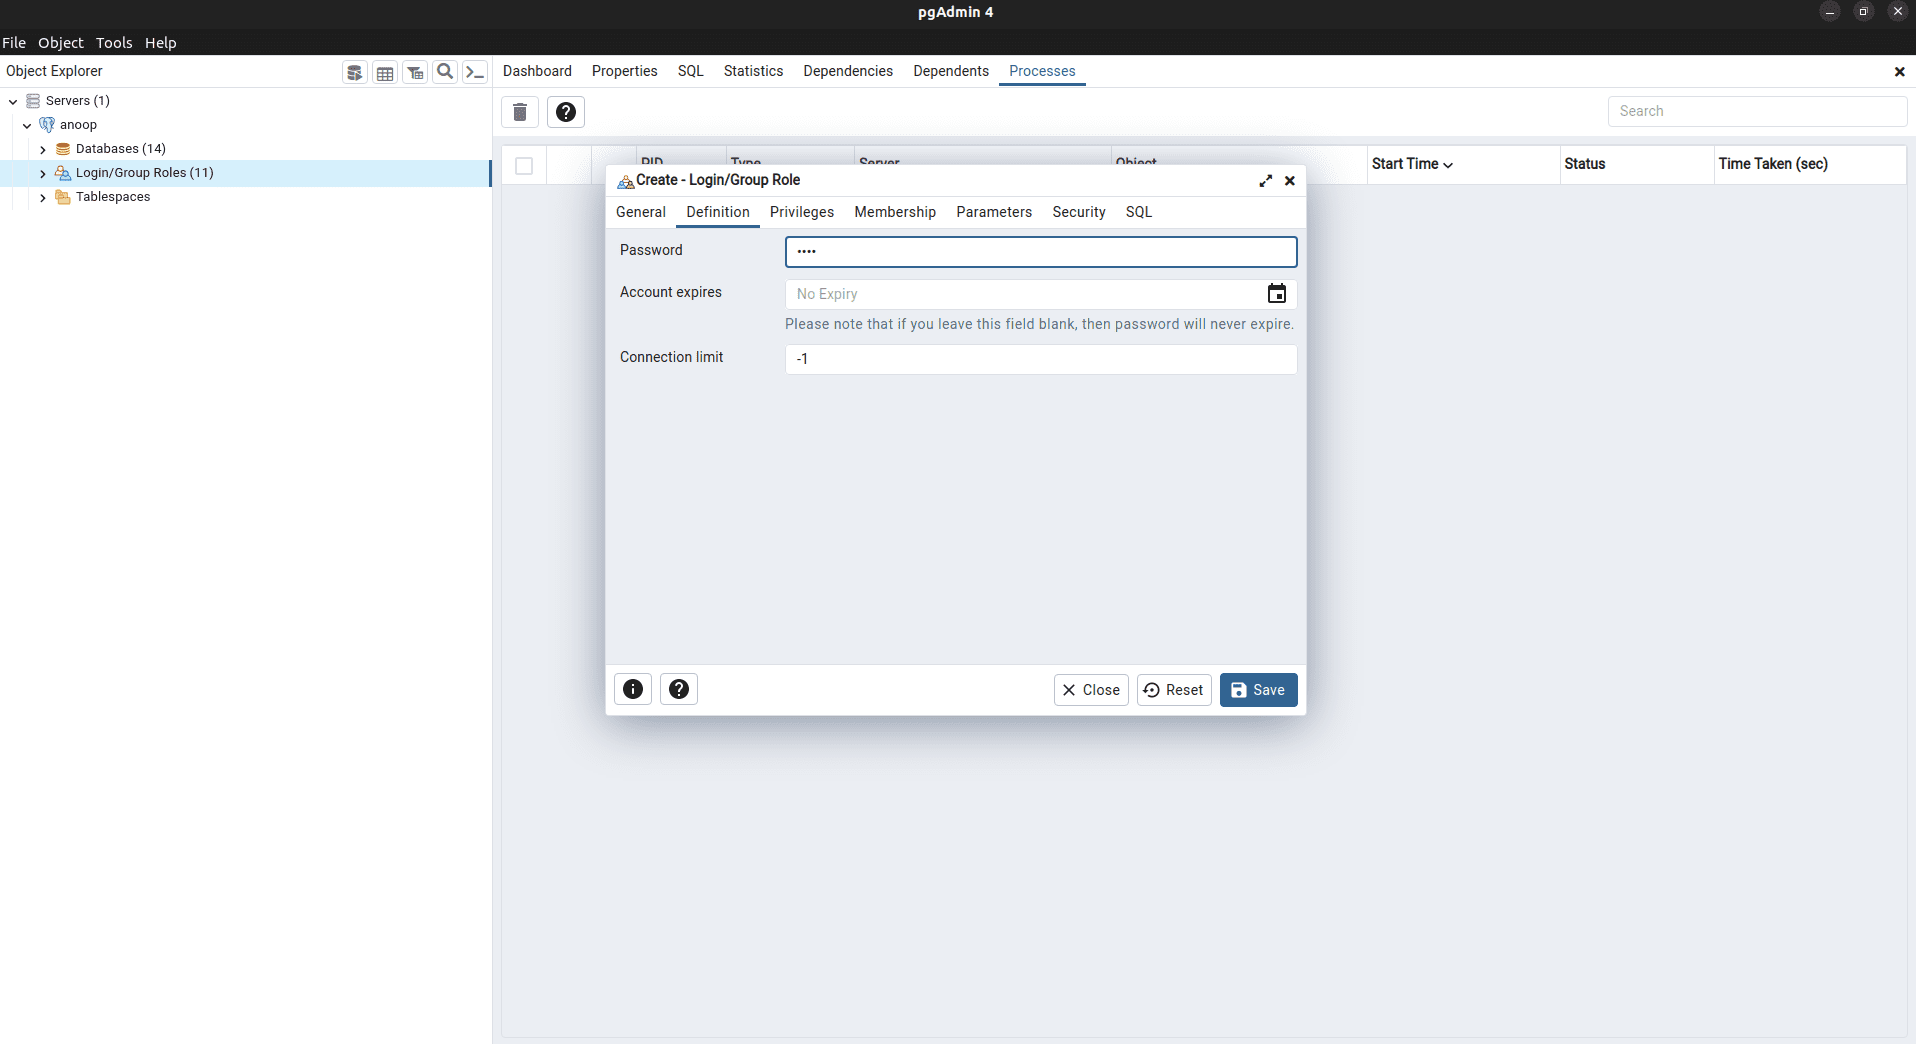
Add a new password for the user.
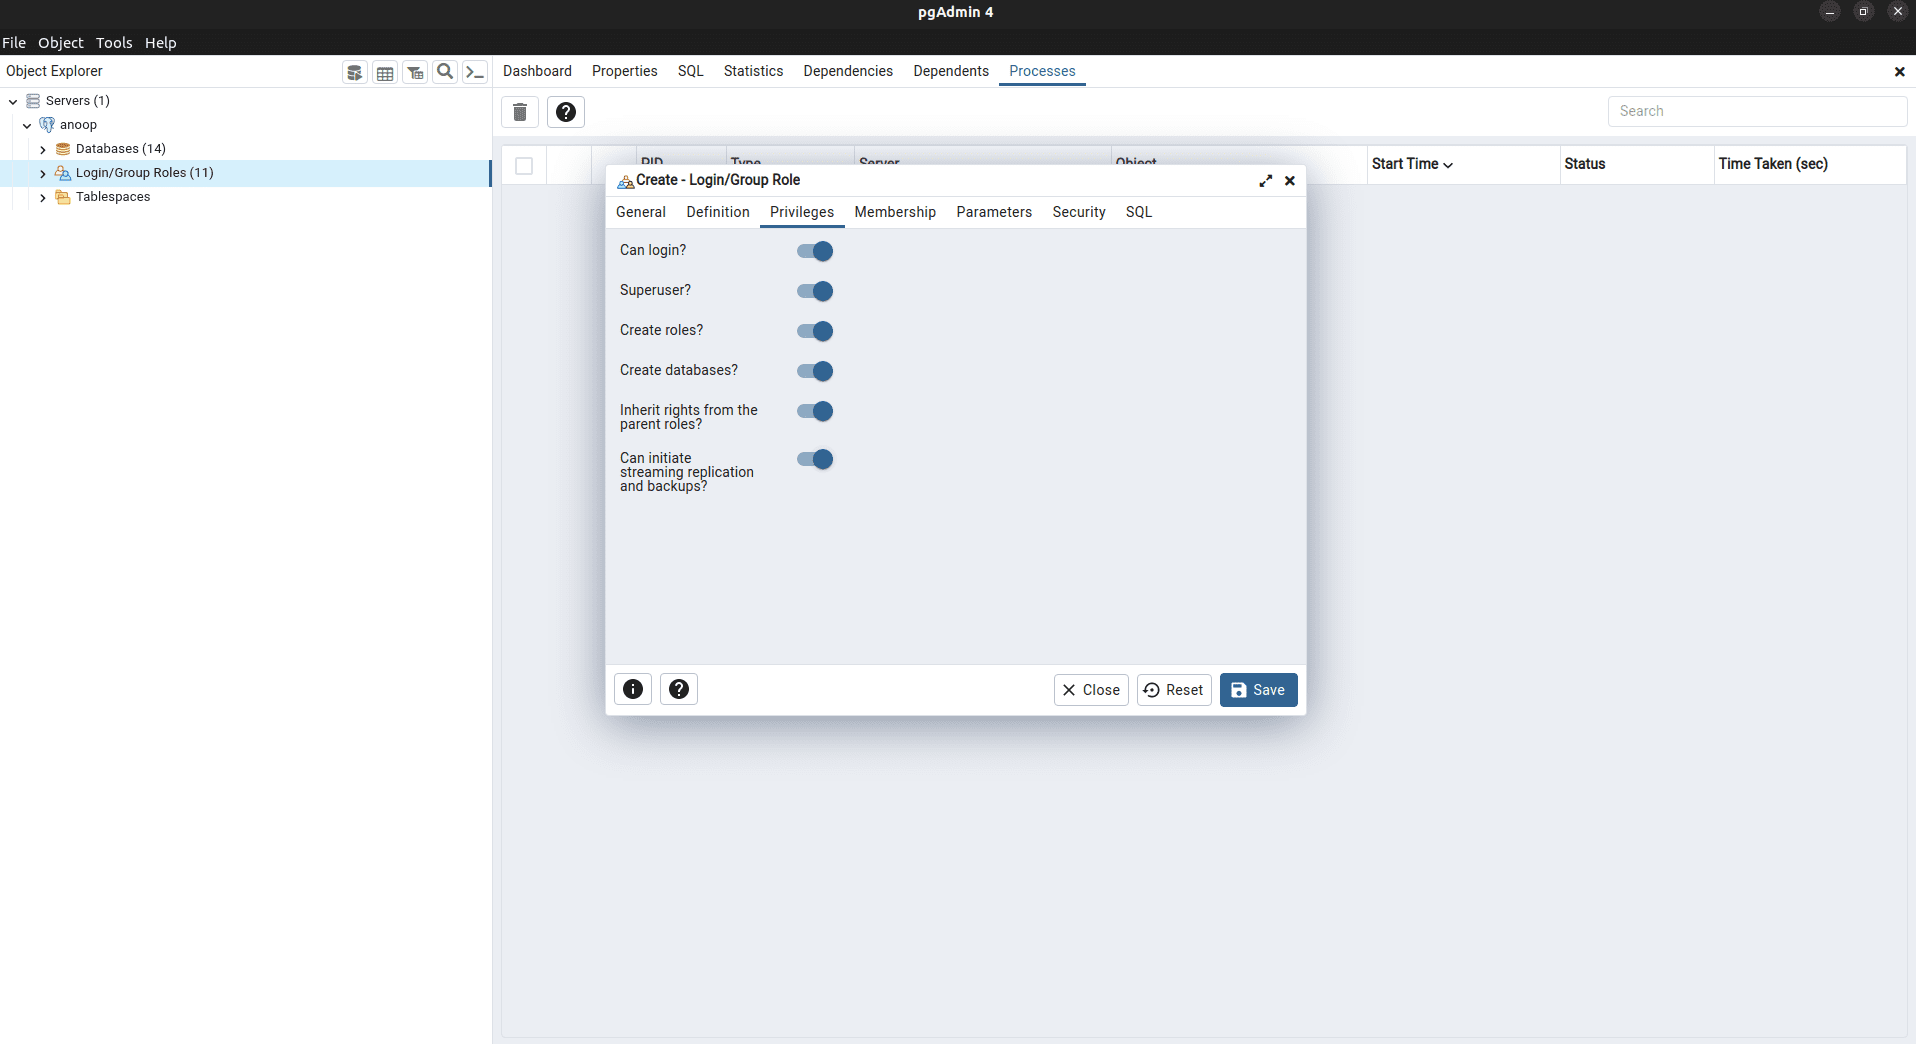
Enable all the radio buttons for setting the user as a superuser.
Visual Studio Build Tool installation
Visual Studio Build Tools Supported projects like C++ Desktop. Odoo has a good visual experience, so we need the support of a C++ kit. That is why we need to install the Visual Studio build tool for ODOO development.
You need a stable network connection to install the Visual Studio Build Tool, which has an approximate 6.5 GB file for download and setup in your system.
Before installing the Visual Studio Build Tool, check whether your system already has it or not.
To check if Visual Studio Build Tool is installed on your Windows computer, you can follow these steps:
*Open the Windows Start menu and search for "Visual Studio Installer."
*If Visual Studio Installer is installed, it should appear in the search results. Click on it to open it.
*Once Visual Studio Installer is open, ensure that the C++ package is installed or not.
*If it is not installed, choose the package and complete the installation.
If you do not see Visual Studio Installer in the start menu, it is likely that Visual Studio Build Tool is not installed on your Windows machine. In that case, you may need to install it using the steps I provided earlier.
Visit the official Visual Studio Build Tool site at
https://visualstudio.microsoft.com/visual-cpp-build-tools/

After completing the download, run the installer.
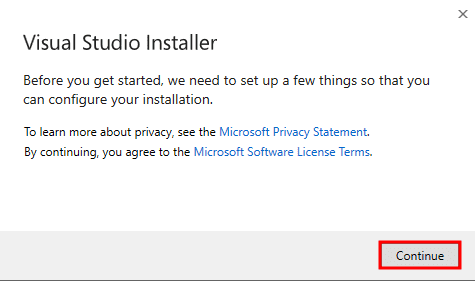
Choose the C++ package, update the installation details on the right side of the installer and complete the installation.
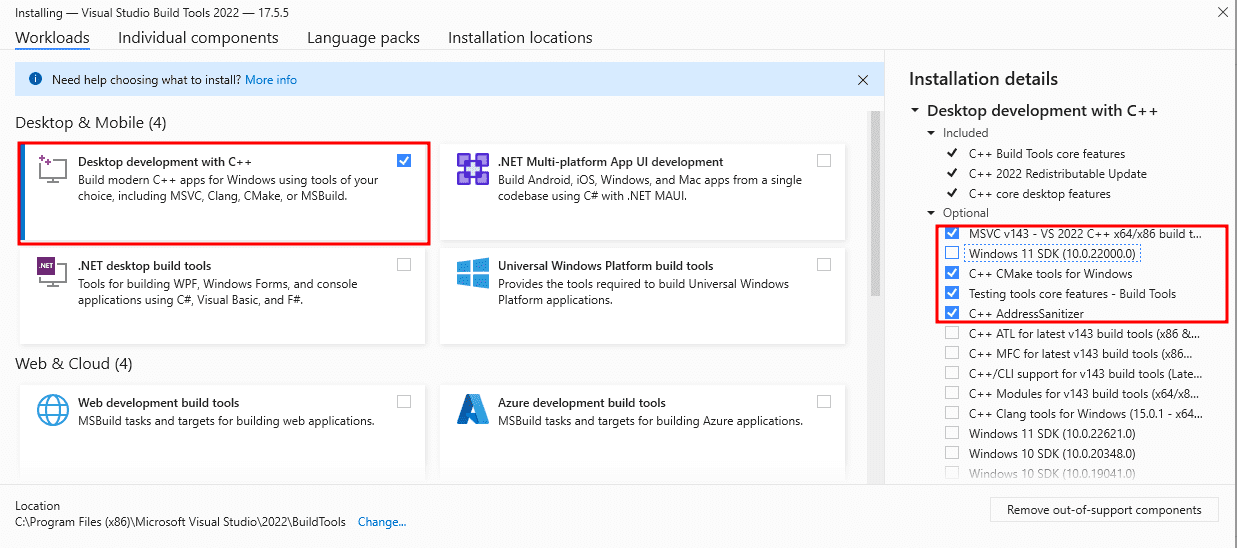
After completing the installation, restart your system to apply the changes.
Pycharm installation
PyCharm is the most popular IDE used for the Python scripting language. You can use another IDE like Visual Studio Code, Atom, etc. But the blog encourages the user to use PyCharm because it is dedicated only to Python development and it is also suitable for the ODOO development environment setup.
Before installing PyCharm, check whether your system already has it or not.
To check if Pycharm is installed on your Windows computer, you can follow these steps:
*Open the Windows Start menu and search for "Pycharm".
*If Pycharm is installed, it should appear in the search results. Click on it to open it.
You do not see Pycharm in the start menu, it is likely that Pycharm is not installed on your Windows machine. In that case, you may need to install it using the steps suggested below.
*Visit the official Pycharm site at
https://www.jetbrains.com/pycharm/download/#section=windows
*Download the Community version of PyCharm
*Run the downloaded.exe file, follow the installation instructions, and complete the installation.
Downloading Odoo From Github
For downloading Odoo, visit Odoo official github using the link https://github.com/odoo/odoo
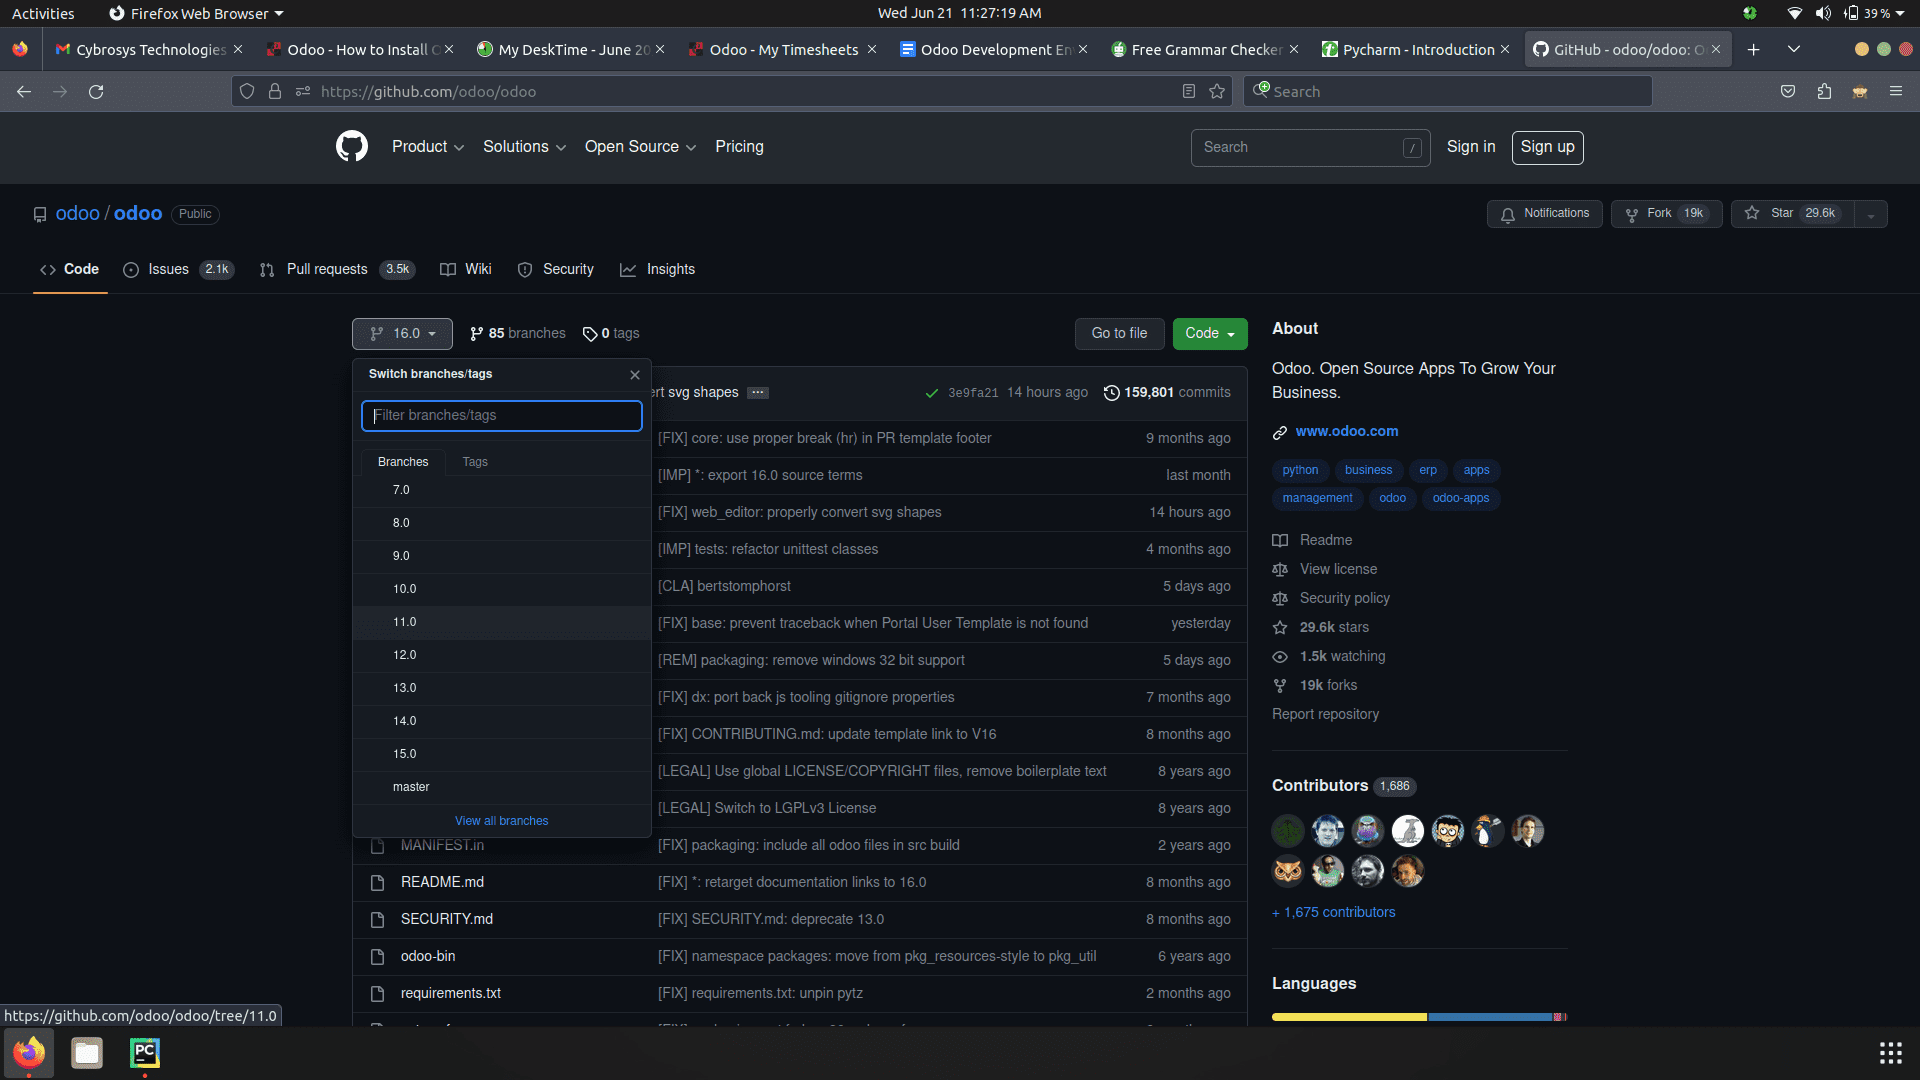
Download the version that you want and extract the file and save that file in a safe folder.
Setting up Odoo Development Environment
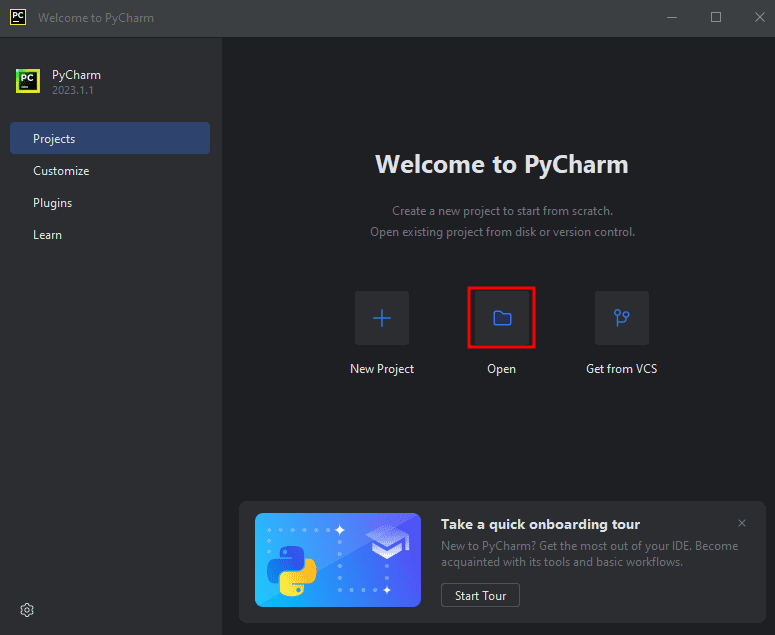
Open pycharm in your system. To open pycharm, search "pycharm" in the search bar and click the pycharm icon to open it.
To open the odoo file in Pycharm, click the open button.
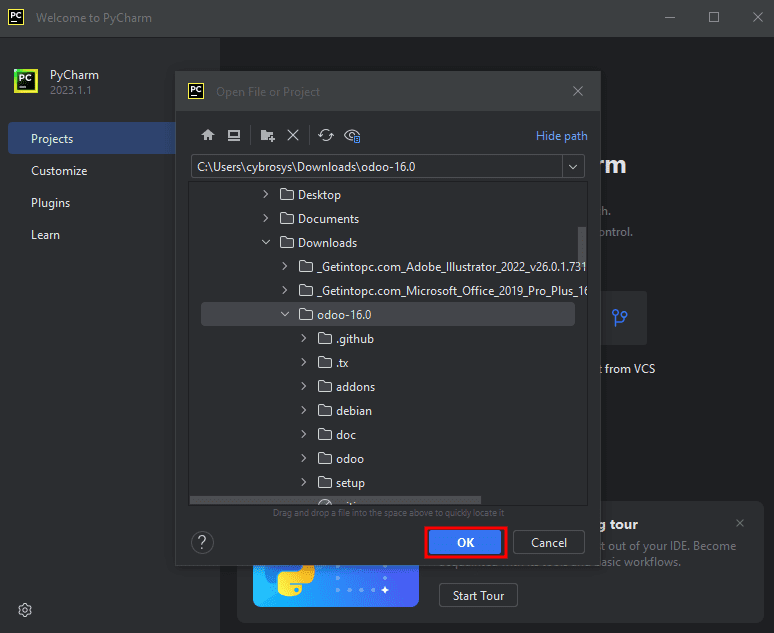
Select the file that was extracted from the odoo zip file.
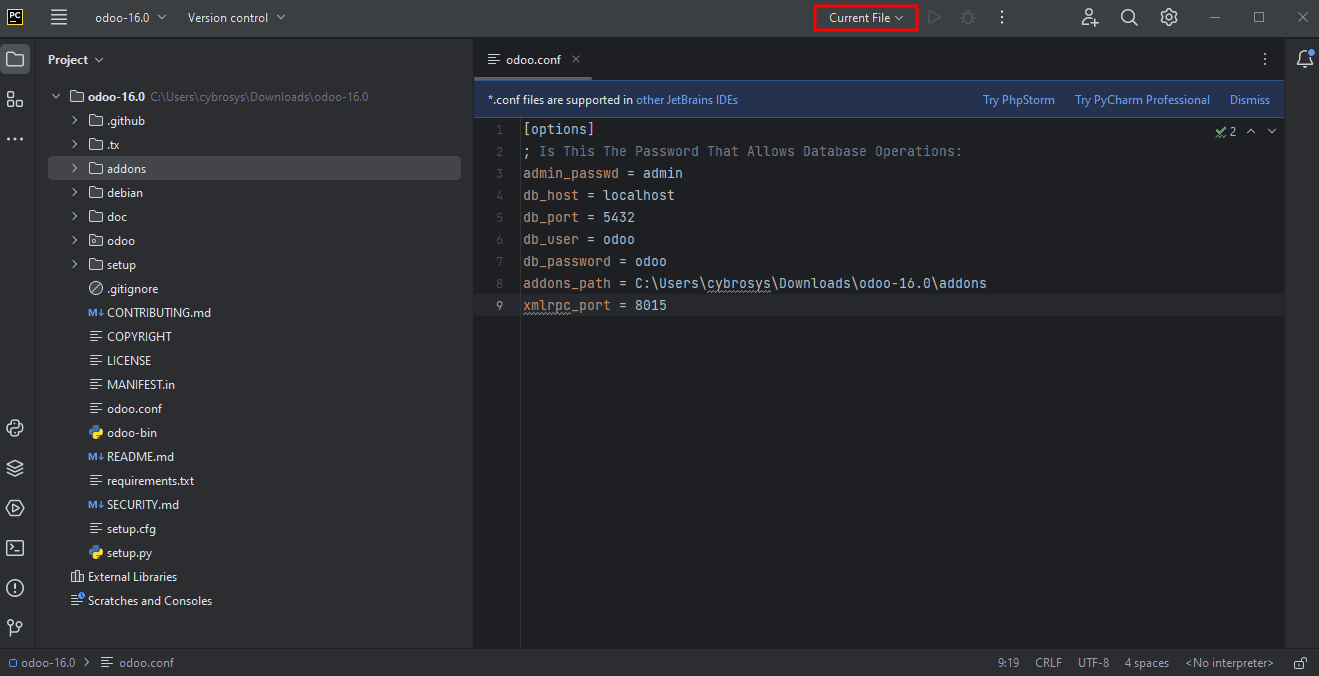
Create an odoo.conf file inside the odoo directory and paste the code inside it.
[options]
; Is This The Password That Allows Database Operations:
admin_passwd = admin
db_host = localhost
db_port = 5432
db_user = odoo
db_password = odoo
addons_path = /home/user/odoo/addons
xmlrpc_port = 8015
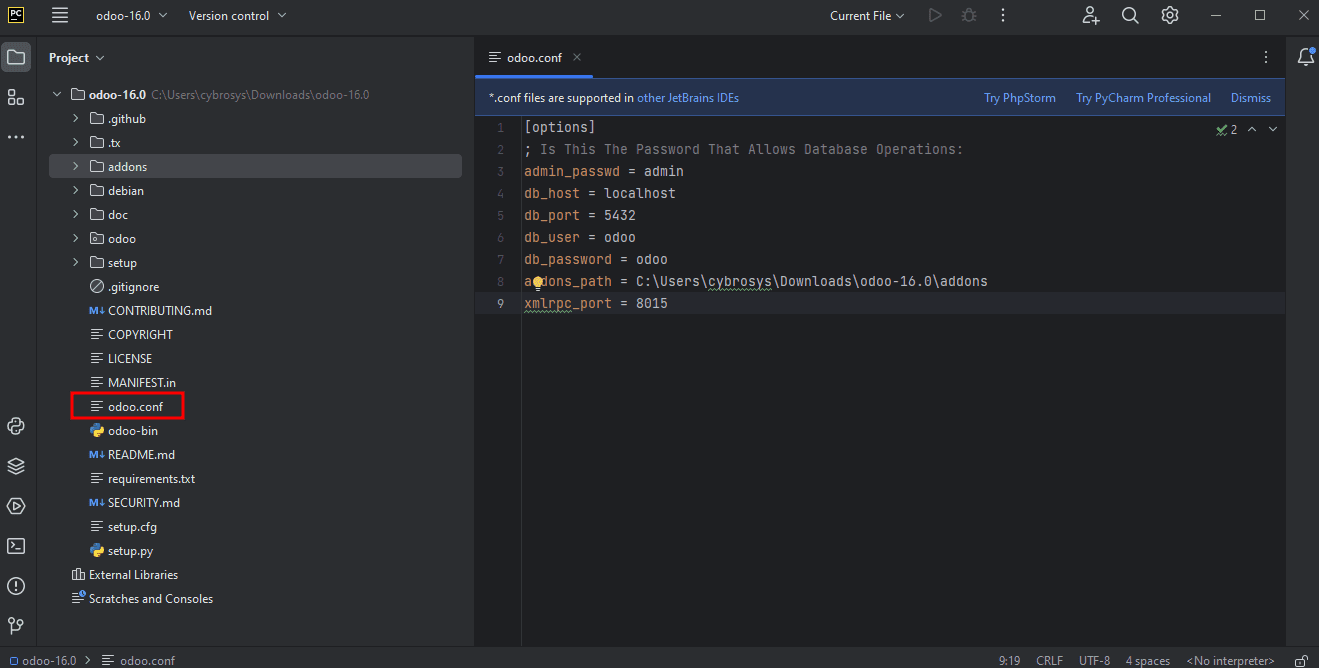
You should change the db_user and db_password which is the password and username you set by creating a new super user in pgAdmin4.
Also check the db_port number; if you change the Postgres port, do not use that port number.
Change addons_path; copy the path of the directory named "addons" and paste that path in addons_path.
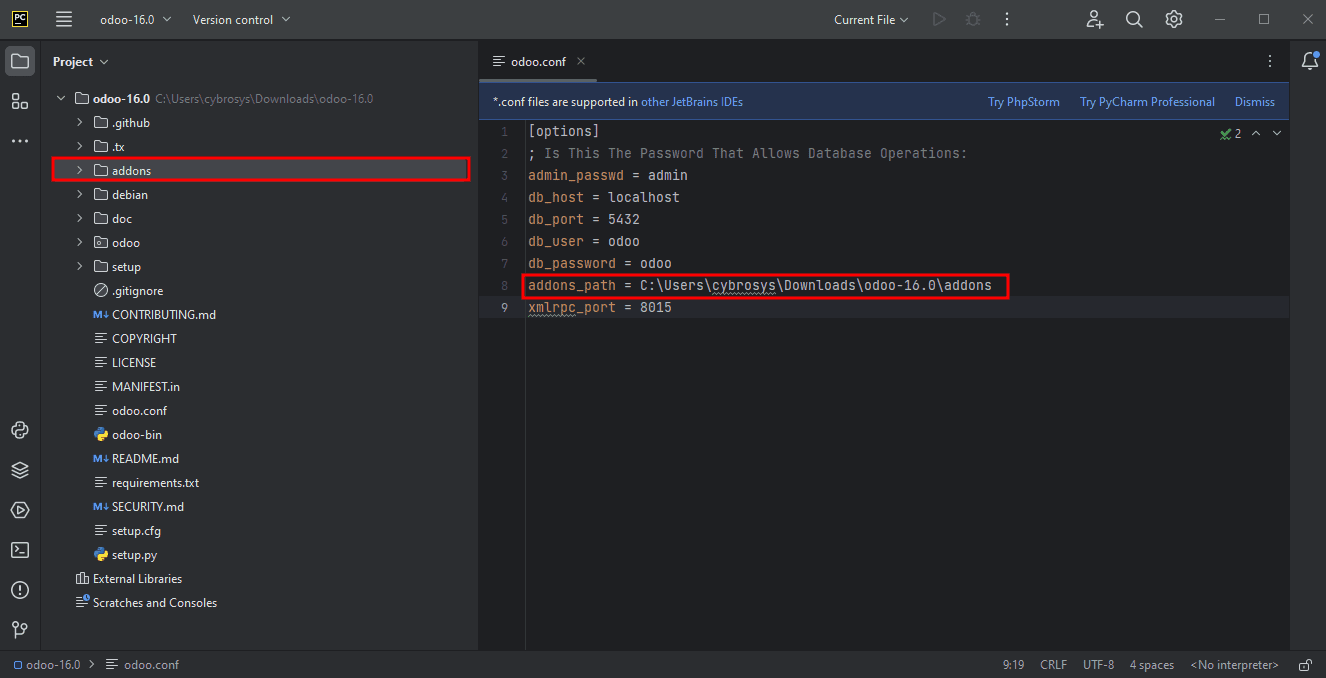
Addmin_passwd is your master password for database creation. You can set a new password for creating database.
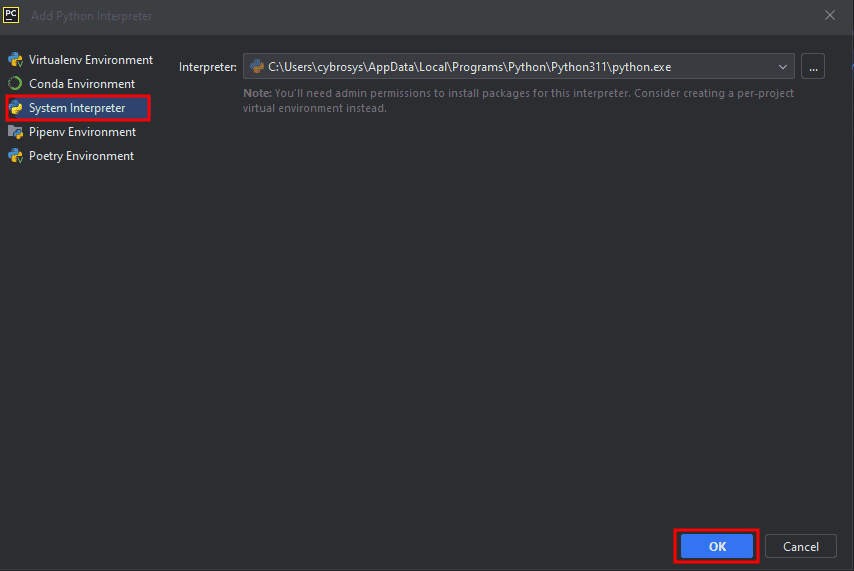
In the next step, configure the interpreter for the pycharm, so open the settings and choose the interpreter option.
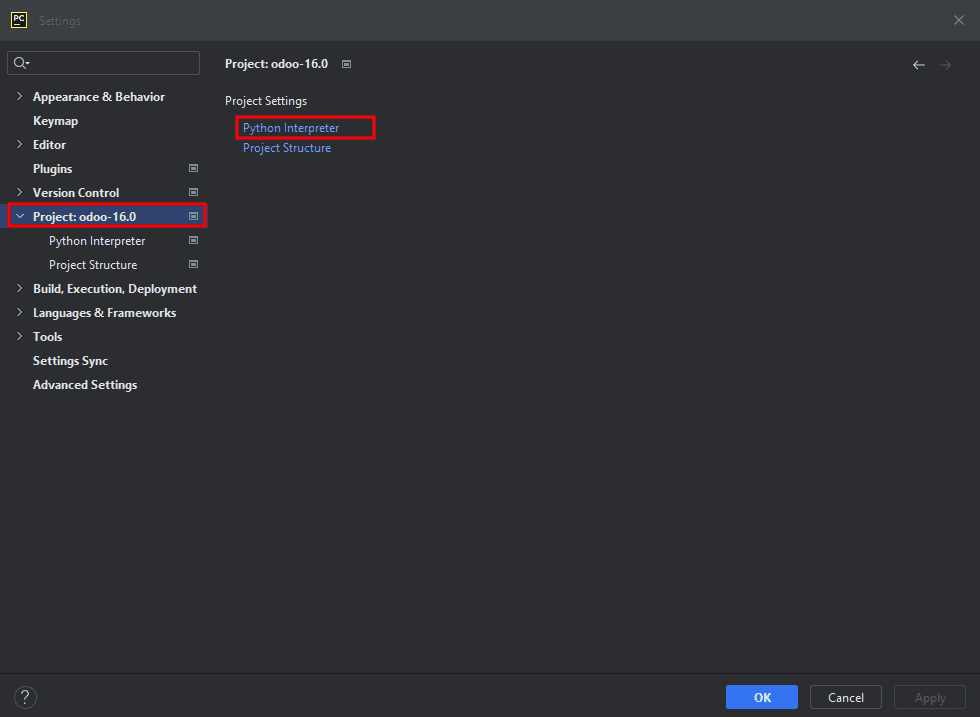
Choose the interpreter from the selection box.
You can't see any interpreters in the selection box. Click the option near the selection box named "Add Interpreter."
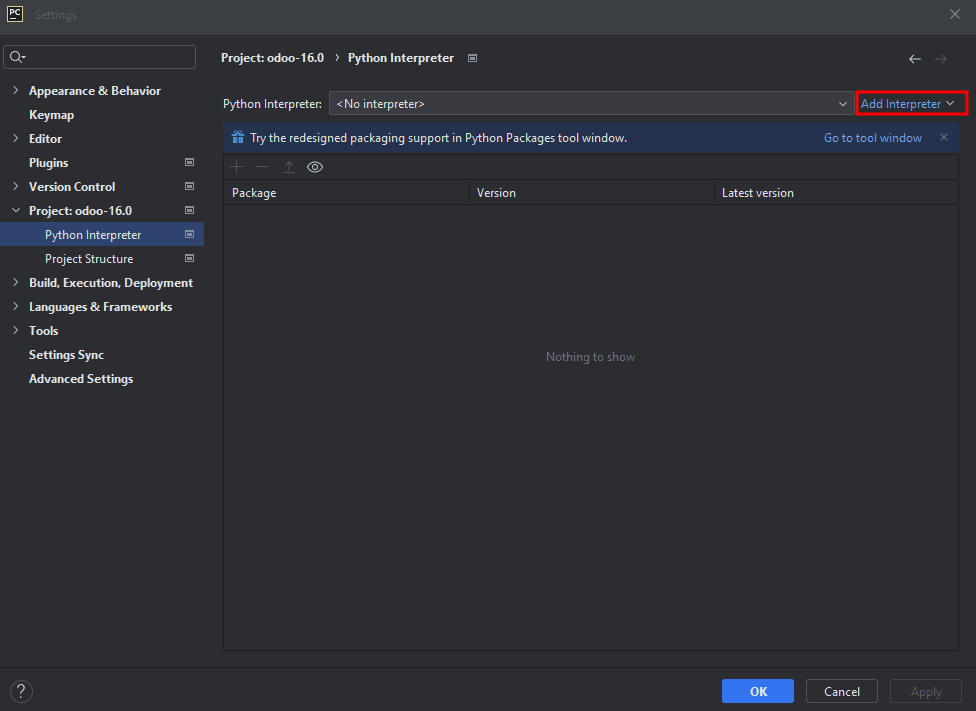
Now you have a window for choosing an interpreter. Select the system interpreter option from the left panel, choose the option inside the selection box, and click the OK button.
In the final step, you need to configure "Run configuration".
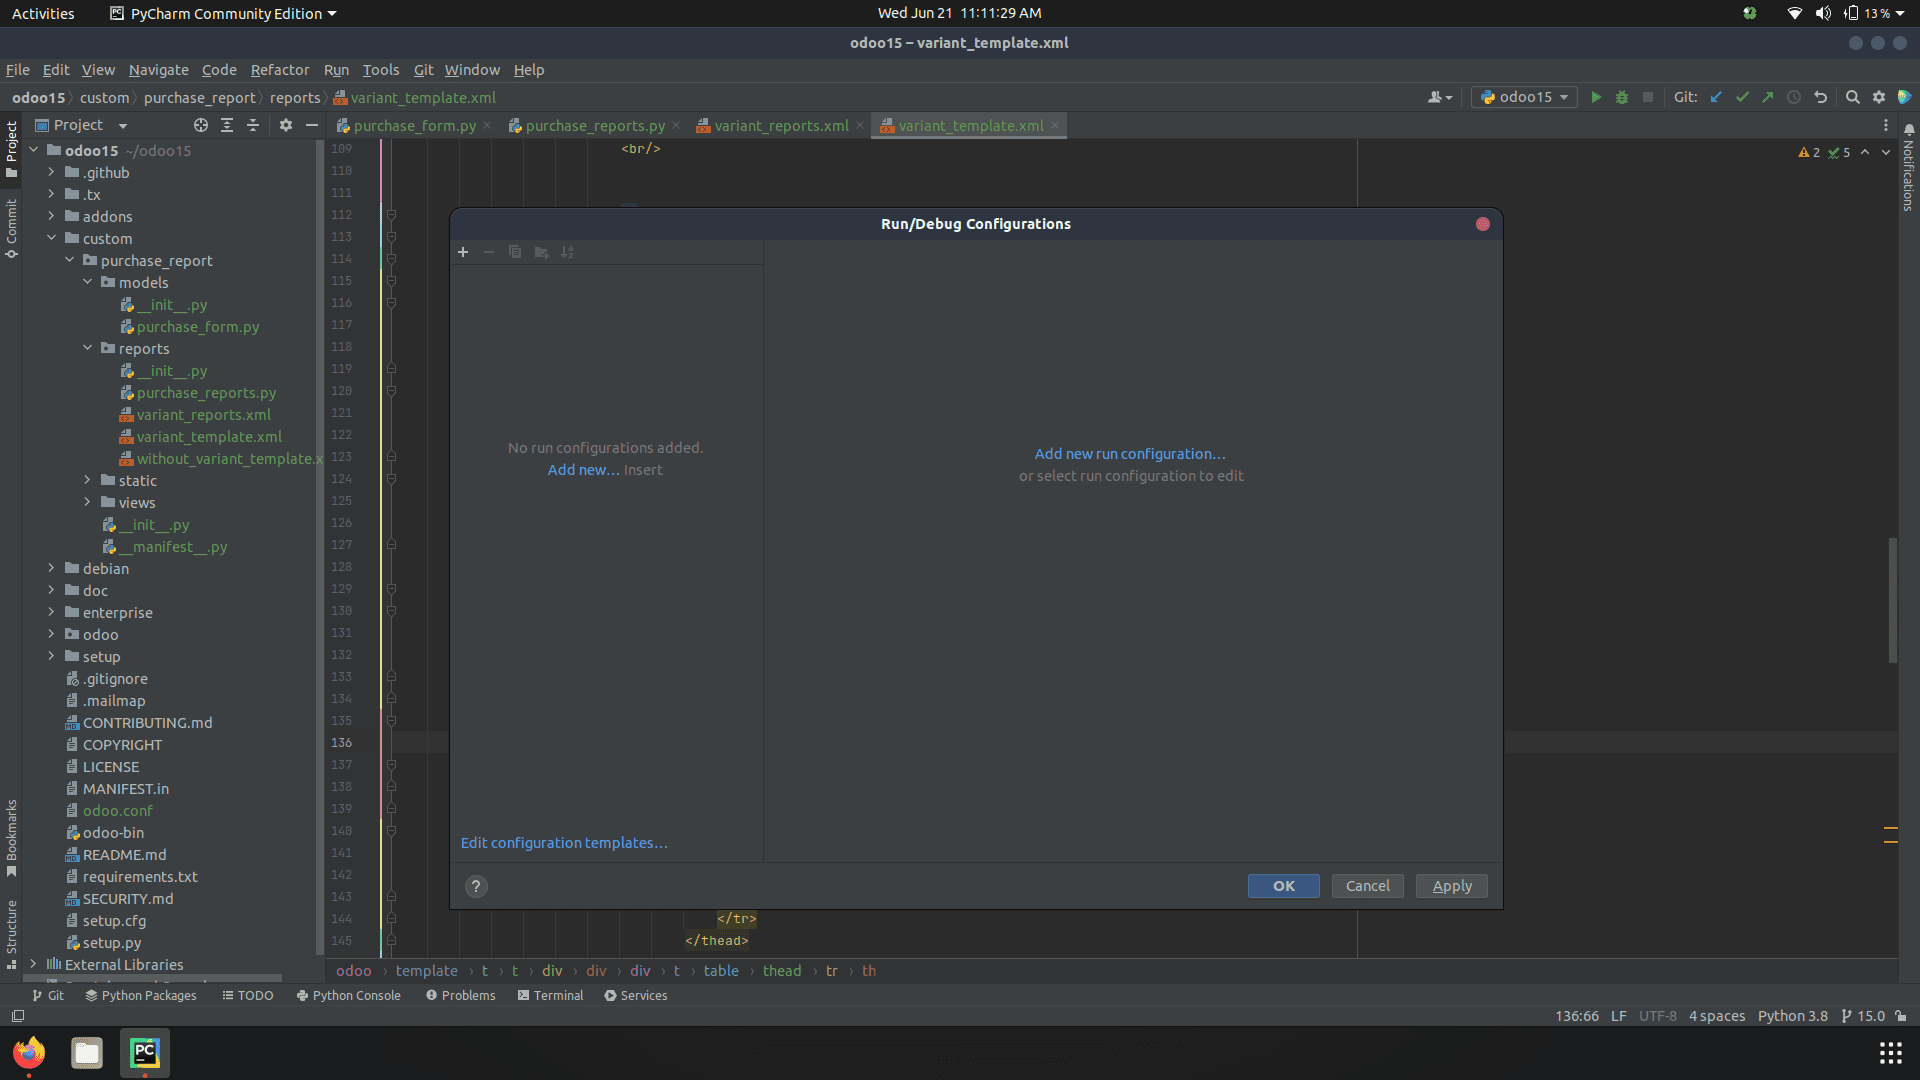
Click on the "Current File" option on the top of Pycharm and choose the "Edit Configuration" option.
Now you have a window for setting the run configuration. Click on the pulse button in the left panel to add a new run configuration.
In the new window, add the necessary information and click OK.
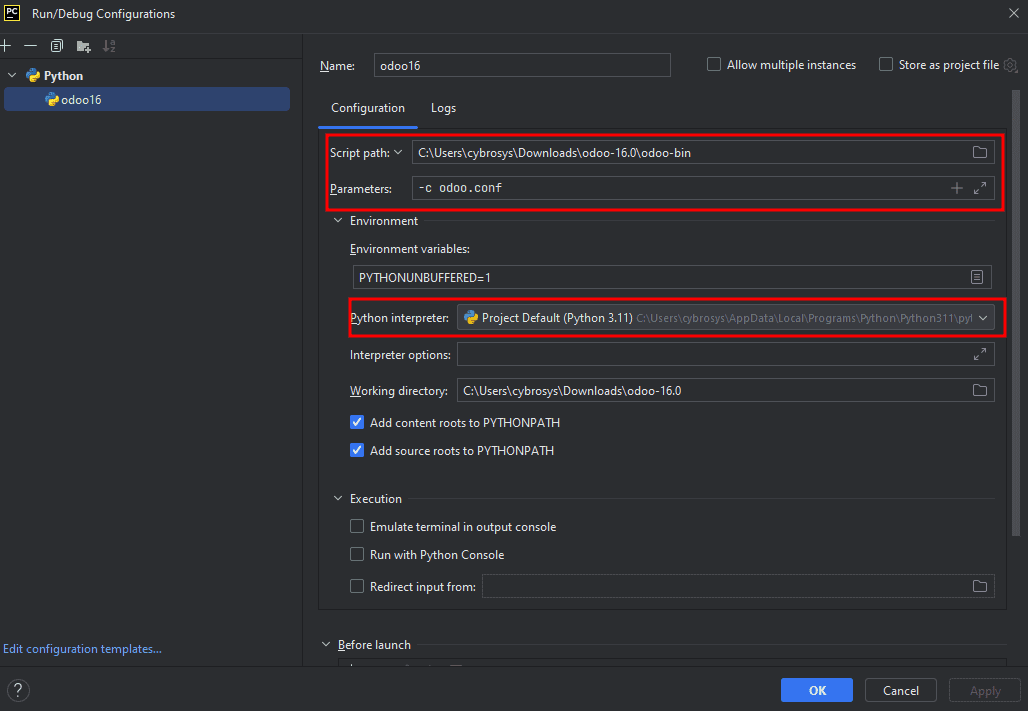
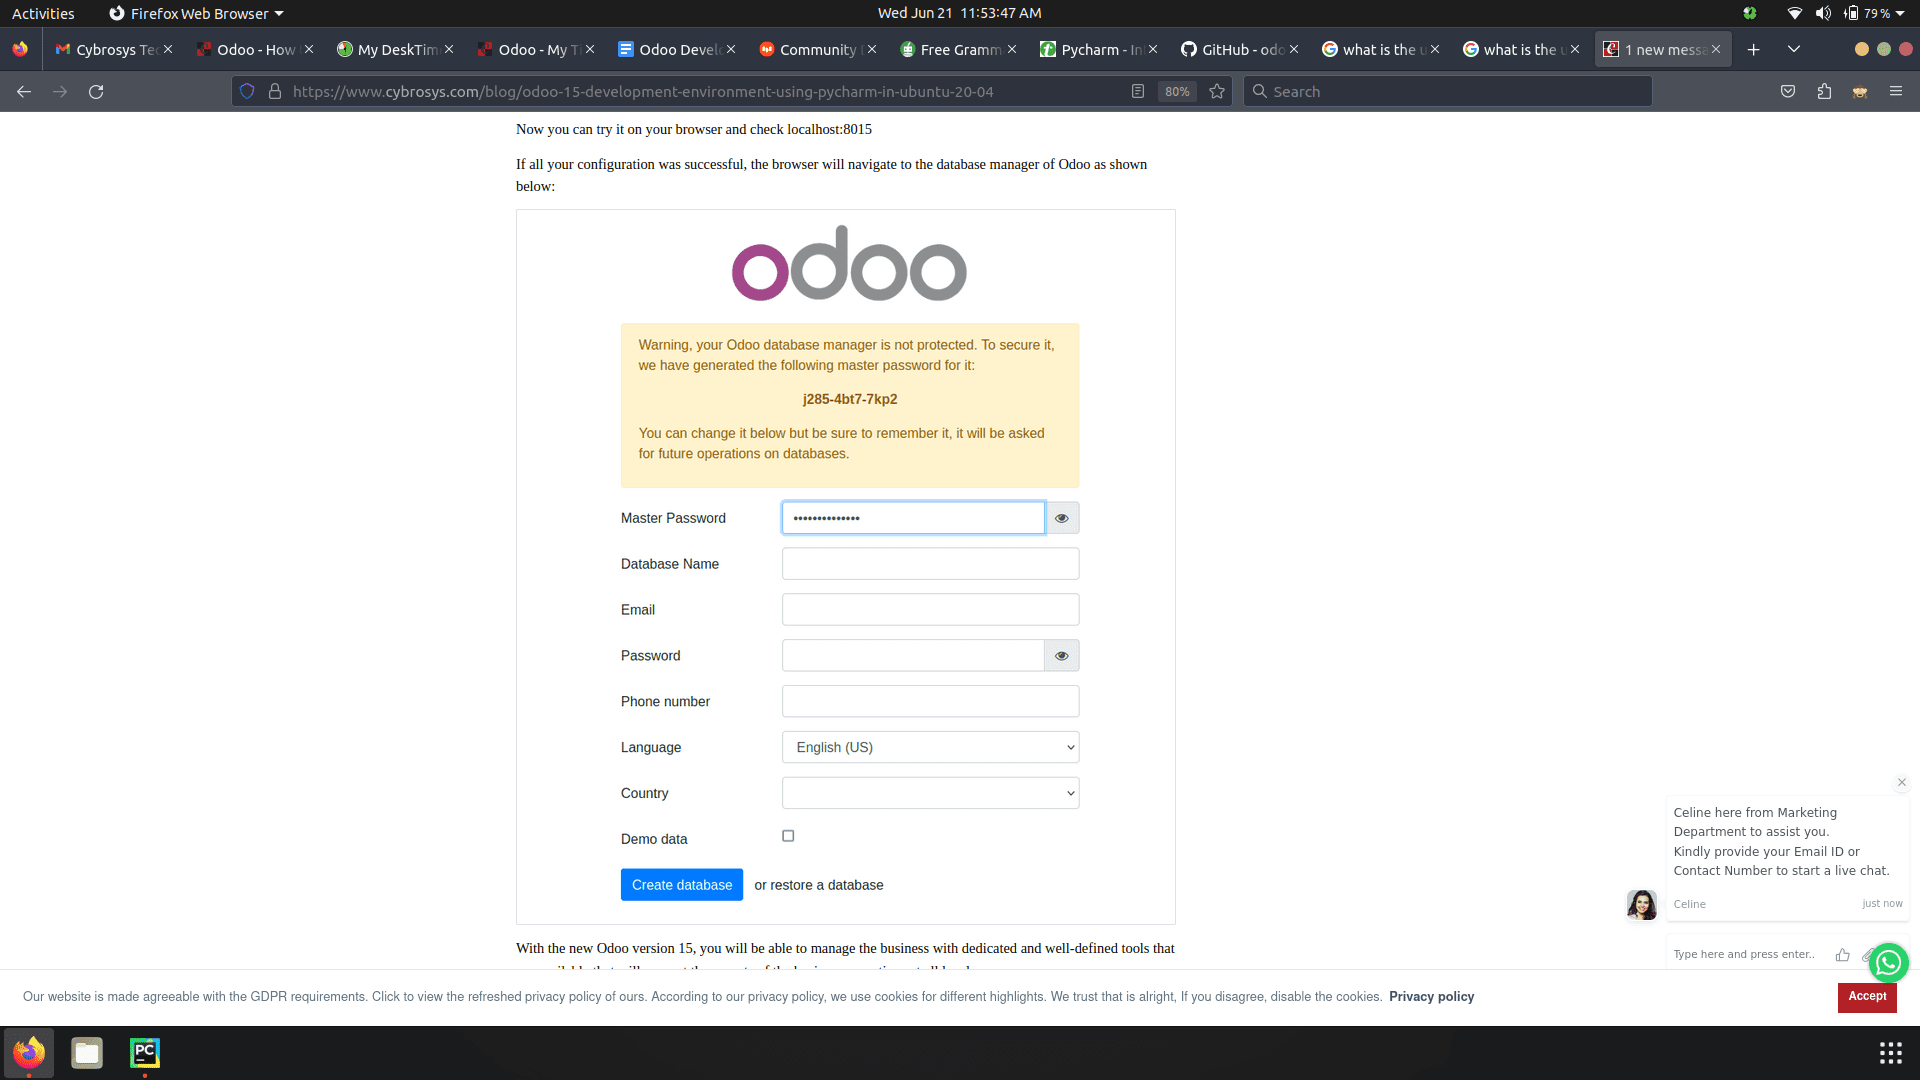
Now you need to run pycharm, open the browser, and enter the url "localhost:8015" and press enter.
If all your configuration was successful, the browser will navigate to the database manager of Odoo as shown below:
With Odoo, you will be able to manage the business with dedicated and well-defined tools that are available that will support aspects of business operations at all levels.