Efficient storage and management of products, including warehouses, locations, and product variations, are all part of inventory management. It also covers tracking management and logistical support. With the aid of Odoo Inventory, locations can be organized, and physical or virtual warehouses can be built. The system can manage the hierarchy of locations hierarchically, with sub-locations for every location to define the hierarchy clearly. Users can arrange several child locations beneath a single parent location by creating Parent and Child Locations in the Odoo Inventory. The way the products are arranged in these child locations makes stock take and product movement management easier. All things considered, the Odoo Inventory is a useful tool for efficient inventory and product management.
Locations in Odoo Inventory
A location in a warehouse is a designated area, like a room, aisle, or shelf. There are three different kinds of locations in Odoo:
1. Partner locations: whereas partner locations are found inside a customer's or vendor's warehouse. These locations can be used by customer or vendor warehouses,
2. Virtual locations: Virtual locations are non-physical places where items not in inventory can be placed and are used for items not in inventory,
3. Physical locations: The user's company owns the physical locations, which house things like aisles and loading bays and are used for product storage.
Configuring Locations in Odoo Inventory
Storage Locations must be enabled in order to use the locations facility in the Odoo 17 Inventory Application. The "Warehouse" tab of the "Settings" page under the "Configuration" menu is where you can find this setting. After that, select the “Warehouse” tab and enable the “Storage Locations” box as depicted below.
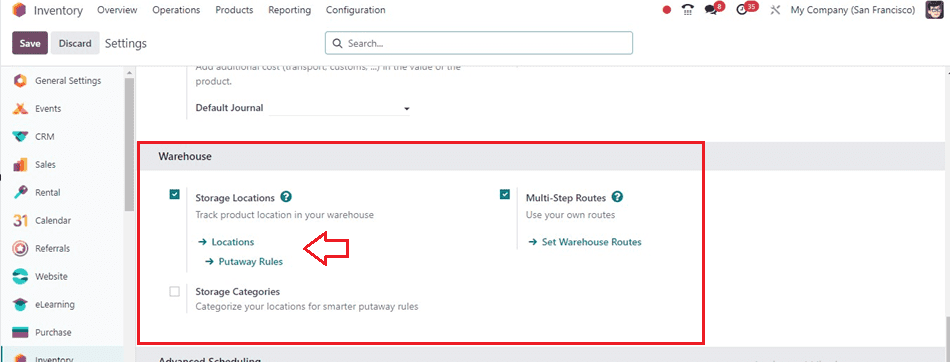
Then, save the changes using the “Save” button and move on to the configuration of a storage location or category.
Creating a new Location
By choosing the “Locations” option from the “Configuration” menu dropdown list or clicking on the “Locations” link provided under the “Storage Locations” field, users can create a new storage location. You can access the dashboard window with the available storage locations using either of the two methods, as illustrated below.
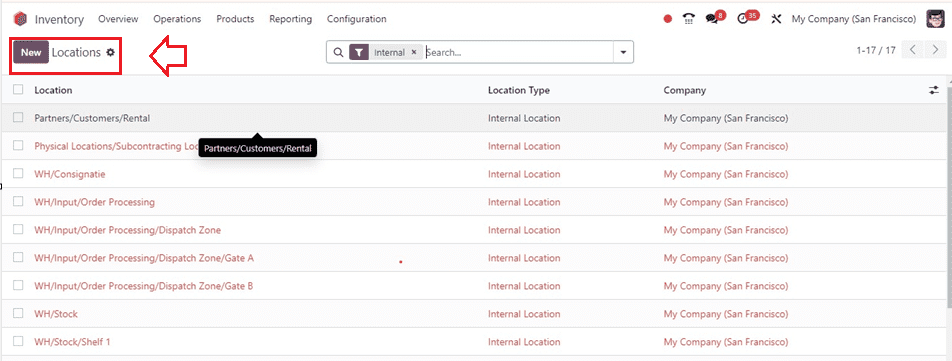
Details about the Locations, Location Type, and Company are available on this platform in the list view. We can discuss these in detail while setting up a new location in Odoo. You can click the “New” button to open a new location configuration form.
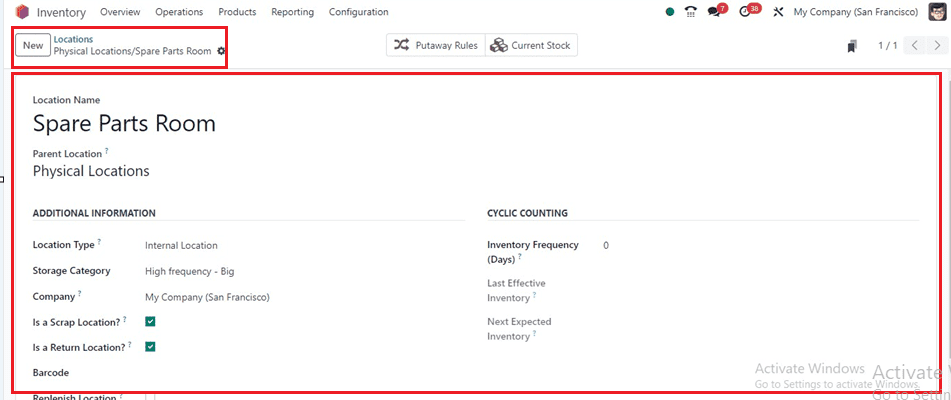
First of all, provide a location name in the “Location Name” field. Then, fill in the details of the building or warehouse where the new site is situated in the “Parent Location” field and the “Location Type” category the location falls under. Then, provide the “Company” name and tick this box to authorize the storage of damaged or scrapped goods here inside the “Is a Scrap Location?” area. Enabling the “Is a Return Location?” checkbox permits returns of goods to this address. Then, set a location-specific barcode number inside the “Barcode” area. Then, provide a “Removal Strategy:” The plan outlining how inventory items should be removed and save the form data using the “save” icon.
Configuring Storage Categories
The Odoo Inventory module's put-away procedures are made more efficient by the ability to consolidate several storage sites under a single category thanks to the Storage Categories feature. Activate the “Storage Location” from the Settings module to group them under a particular category. This gives you the ability to designate and oversee each storage location in your business. You can also define various categories using a separate field called “Storage Categories.”
Inside the “Settings” window, activate the “Storage Categories,” and you can create a new category using the “Storage Category” link given inside the “Warehouse” tab depicted in the screenshot below.
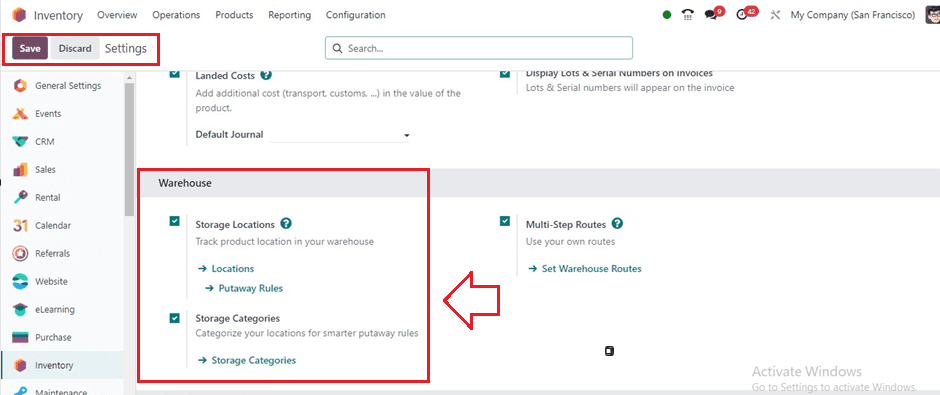
You can configure the storage categories from the “Configuration” menu. Choosing the “Storage Categories” option will show the dashboard of the available categories with their Name, Max Weight, Allow New Product and Company.

Click on the “New” button to create a new category. This will open a configuration form, as shown below.

The “Storage Category” name can be specified in the given space, along with the “Maximum Weight” it can store and the “Company.” Conditions can be placed in the "Allow New Product" section to enable new items to the location. These conditions can include empty locations, all products being the same or mixed products.
To add a storage category to your inventory, use the “Capacity by Package” tab to specify the “Package Type” and “Quantity” by clicking on the “Add a line” button. Choose the items to be added under the "Capacity by Products" tab. Save the category by clicking the Save icon, and the “Locations” smart button placed at the top of the form will provide the location details of the specified storage category.
When we refer to the storage category, it will look up the locations with the defined capacity and determine which is the best place to store the product. To find the appropriate location for this particular storage category, simply click the "Locations" smart button. This will cause the associated locations' dashboard to open. As you can see below, the category here corresponds with our previously created location.

When products arrive at the High Frequency-Big storage category, set the Putaway rule to move them to the Spare Parts Room based on available storage space.
Setting Putaway Rule
To store or move products based on storage spaces, go to the “Putaway Rules” page of the “Configuration” menu and create a new putaway rule.

Creating a Sample Order
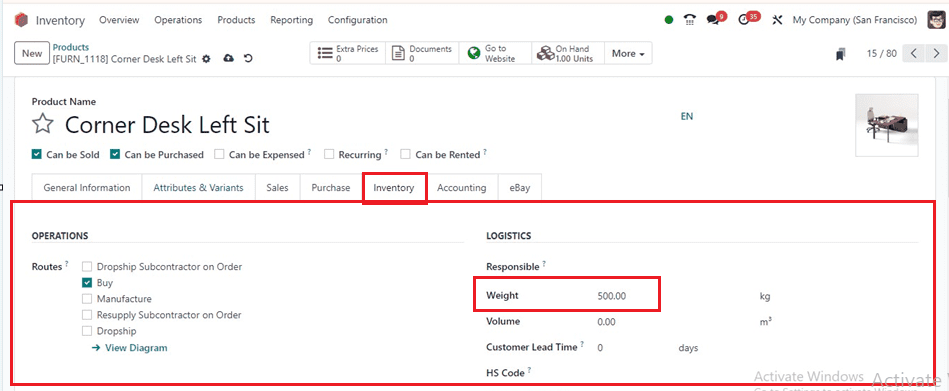
To create an inventory transfer order to check the storage category and location functionality, we can create or alter a product and must provide its weight in order to move that product to a certain location or storage category according to its weight. Here, We can choose a product and alter its weight from the product form's “Inventory” tab, as shown below.
Now, Create a new product transfer order using the “Batch Transfer” option available in the “Operations” menu and start editing the required transfer details in the displayed form view.
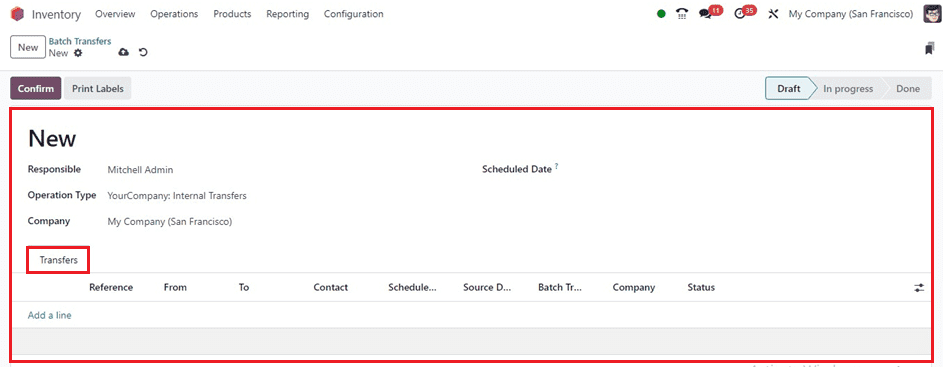
The “Transfers” tab can be used to add the transfer details with their Reference, From location, To, Contact, Scheduled date, Batch Transfer, etc. Inside the “Create Transfers” window, provide the details as shown below.
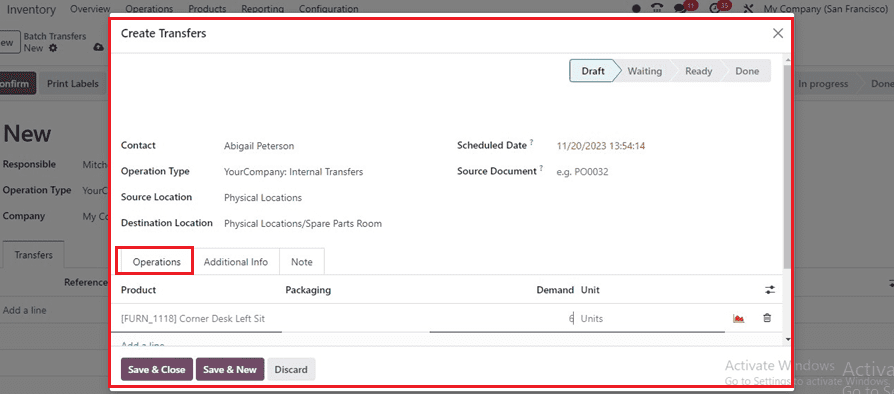

After saving the transfer details, confirm the transfer and validate the transfer order using the “Validate” button. Here, we have moved six products that weighed 500 kg and the storage category's maximum weight limit was 3000 kg.
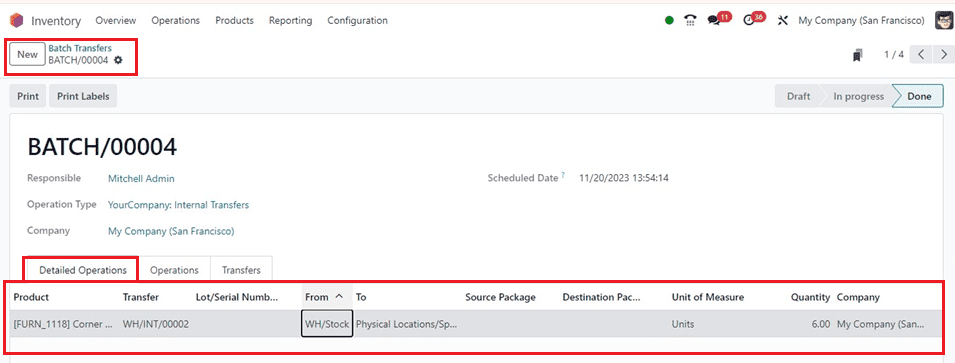
After the completion of the transfer process, if we look at the product's move history inside the “Detailed Operations” tab of the batch transfer form, we can see that it was transferred from the “WH/Stock” location to the “Physical Location/Spare Parts Room” as indicated below.
After completing the order, we can check the products available in the created location by opening the “Current Stock” Smart button of the location as shown below.

Inside the Current Stock dashboard, the available inventory stock products with the recently transferred products will be displayed as depicted below.

This feature of the Odoo 17 Inventory Module allows users to add a location attribute to Storage categories, enabling them to define putaway rules and the number of products to be stored in a specific location.