Odoo POS is primarily based on a smart interface that any retailer can effortlessly use. Being so flexible, Odoo POS can be configured to fit any of your needs easily.
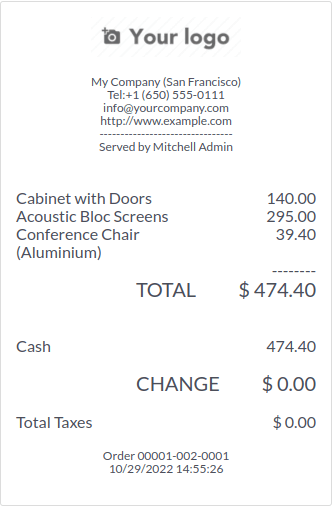
Now we can discuss how we can customize POS receipts in detail. Before we move to the customization part, let's see what the default POS receipts look like in Odoo 16

In the default view, as we can see, it only shows basic details about the current order, which allows us to customize the receipts for our individual needs.
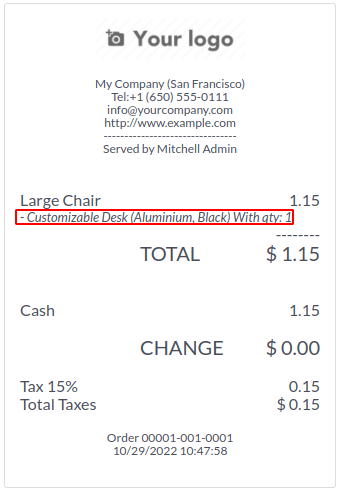
To customize receipts, first of all, we need to create an XML file inside the Static –>Src–>Xml folder. In this example, we are going to add a combo product under each product. For that, we need to inherit the OrderLineReceipt template and specify the position in which we are going to display the combo product. For that, we use ‘xpath’ to locate the exact position.
<t t-name="OrderLinesReceipt" t-inherit="point_of_sale.OrderLinesReceipt" t-inherit-mode="extension" owl="1">
   <xpath expr="//t[@t-foreach='receipt.orderlines']" position="inside">
                  <t t-if="line.combo_items">
                   <t t-foreach="line.combo_items" t-as="combo_item" t-key="combo_item.id">
                       <div class="receipt-combo">
                            - <t t-esc="combo_item.name"/>
                           With qty:
                           1
                       </div>
                   </t>
           </t>
       </xpath>
   </t>
</t>
There is a small change in adding XML into __manifest__.py compared to Odoo 15, in Odoo 15 the qweb template is added in the assets section of web.assets_qweb in __manifest__.py file. But in Odoo16, the XML template is added in the asset section of point_of_sale.assets, as we can see in the example below,
{
   'name': "custom POS Receipt",
   'version': '16.0.1.0.0',
   'summary': """custom POS Receipt""",
   'description': """Customized Receipt of Point Of Sales  """,
   'author': 'Cybrosys Techno solutions',
   'company': 'Cybrosys Techno Solutions',
   'website': 'https://www.cybrosys.com',
   'maintainer': 'Cybrosys Techno Solutions',
   'category': 'Point of Sale',
   'depends': ['point_of_sale'],
   'data': [
       'security/ir.model.access.csv',
       'views/pos.xml',
   ],
   'images': ['static/description/banner.png'],
   'installable': True,
   'auto_install': False,
   'application': False,
   'assets': {
       'point_of_sale.assets': [
                 'combo_product_pos/static/src/xml/**/*'
       ],
 },{
}
As we can see in the above example, the customized portion of receipts is highlighted in red color.
In some cases, you need to load the custom field that you have created, and then you have to load the custom field through python code. For example, if you created a custom field in the product_product model, then your python code looks like this
class PosSessions(models.Model):
   _inherit = 'pos.session'
   def _loader_params_product_product(self):
       result = super()._loader_params_product_product()
       result['search_params']['fields'].append('your_custom_field')
       return result