In this blog, we are going to discuss adding new items from the backend to the home page of Odoo website. In the community edition of Odoo 12, Odoo provides us help to add an option for various building blocks on the home page by drag and drop.
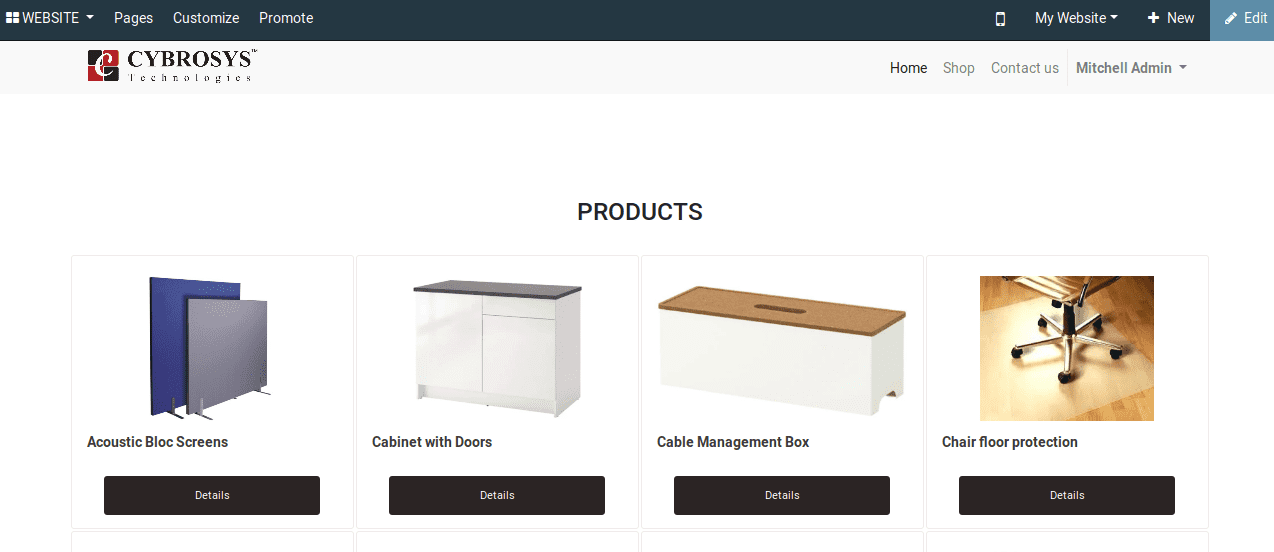
Here we can consider the example for displaying all the products available in our company on the home page of the Odoo website.
We can do this in many ways always remember if we replace or put our custom page inside the current layout of the Odoo home page then we can't add custom blocks a feature provided by Odoo itself. So always try to put the custom view after or before the current layout.
In .py
In order to add our custom details from the backend to the home page of Odoo website, we have to inherit the controller function of the home page and we can add our custom code of retrieving our required details from the backend.
from odoo import http
from odoo.addons.website.controllers.main import Website
class Website(Website):
	@http.route(auth='public')
   def index(self, **kw):
       super(Website, self).index()
       return http.request.render('<template_external_id>', {data})
In .xml
We have to extend the template of home page layout like below
<template id="new_homepage" inherit_id="website.homepage">
</template>
If we want to add an option to hide/show in our custom view, then we can add this option in the “Customize” menu of our website simply by adding the following code.
<template id="new_homepage" inherit_id="website.homepage" customize_show="True">
</template>
If we want to make it active at the time of loading the website just try the following code.
<template id="new_homepage" inherit_id="website.homepage" customize_show="True" active="True">
</template>
We can consider an example of displaying all the products which are in a published state to the homepage of the odoo website.
In .py
from odoo.addons.portal.controllers.web import Home
from odoo import http
from odoo.http import request
class WebsiteSort(Home):
@http.route()
def index(self, **kw):
super(WebsiteSort, self).index()
website_product_ids = request.env['product.template'].search([('is_published', '=', True)])
return request.render('website.homepage', {
'website_product_ids': website_product_ids
})
In .xml
<?xml version="1.0" encoding="utf-8"?>
<odoo>
   <template id="homepage_inherit_product_display" inherit_id="website.homepage" name="Products" active="True"
             customize_show="True">
       <data inherit_id="website.homepage">
           <xpath expr="//div[@id='wrap']" position="after">
               <input type="hidden" name="csrf_token" t-att-value="request.csrf_token()"/>
               <div class="container mt32 mb64">
                   <section>
                       <div class="product_details">
                           <center>
                               <h3>PRODUCTS</h3>
                           </center>
                       </div>
                       <br/>
                       <div class="oe_product_cart_new row" style="overflow: hidden;">
                           <t t-foreach="website_product_ids" t-as="website_product_id">
                               <div class="col-md-3 col-sm-3 col-xs-12"
                                    style="padding:1px 1px 1px 1px;">
                                   <div style="border: 1px solid #f0eaea;width: 150px;height: auto;padding: 7% 0% 10% 0%;
                                    border-radius: 3px;overflow: hidden;
                                    margin-bottom: 44px !important;width: 100%;height: 100%;">
                                       <div class="oe_product_image">
                                           <center>
                                               <div style="width:100%; height:145px;overflow: hidden;">
                                                   <img t-if="website_product_id.image"
                                                        t-attf-src="/web/image/product.template/#{website_product_id.id}/image"
                                                        class="img oe_product_image"
                                                        style="padding: 0px; margin: 0px; width:auto; height:100%;"/>
                                               </div>
                                               <div style="text-align: left;margin: 10px 15px 3px 15px;">
                                                   <t t-if="website_product_id.name">
                                                       <span t-esc="website_product_id.name"
                                                             style="font-weight: bolder;color: #3e3b3b;"/>
                                                       <br/>
                                                   </t>
                                               </div>
                                               <a style="background-color: #2b2424;color: white;width: 76%;left: 12%;
                                           height: 39px;display: block;padding: 11px 1px 1px 1px;font-size: 11px;
                                           border-radius: 3px;margin-top: 10px;text-decoration: none;
                                           position: absolute;bottom: 15px;"
                                                  t-attf-href="/shop/product/#{ slug(website_product_id) }">Details
                                               </a>
                                           </center>
                                       </div>
                                   </div>
                               </div>
                           </t>
                       </div>
                   </section>
                   <br/>
                   <hr class="border-600 s_hr_1px w-100 mx-auto s_hr_dotted"/>
               </div>
           </xpath>
       </data>
   </template>
</odoo>
The possible output will be

And we can enable/disable this from the menu “Customize”.