In this blog, we are discussing how we can create user notifications in Odoo version 14. In odoo, we can give the result of certain actions by using different types of notifications.
Odoo has different types of notifications. They are:
1. Sticky Notifications
2. Rainbow man
3. Alert
4. Raising Exceptions
Sticky Notifications
We can write sticky notifications for our functions on the custom module or for existing modules based on the conditions that we need.
By default, Odoo uses some sticky notifications.

We can create sticky notifications using both JavaScript and python functions.
By using the python code:
def sticky_notification(self):
	 notification = {
	'type': 'ir.actions.client',
	 'tag': 'display_notification',
	'params': {
		'title': _('Warning'),
		'message': 'You cannot do this action now',
		'sticky': True,
		}
	}
	return notification
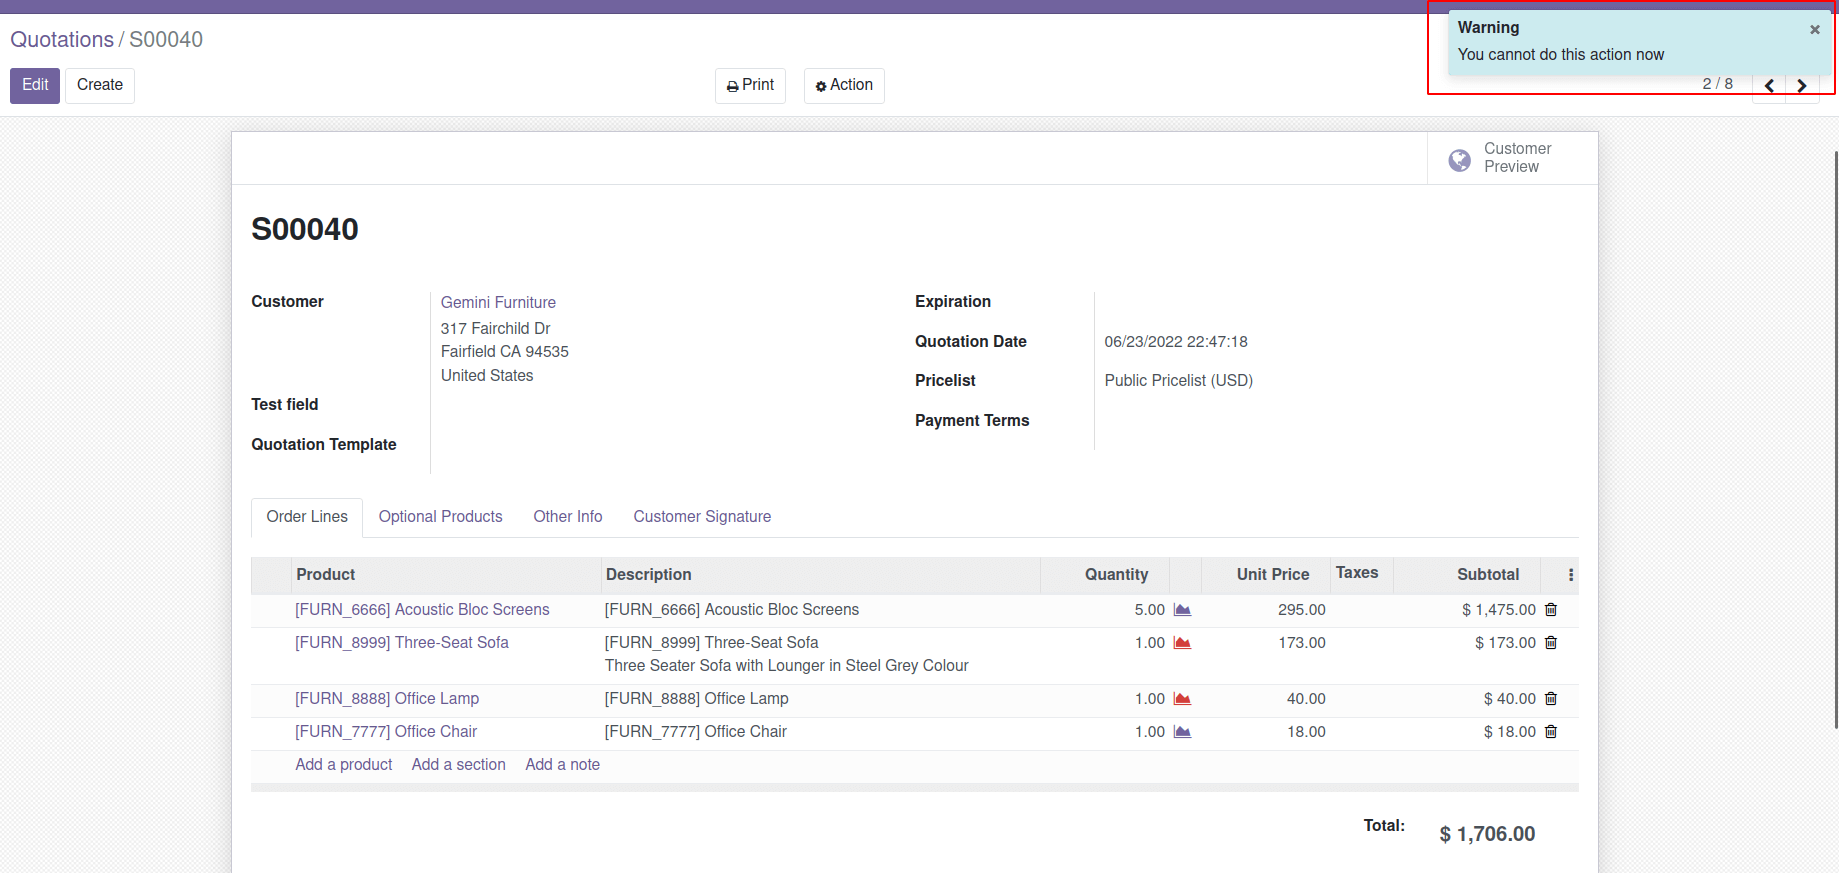
The result of the above code will give a notification like the below.

By using the javascript function
In the case of javascript, there are two options. They are :
do_notify
- This will display notification as in the above code.
do_warn
-Used to show a warning message.
{
this.do_notify("title", "message", "sticky", "className");
}
title: Title for the notification
message: Message to display inside the notification
sticky: Boolean value which is optional, if it is true the user must need to cancel the notification
className: Specifies CSS class which is optional.
onclick_sticky_notification: function(){
this.do_notify("Error", "Please Check the values before save");
}
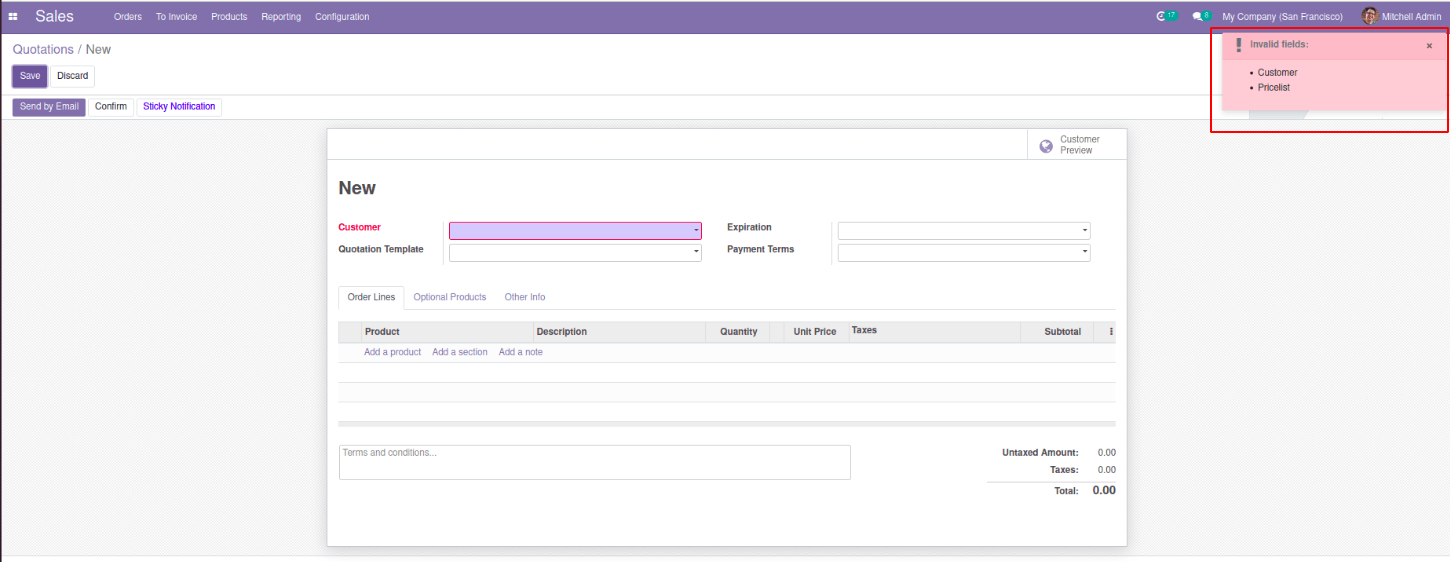
The above code will return

onclick_sticky_notification: function(){
this.do_notify("Error", "Please Check the values before save");
}
The above code will return the following

Rainbow Man Effect
The rainbow man effect is another type of notification in Odoo. By default, we can see the rainbow man effect while doing reconciliation. By adding the following code, you can add a rainbow man effect to your custom modules.
def action_confirm(self):
	 return {
	 'effect': {
	 'fadeout': 'slow',
           'message': 'Sale order is confirmed',
           'type': 'rainbow_man',
        }
}
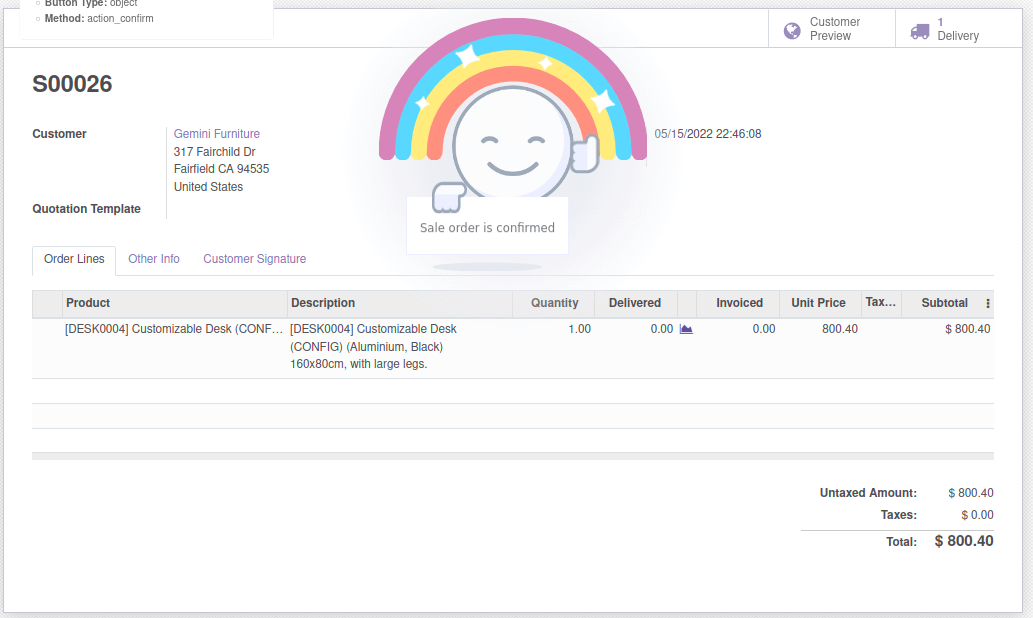
The above function will return a rainbow man with the message “sale order confirmed” after clicking on the confirm button on the sale order. Here fadeout can be slow, fast, and no for the rainbow man effect.

Alerts
Alert is another type of notification in Odoo. We can create different alerts based on the conditions and actions we need.
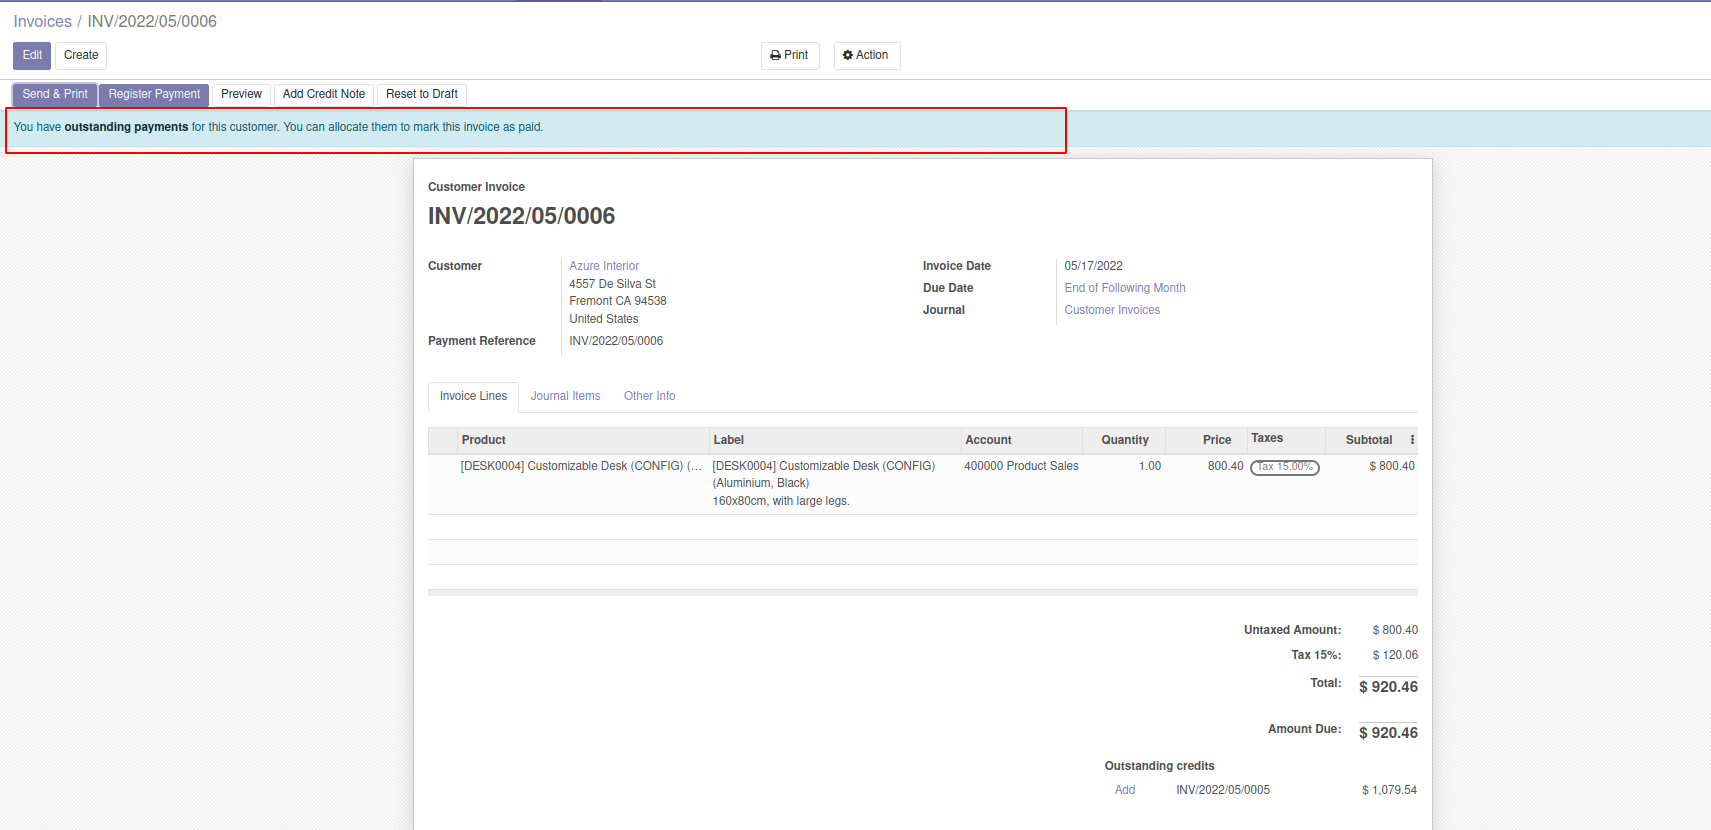
For example, This is the default alert that appears when there are outstanding payments.

We can add these types of notifications to our custom modules according to our needs.
Example:
<xpath expr="//form/sheet" position="before">
<div class="alert alert-danger" role="alert" style="margin-bottom:0px;" attrs="{'invisible': [('state', '!=', 'sale')]}"> Your sale order <bold> <a class="alert-link" role="button">
 <field name="name" readonly="True"/> </a> </bold> going to be expired on <bold> <field name="validity_date" readonly="True"/> </bold>
 </div>
</xpath>

We can add notifications either to the existing models or to the custom models we created. The above code shows an example of adding a notification to an existing model(sale. order).
In such cases, we need to use XPath for adding the notifications to the existing models.
We can define these types of notifications inside div. If we want to redirect to any other form, we can specify the related field to those required forms inside that div. In the example given above, we can redirect to the sales order mentioned in the notification. We can give different classes (alert alert-warning, alert alert-danger, alert alert-info, etc) to the div to give them different looks and appearances.
Raising Exceptions
Raising exceptions is used in Odoo to prevent the program from continuing its execution and we can perform this by showing error messages by raising exceptions. On raising an exception all the data manipulations in the database are rolled back and operations are canceled. So we can prevent incorrect data entry to databases.