Odoo, the leading open-source enterprise resource planning (ERP) software, offers a plethora of built-in features and functionalities. However, its true power lies in its extensibility, allowing developers to create custom modules and widgets tailored to their specific business needs. In this comprehensive guide, we will delve into the world of custom widgets in Odoo 17, exploring their creation, implementation, and integration into the Odoo ecosystem.
Creating a custom widget in Odoo 17 involves several steps, each contributing to the overall functionality and integration of the widget. Let's explore these steps in detail:
Practical Example: Order Line Count Widget
To illustrate the process of creating a custom widget in Odoo 17, let's consider a practical example: an order line count widget that displays the number of order lines and the total quantity of products in a sale order.
Python:
# -*- coding: utf-8 -*-
from odoo import fields, models

class SaleOrder(models.Model):
    _inherit = 'sale.order'
    order_line_count = fields.Integer(string='Order Line Count', compute='compute_line_count', store=True)
    num_qty = fields.Integer(string='Number Of Quantity',  compute='compute_line_count', store=True)
    def compute_line_count(self):
        for rec in self:
            rec.order_line_count = len(rec.order_line.mapped('id'))
            rec.num_qty = sum(rec.order_line.mapped('product_uom_qty'))
In this example, we extend the sale.order model and add two computed fields: order_line_count and num_qty. The compute_line_count method calculates the values for these fields based on the order lines associated with each sale order.
Implementation of JS and XML:
/** @odoo-module **/
import { registry } from "@web/core/registry";
import { useService } from "@web/core/utils/hooks";
import { usePopover } from "@web/core/popover/popover_hook";
import { Component } from "@odoo/owl";
export class orderLineCountPopover extends Component {
    setup() {
        this.actionService = useService("action");
    }
}
orderLineCountPopover.template = "your_module.OrderLineCountPopOver";
export class orderLineCountWidget extends Component {
    setup() {
        this.popover = usePopover(this.constructor.components.Popover, { position: "top" });
        this.calcData = {};
    }
    showPopup(ev) {
        this.popover.open(ev.currentTarget, {
            record: this.props.record,
            calcData: this.calcData,
        });
    }
}
orderLineCountWidget.components = { Popover: orderLineCountPopover };
orderLineCountWidget.template = "your_module.orderLineCount";
export const OrderLineCountWidget = {
    component: orderLineCountWidget,
};
registry.category("view_widgets").add("order_line_count_widget", OrderLineCountWidget);
In the JS file, we define two components: OrderLineCountPopover and OrderLineCountWidget. The OrderLineCountWidget component renders an icon that, when clicked, opens a popover displaying the order line count and total quantity. The OrderLineCountPopover component is responsible for rendering the popover content.
XML:
<?xml version="1.0" encoding="UTF-8" ?>
<template id="template" xml:space="preserve">
    <t t-name="your_module.orderLineCount">
        <a t-on-click="showPopup" t-attf-class="fa fa-info-circle"/>
    </t>
    <t t-name="your_module.OrderLineCountPopOver">
        <div>
            <table class="table table-borderless table-sm">
                <br/>
                <tr>
                    <td><h5>Order line count:</h5></td>
                    <td>
                        <h6><span t-out='props.record.data.order_line_count'/></h6>
                    </td>
                </tr>
                <tr>
                    <td><h5>Number of quantity:</h5></td>
                    <td>
                        <h6><span t-out='props.record.data.num_qty'/></h6>
                    </td>
                </tr>
            </table>
        </div>
    </t>
</template>
The XML template defines the structure and layout of the widget, including the icon and the popover content.
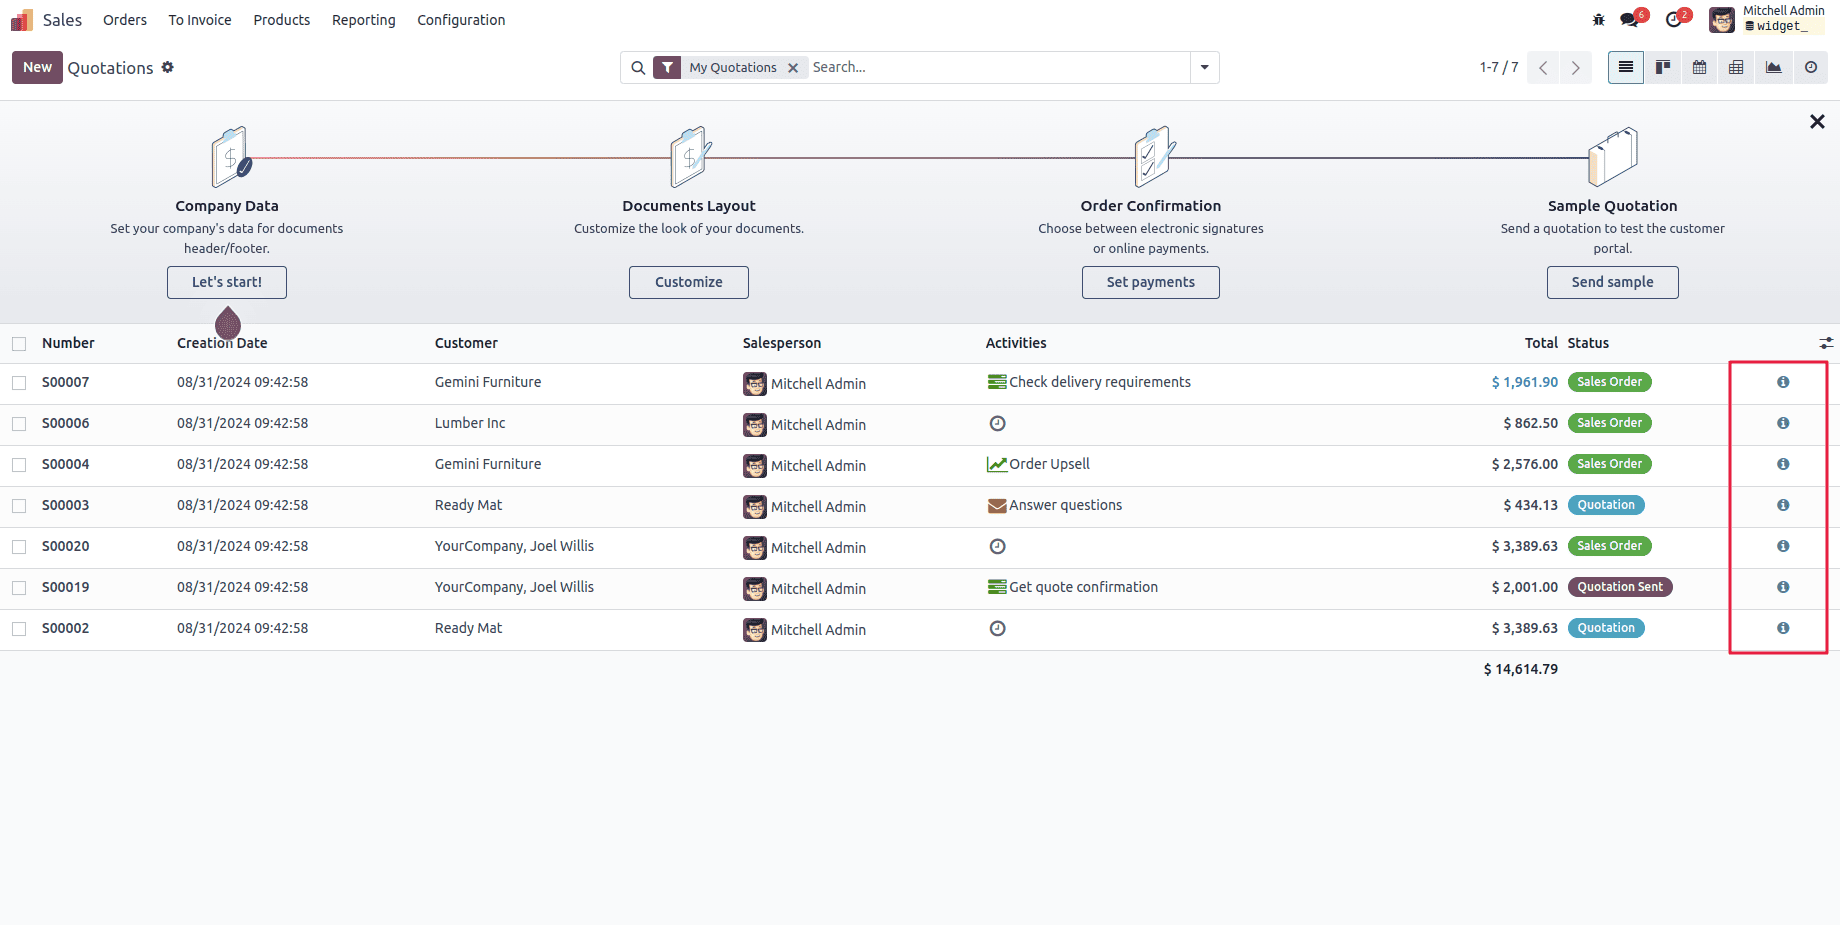
Integrating the Widget into Views:
To integrate the order line count widget into Odoo's views, we need to modify the XML view definition for the sale order tree view:
<?xml version="1.0" encoding="UTF-8" ?>
<odoo>
    <record id="view_quotation_tree_custom" model="ir.ui.view">
        <field name="name">sale.order.tree.custom</field>
        <field name="model">sale.order</field>
        <field name="inherit_id" ref="sale.view_quotation_tree"/>
        <field name="arch" type="xml">
            <xpath expr="//tree" position="inside">
                <field name="order_line_count" column_invisible="True"/>
                <field name="num_qty" column_invisible="True"/>
                <widget name="order_line_count_widget"/>
            </xpath>
        </field>
    </record>
</odoo>
In this example, we create a new view record that inherits from the existing sale.view_quotation_tree view. We then use the <xpath> element to insert the order_line_count and num_qty fields (invisible columns) and the order_line_count_widget widget into the tree view.
If we click on the icon,
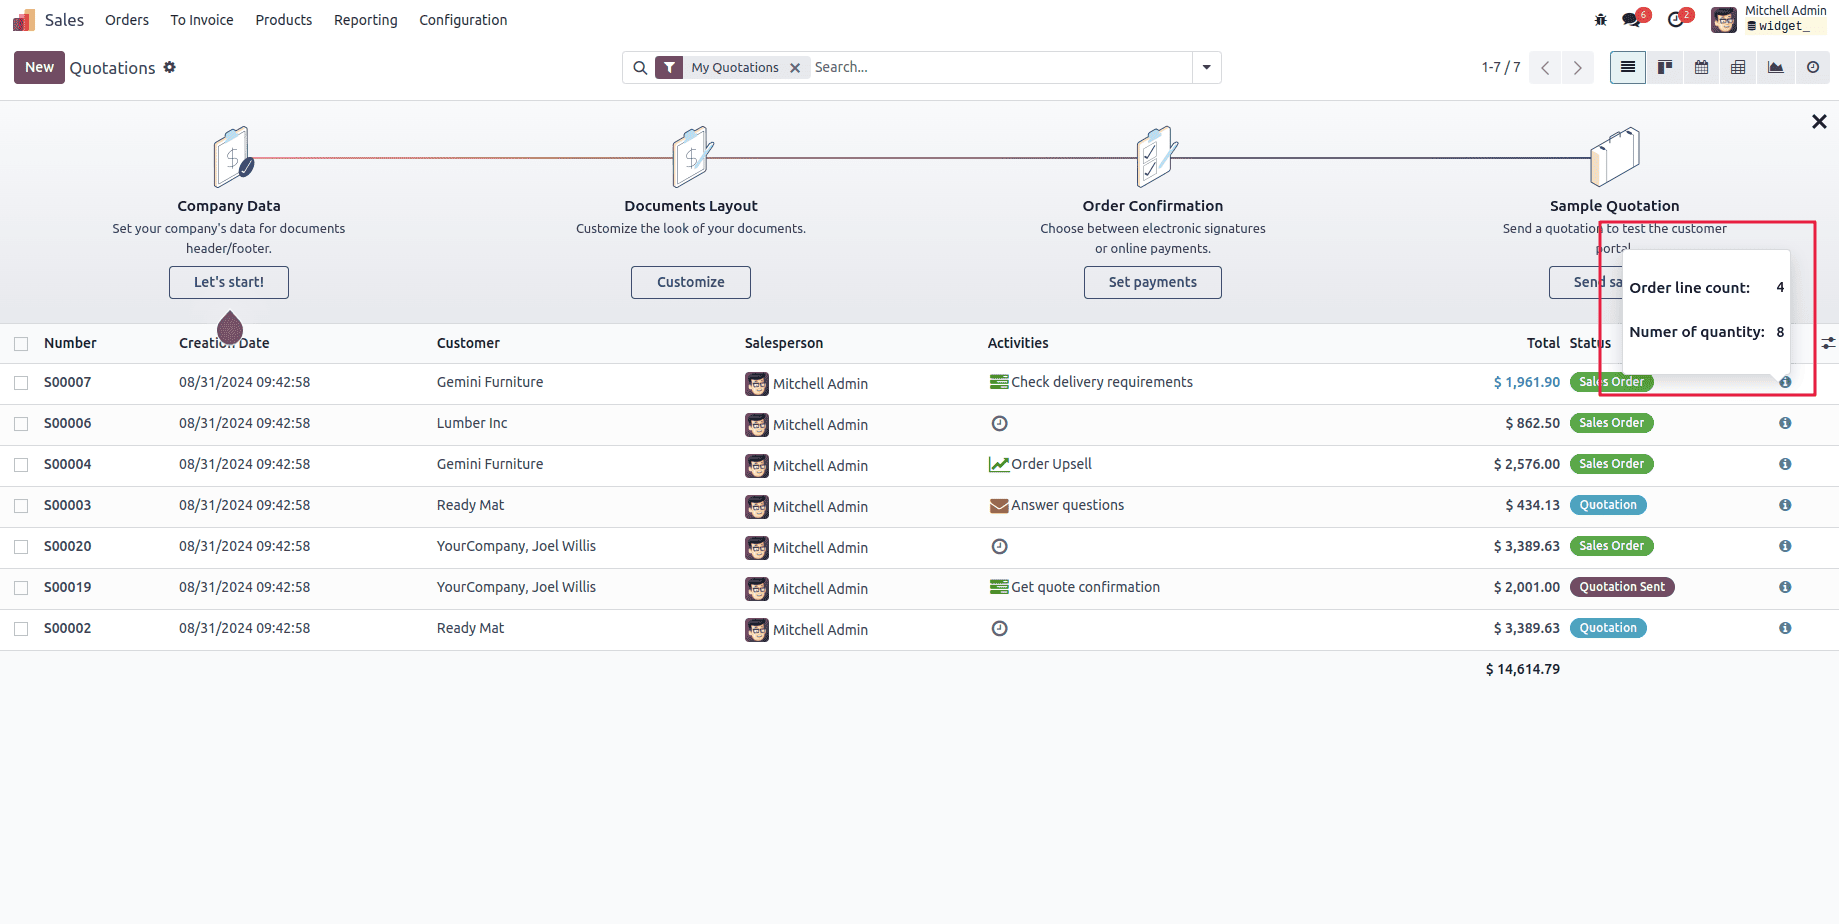
By following these steps, developers can create custom widgets tailored to their specific business requirements, enhancing the functionality and user experience of Odoo 17.
Creating custom widgets in Odoo 17 is a powerful way to extend the functionality of the platform and tailor it to specific business needs. By leveraging Python for backend logic and JavaScript for frontend interactivity, developers can create dynamic and interactive widgets that enhance the user experience and streamline business processes.
Throughout this comprehensive guide, we have explored the significance of custom widgets, the building blocks required for their development, and a step-by-step approach to creating and integrating them into Odoo. Additionally, we have provided a practical example of an order line count widget to illustrate the implementation process.
As Odoo continues to evolve, the demand for custom widgets will only increase. By mastering the techniques and best practices outlined in this article, developers can position themselves at the forefront of Odoo customization, delivering innovative solutions that drive business growth and success.
To read more about Field Types and Widgets in Odoo 16, refer to our blog Field Types and Widgets in Odoo 16.