The search panel is one of the effective features of Odoo. The main purpose is to provide a filtering view in the easiest and most advanced way based on given data. We can see the search panel in Apps and Odoo modules like Employee.
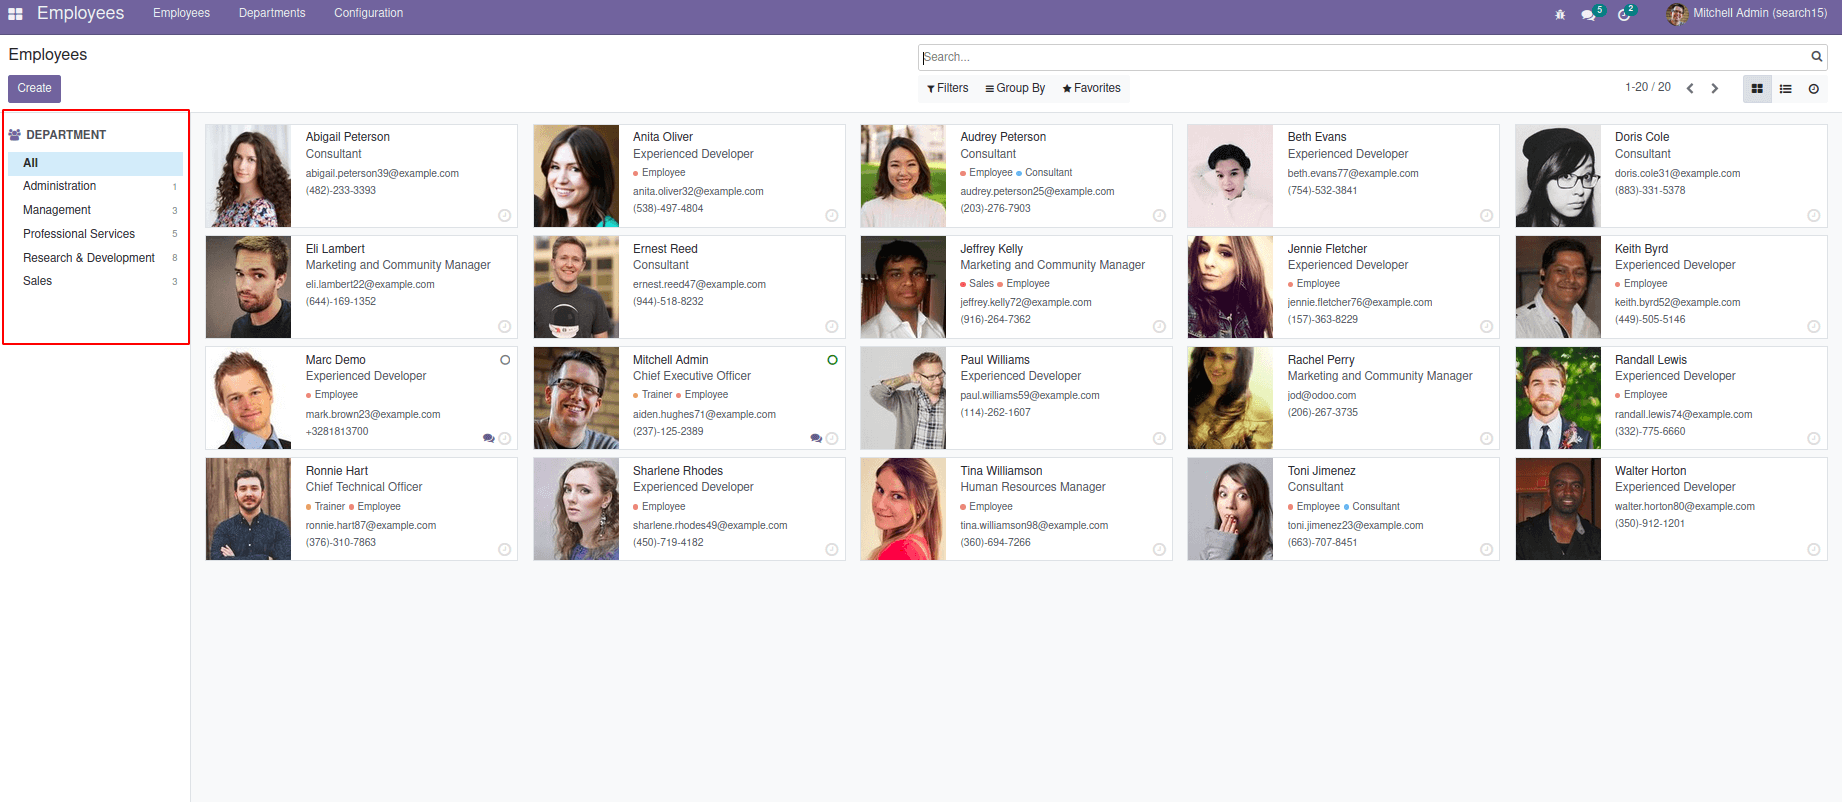
In the HR module, we can see the search panel on the left side of the employees.

In the search panel, select based on a filter. For example, In the above image, All condition is satisfied. So it shows all employees based on this condition.
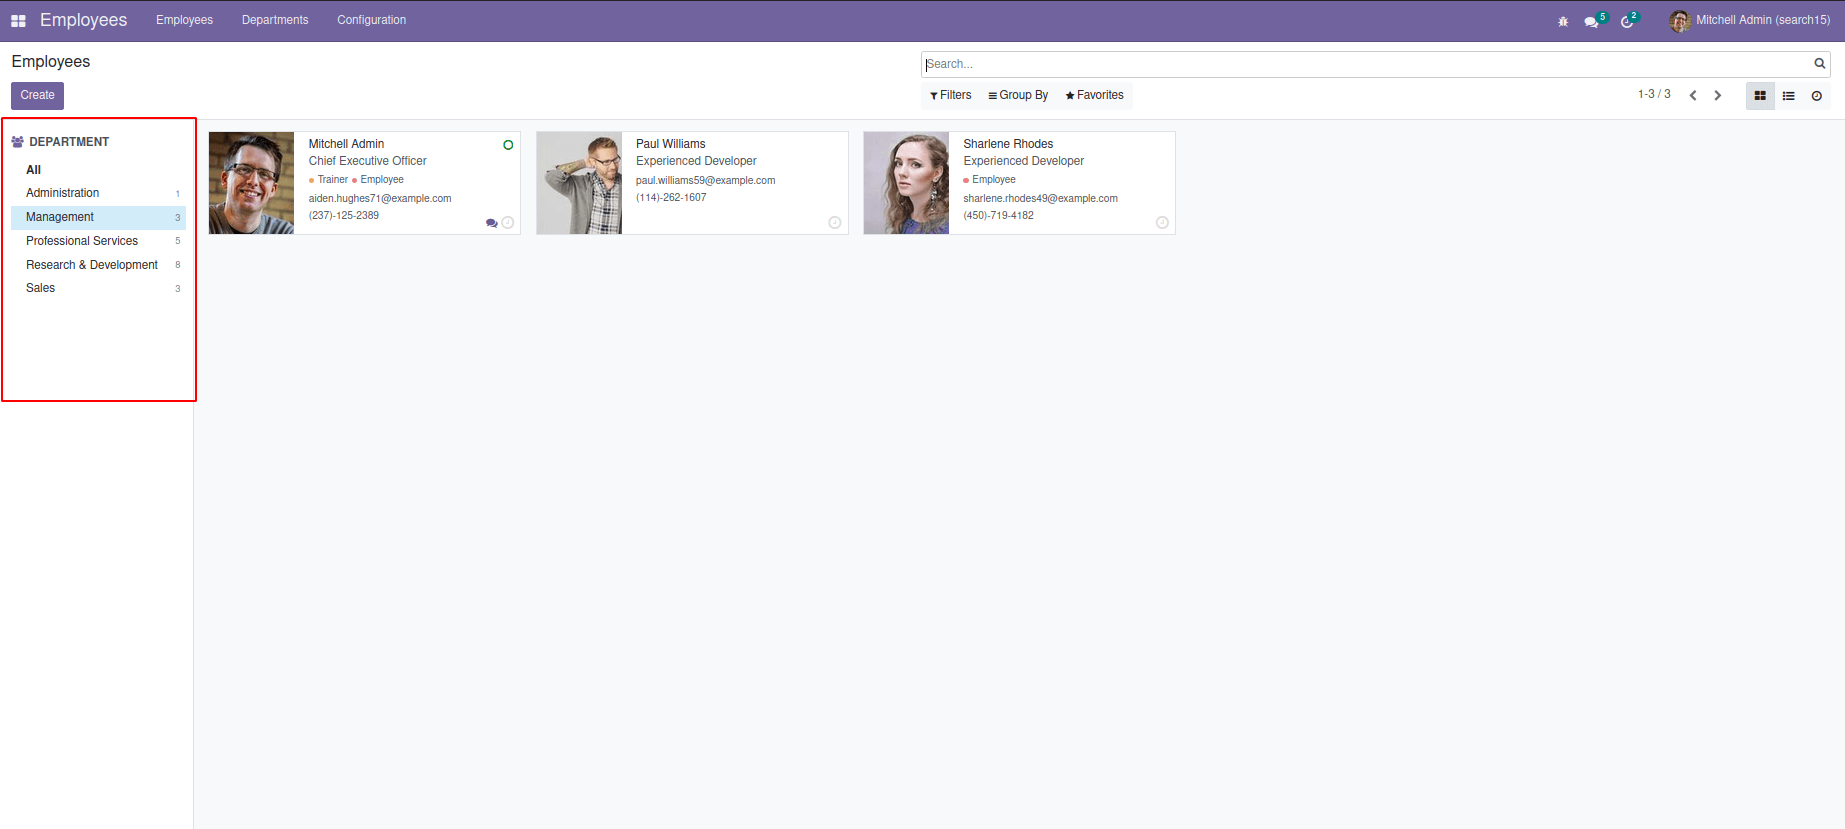
The corresponding data is visible on the screen if the search is based on any specific filter, the corresponding data is visible on the screen.

Here in the image above, the search panel is based on Management.
In addition, in apps, we can see a search panel. So based on we can filter the group by condition satisfied

In this Blog, we can discuss how to create a search panel in existing as well as a custom module in odoo 15.
So firstly, check how to create a search panel on the existing module. For this, we can take an example as adding a search panel on the sale module.
So In XML :
<odoo>
<record id="sale_order_search_panel_sale_order_search"
model="ir.ui.view">
<field name="name">sale.order.search (module_name)
</field>
<field name="model">sale.order</field>
<field name="inherit_id" ref="sale.view_sales_order_filter"/>
<field name="arch" type="xml">
<search position="inside">
<searchpanel>
<field name="invoice_status" enable_counters="1"/>
<field name="state" enable_counters="1"/>
<field name="partner_id" enable_counters="1"/>
</searchpanel>
</search>
</field>
</record>
</odoo>

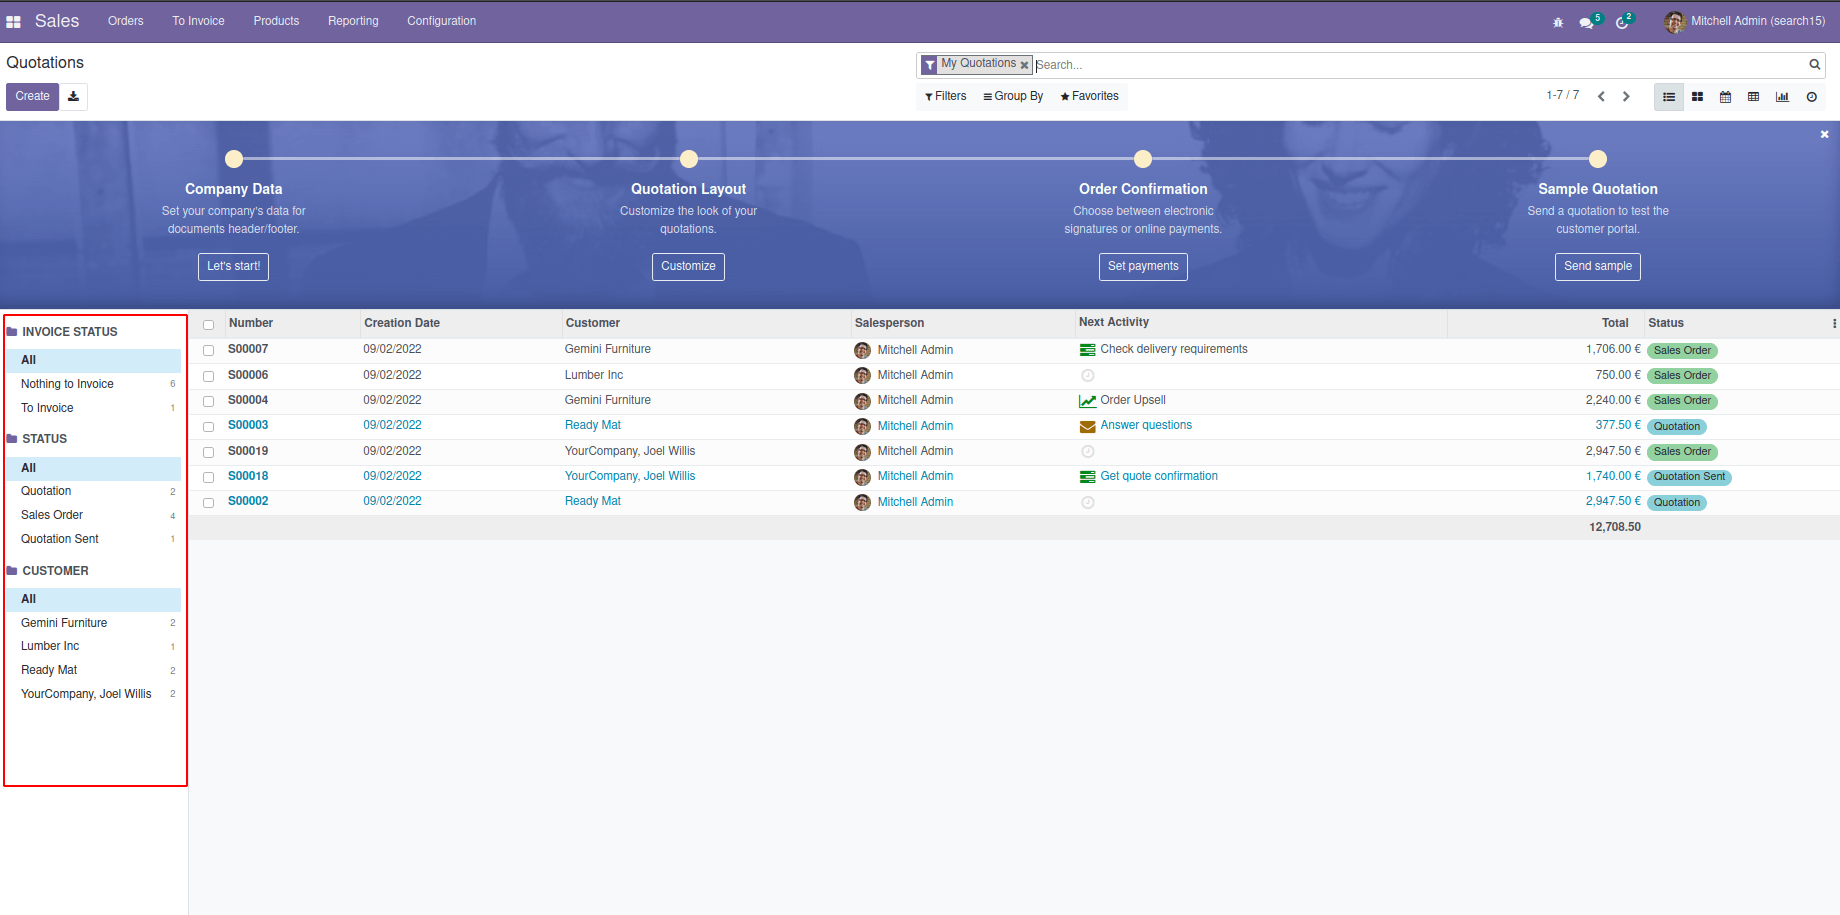
The result of this code will be like this.
Here, we add a search panel based on three fields in the sale order. That is based on invoice status, status, and customer. Similarly, we can include more fields here. The attribute that is used in search panel along with name field.
They are:
name: Filter field name (It is a mandatory field). Based on this field, filtration occurs. For example, if partner_id is the field given to the search panel, then it shows filtration based on the partner.
One: By default, it can select one value at a time. many2one and selection are the types of fields.
multi: Select several values with the use of checkboxes. It supports many2one, selection, and many2many.
Icon: Option to choose icon for display the string.
Enable_counters: If enabled, this shows the number of records in each value. By default, it will be zero.
Limit: It will determine the maximum records to be fetched on the field.
Let us take another example as creating a search panel on a purchase order.
<odoo>
<record id="view_purchase_order_filter" model="ir.ui.view">
<field name="name">request.quotation.search (module_name)
</field>
<field name="model">purchase.order</field>
<field name="inherit_id" ref="purchase.view_purchase_order_filter"/>
<field name="arch" type="xml">
<search position="inside">
<searchpanel>
<field name="partner_id" enable_counters="1"
icon="fa fa-user"/>
<field name="user_id" enable_counters="1"
icon="fa fa-user"/>
<field name="state" limit='5'/>
<field name="invoice_status"/>
</searchpanel>
</search>
</field>
</record>
</odoo>
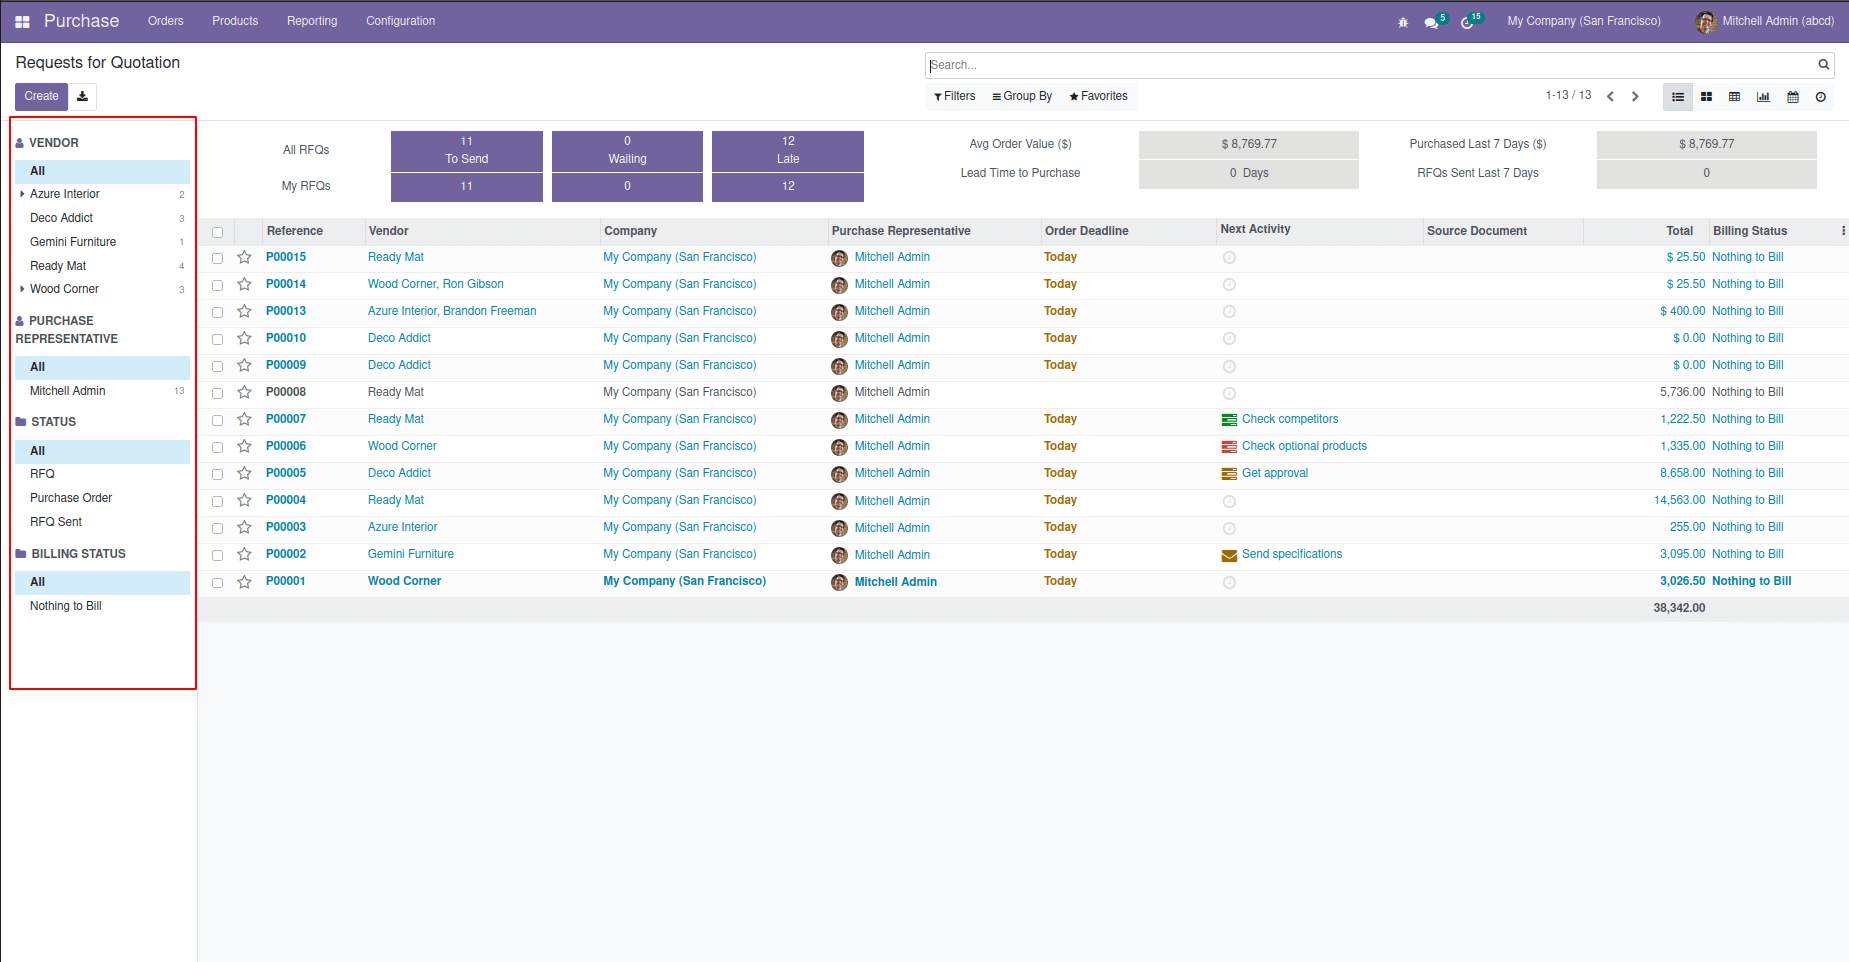
So we can see the search panel in the purchase order as follows:

Similarly, In the custom module.
1. Create a new custom model with the required menu and fields.
2. Create views including tree and form.
3. Define the access rights to the corresponding user group for newly created modules.
4. Add a search panel for required fields similar to the above explained.
This Search panel is mainly used to make it an easier way to filter out the object as per our wish. You can add any fields for any model, whether a custom or an already existing module. Search panels can make it more attractive by using awesome icons and fonts. It is mainly a user-defined way to create.