Odoo is an experienced ERP software that includes various business management systems such as CRM, eCommerce, Invoicing, Accounting, Production, Warehouse Management, Project Management, Sales Management, Purchasing Management, Human Resources Management, and Inventory Management.
In this blog, we will talk about the HubSpot Odoo Connector app (technical name: hubspot_odoo_connector) available in the Odoo App Store.
HubSpot is the most popular marketing and sales platform, offering tools designed to help businesses attract, engage, and retain customers. Content management can include marketing campaigns, email marketing, customer relationship management (CRM), sales automation, and more.
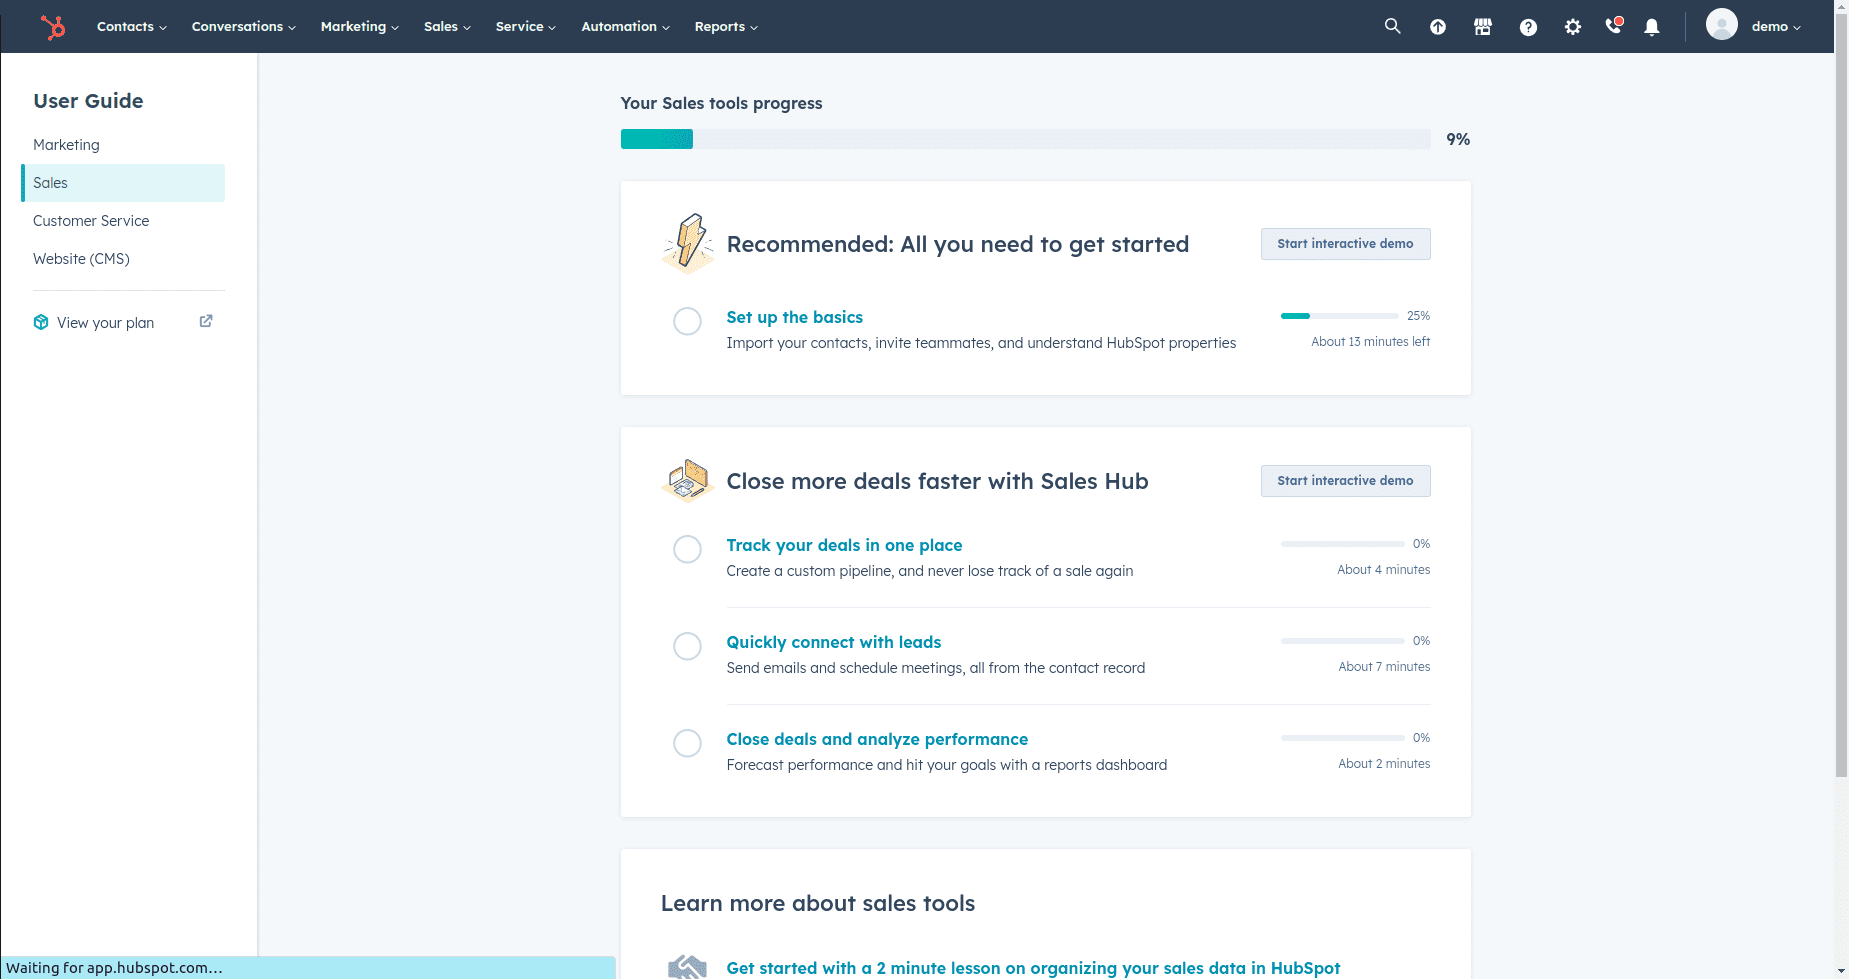
To access the HubSpot platform, you can either log in or sign up using the link: https://app.hubspot.com/.
Once logged in successfully, users will be directed to the HubSpot interface, which resembles the image displayed below.
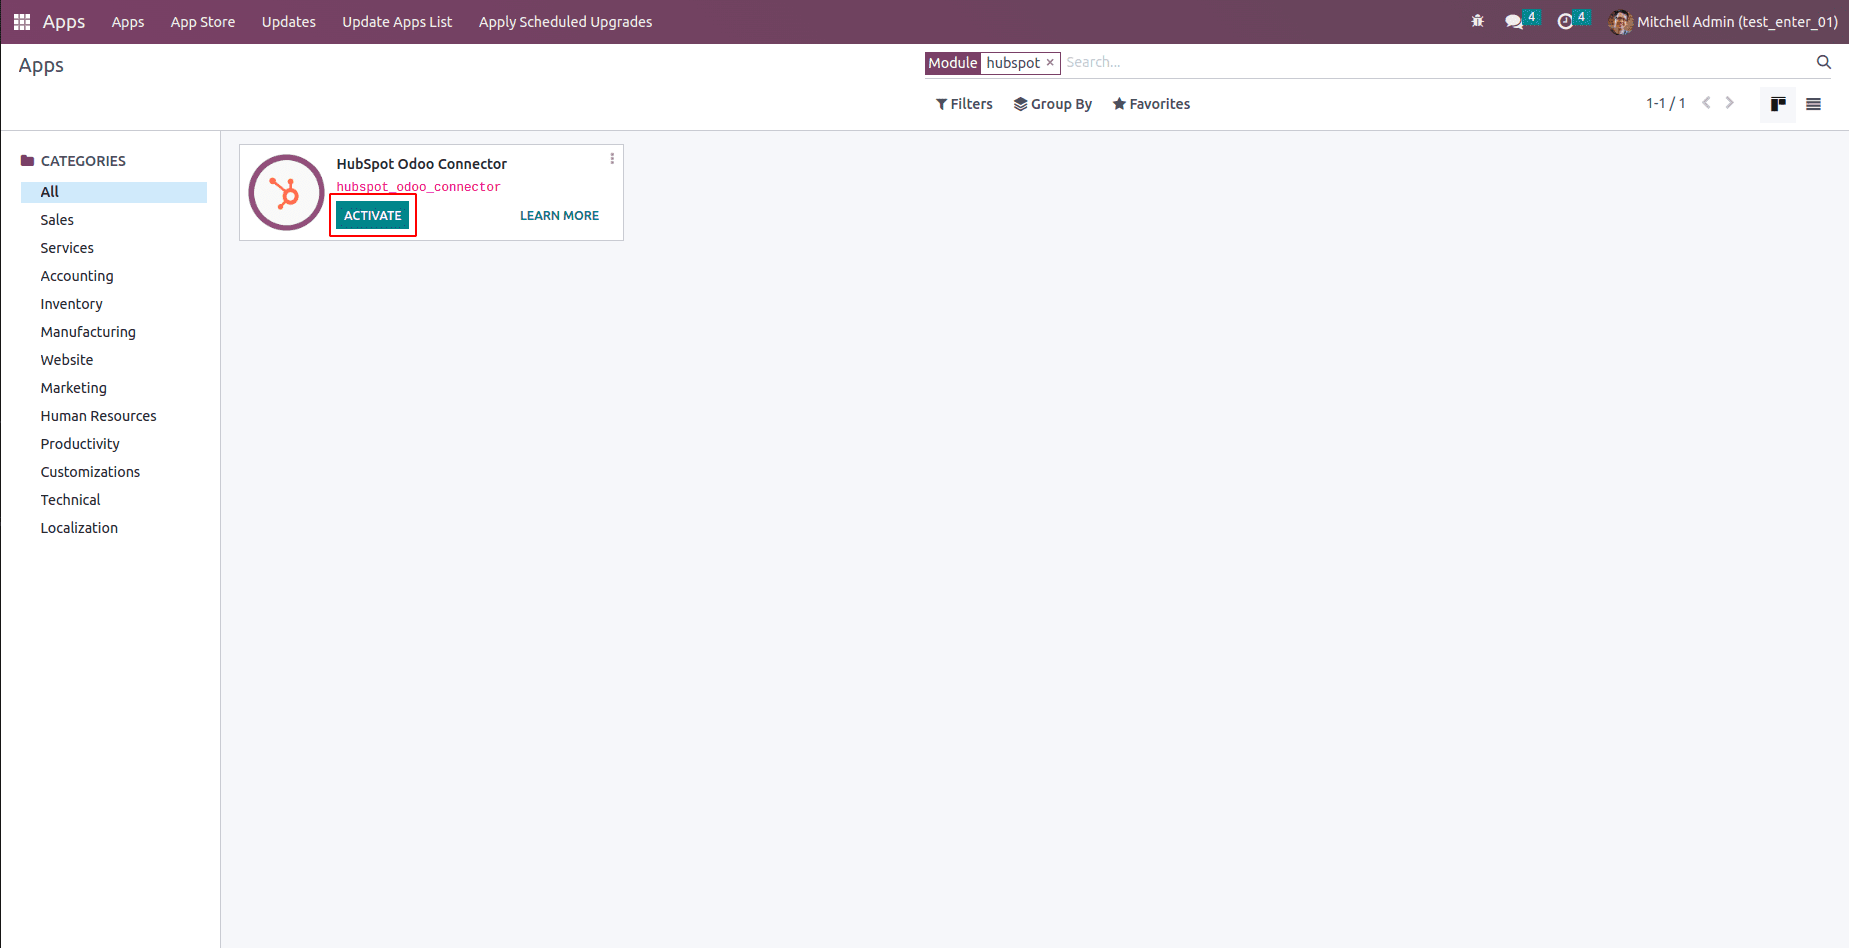
Install the application from Odoo Apps.
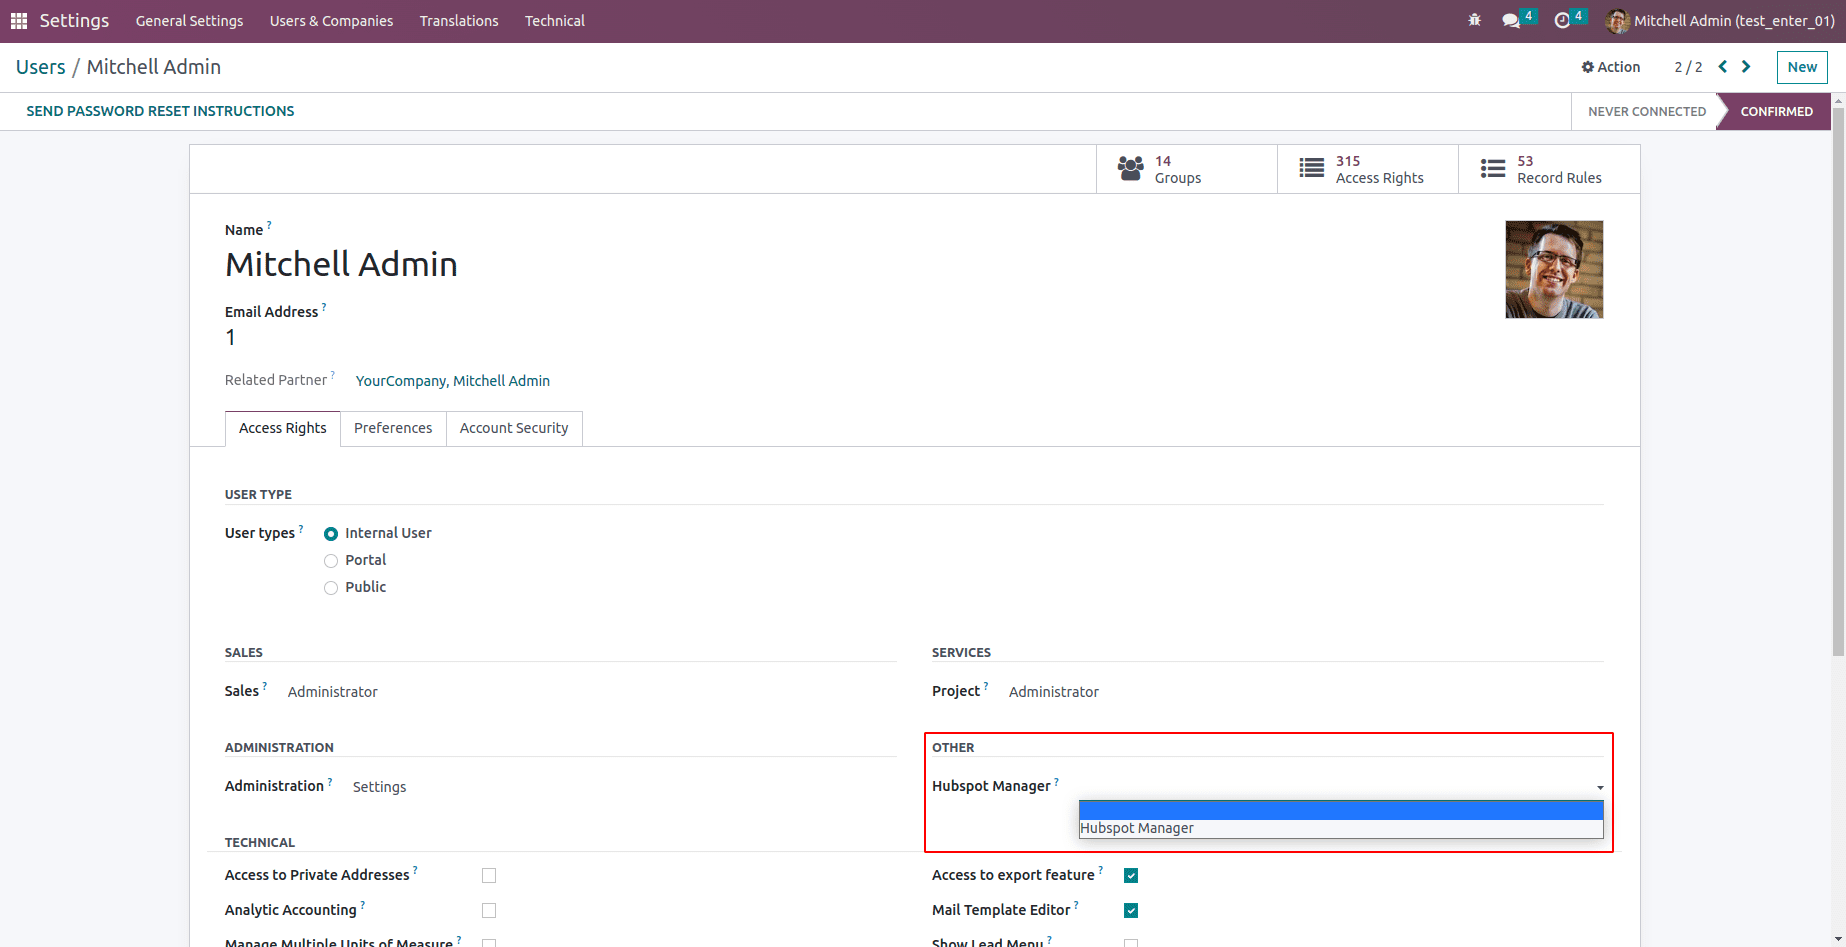
Subsequently, grant the manager access to this application through the settings, as exemplified in the provided image.
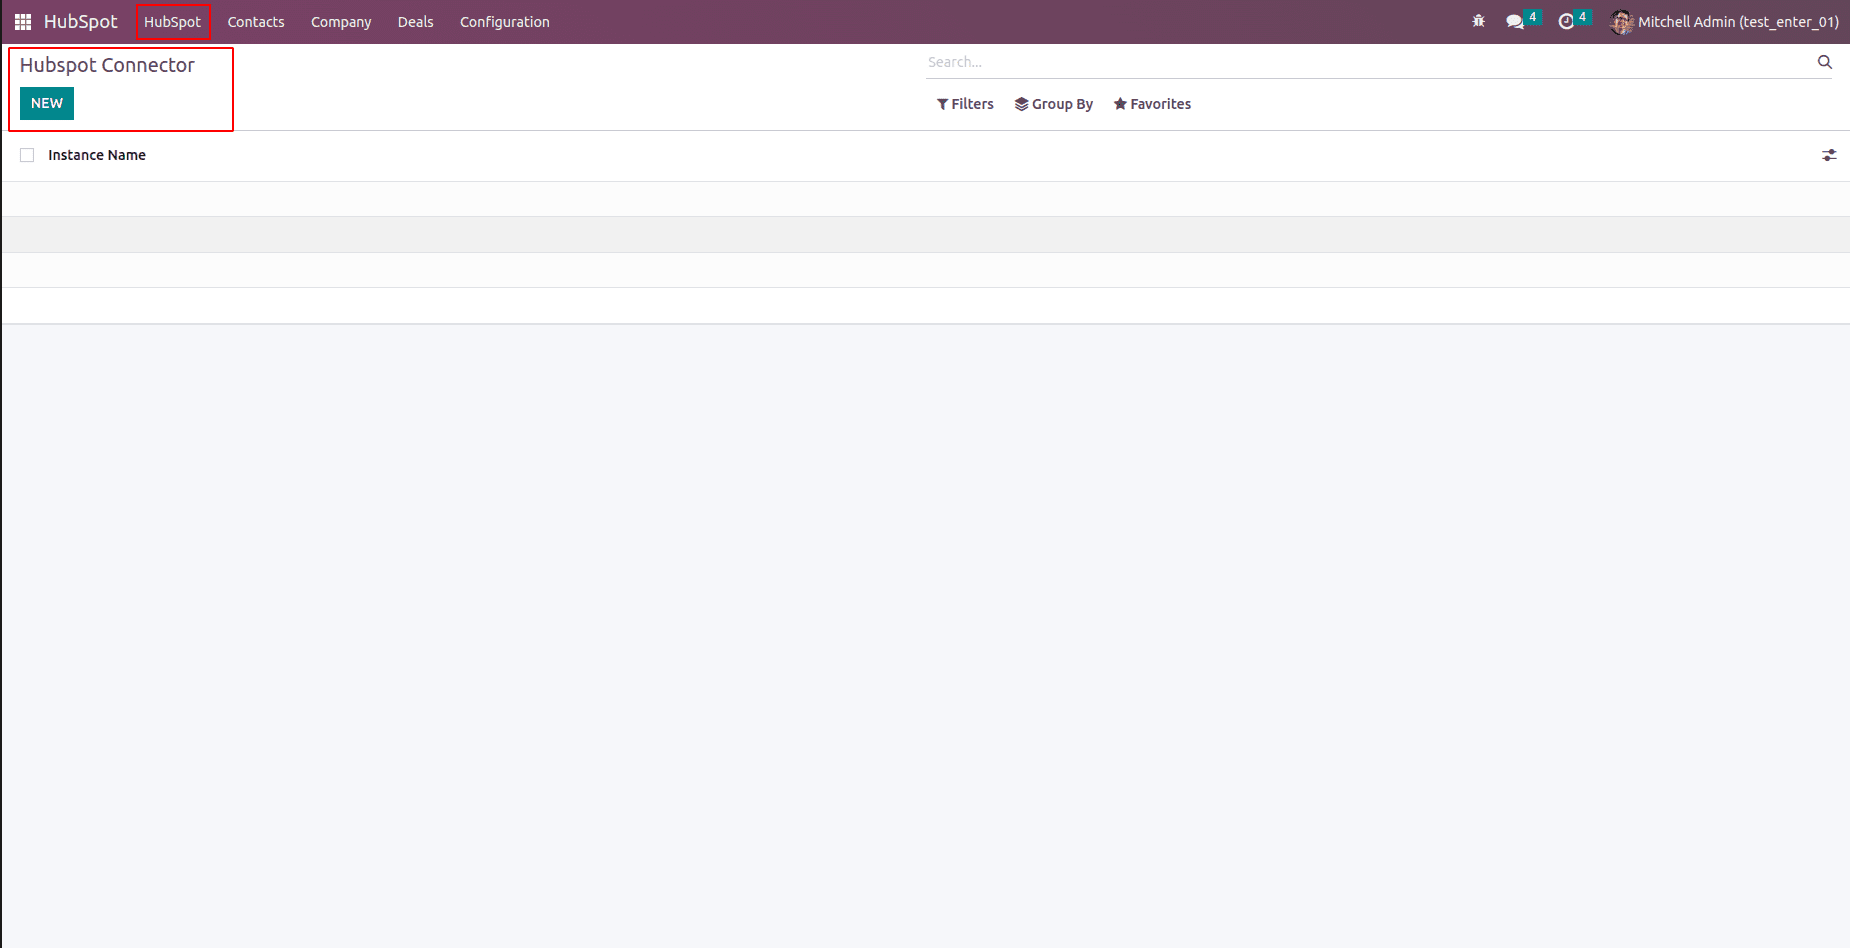
Once the manager has been granted access, they will be able to view the HubSpot app. Upon integrating HubSpot within Odoo, the interface will display the HubSpot menu, depicted as shown in the accompanying image.
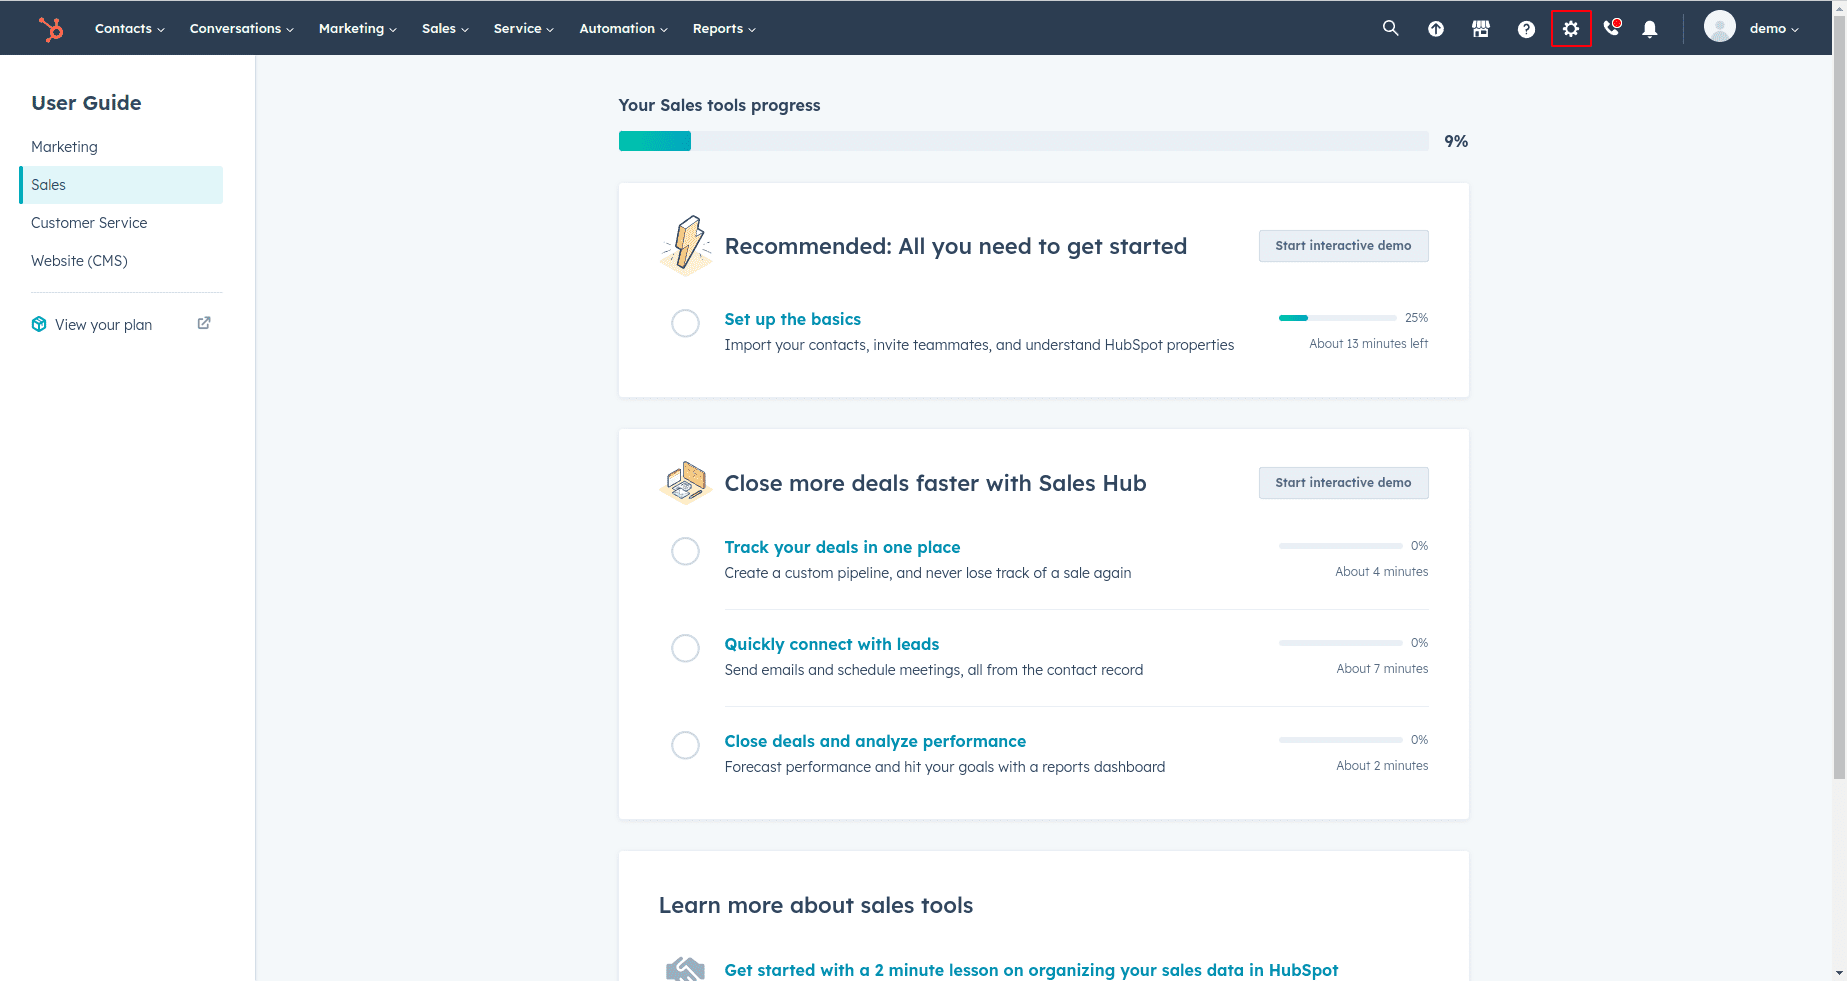
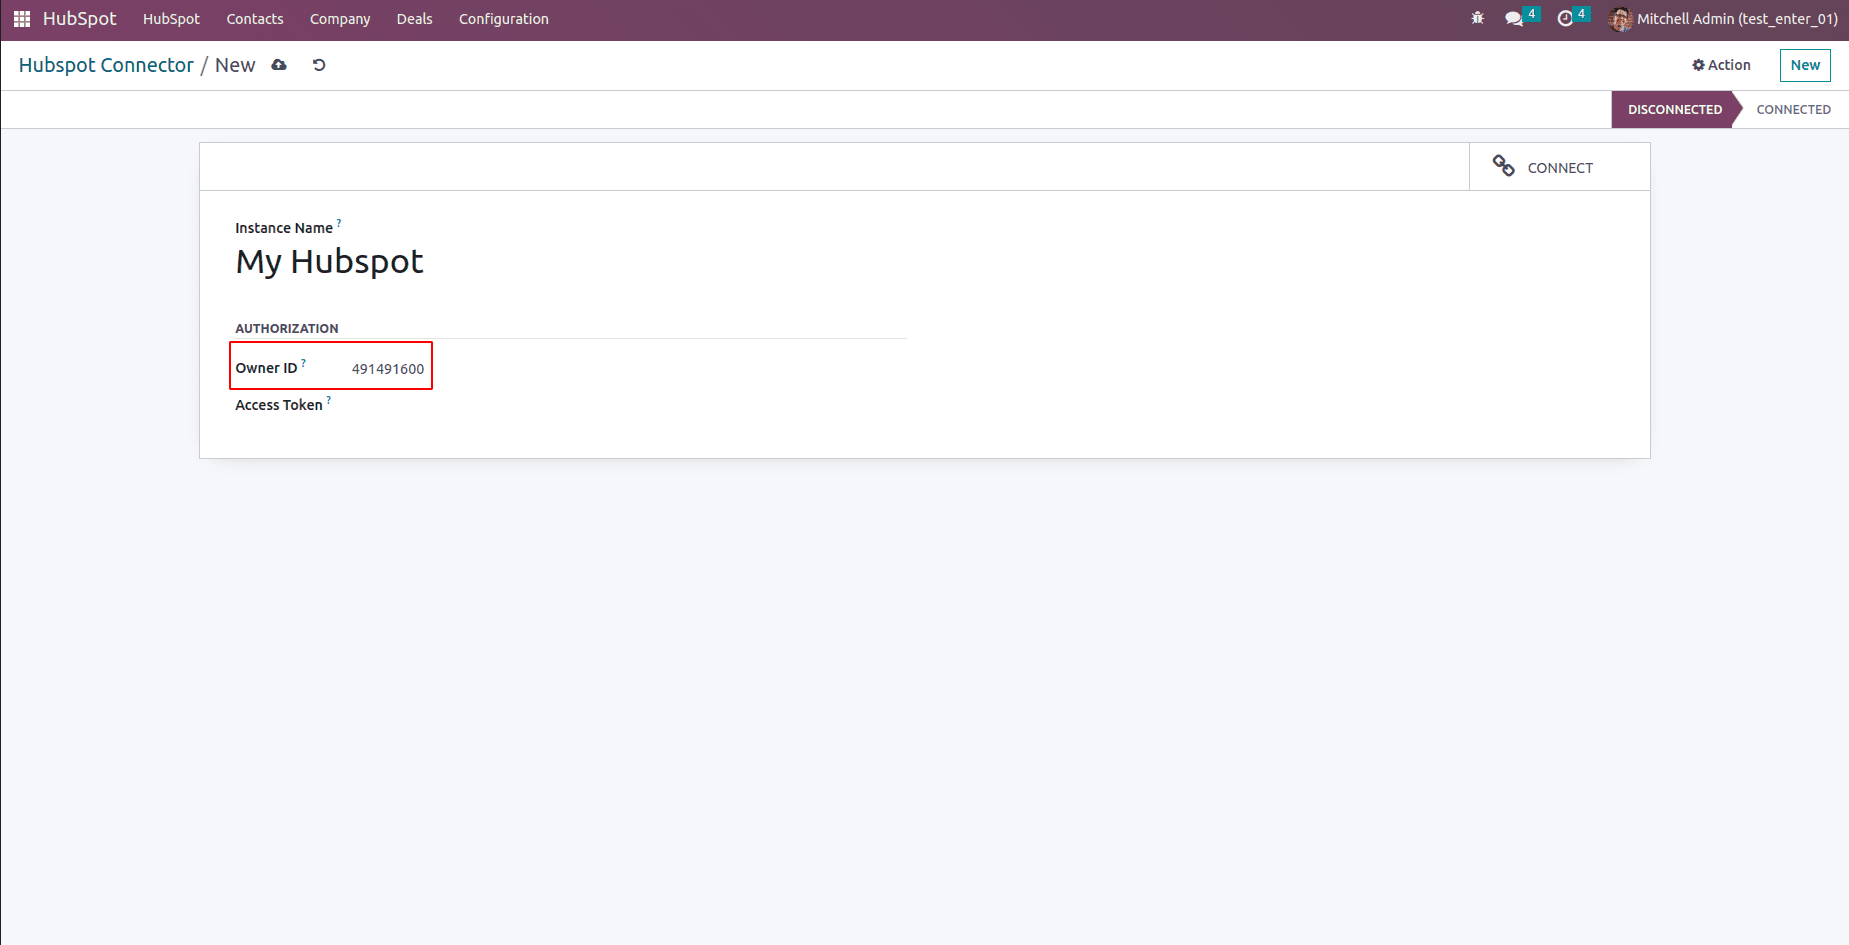
To establish a connection with HubSpot through the HubSpot Connector form view, you will need to input the Owner ID and Access Token. To obtain the Owner ID, navigate to the settings icon within HubSpot, which is located in the header section, as illustrated in the image provided below.
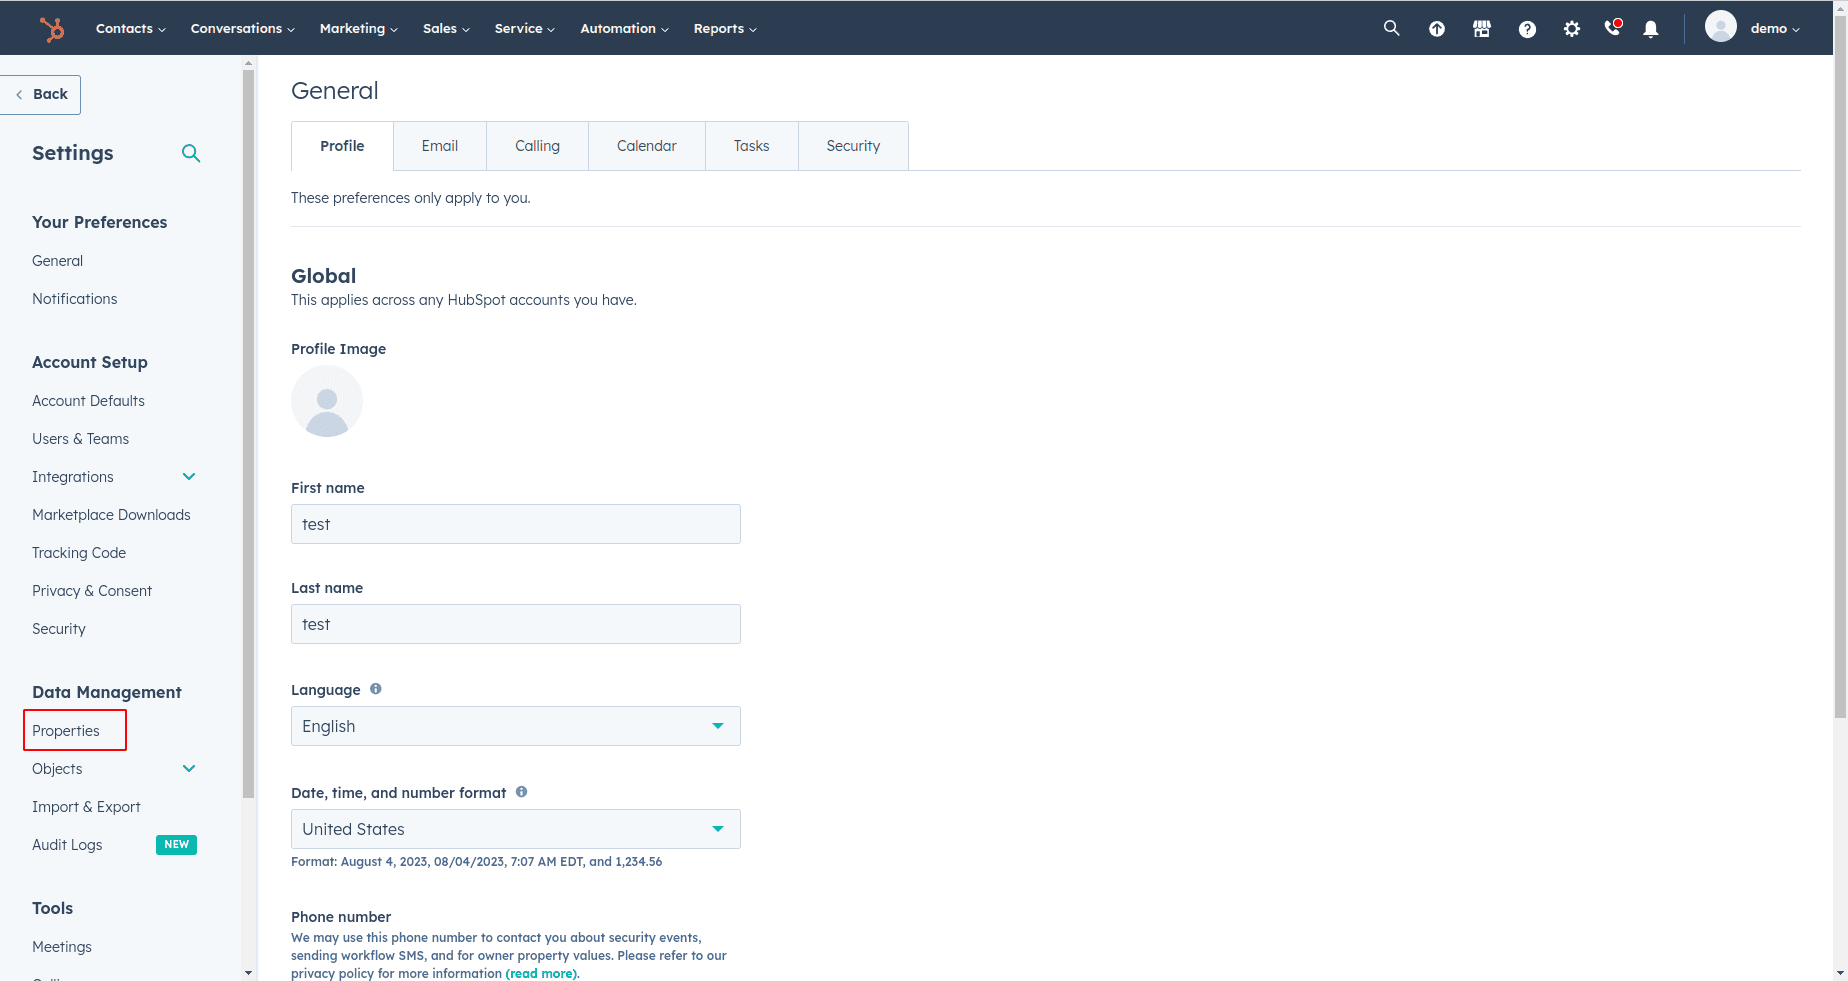
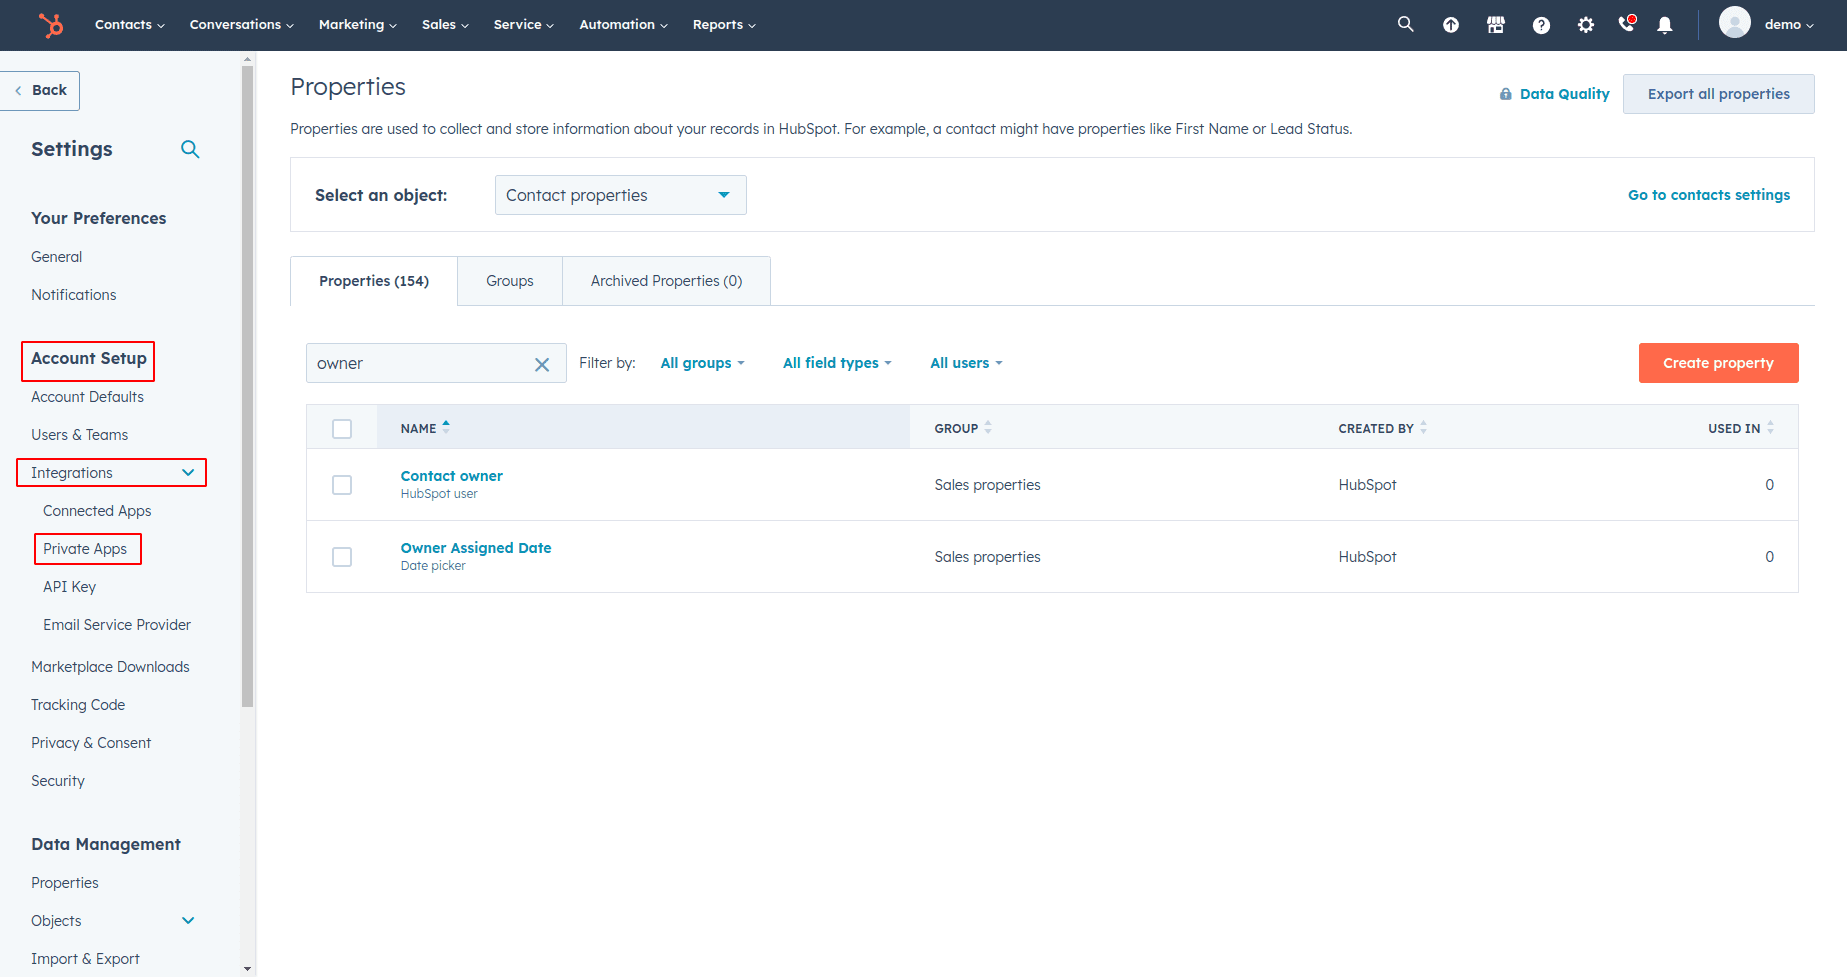
Under the "Data Management" section in the settings, access the "Properties" option.
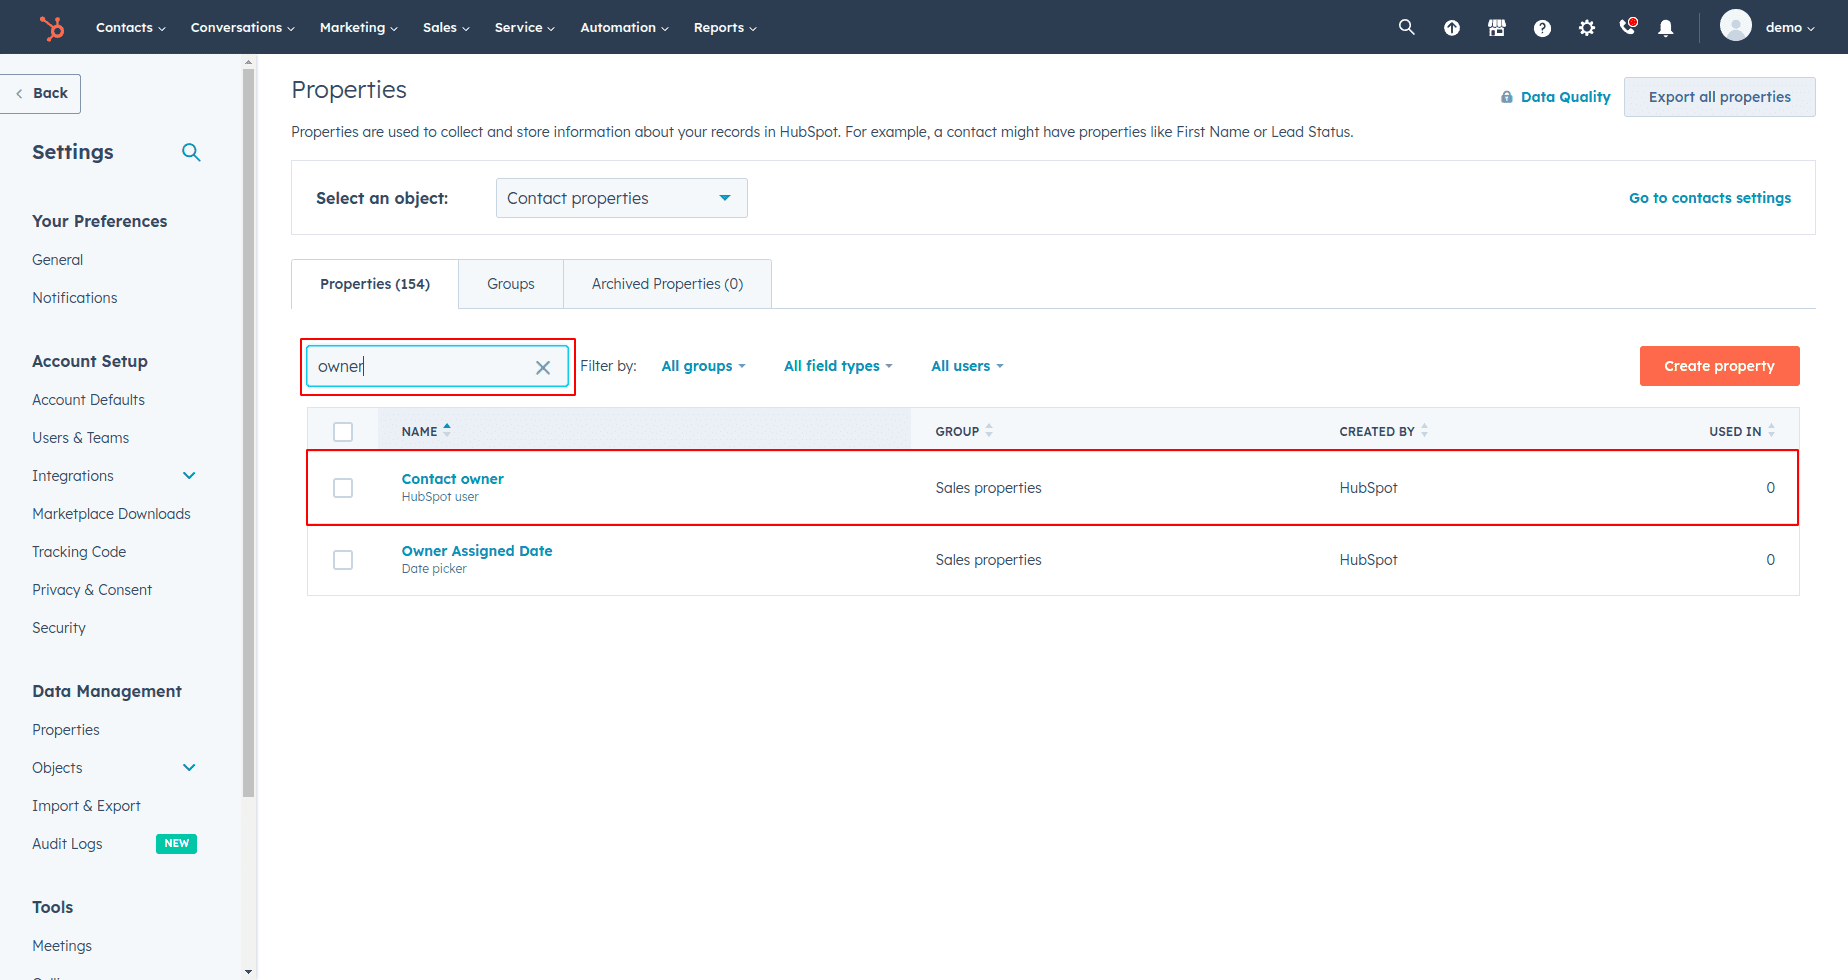
Referencing the image below, utilize the search bar within the settings to locate "Owner." Subsequently, select "Contact Owner" from the search results.
Upon selecting "Contact Owner," you will be directed to the form shown below. To access the internal value, simply view the relevant field and proceed to copy it.
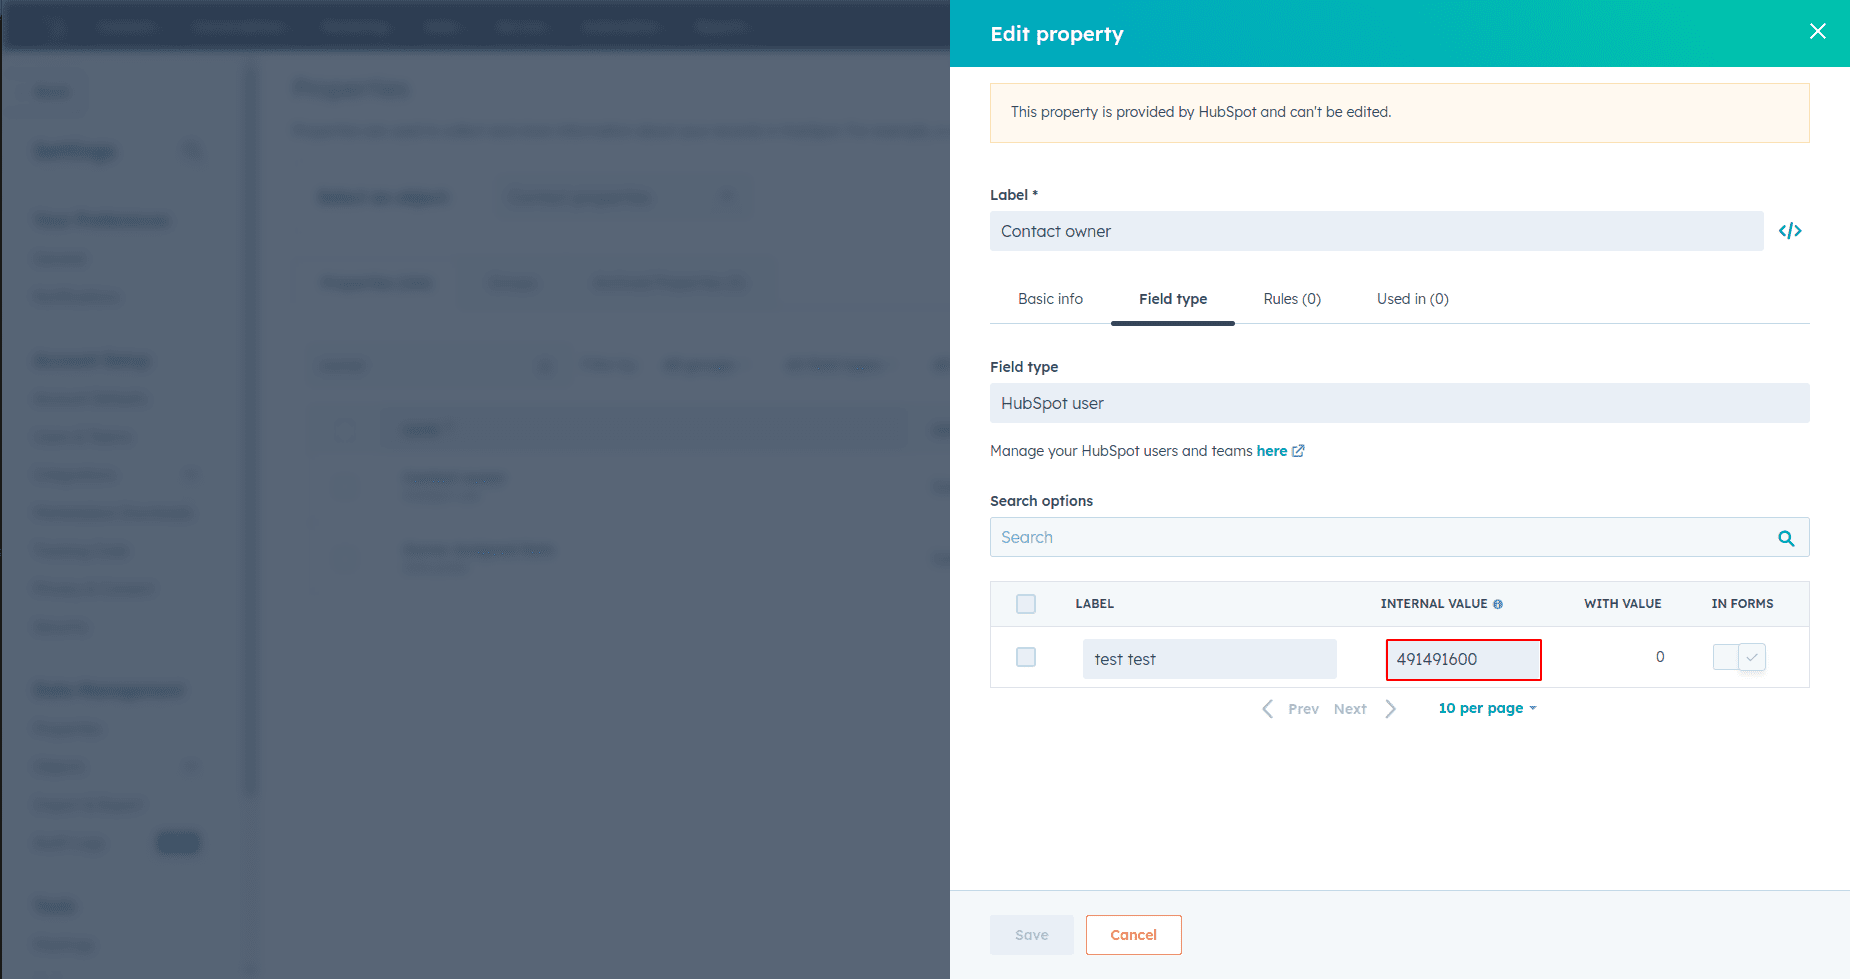
Kindly copy the internal value from the "Contact Owner" form and then paste it into the "Owner ID" field within the HubSpot Connector. This will facilitate the connection between the two platforms.
To obtain the Access Token for integration, follow these steps within HubSpot:
Settings -> Account Setup -> Integrations -> Private Apps
Generate a Private app within the "Private Apps" section by selecting the "Create a private app" button, as demonstrated in the provided image.
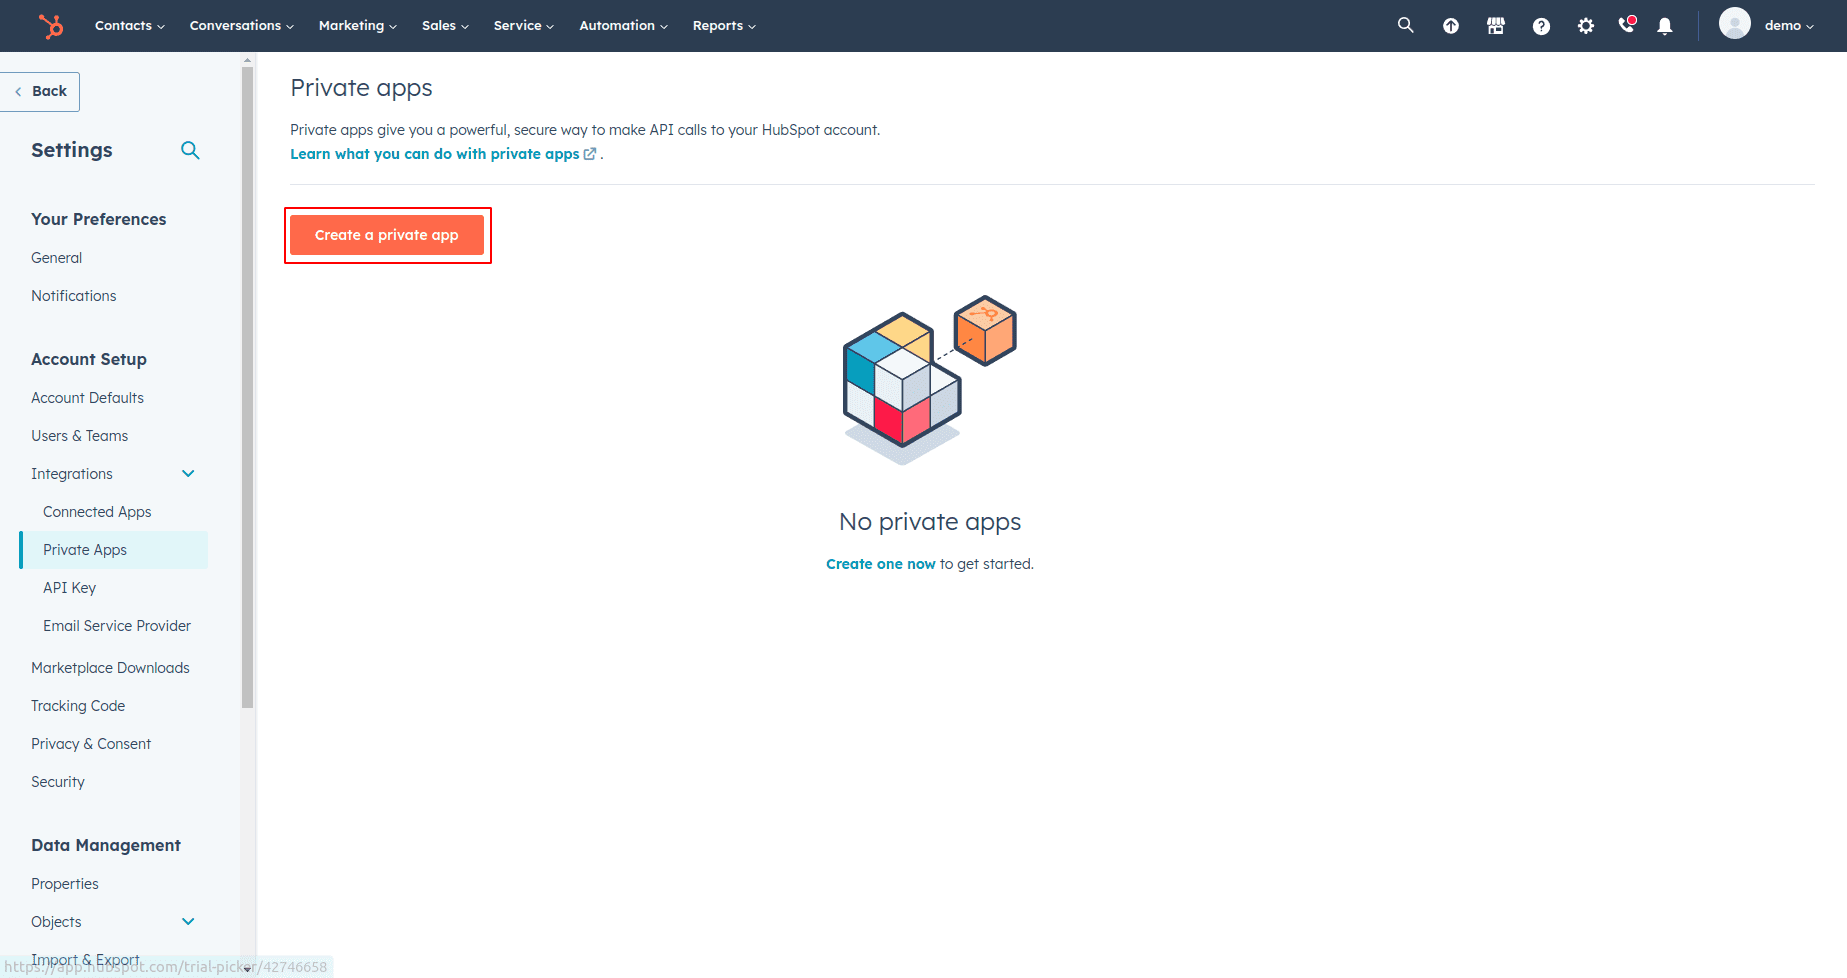
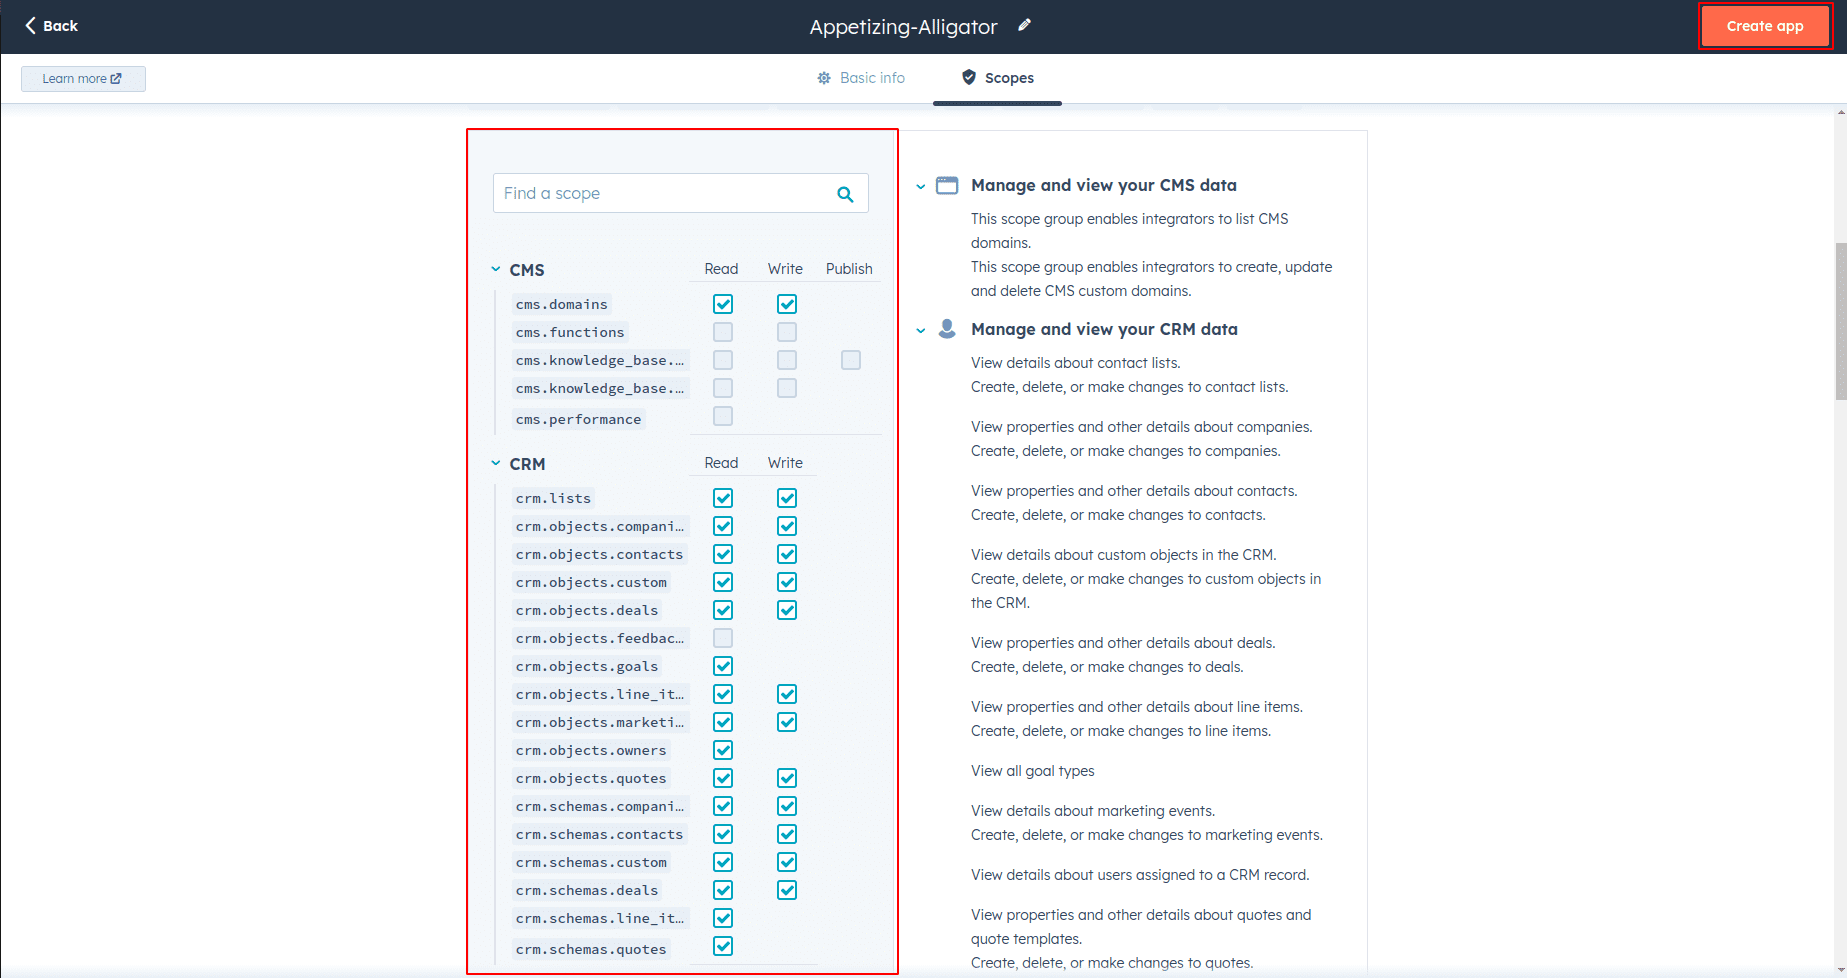
Upon clicking the "Create a private app" button, you will be directed to a page resembling the one depicted below. From this page, retrieve the necessary scopes required for the integration.
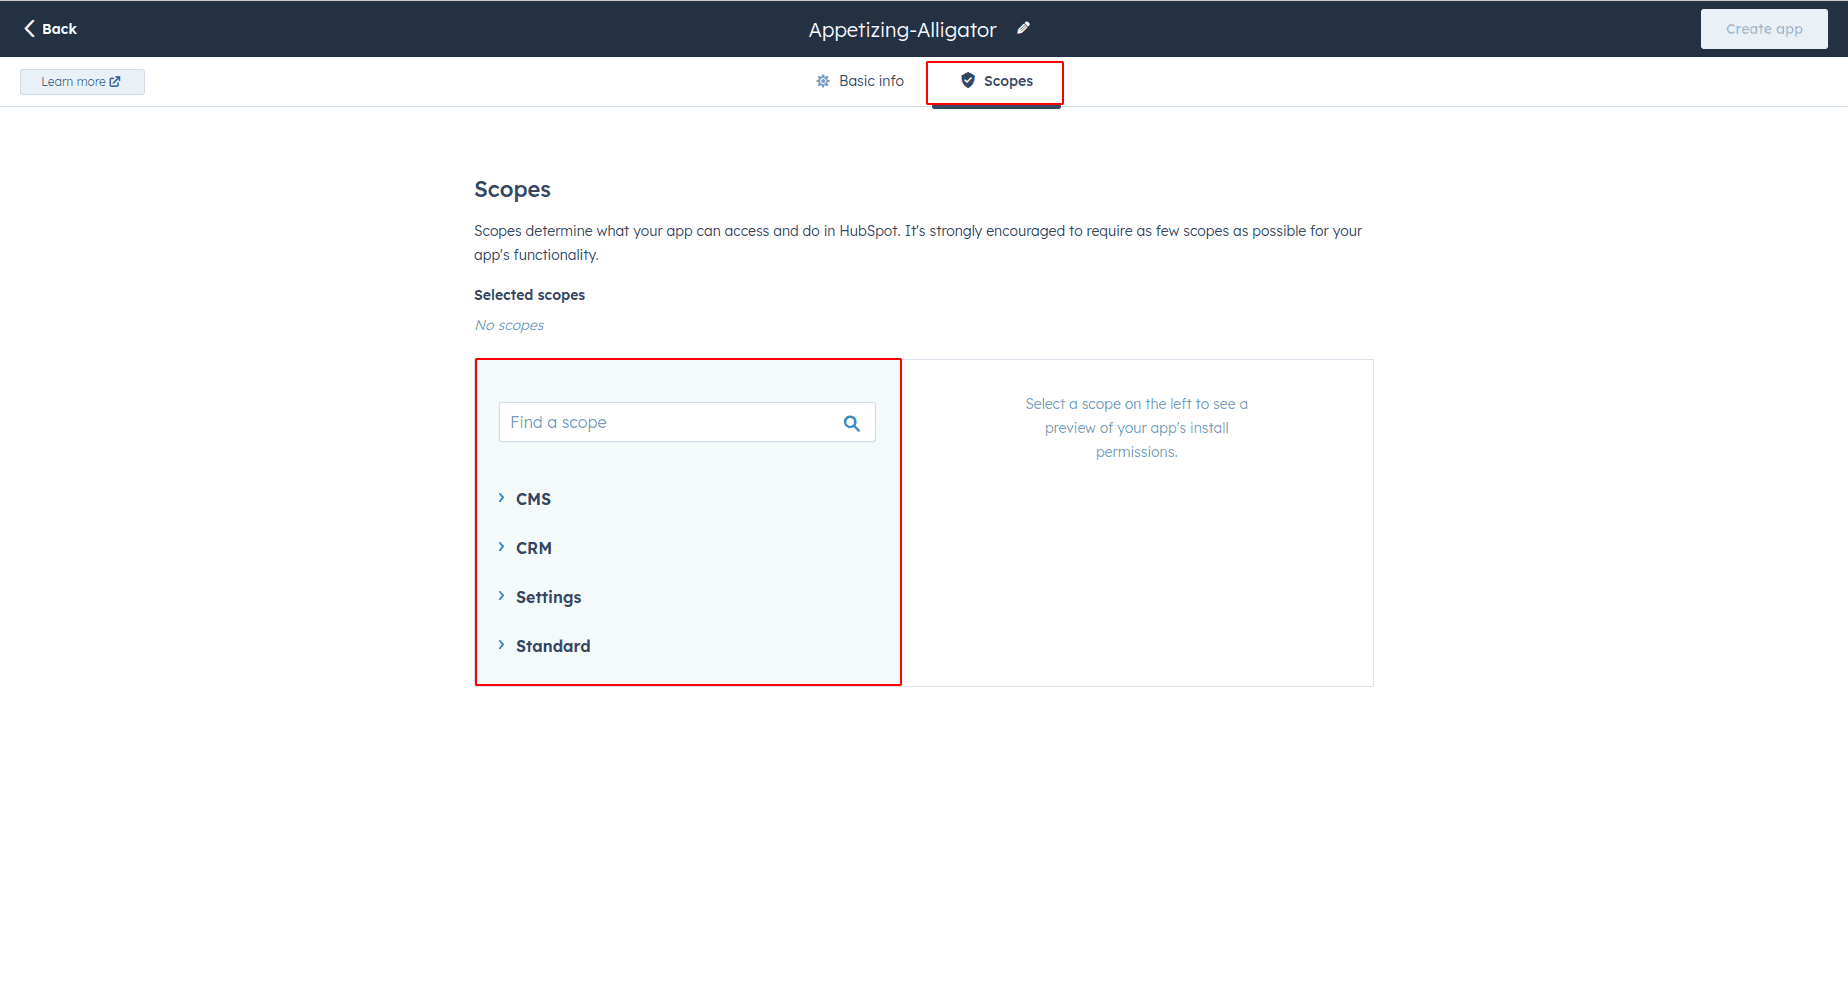
Enable both read and write permissions for all scopes provided. Subsequently, proceed to click the "Create app" button. This will finalize the creation of the private app with the designated permissions for read and write access.
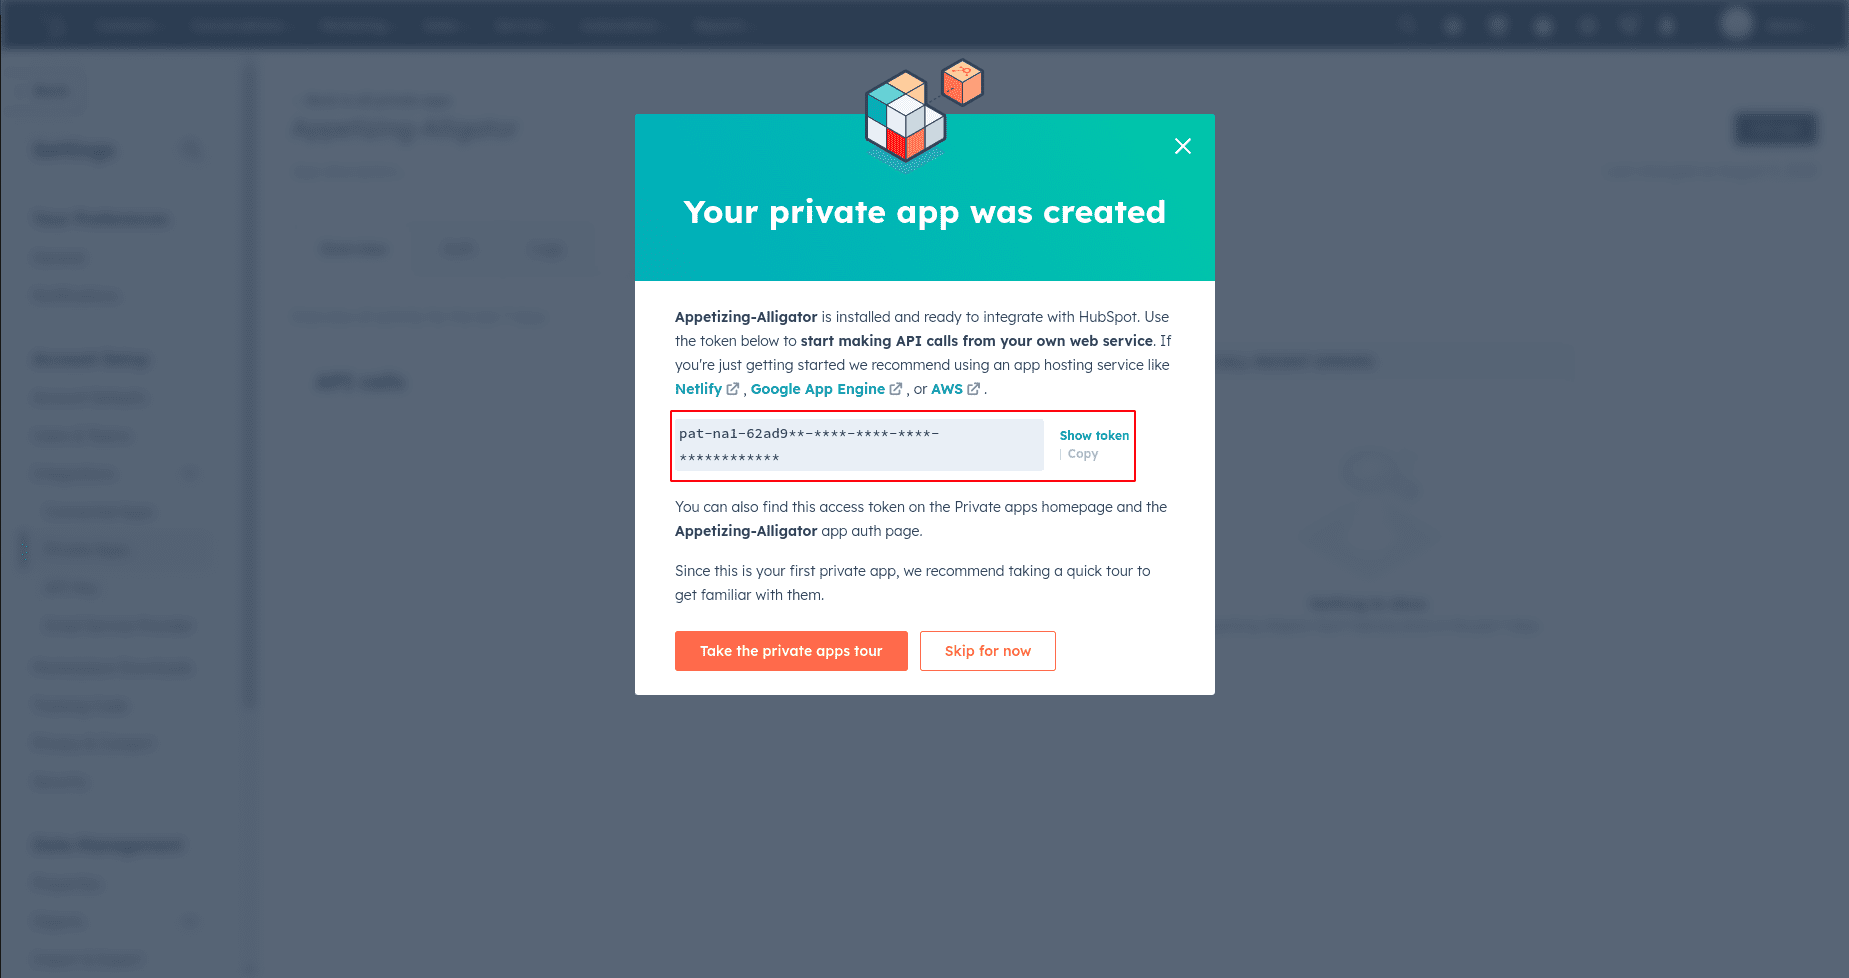
After clicking the "Create app" button, you will be prompted to grant permission for the creation of the app. Accept this permission. Following that, a token for HubSpot will be generated. Copy this token for further use in the integration process.
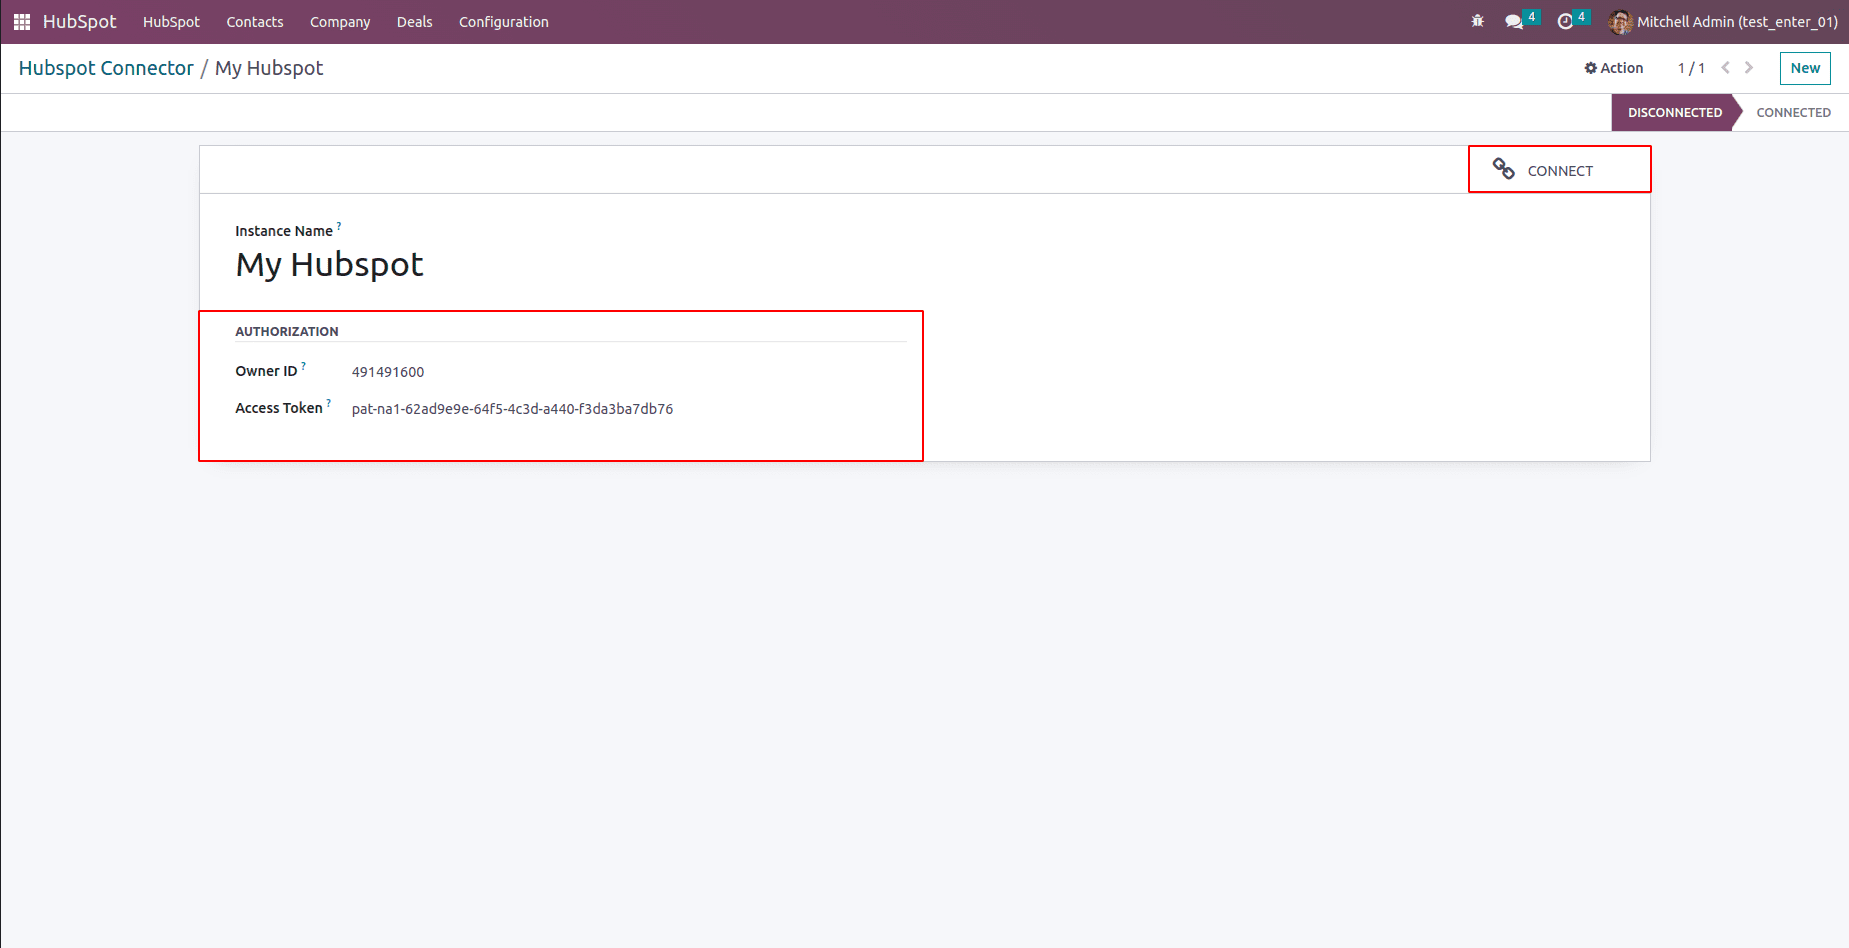
Paste the token that you obtained from HubSpot into the "Access Token" field within the HubSpot Connector. Afterward, click the "Connect" button to initiate the integration process. This action will establish the connection between the two platforms using the provided Access Token.
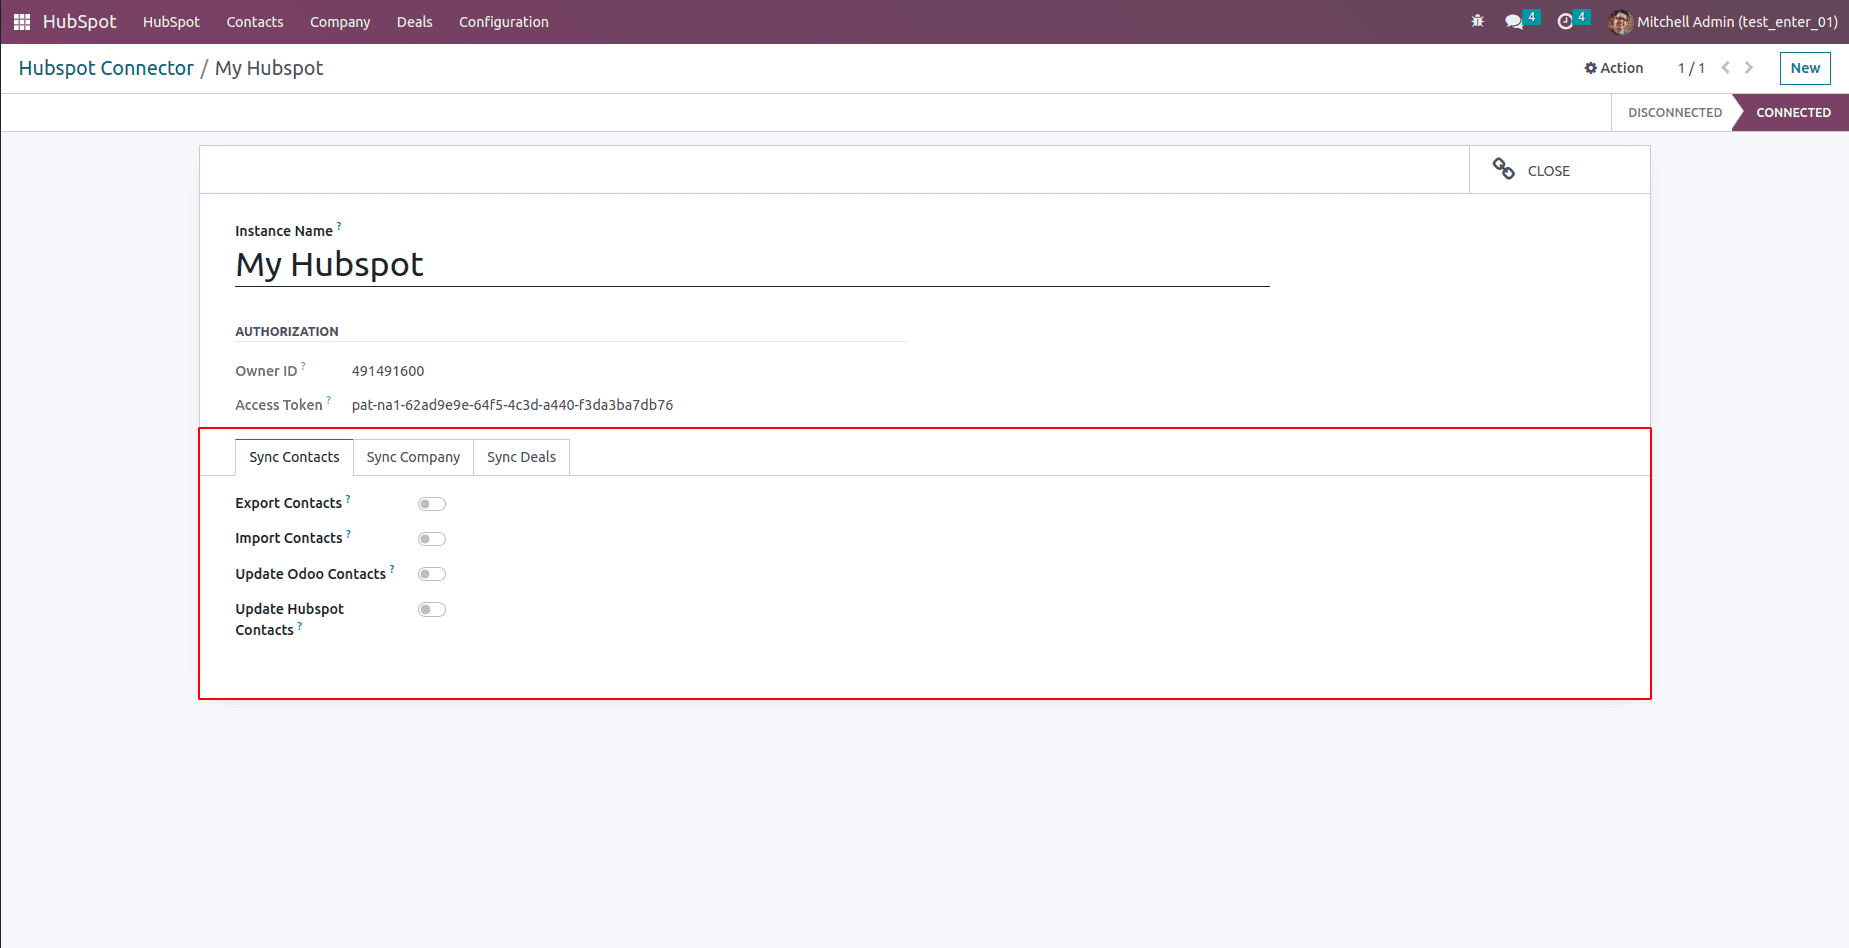
After selecting the "Connect" option, a set of three intelligent tabs will become visible: "Sync Contacts," "Sync Companies," and "Sync Deals." Our primary attention will be directed toward the "Sync Contacts" tab for now.
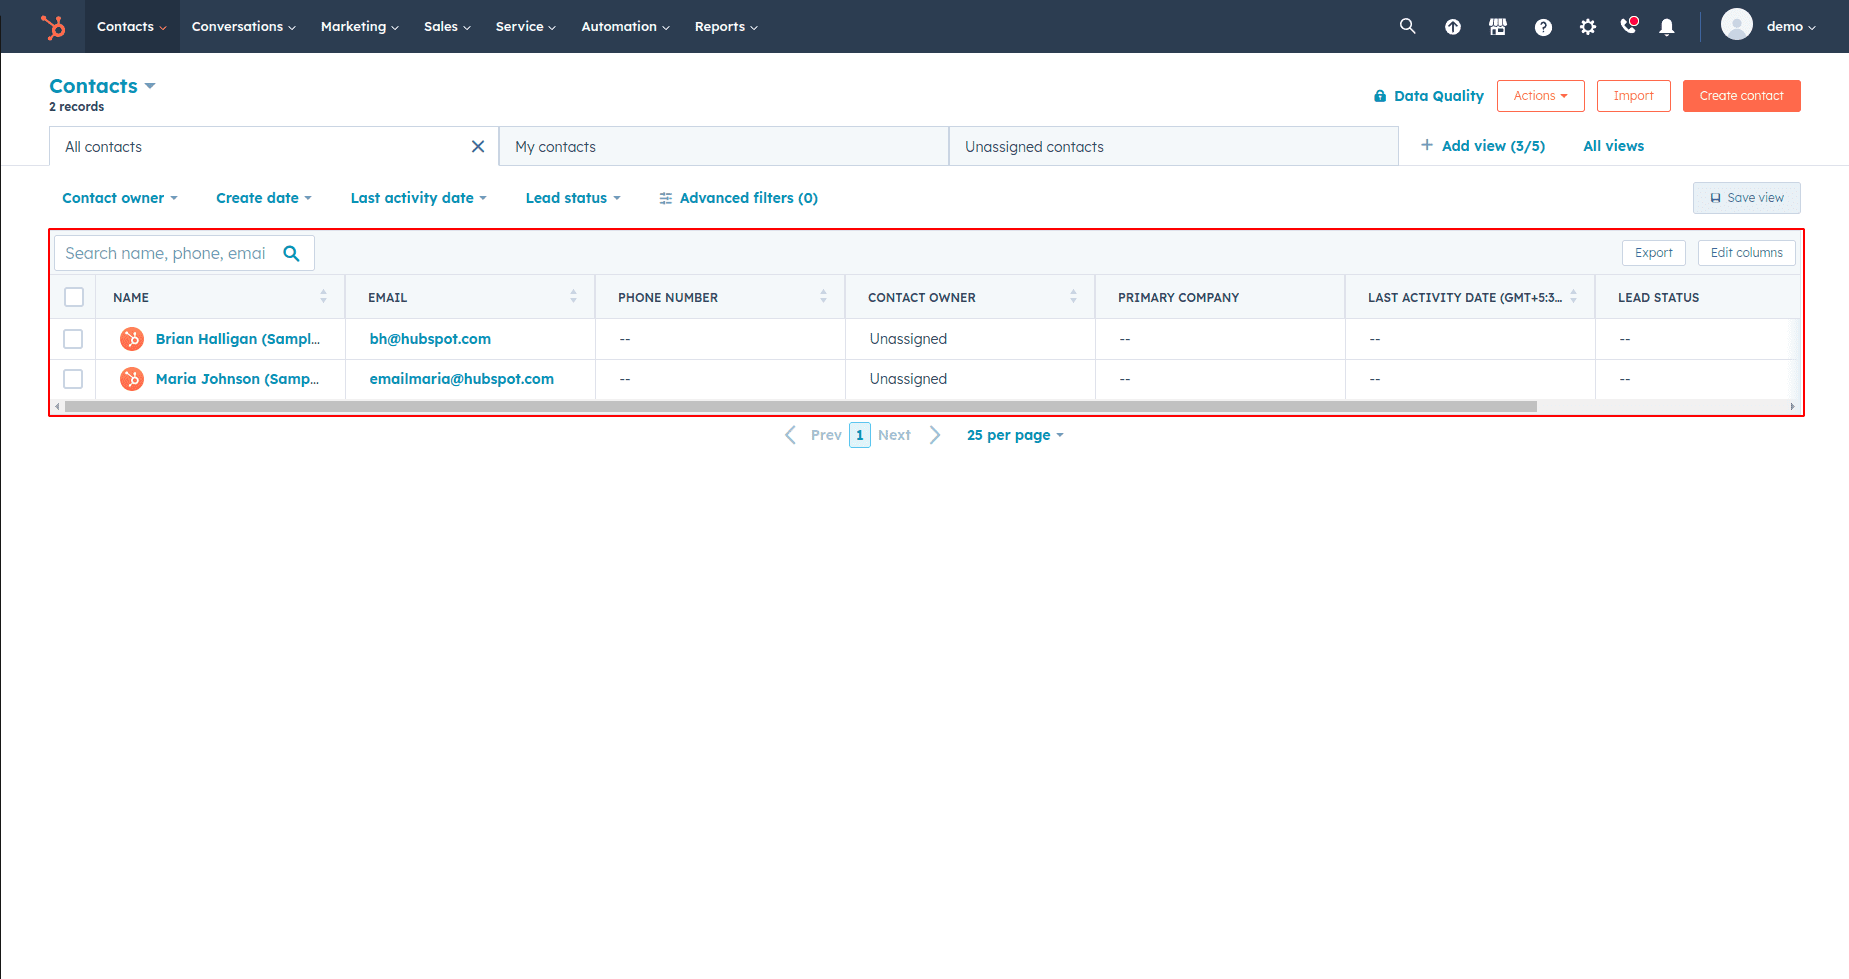
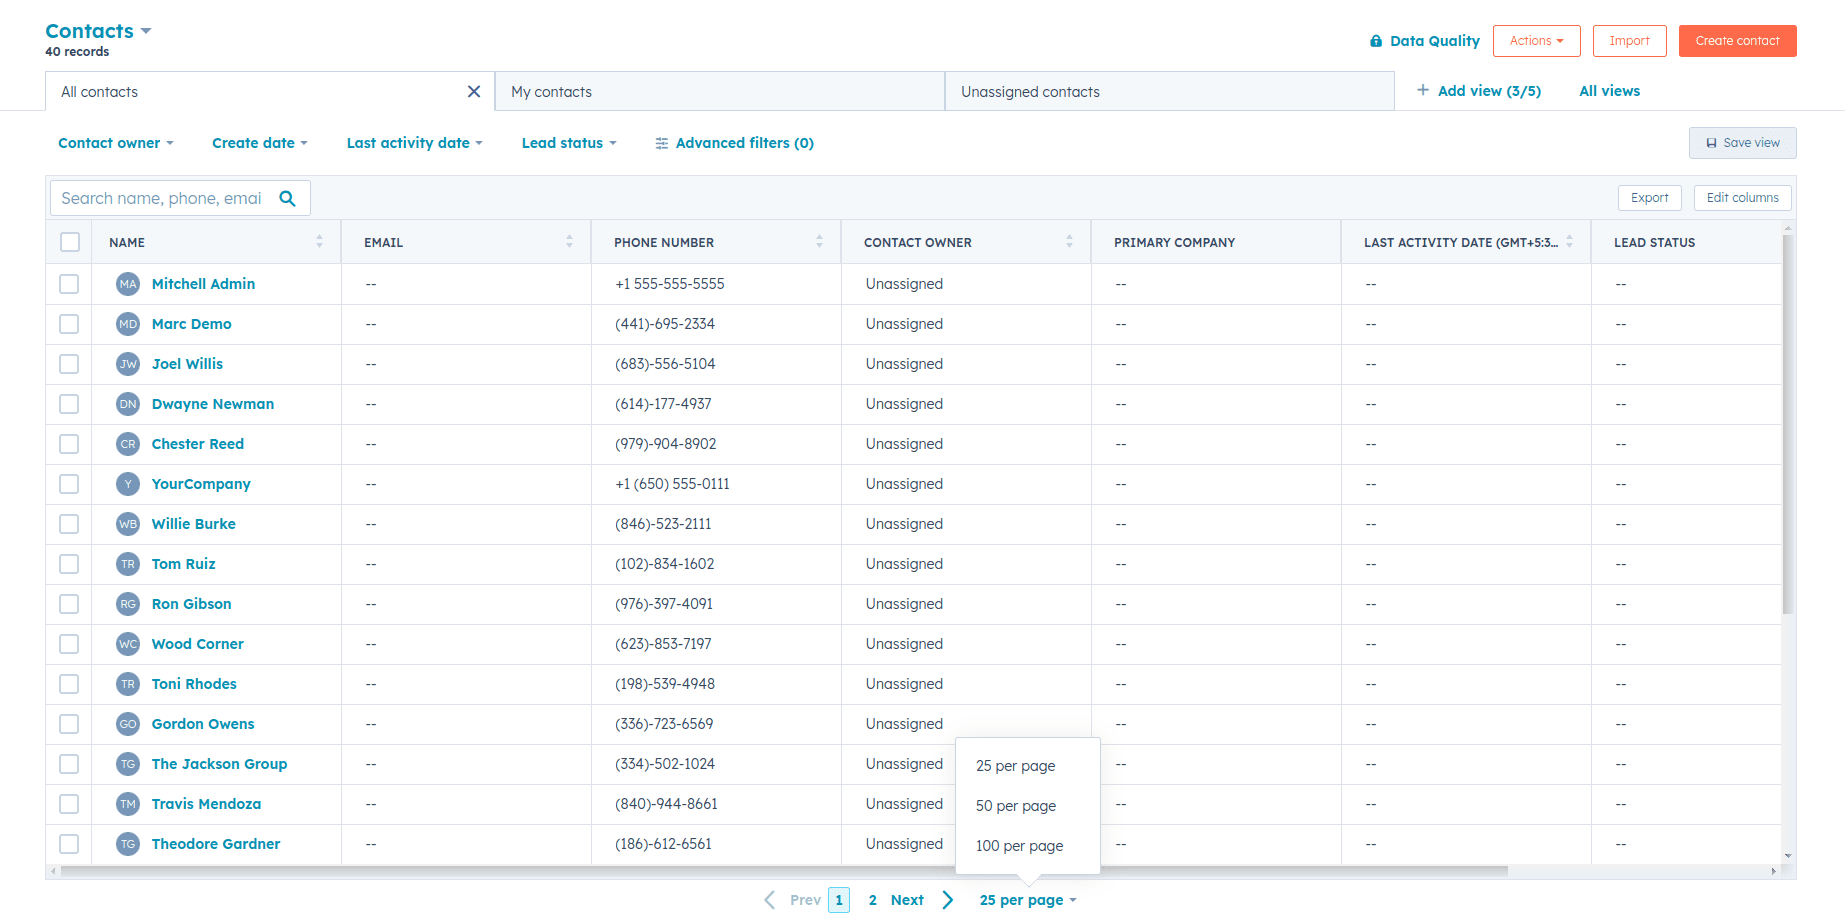
You can view your contacts in HubSpot as in the image below.
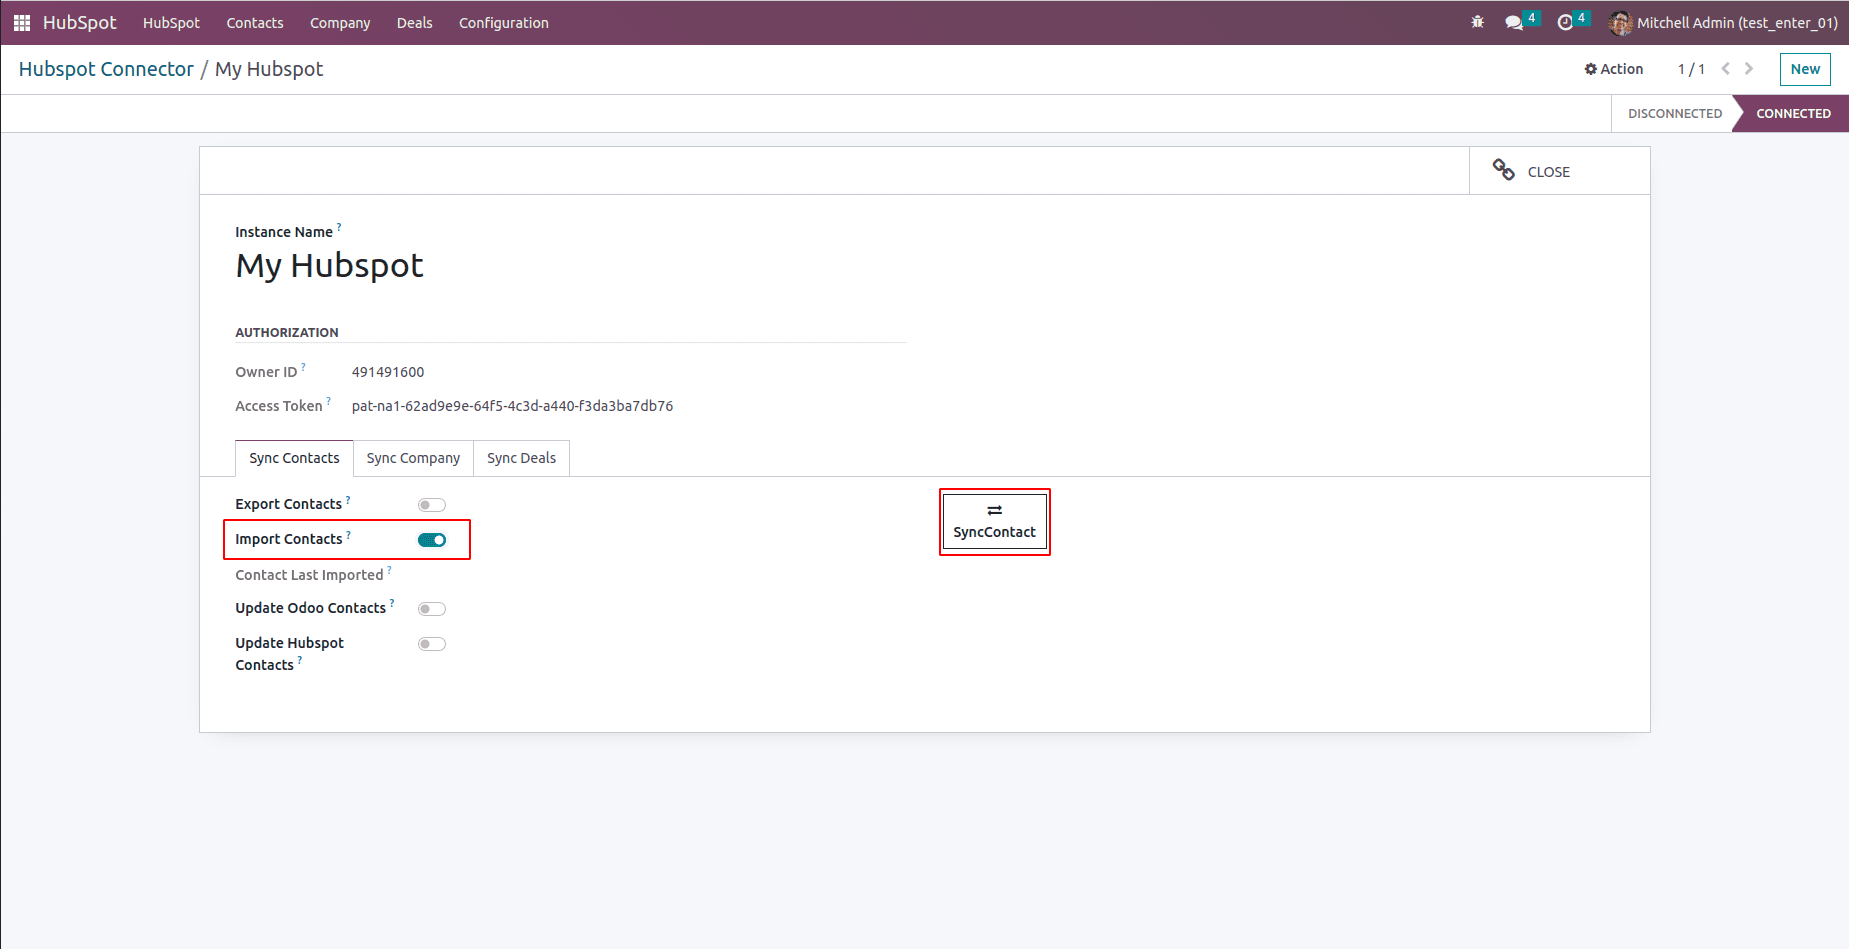
Activate the "Import Contacts" option and press the "Sync Contacts" button. This action will trigger the synchronization process of importing contacts from HubSpot.
Once you've clicked on the "Sync Contacts" button and completed the import process, you'll be able to view the imported date and the list of contacts that have been successfully imported from HubSpot. This will give you an overview of the newly imported contacts.

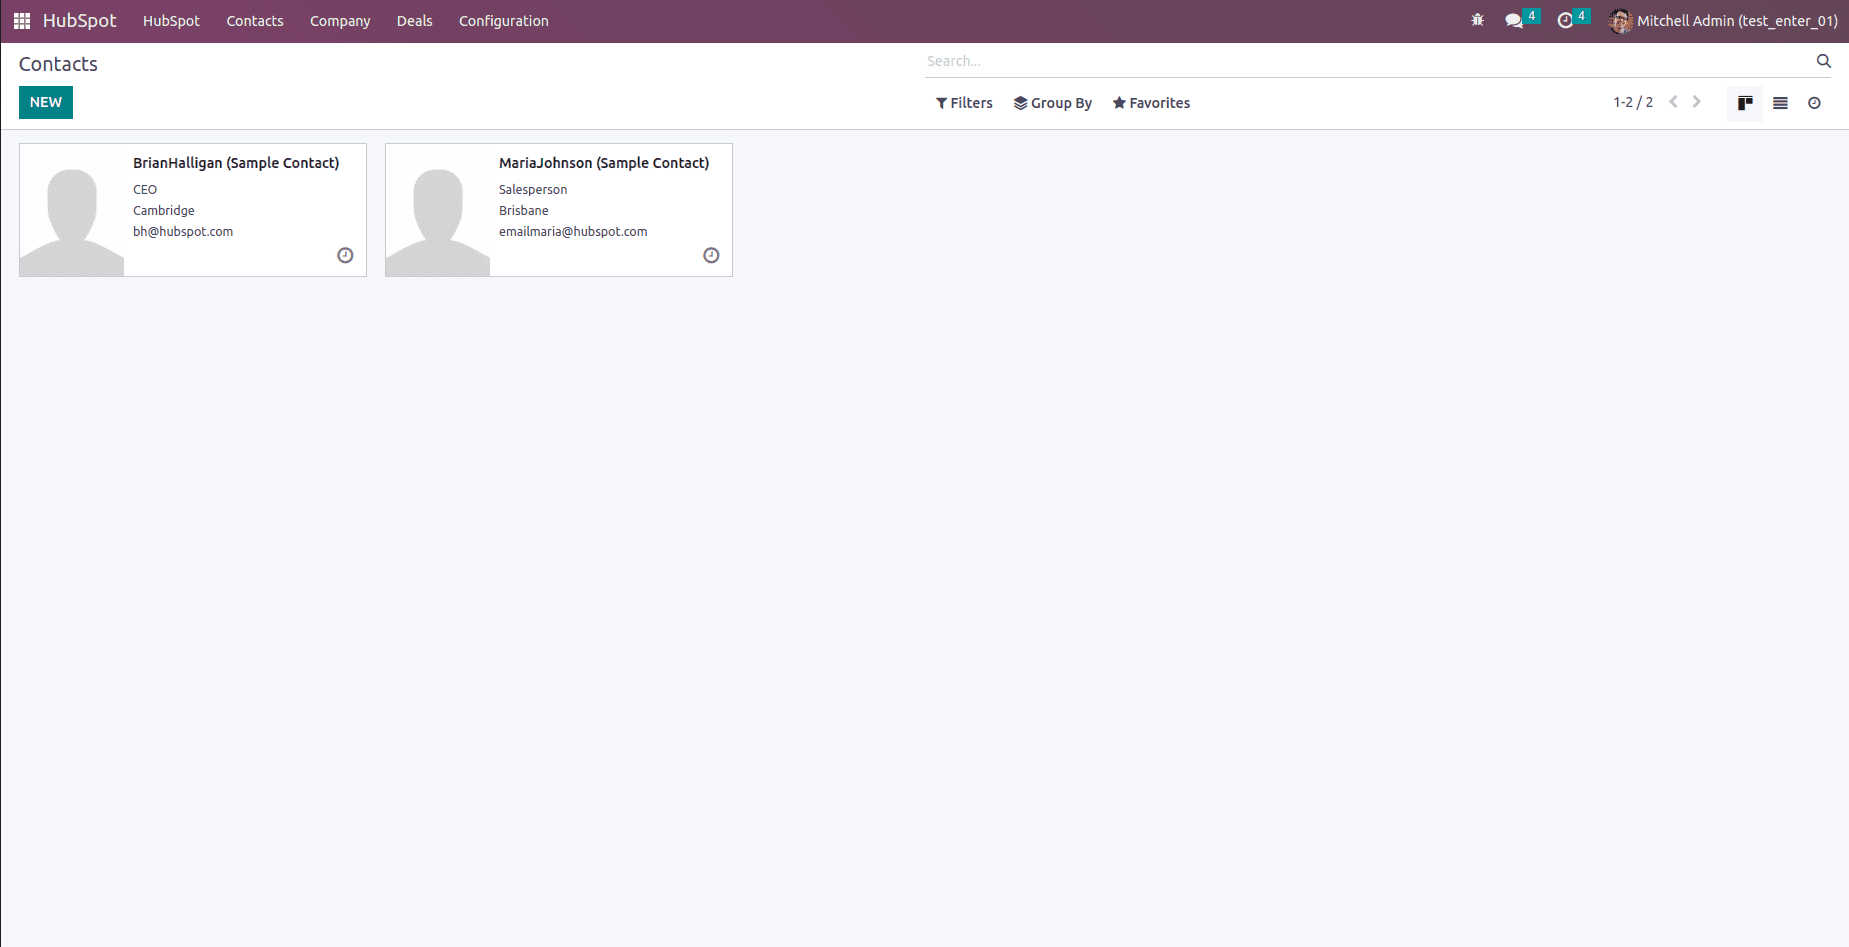
After the import process is complete, navigate to the "Contacts" menu. You should now be able to see the contacts that have been imported from HubSpot.
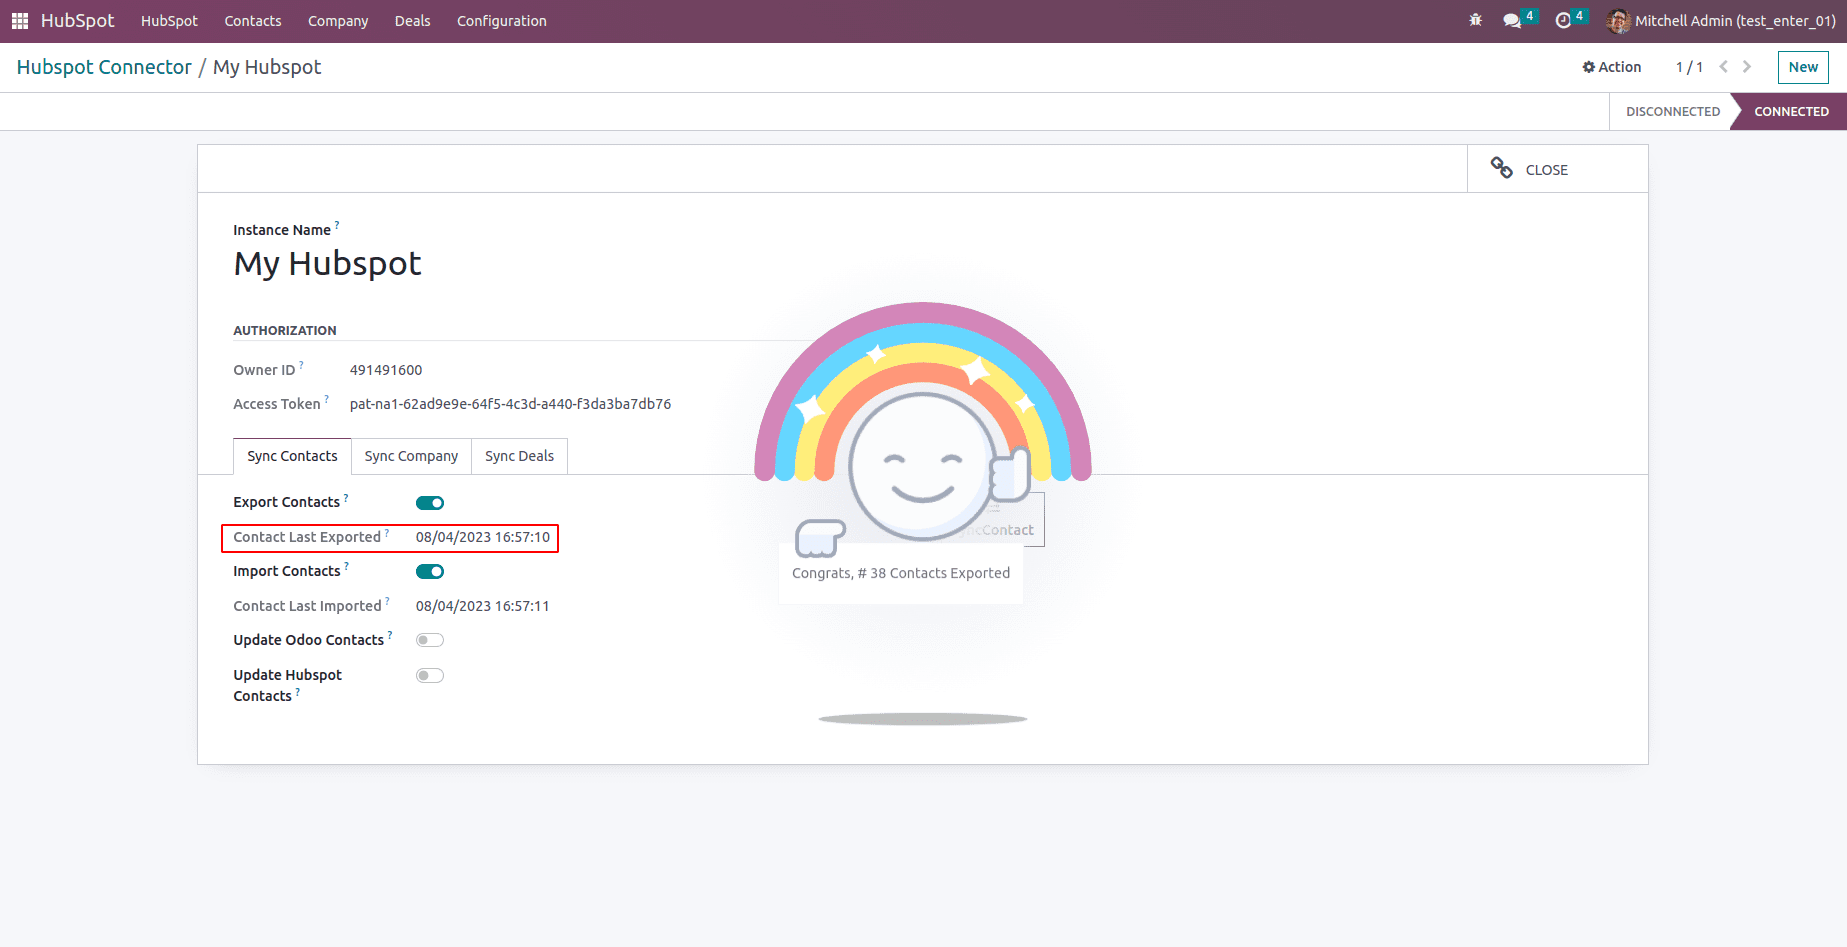
Enable the "Export Contacts" option to allow the export of contacts to HubSpot. Once enabled, click the "Sync Contacts" button again to initiate the synchronization process for exporting contacts to HubSpot.
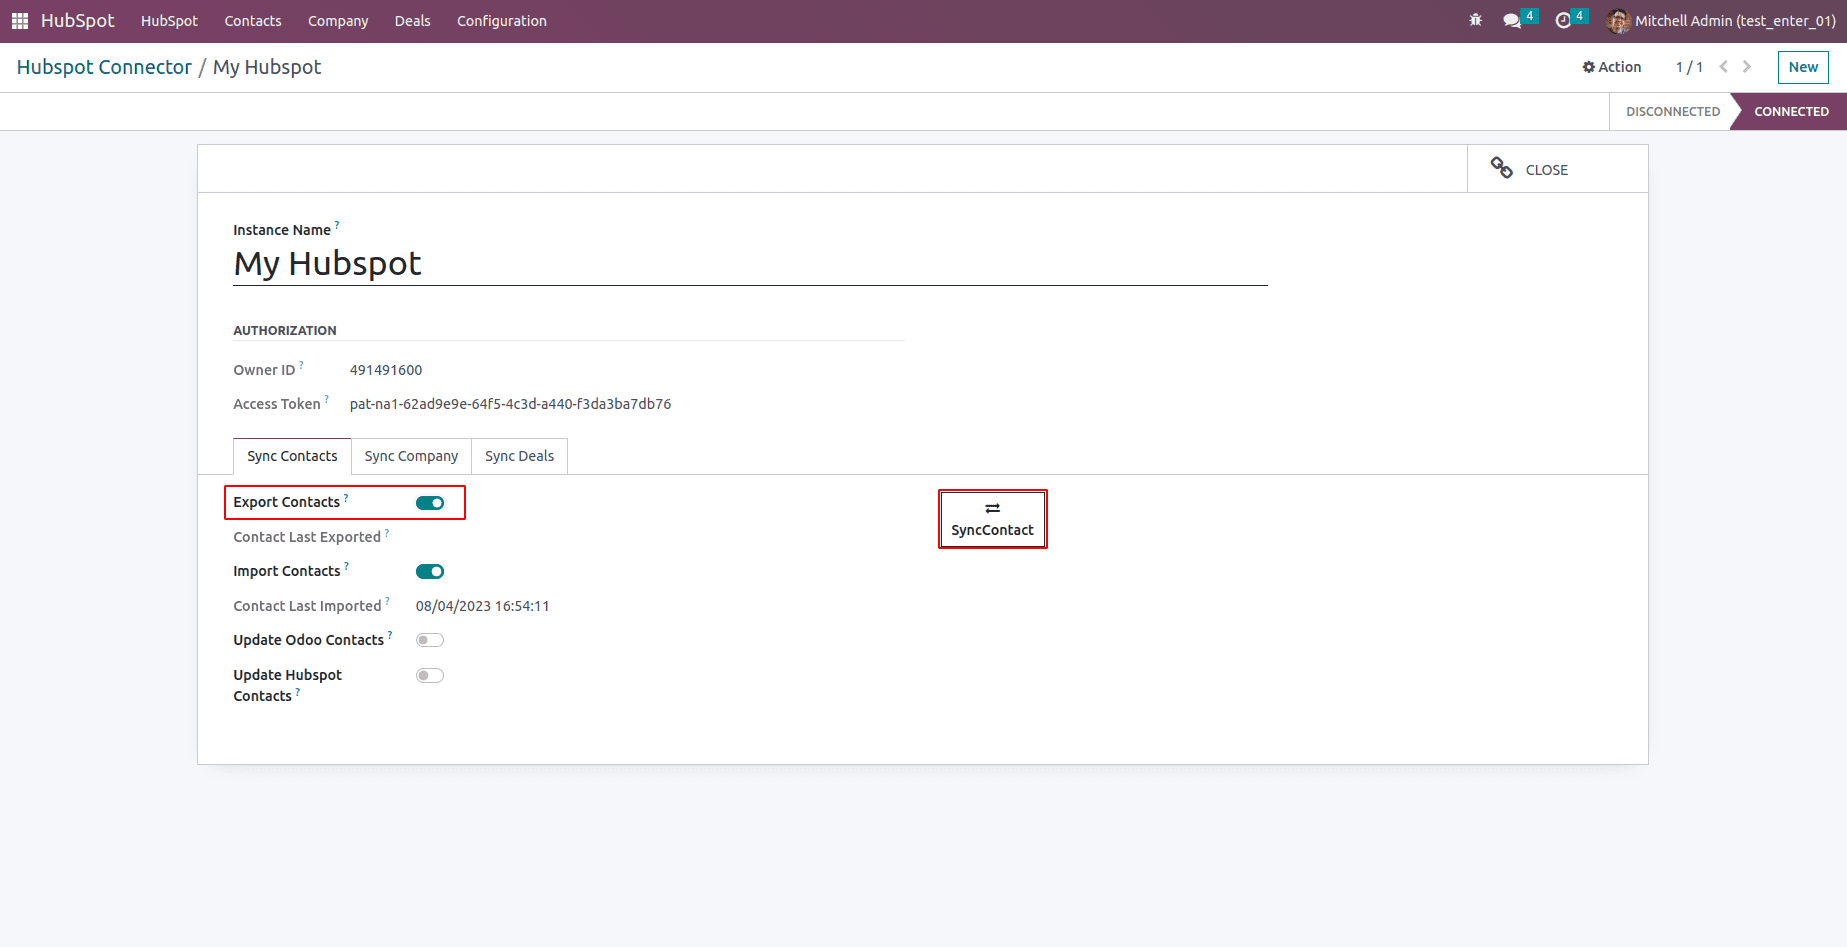
Upon completing the contact export process, you will be able to view the exported date and time, as well as an exported message that confirms the successful export of contacts from Odoo to HubSpot.
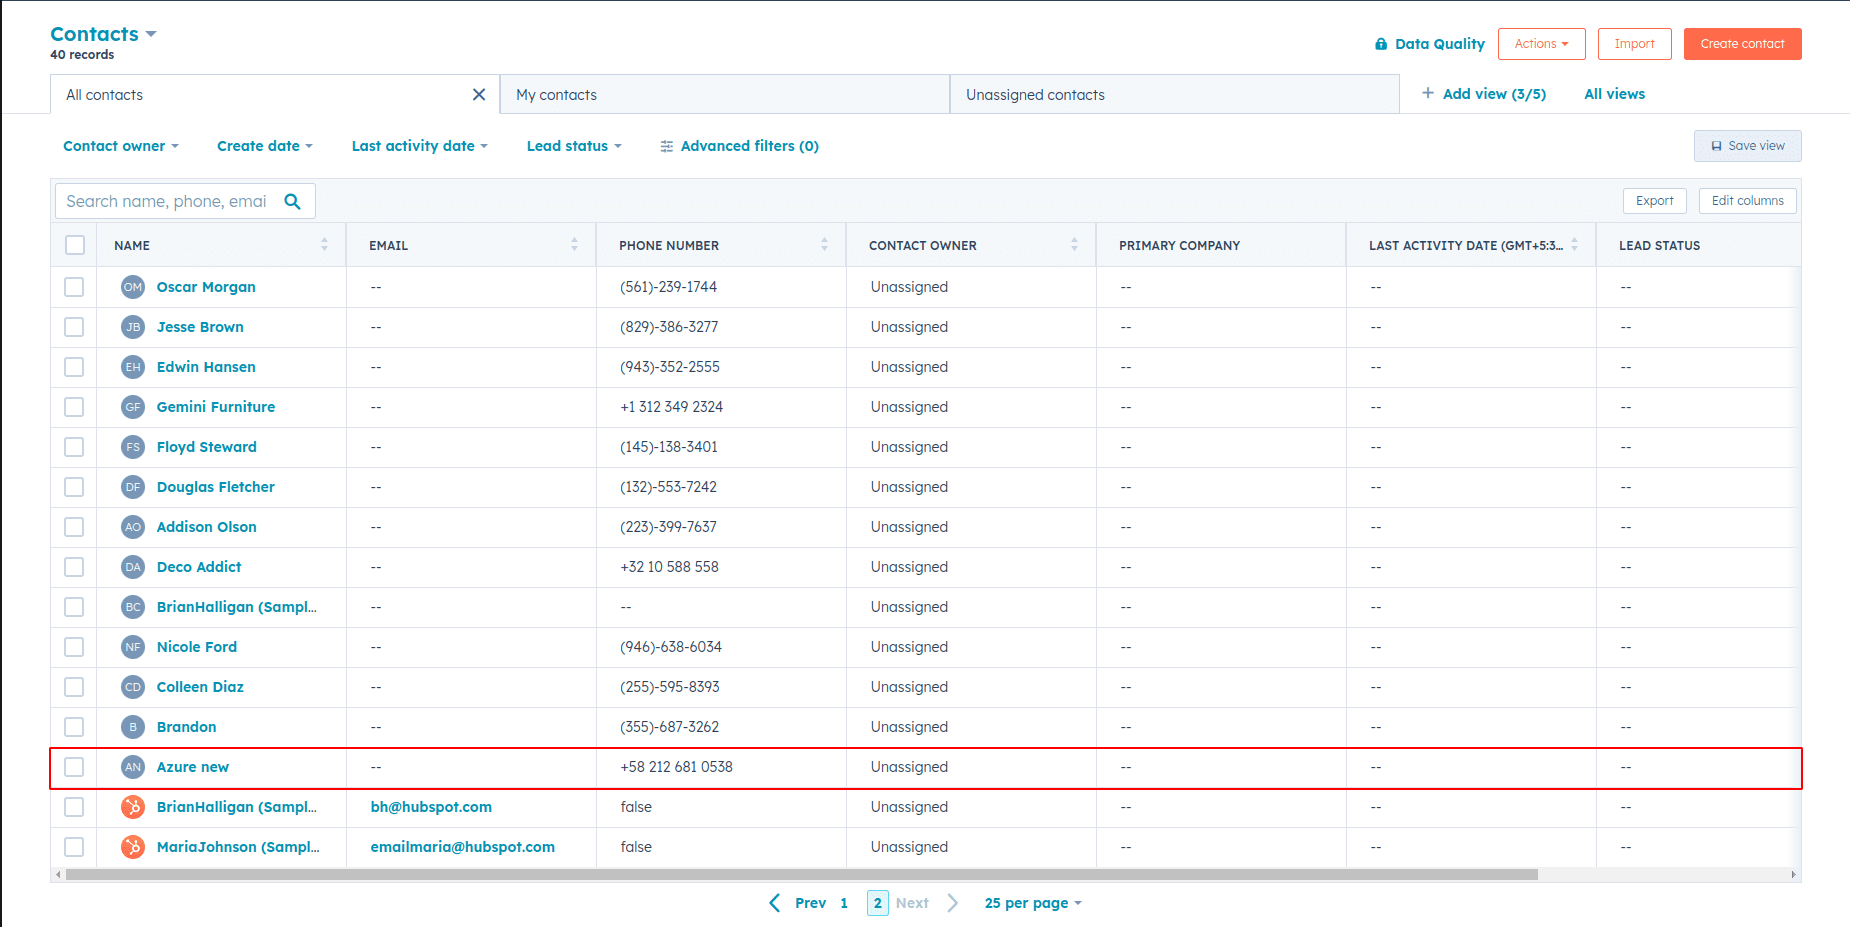
After exporting the contacts to HubSpot, navigate to HubSpot's interface. You should be able to see all the contacts that have been successfully exported from Odoo to HubSpot.
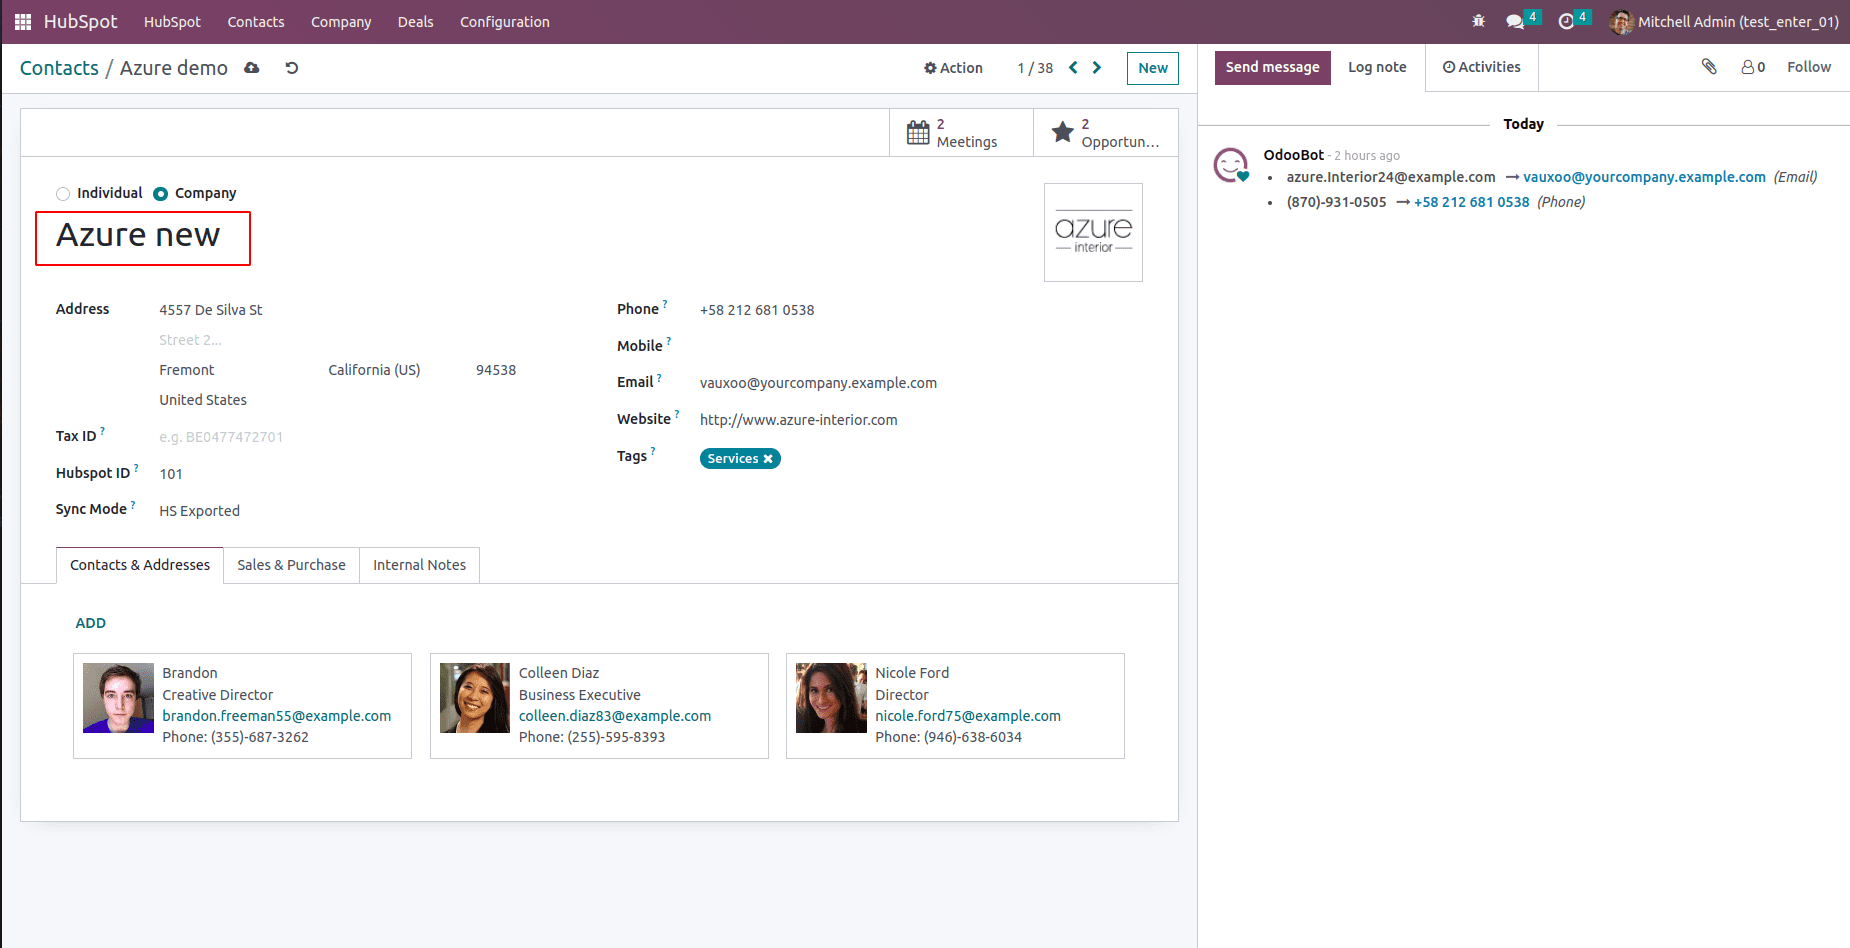
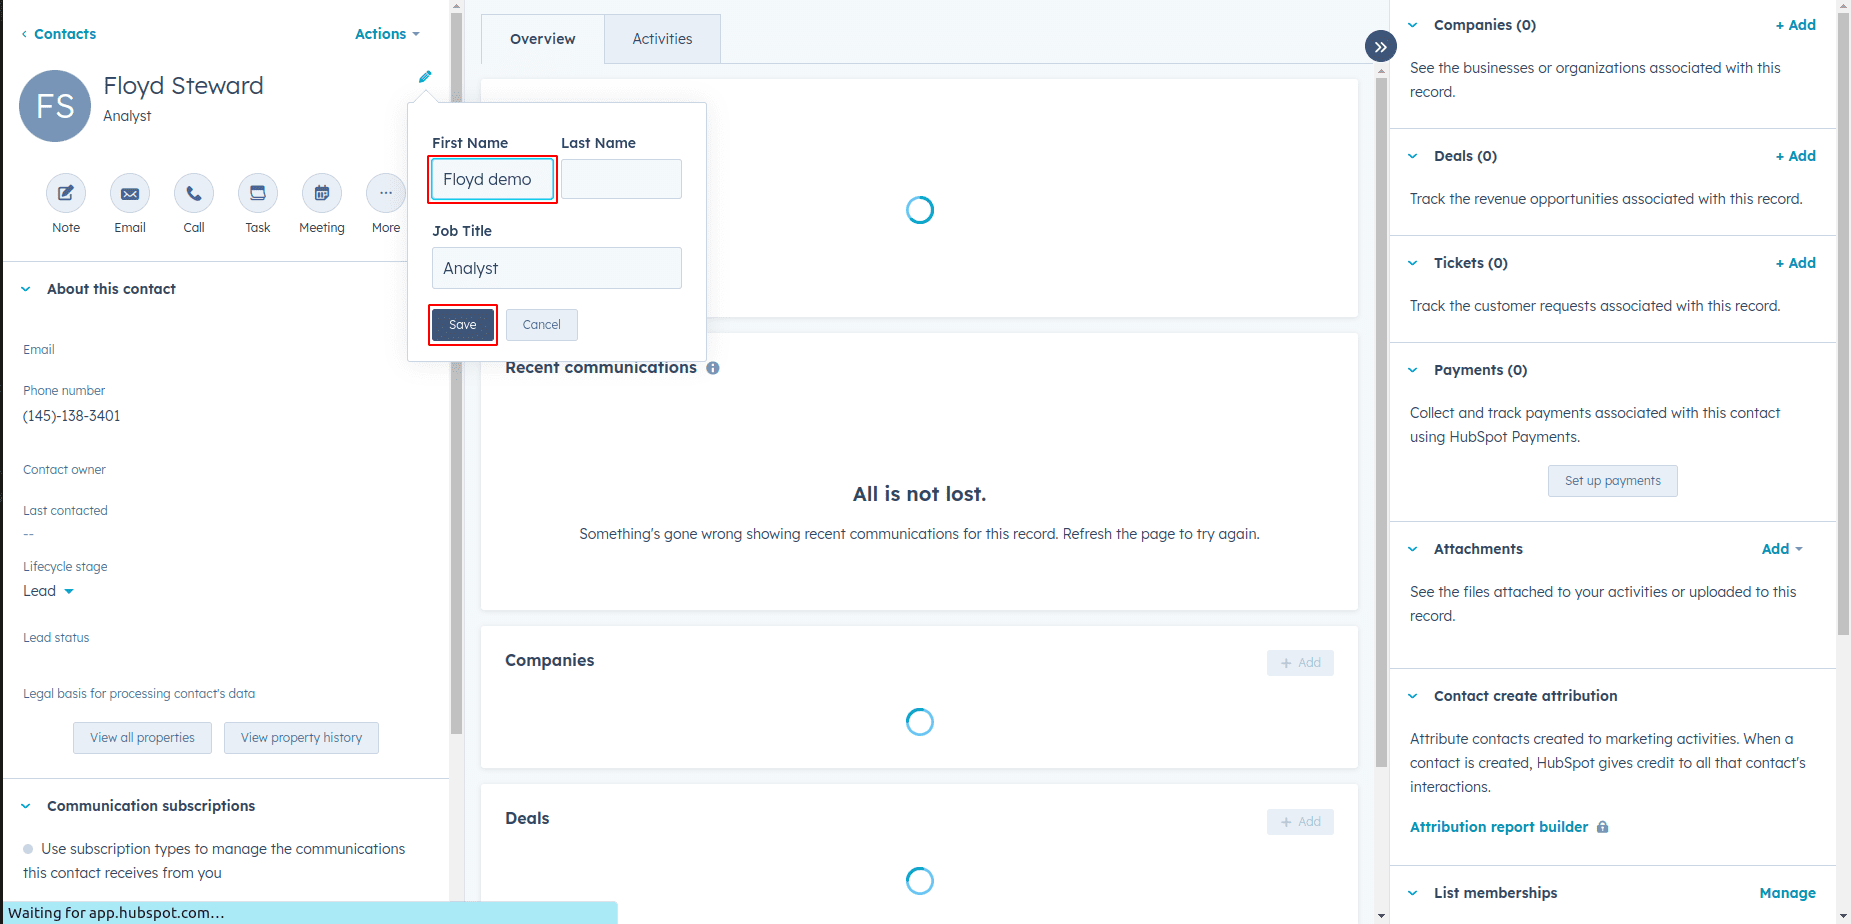
Now proceeding to modify the contact's name within Odoo.
Next, activate the "Update HubSpot Contacts" option and proceed to select the "Sync Contacts" button. This action will trigger the synchronization process, updating the changes you made to the contact's name in Odoo within HubSpot as well.
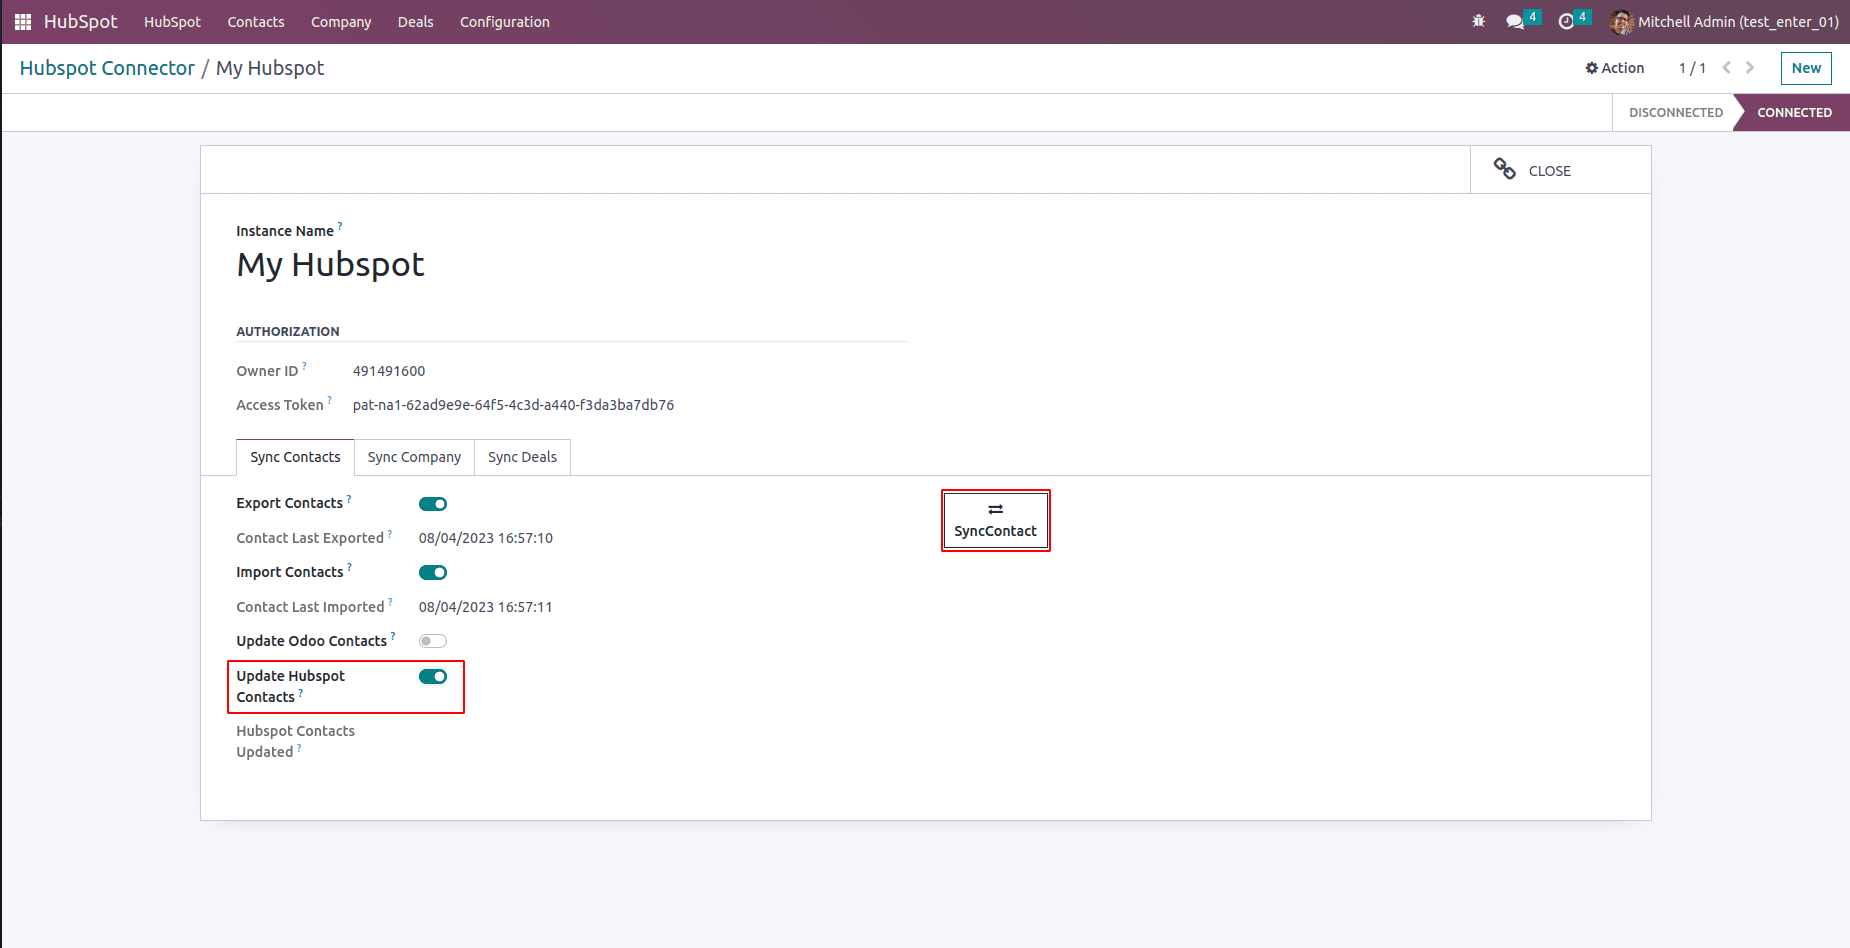
After successfully updating the contact's information in HubSpot through the synchronization process, you will be able to observe the updated date, time, and a corresponding message indicating that the update was completed successfully.

You will be able to view the updated name of the contact in HubSpot.
Furthermore, you can make edits to the names of contacts within HubSpot and subsequently save the changes you've made.
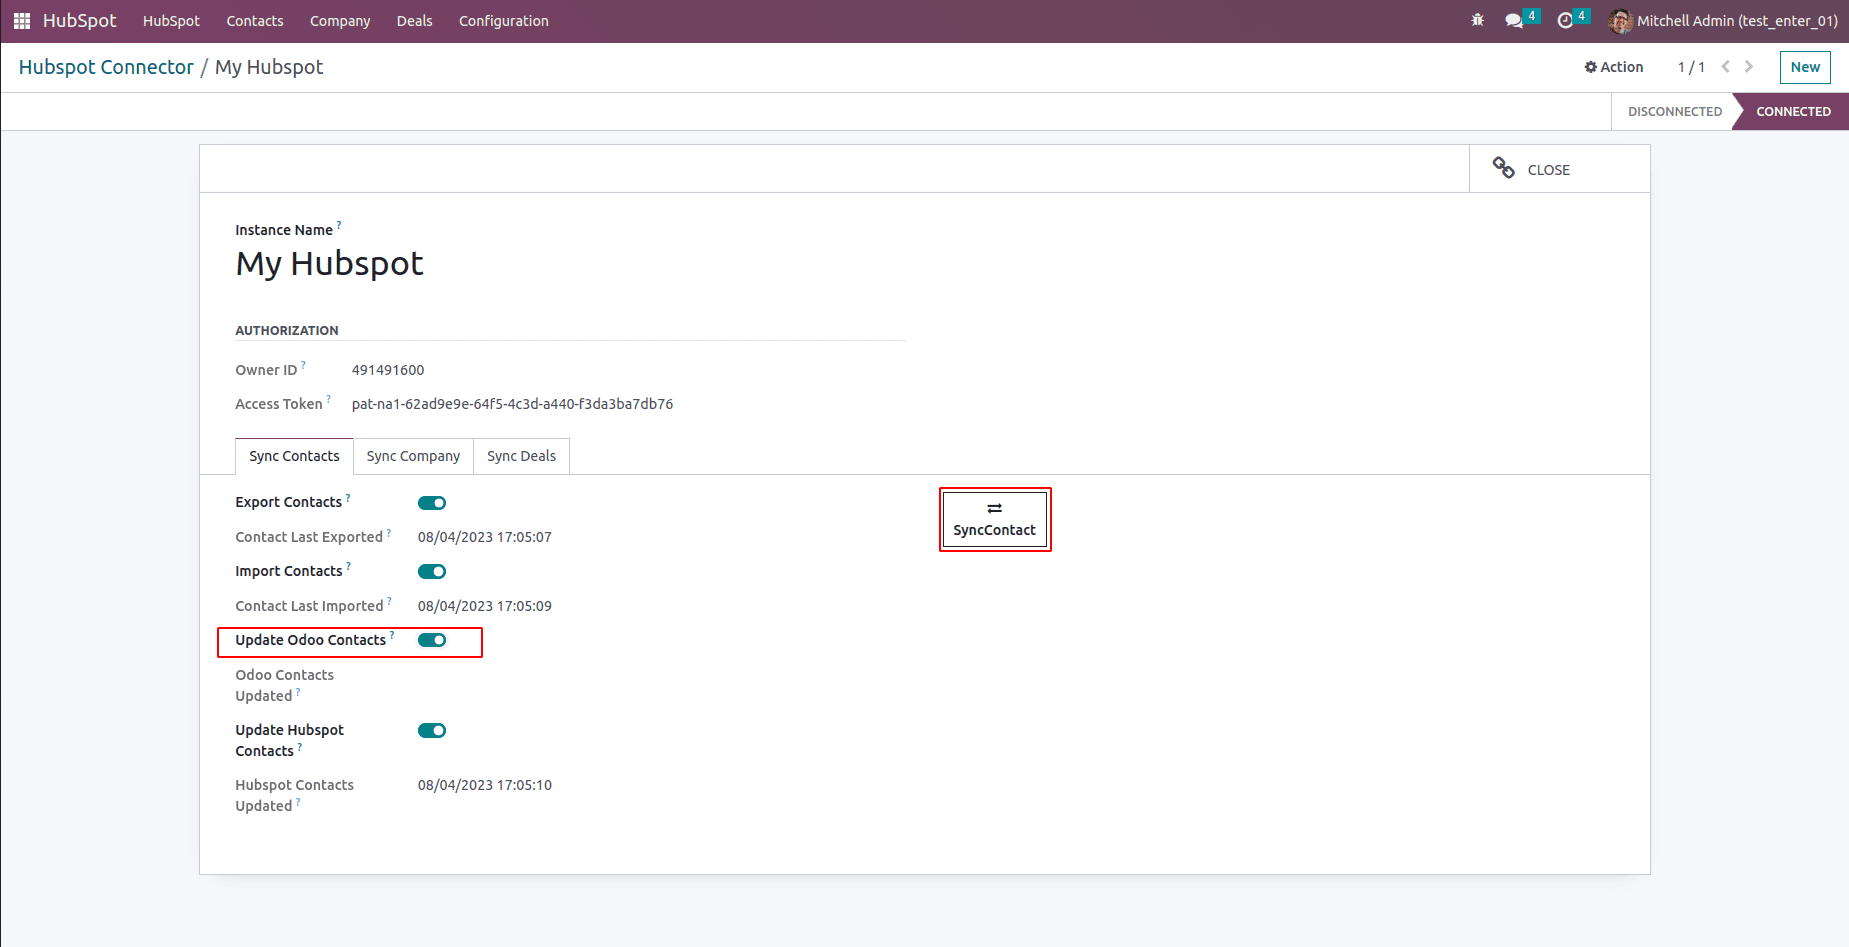
After making the necessary edits in HubSpot, activate the "Update Odoo Contacts" option, and proceed to click the "Sync Contacts" button. This action will initiate the synchronization process, ensuring that the modifications you applied in HubSpot are also reflected in your Odoo contacts.
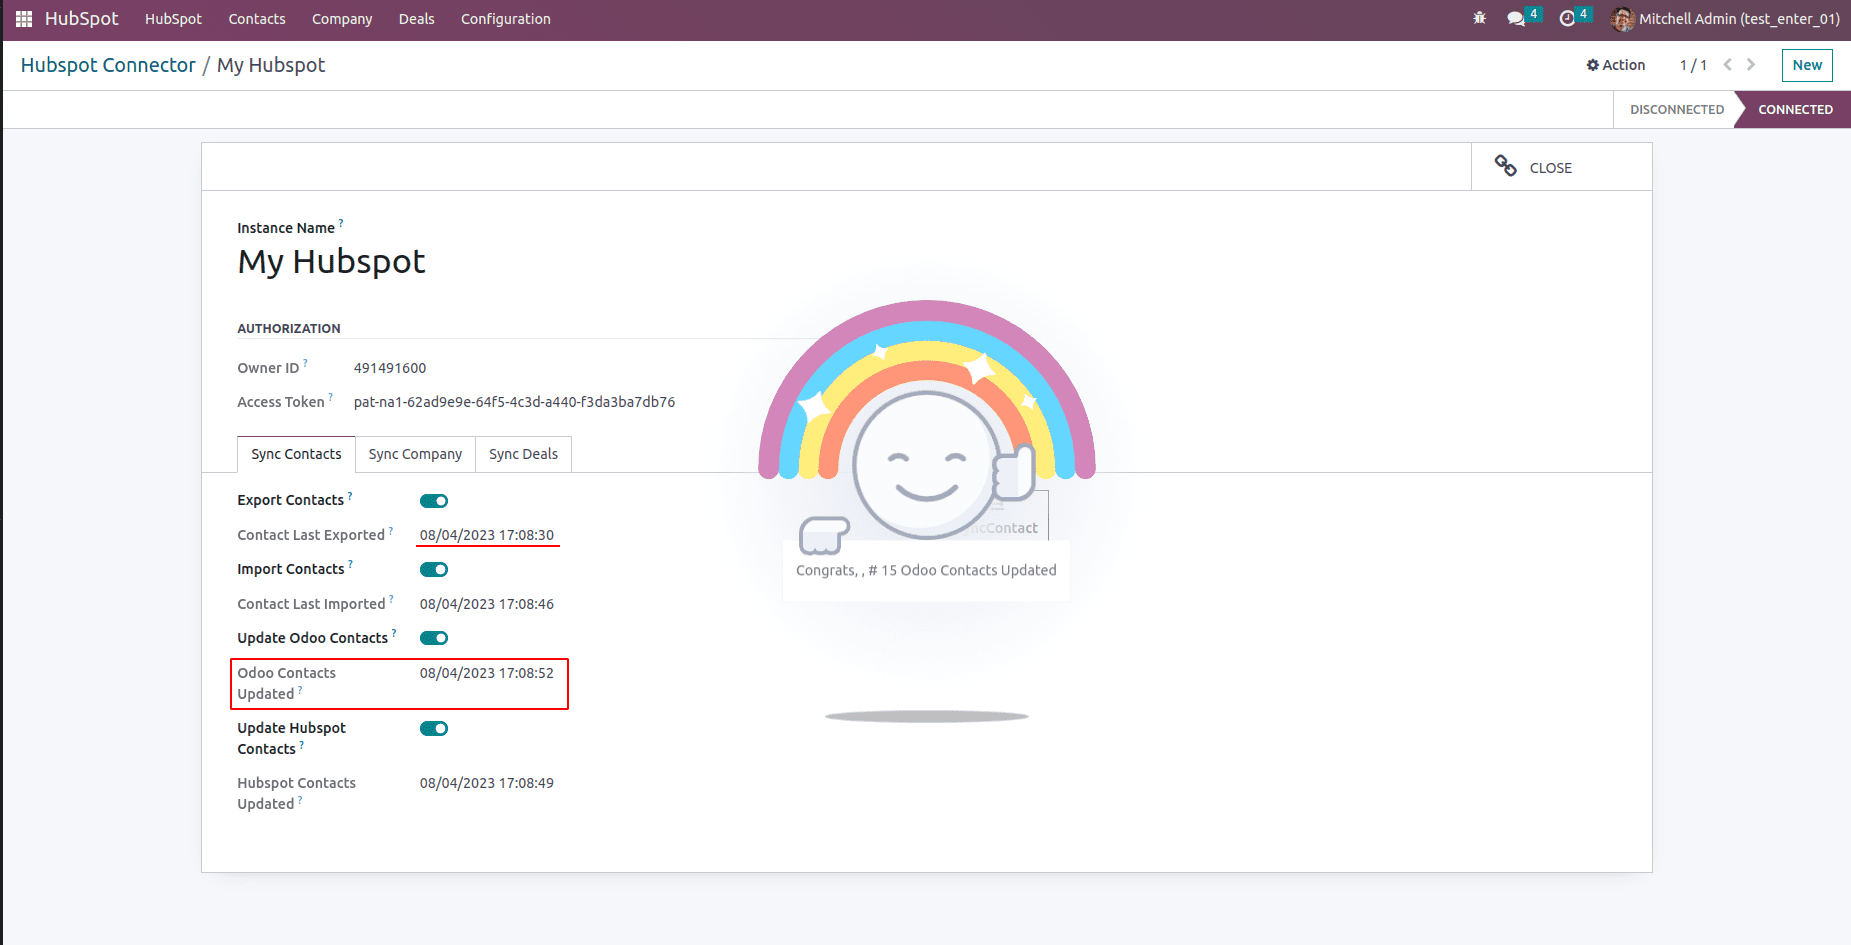
Upon successful completion of the synchronization process, you will be presented with information displaying the updated date, time, and a confirmation message. This confirms that the changes you made to the contact's name in HubSpot have been effectively updated in Odoo as well.
Now, navigate to the "Contacts" tab in either Odoo, depending on where you initiated the update. You will be able to observe the updated name of the contact.
Similarly, the synchronization process applies to Companies and Deals between HubSpot and Odoo. By following the steps outlined above, you can seamlessly sync Company and Deals in both directions, ensuring that your information remains accurate and up-to-date across both platforms. This synchronization enhances your ability to manage customer relationships and sales activities effectively.