Odoo Sales Module is one of the most advanced Sales Management systems in the world. The Module can deal with a large amount of data where you can efficiently manage and view those Sales data. Using its integrated features and functionalities, you can manage and control data very easily. Each year these Modules under Odoo Software are getting updated with new features. With Odoo 16, the whole system has changed to a great level of functionality and performance. Its user-friendly interface is one of its notable features among them.
The updations that come under Odoo 16 Sales Module are :
Merged Subscriptions Into Sales Order
Recurring Sales Order
Sale Order Smart button on the invoice
Can be Expensed
Recurring Price list
Among all these features, the configuration of Customers is one of the most important as well as notable foundational processes in the Sales Module. In Odoo Sales Module, you will get a separate platform to create and manage details of customers of our Company. So let's look at how to create a Customer in the Sales Module using Odoo ERP Software and add further information regarding the customer.
For that, firstly, login to the Odoo 16 Database, and then you will be directed to a Page, among which you have to choose the Sales Module as shown below.
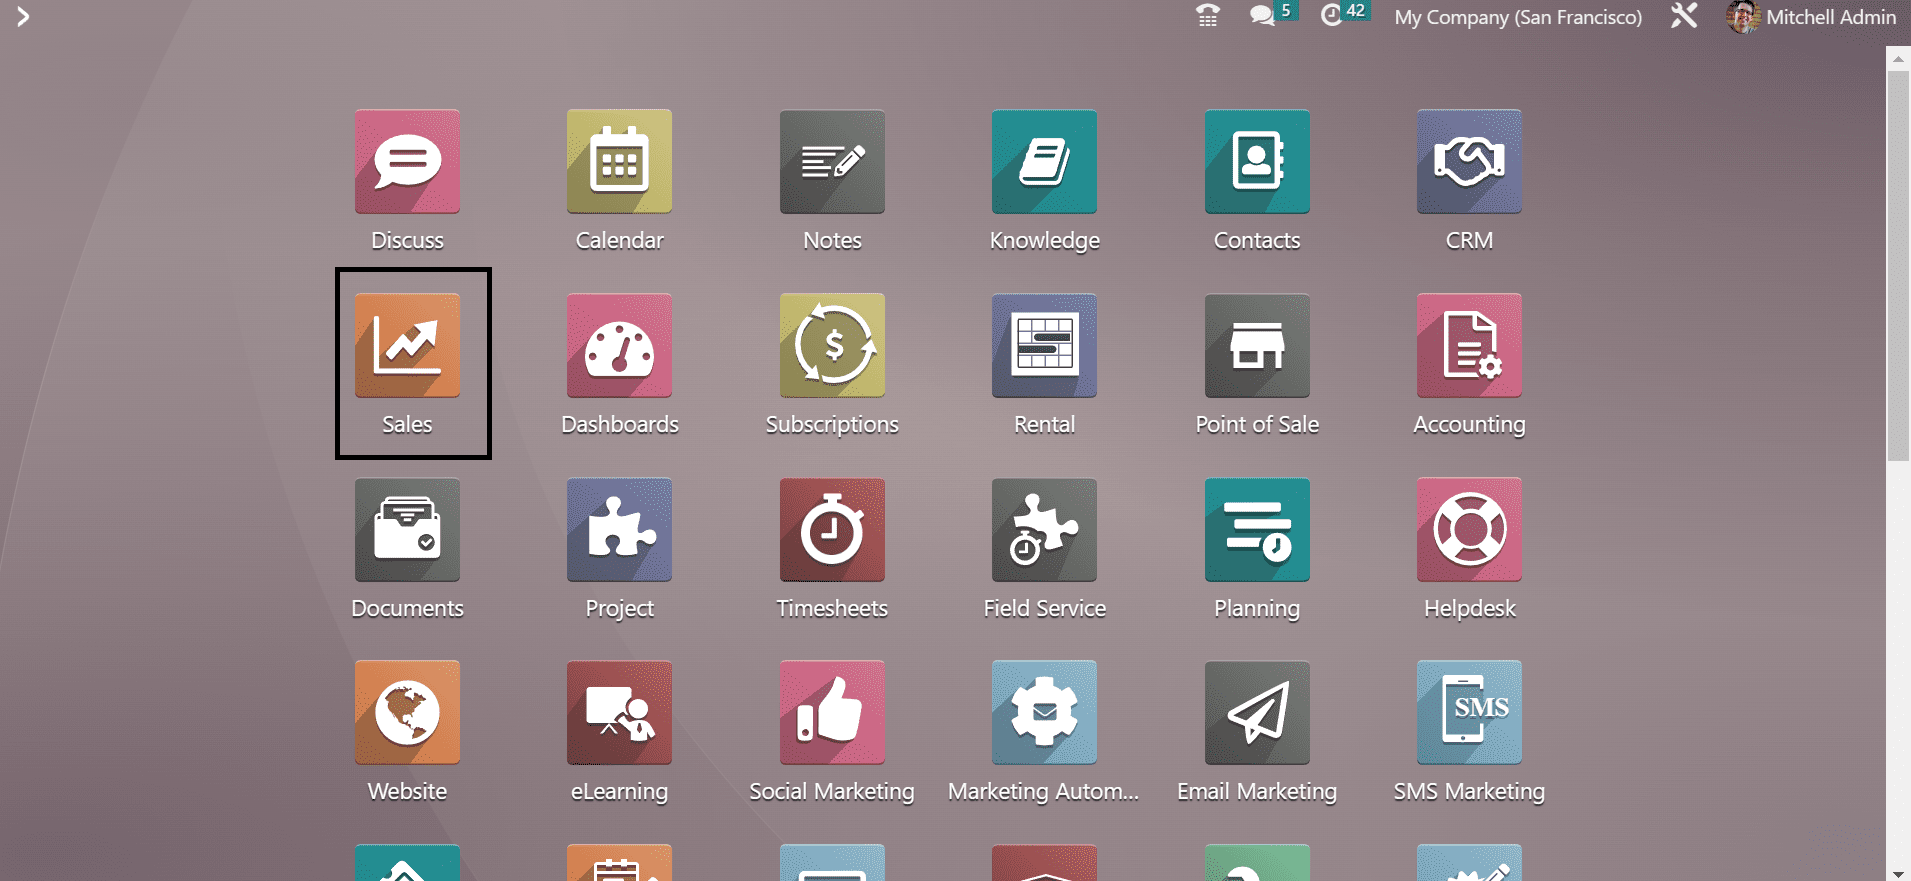
On Selecting Sales Module, you will be directed to a page where the customers and their details that we configured earlier will be visible as shown below.
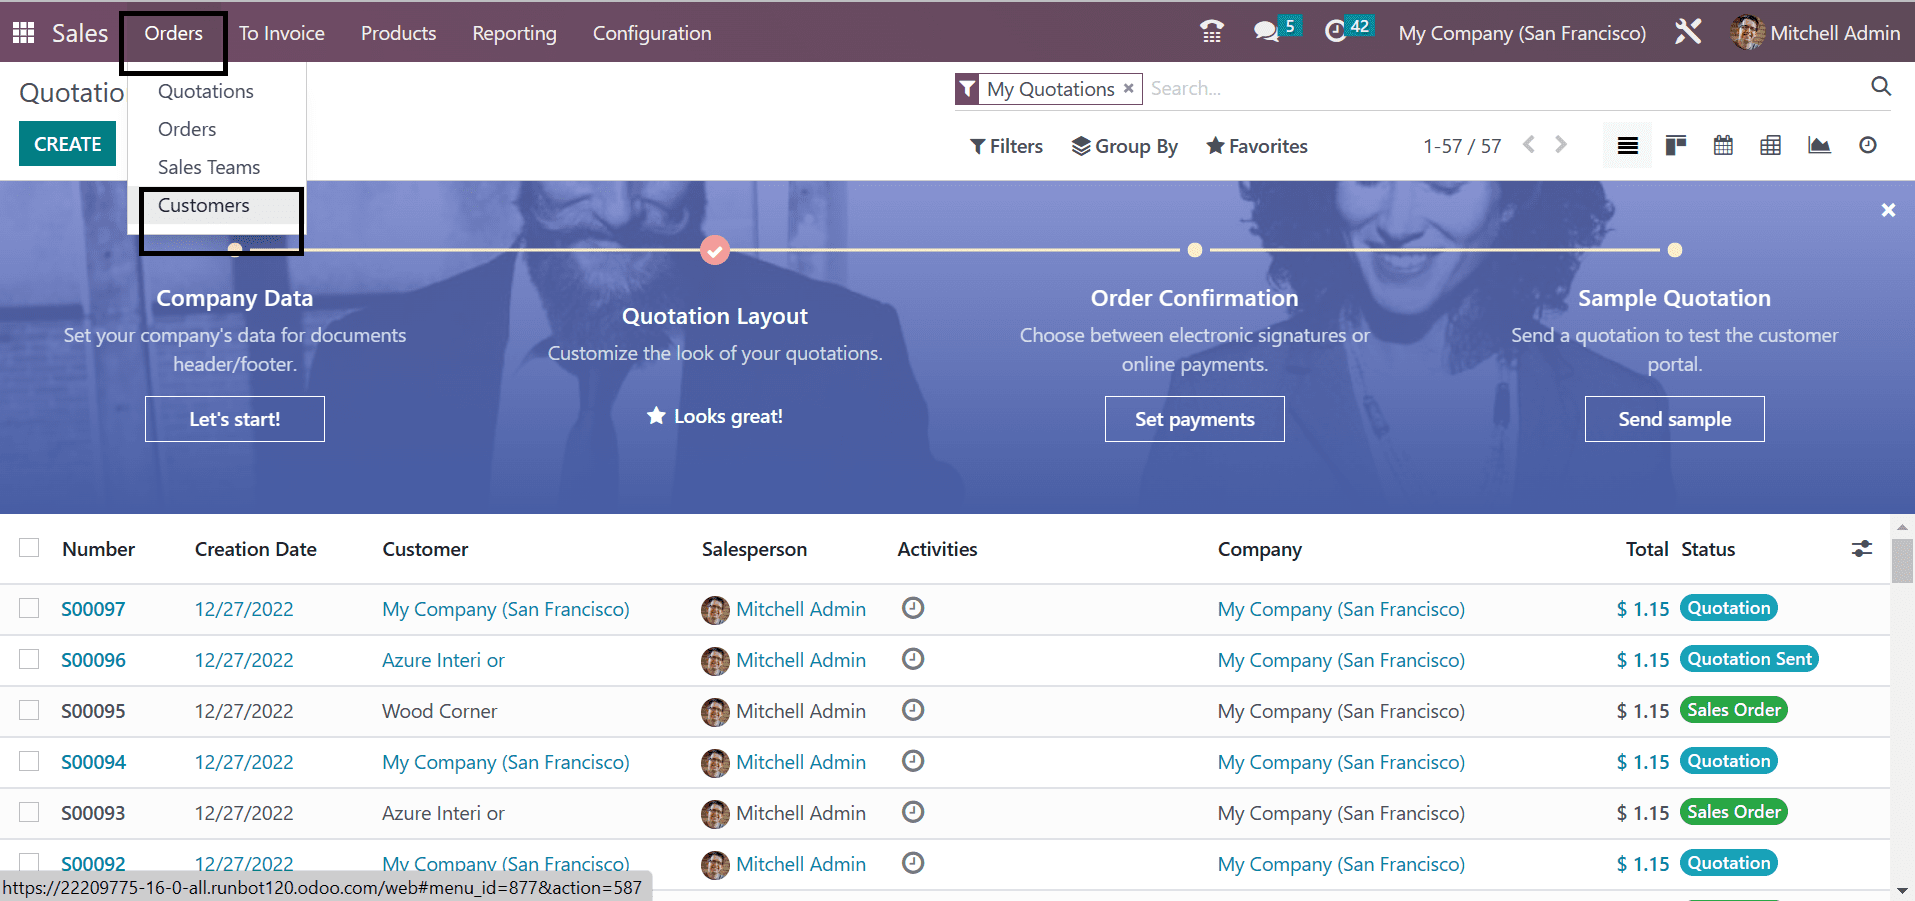
You can also see some menu items such as Orders, To Invoice, Products, Reporting, and Configuration. Among these options, Click on Orders which will give us sub-options such as;
* Quotations
* Orders
* Sales Teams
* Customers
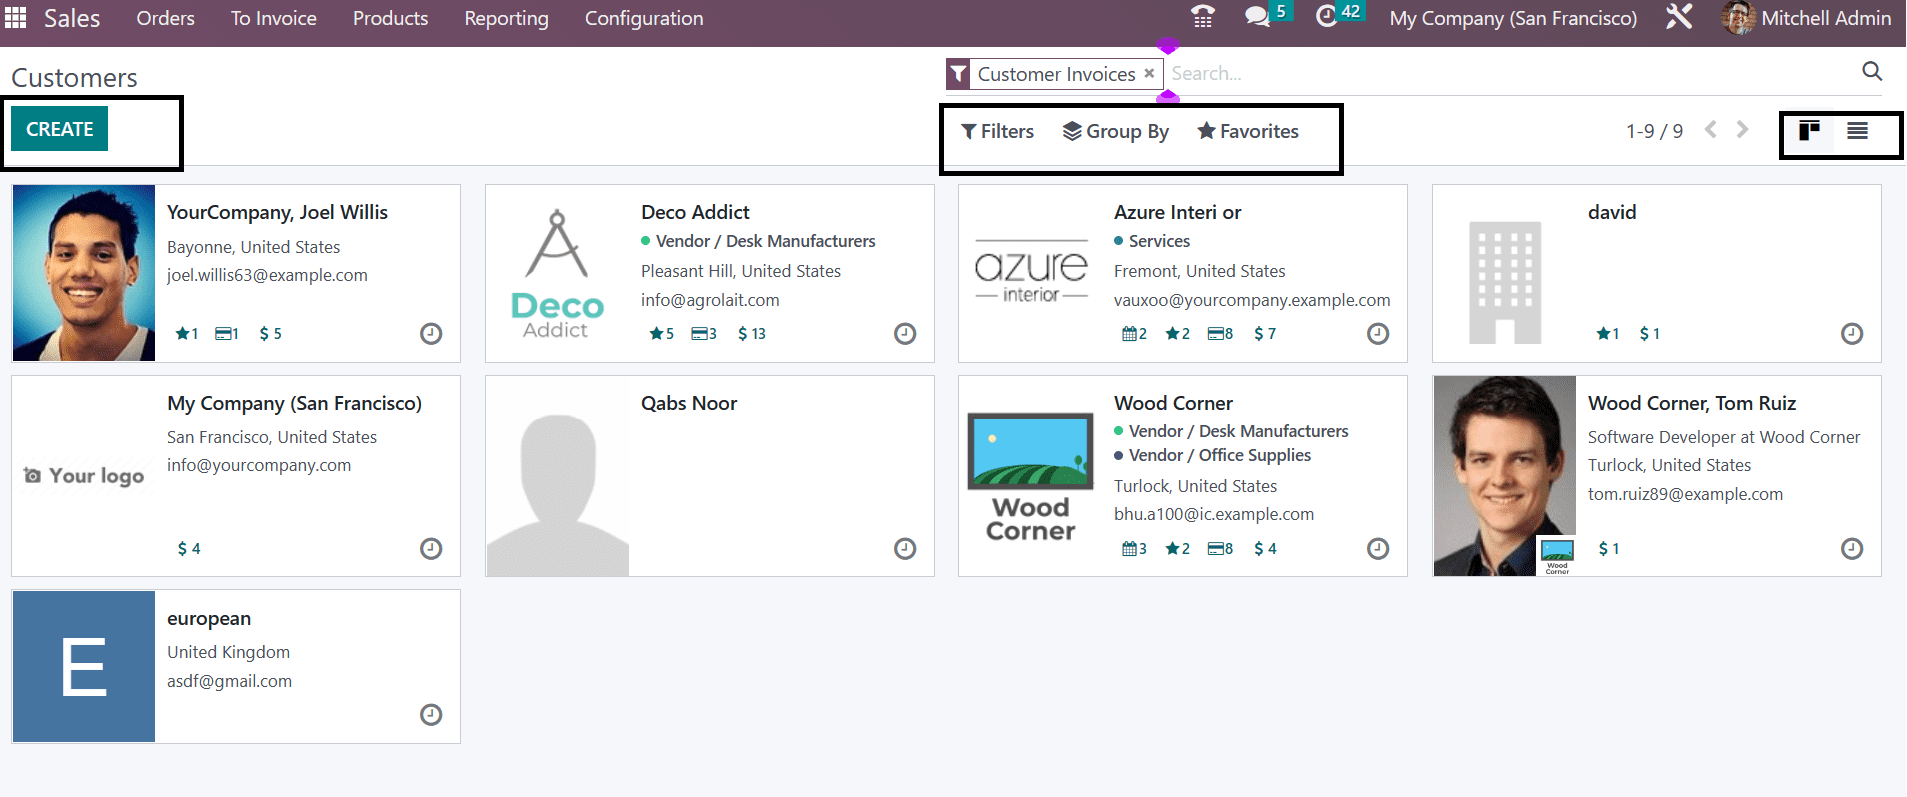
From these given options, go to Customers, and there opens a Page which is shown in Kanban format as shown in the above image. There are some other options like Filters, and Group By Options for easily locating the essential data from the Customer’s record that is saved in our Database. And using the small clock icon on the right corner can be used to schedule various activities with those customers.
In each customer’s profile, you are provided with a number of scheduled activities, added to favorites which are marked using a star, purchases, and sales are done by each of these customers. And clicking these icons will help us to provide necessary changes if required. Now let us look at how to configure or create a New Customer under this Sales Module.
For that, click on the Create button marked in the above image, which will help us to create a new customer profile. You can configure a new name for the customer profile, which can be mentioned in the given space respectively. Moreover, you can add all other necessary information about the newly forming customer, such as;
* Address
* Tax ID
* Phone
* Mobile
* Email
* Website
* Language
* Tags
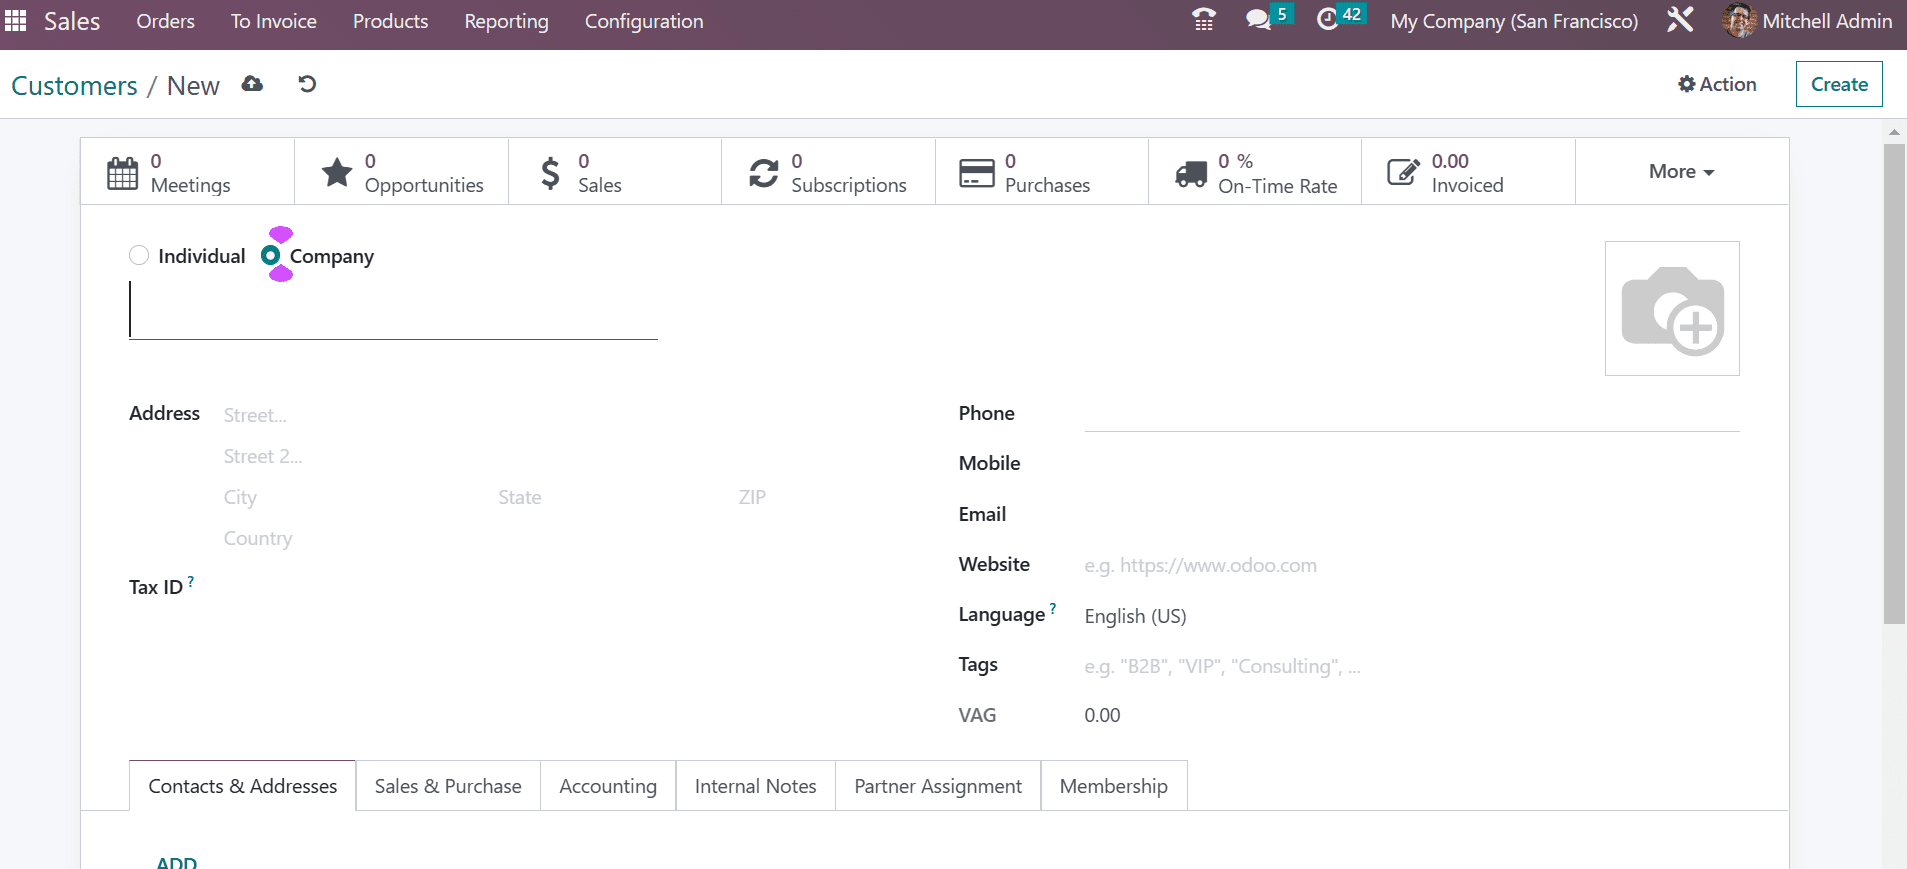
Now there are some other sub Tabs like; Contacts and Addresses, Sales and Purchase, Accounting, Internal notes, Partner Assignment, and Membership. In the Contact and Address option, you can add contact details like Contact Name, Address, Email, Phone, and Mobile by clicking on Add button.
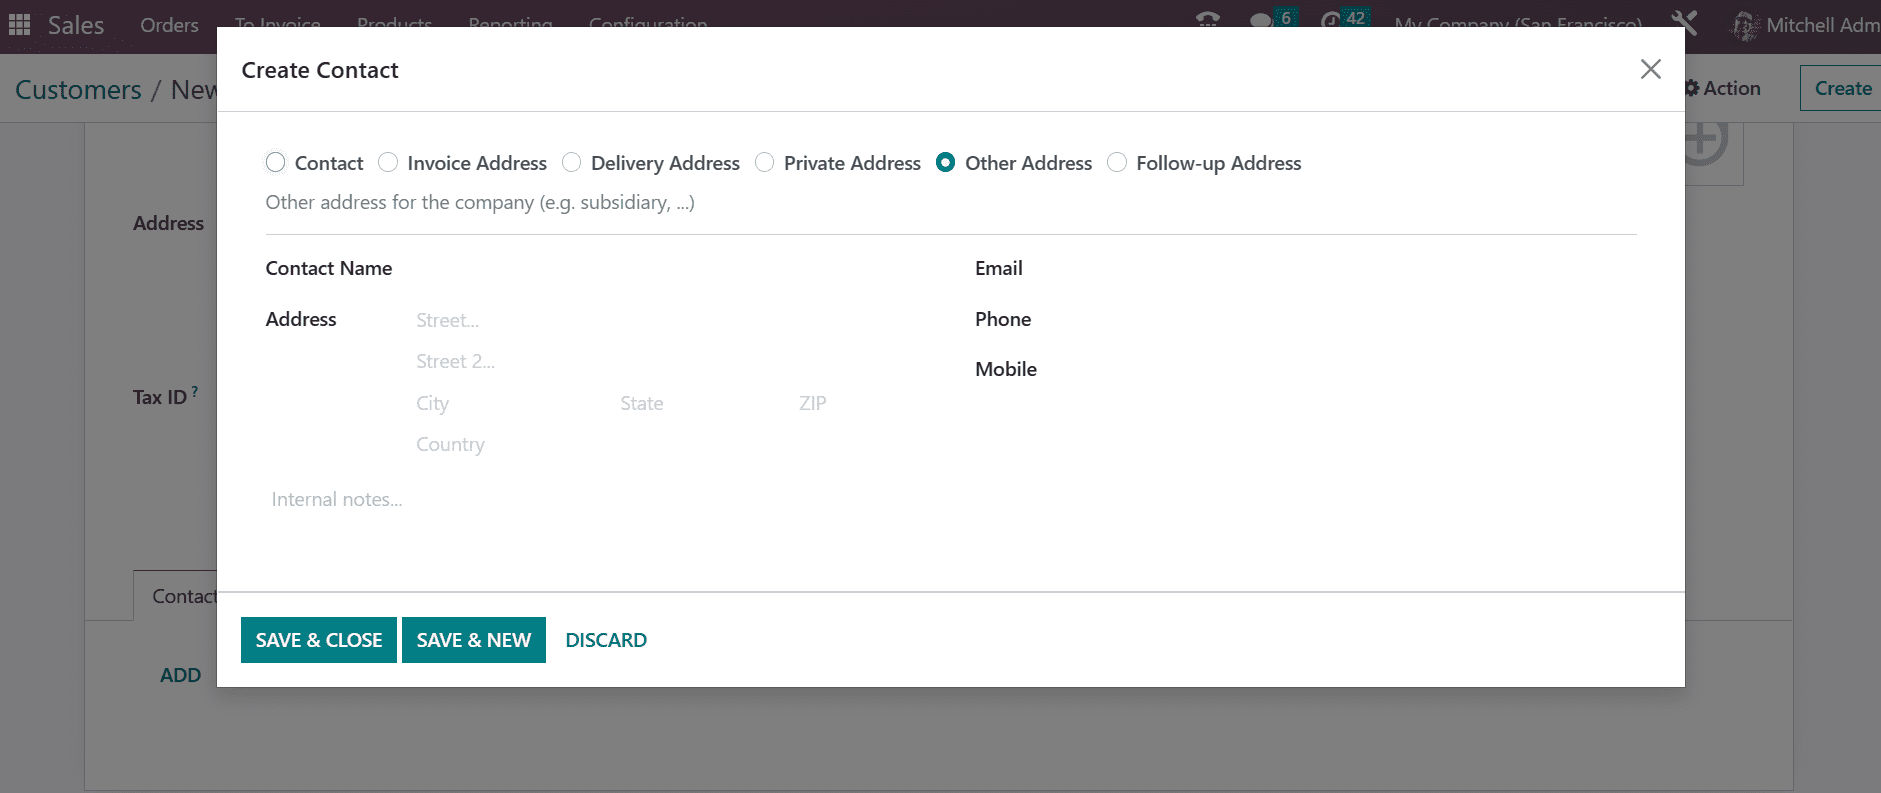
You are allowed to provide some other addresses like Invoice address, Delivery address, Private address, or other address. The next Tab is Sales and Purchase, under which you can provide your details for Sales and Purchase-related operations. Under this Tab, the details that you have to provide are; Name of the Salesperson, Sales Team, Payment Terms, assigned partner ID in the Implemented By field, Price List for this customer which is used for sales instead of default one, Avalara Code which is used for cross-reference in the Avalar port, Avalar Partner Code, and Avalara Exemption, Delivery Method respectively.
Under the Sales Tab, there are some sub-options like Payment Terms which are used for the purpose of purchase orders and vendors' bills, and 1099 Box, where the journal items will be summed in. In the Payment Method field, provide the required payment method for registering payments. In Receipt Reminder for sending a confirmation mail to the customer before the date of the expected receipt to confirm the exact date by the customers, and finally, in the Supplier Currency field, for purchasing from the current partner respectively.

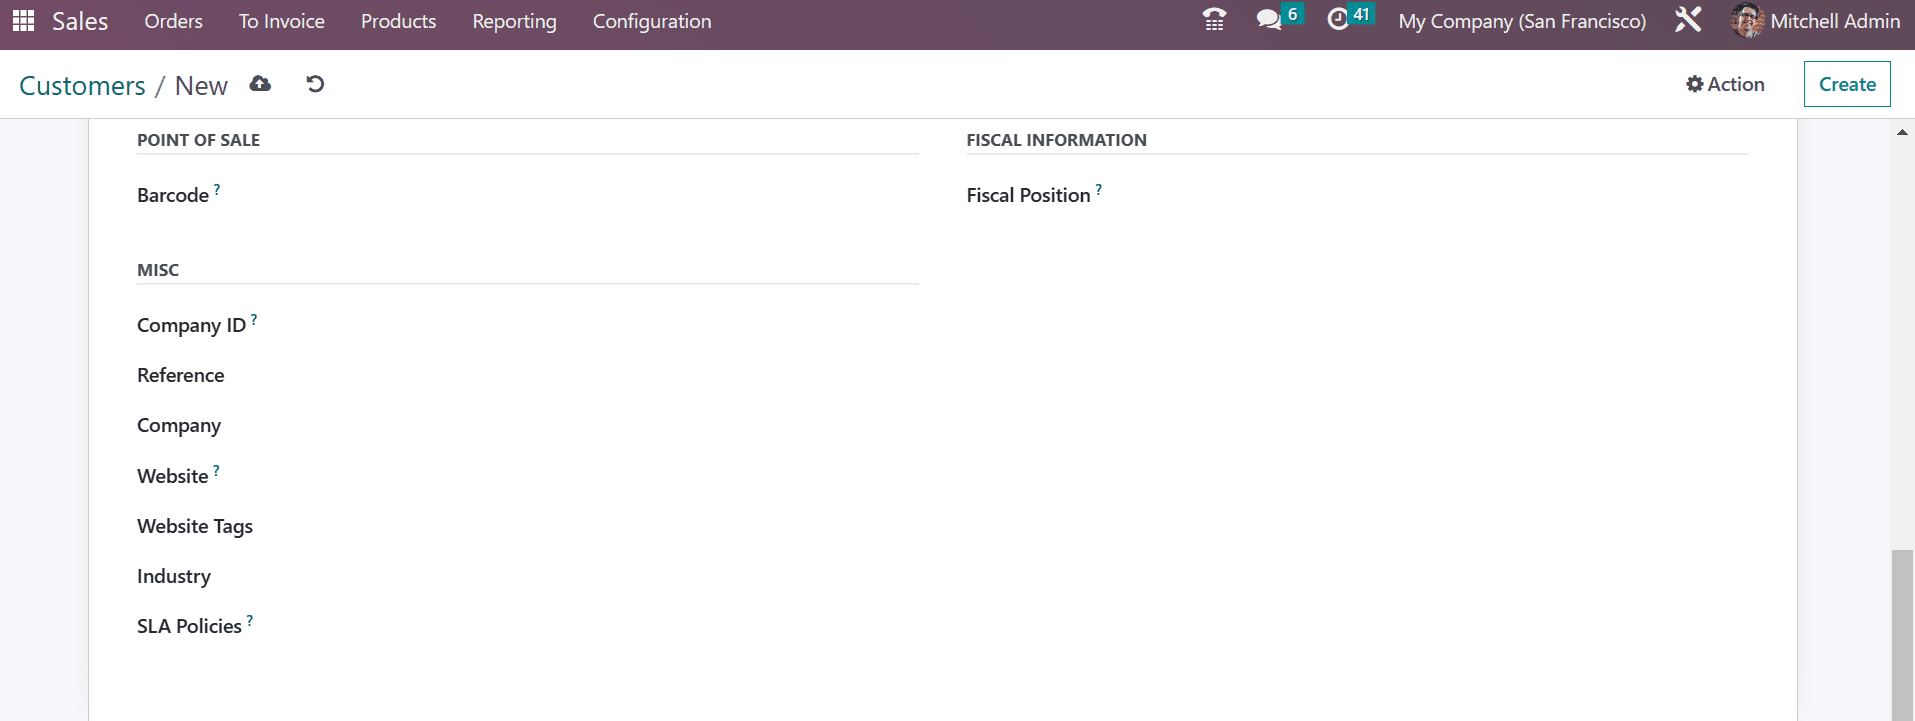
Now under the Point of Sale option, you can set a Barcode, fiscal position under the fiscal information field which decides the accounts for this contact, Miscellaneous field to provide the Company ID, Reference, Company, Website, Website Tags, Industry and SLA Policy respectively and finally Inventory field to provide Customer Location, Vendor Location, and Subcontractor Location to get the exact location when sending the goods to this contact.
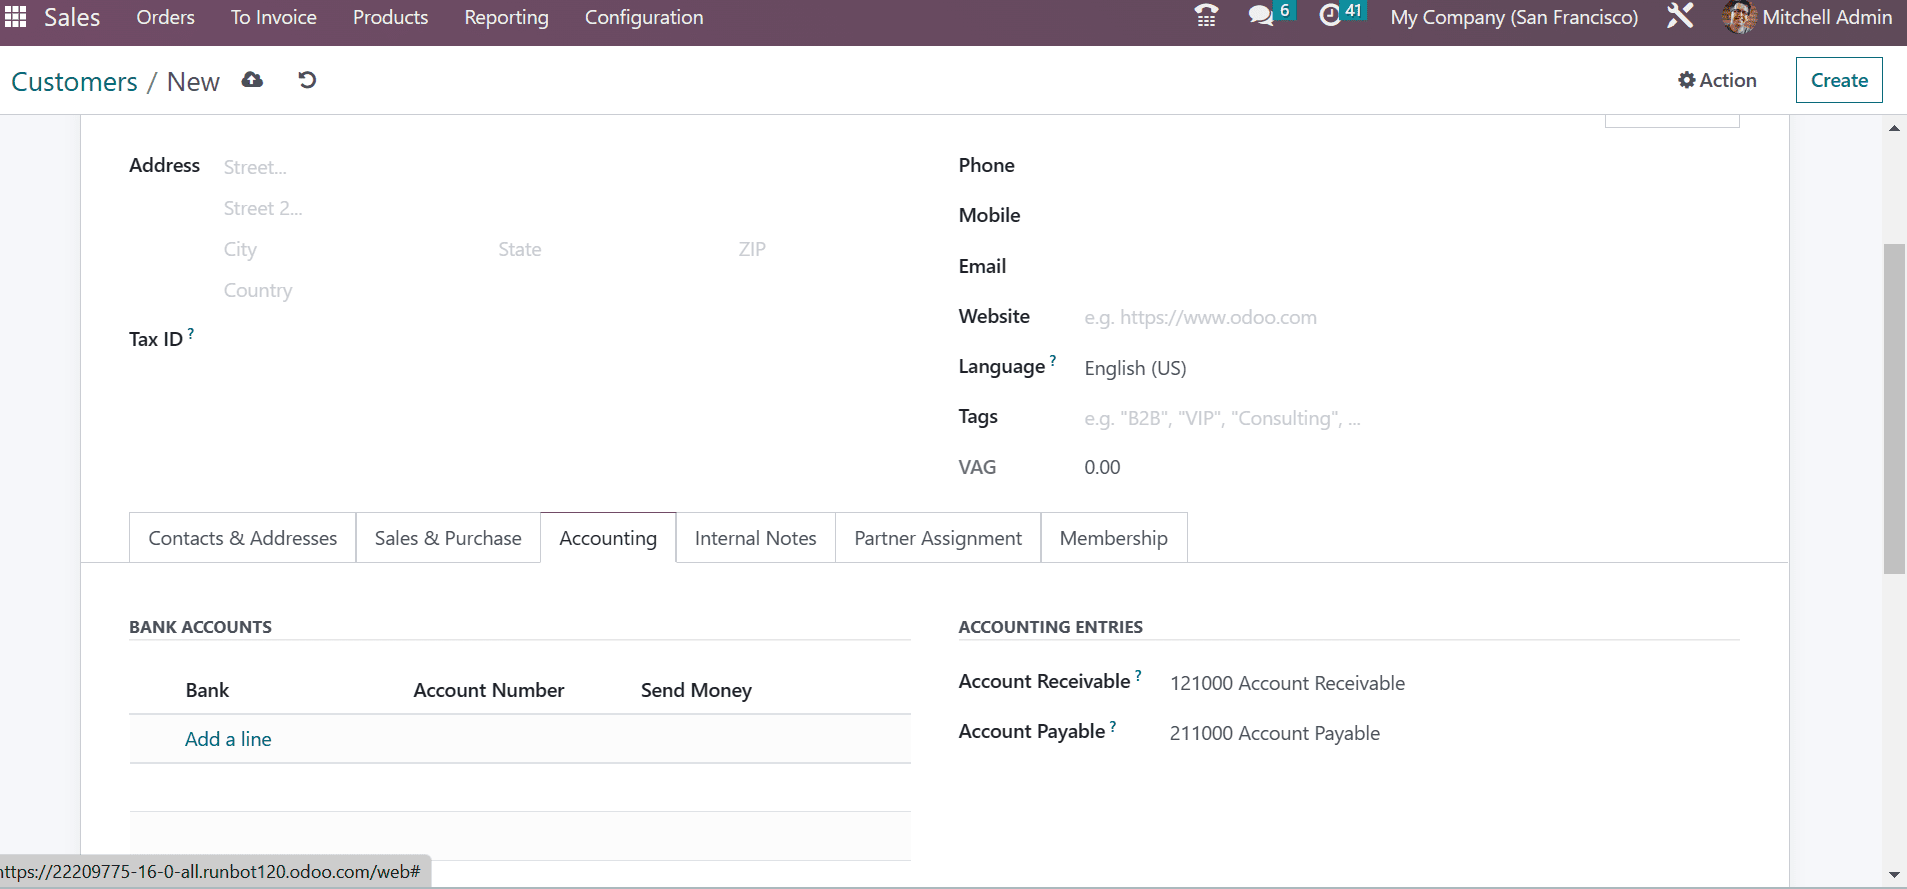
The next Tab is Accounting, where you can add Bank Account details like the name of the bank, account number, etc. After that under Accounting Entries, you can mention Account Receivable and Account Payable. Then you can view account details to get a better view of accounts.
You can activate Check Vendor OCR if the OCR number is used by the customer and can provide Default Vendor Payment Reference under the view account details option as shown below.

Now, the next Tab is Internal Notes where you can add additional notes about the customer. And we can set a warning feature using the Warning on the Sales Order under which sub-options like warnings on sales orders, purchase orders, invoices, and picking to the customer, respectively.
The next Tab is Partner Assignment Tab, where you can give Partner Activation, Partner Review, and Geolocation as well. Below the Partner Activation option provide the Partner level, Commission plan, Activation, and Level Weight. Similarly under the Partner Review, mention the latest partner review, Next partner review, and Partnership date.

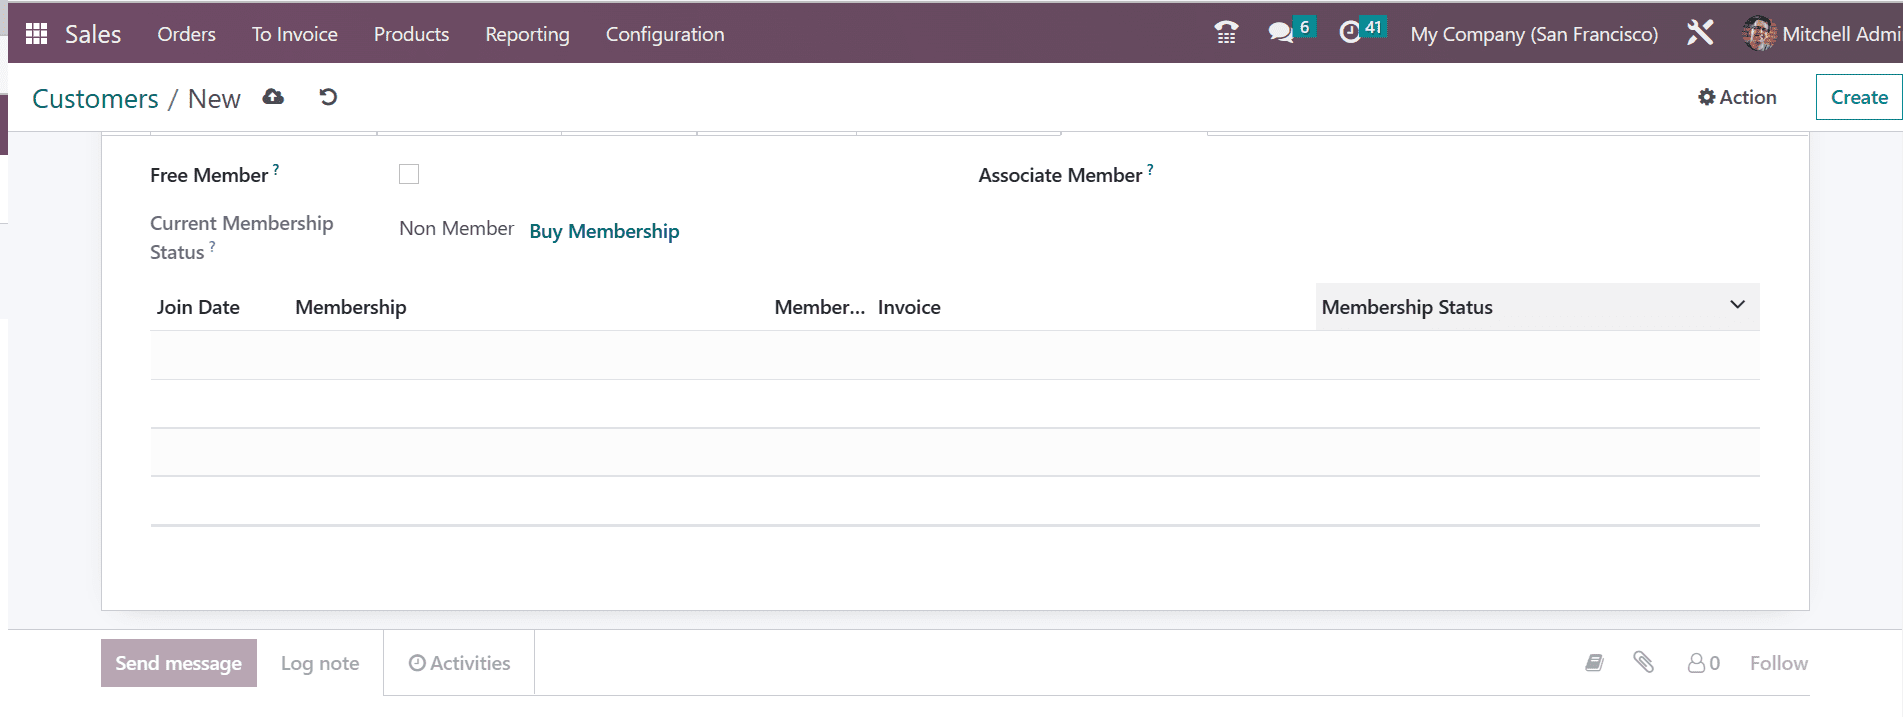
In the Membership Tab, you can add the details of the customer’s membership details. Here there are some sub-options like the Free Member option to give free membership, the Associate Member field to associate customers’ membership, Current Membership Status to get current status, and the buy membership option for buying the Membership very easily. Along with these options, there are other options like Join date, Membership, Membership Price, invoice, and Membership Status.
These are the major Tabs that we had to fill for configuring a New Customer. Apart from these options, based on the operations, you have some smart buttons for Meetings, Opportunities, Sales, Subscriptions, Tasks, Purchases, On Time Rate, Due, Invoiced Amount, Vendor Bills, Partner Ledger, Saved Payment Tokens, Certifications, Signature, Documents, Direct Debit Mandates, and Courses details of the customer as shown below.
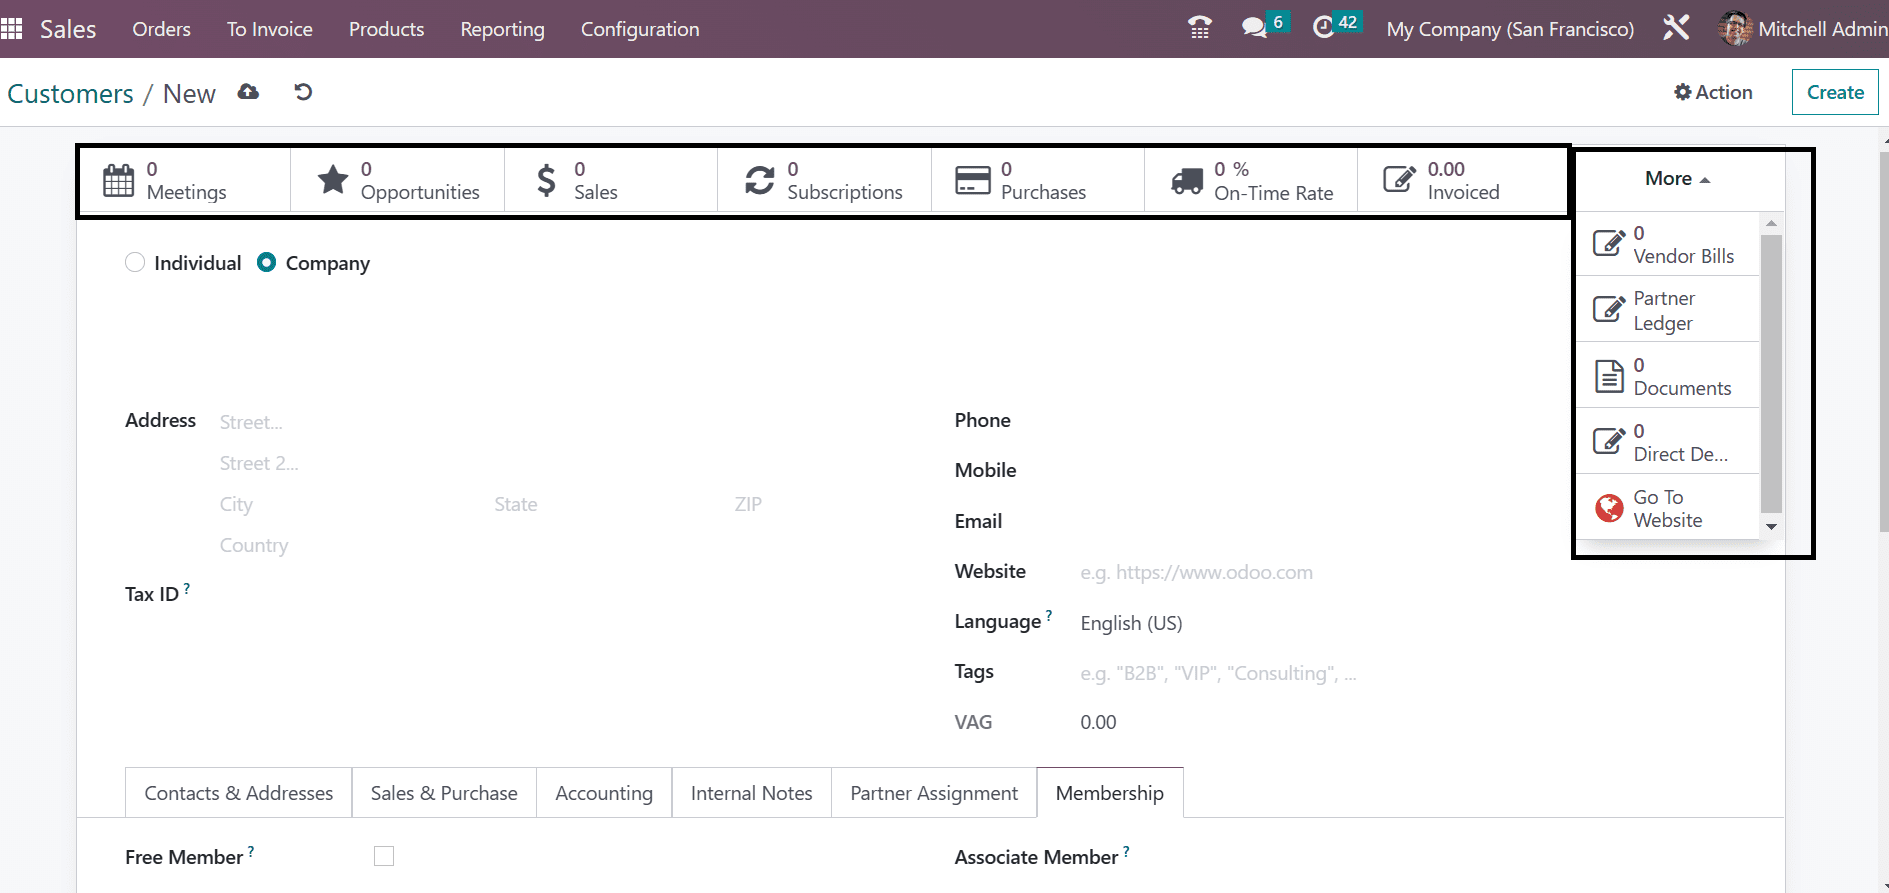
This is the information that we had to provide while configuring a new Customer in the Sales Module using Odoo 16 ERP Software.