Odoo is a versatile business management platform designed to help companies of all sizes handle their day-to-day operations more effectively. With its wide variety of modules covering areas like sales, inventory, CRM, accounting, and HR, Odoo simplifies processes and brings all your business data together in one place. Its flexibility and ability to scale with your business make it an excellent solution for companies looking to streamline operations and improve efficiency.
A key feature that sets Odoo apart is its ability to automate routine tasks, allowing businesses to ensure that important processes happen seamlessly without constant manual oversight. In Odoo 18, the Automated Actions feature has been enhanced, offering even more ways to set up customized workflows across different modules. These automated workflows can trigger actions such as sending reminders, updating records, or kicking off more complex processes, all based on specific conditions, helping you stay on top of your operations with minimal effort.
By automating repetitive tasks, businesses can save time, avoid mistakes, and boost operational efficiency. In this blog, we’ll dive into how Automated Actions in Odoo 18 work, how you can tailor them to your needs, and how they can be used to streamline everything from sales and customer management to inventory and HR.
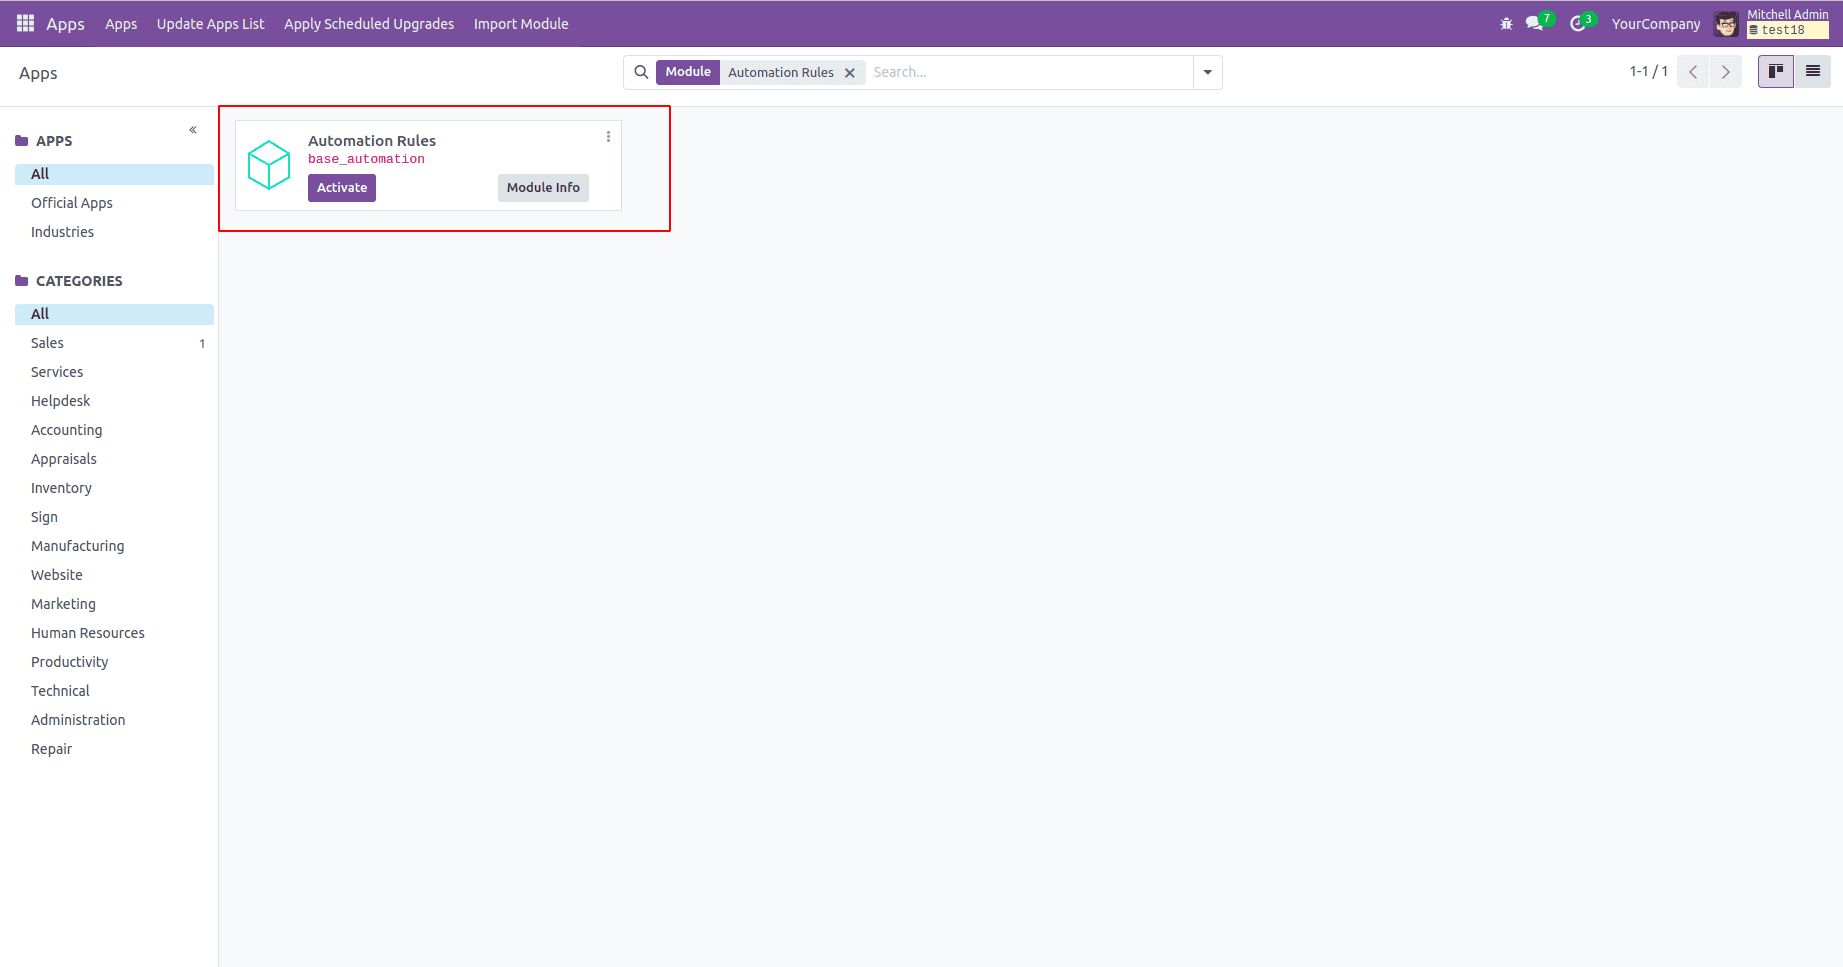
To configure Automatic Actions, you need to install the Automatic Action Rules module. Specifically, you should install the base_automation module, as illustrated in the figure below.
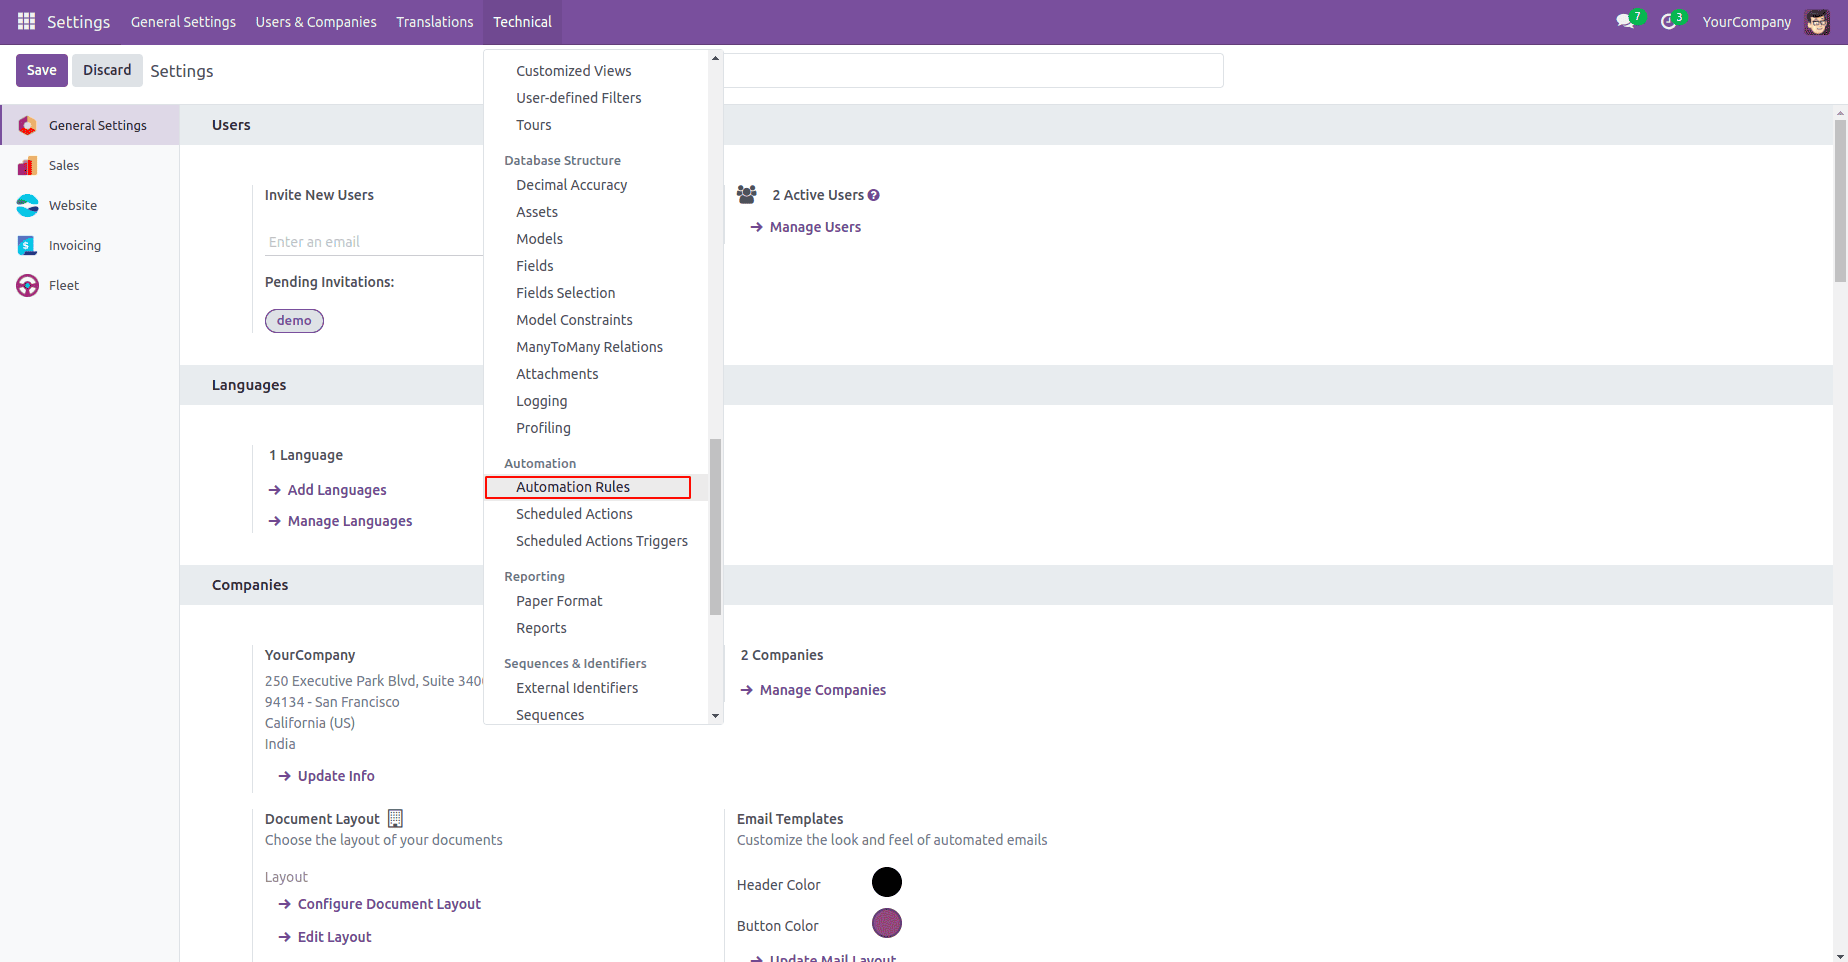
To set up automated actions, first, enable developer mode. Then, go to Settings and select Technical followed by Automated Actions. Here, you can create rules and conditions that will activate automated actions, helping to enhance your workflow and ensure data accuracy. It's shown in the figure below.
To set up an automated action with trigger conditions and domains in Odoo 18, follow these steps(example shown in figure):
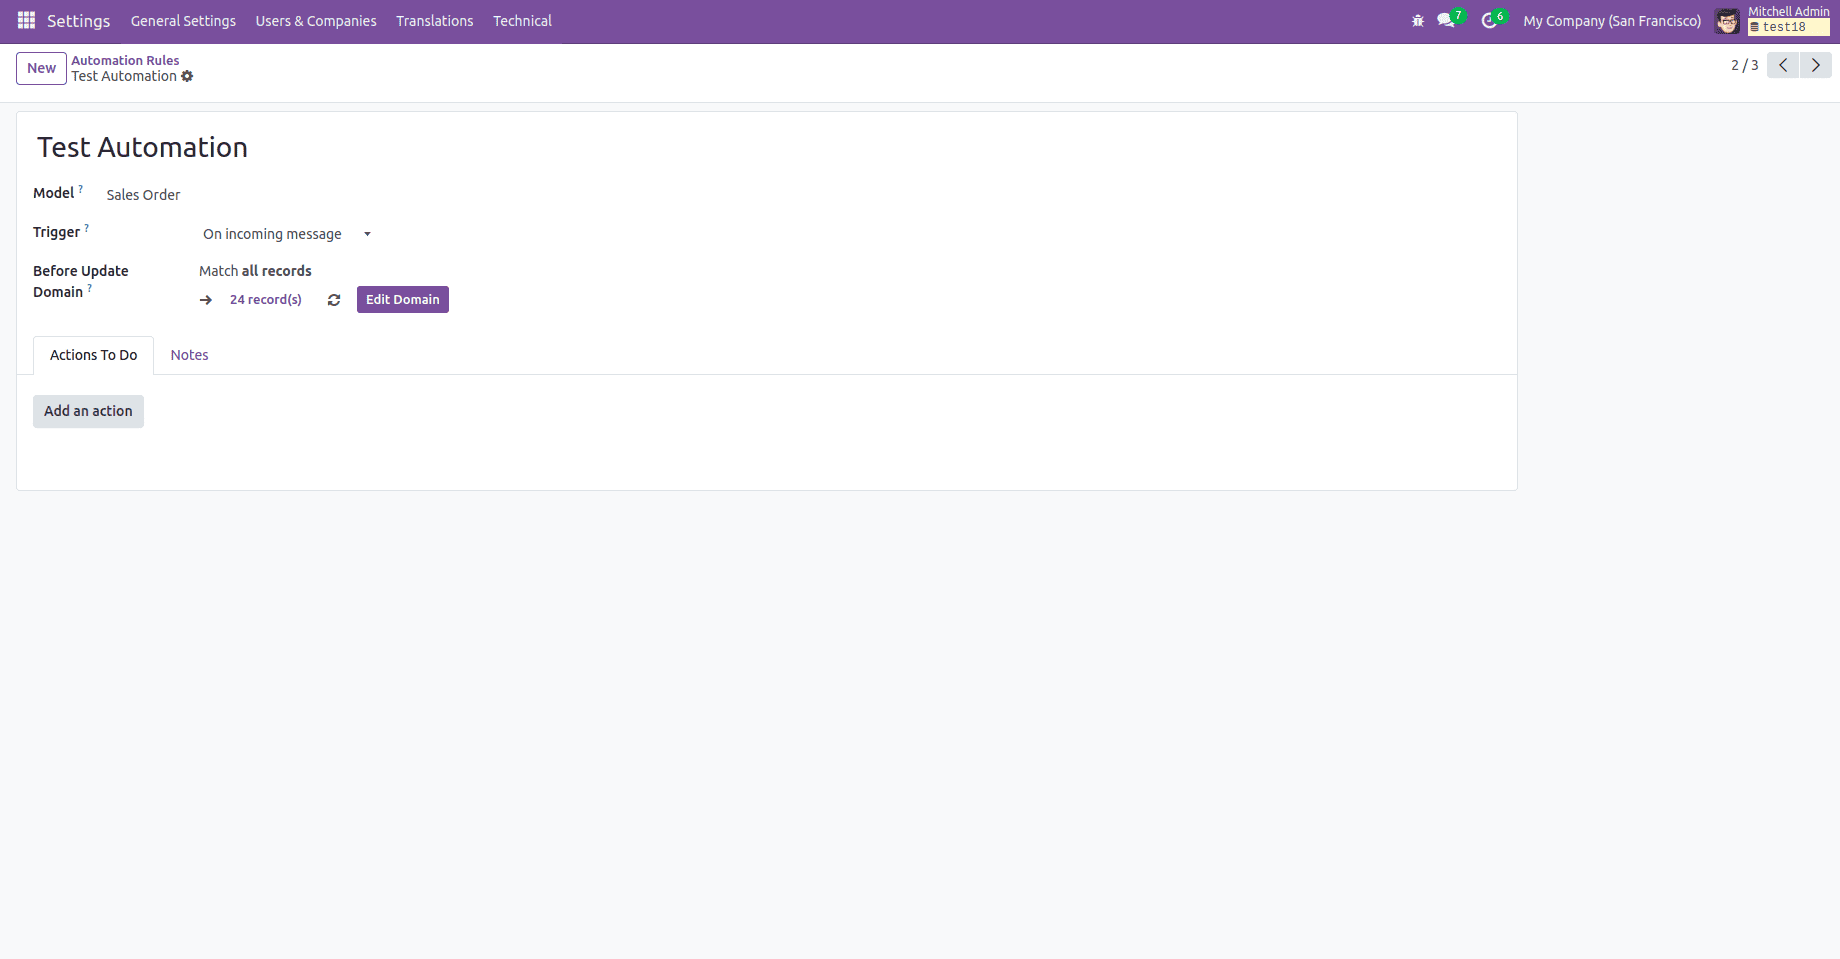
Name
You can enter the name of the automated action here.
Model
First, select the model where you want the automated action to be applied (Eg: Sale Order).
Triggers
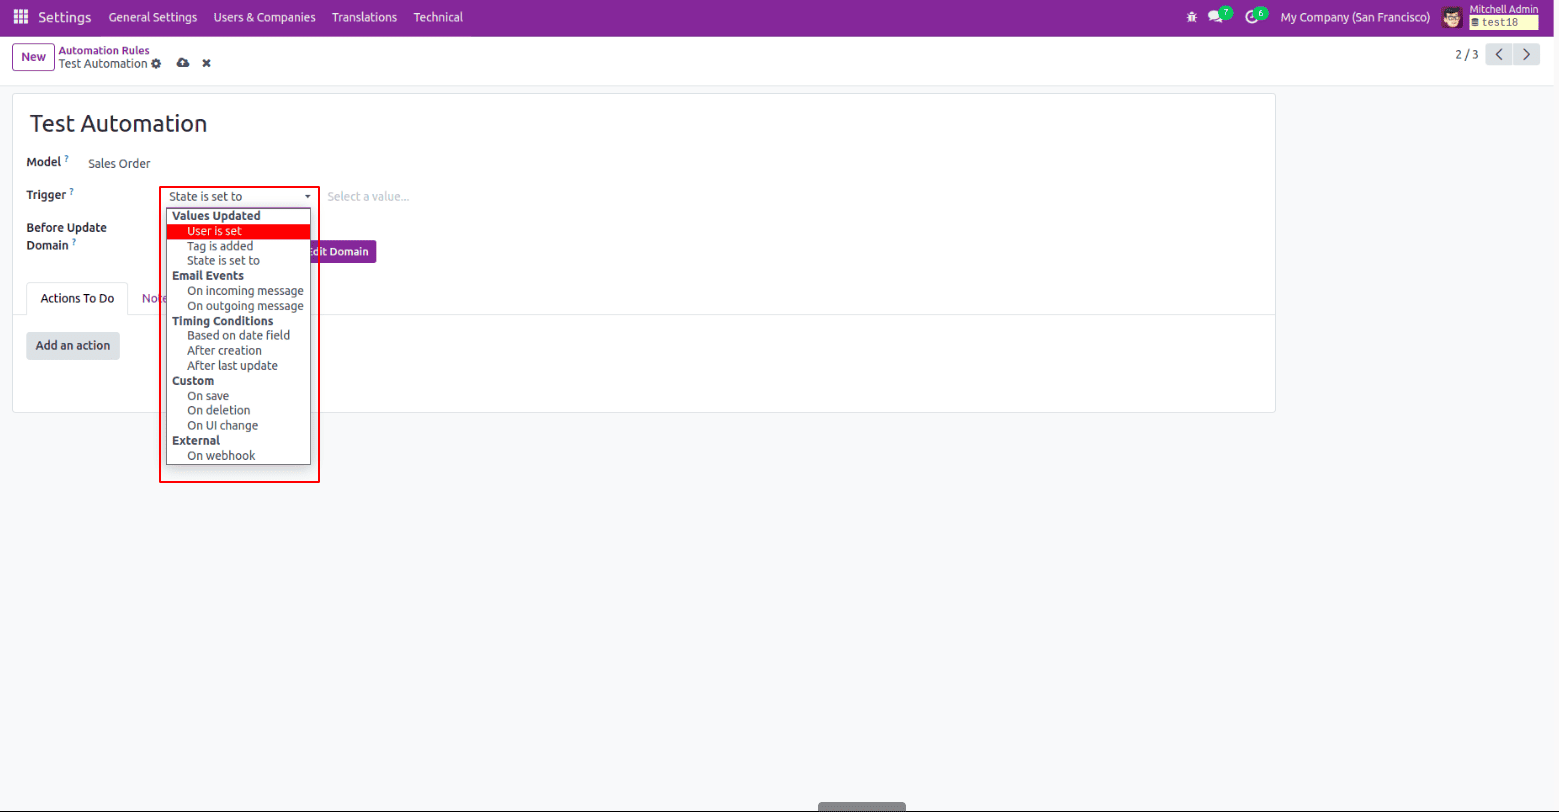
1. Values Updated: Automation triggers when specific changes happen, such as:
* A user is assigned to a record.
* A tag is added to an item.
* The state or status of a record is updated (e.g., from "draft" to "confirmed").
2. Upon Update: Automation triggers when specific changes happen, such as:
* On Incoming Email: Triggers automation when a new email is received. For example, this could be used to create a lead from an email or update a record based on incoming communication.
* On Outgoing Email: Automations can be triggered when an email is sent from Odoo, such as sending a follow-up action after an invoice is emailed or logging the email communication in a related record.
3. Timing conditions: Automation triggers can be set based on various time-related events, such as:
* Based on Date Field: Triggers automation at a specific time, relative to a date field in the record (e.g., due date, deadline).
* After Creation: Executes the action a certain amount of time after a record is created.
* After Last Update: Triggers the automation a set time after the last update to a record.
4. Custom: This trigger can be set to specific events such as
* On Save: Executes automation when a record is saved, allowing actions to respond to data entry and updates.
* On Deletion: Triggers automation when a record is deleted, enabling follow-up actions like notifications or logging.
* On UI Change: Executes automation based on changes made in the user interface, such as modifying field values or selections in forms.
5. External: triggers automation can be set to respond to specific events such as:
* On Webhook: Executes automation when a webhook is received from an external system, allowing Odoo to respond to events occurring outside of its environment, such as updates from third-party applications or integrations.
The different types of triggers are shown in the following figure:
Before Update Domain
In Odoo 18 automation refers to the ability to set conditions that must be met before a record is updated. This allows you to define specific criteria using a domain filter that ensures the update only occurs when certain conditions are satisfied.
Specify the conditions for applying the automated action to records within the selected model. You can use filters to target specific records that meet certain criteria.
Action To Do
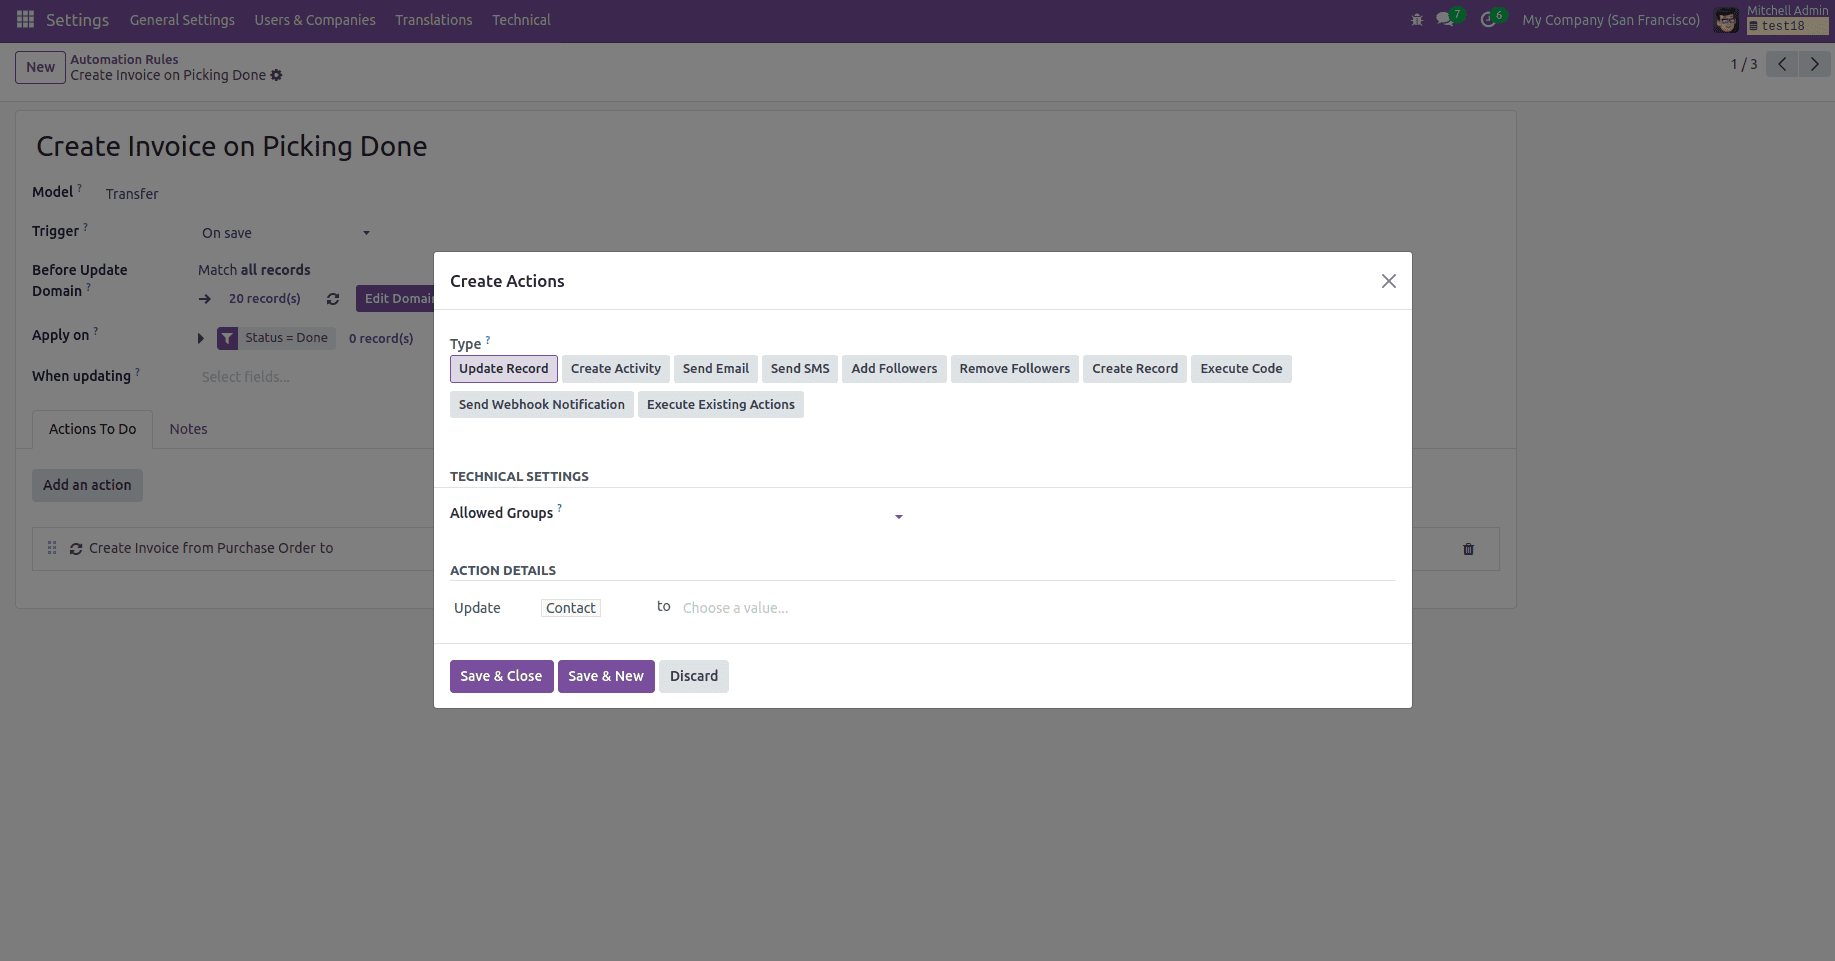
Define the type of automated action (server action) that you want to execute. Odoo offers ten different types of actions:
1. Execute Python Code: This option lets you run custom Python code. You can write the code in the Python Code tab, where the available variables are also listed.
2. Create a New Record: This action is used to automatically create a new record in any model.
3. Update the Record: Use this action to set specific values for fields in the current record, allowing you to update data automatically.
4. Send Email: This action sends an email to a contact related to the record. You can either use an existing Email Template or create a new one tailored to your needs.
5. Add Followers: Use this action to automatically subscribe specific contacts to the record as followers.
6. Remove Followers: Use this action to automatically unsubscribe specific contacts to the record as followers.
7. Create Activity: This allows you to schedule a new activity tied to the record. You can configure this in the Activity tab, where you also set the user responsible for the activity. If the same user should always be assigned, select "Specific User" and choose the responsible person. Alternatively, if the user should be determined dynamically based on the record, choose "Dynamic User From Record" and specify the appropriate field name.
8. Send SMS: This action sends an SMS to a contact linked to the record. You can use an existing SMS Template or create a new one.
9. Send Webhook Notification: Sends a POST request to an external system, commonly referred to as a webhook.
10. Execute Existing Actions: Defines an action that triggers multiple other server actions.
Allowed Groups
Specify the user groups that are permitted to execute the server actions. Only members of these groups will have the authority to trigger the automated actions.
Action Details
Here, you define what the automated action will do when the specified conditions are met. This determines the outcome once the criteria for the action are satisfied.
Automated Actions Executed via Code:
First, you need to create an XML file. For example, you can create an automated action to generate an invoice when a stock picking related to a purchase order is marked as complete. The invoices should be in the draft stage.
<?xml version="1.0" encoding="utf-8"?>
<odoo>
    <!-- Server Action on Stock Picking Done -->
    <record id="action_create_invoice_on_purchase_done" model="ir.actions.server">
        <field name="name">Create Invoice from Purchase Order</field>
        <field name="model_id" ref="stock.model_stock_picking"/>
        <field name="type">code</field>
        <field name="code">
purchase_order = record.purchase_id
if purchase_order and purchase_order.invoice_status == 'to invoice':
    purchase_order.action_create_invoice()
        </field>
    </record>
    <!-- Automated Action on Stock Picking Done -->
    <record id="automated_action_create_invoice_on_picking_done" model="base.automation">
        <field name="name">Create Invoice on Picking Done</field>
        <field name="model_id" ref="stock.model_stock_picking"/>
        <field name="trigger">on_create_or_write</field>
        <field name="filter_domain">[('state', '=', 'done')]</field>
        <field name="action_server_ids" eval="[(4, ref('action_create_invoice_on_purchase_done'))]"/>
    </record>

</odoo>
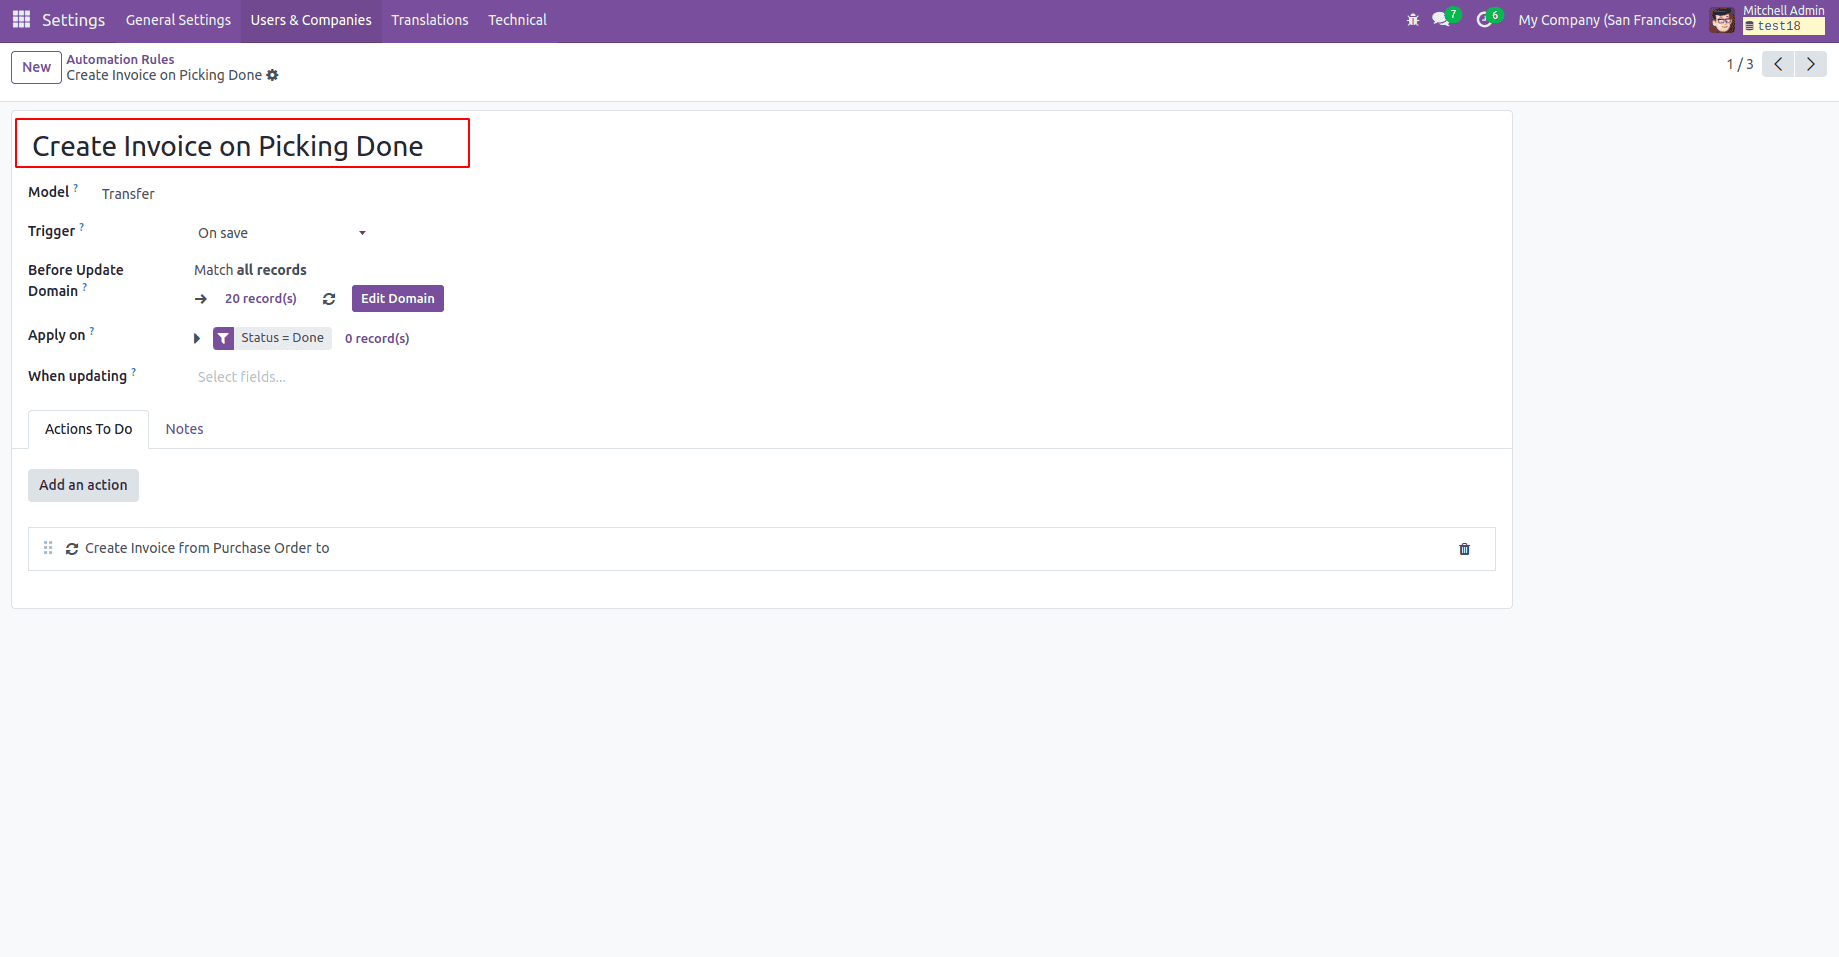
After installing the custom module containing this functionality, an automated action will be created, as illustrated in the figure.
Automated Actions in Odoo 18 provide a fantastic opportunity for businesses to work more efficiently by automating routine tasks and simplifying workflows. By setting up specific triggers and actions, users can save time and reduce the chances of making mistakes. Odoo's use of Server Actions and XML configurations allows for tailored automation that meets each organization’s unique needs. This means that teams can focus on what really matters, driving growth and innovation rather than getting bogged down by repetitive tasks. Overall, these features help businesses operate more smoothly and effectively.
To read more about Automated Actions in Odoo 17, refer to our blog Automated Actions in Odoo 17.