In Odoo 16, a popular and powerful open-source ERP platform, users have the flexibility to customize and extend the functionality of their business applications. One such customization is the addition of new buttons to form views, which can provide quick access to frequently used actions or trigger specific processes.
Other than adding a new button to the list view or kanban view, buttons may occasionally need to be added inside the form view header. In this blog, we'll discuss how to add new buttons near the ‘Create’ button in all form views.
In the static/src/xml directory, an xml file must first be created. (eg:static/src/xml/form_button.xml) and you can add the code below.
form_button.xml
<templates xml:space="preserve">
   <t t-inherit="web.FormView" t-inherit-mode="extension">
       <xpath expr="//button[contains(@class, 'o_form_button_create')]"             position="before">
           <button type="button" class="btn btn-primary history_btn" id="history_btn"
               t-on-click="buttonClicked">
               <span>NEW BUTTON</span>
           </button>
       </xpath>
   </t></templates>
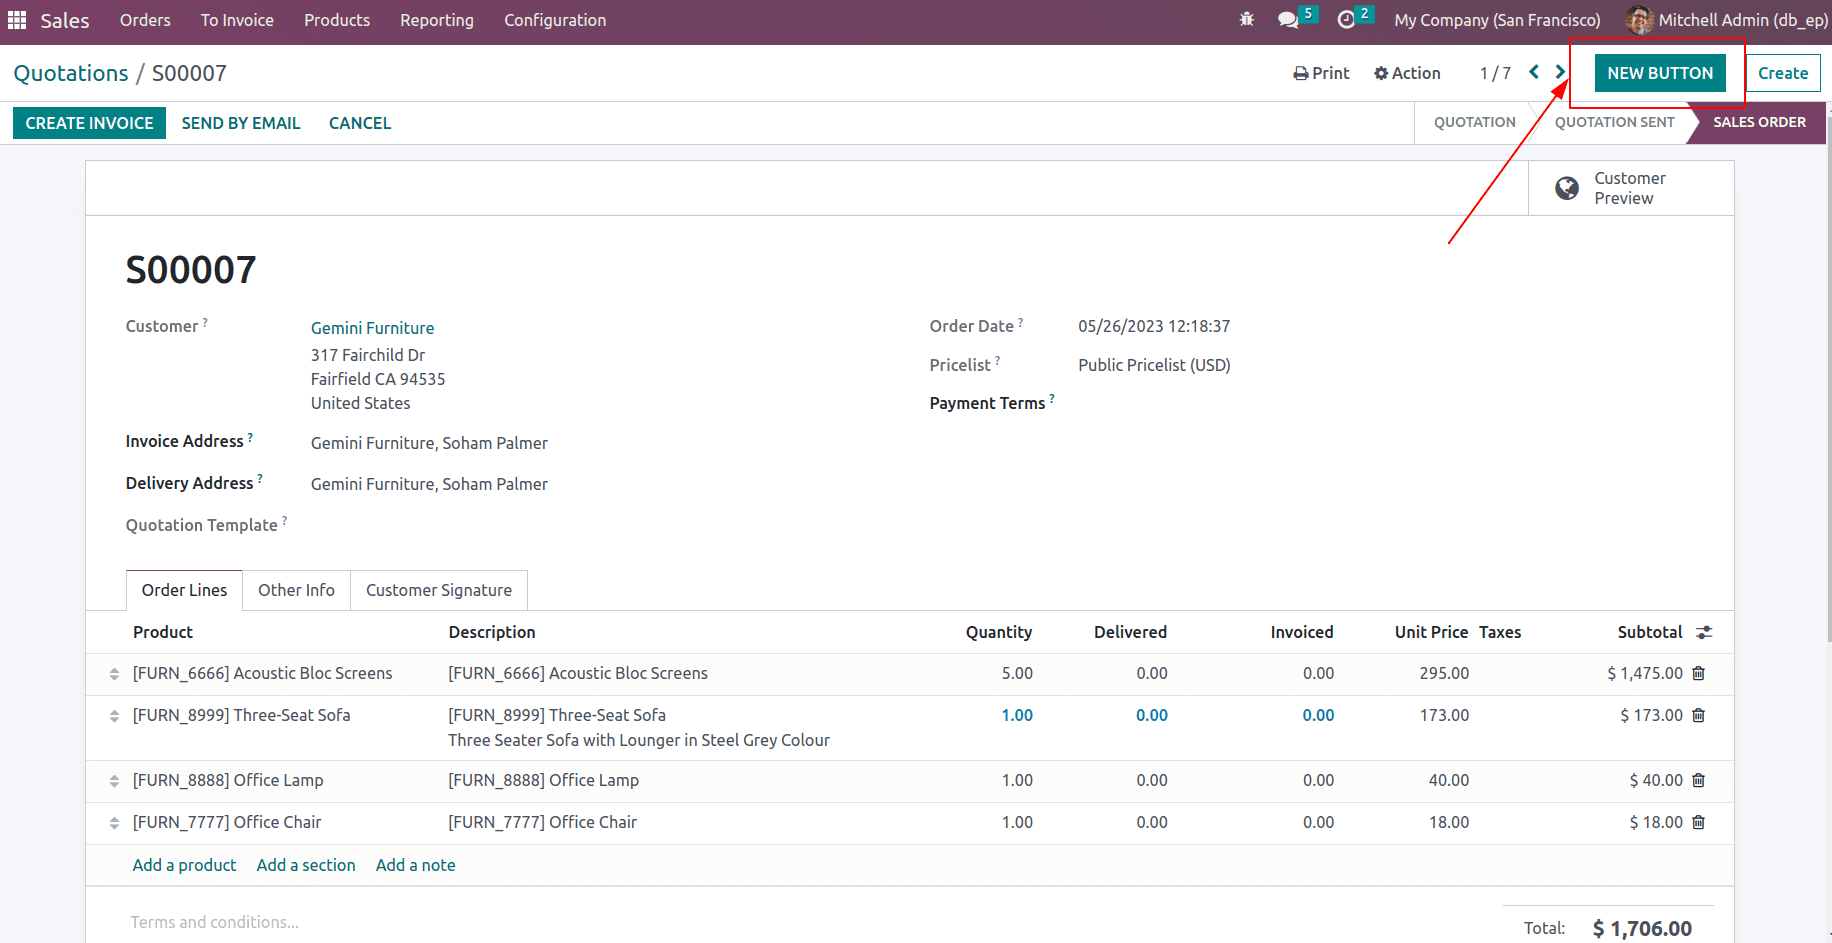
In this case, we extend the "web.FormView" template by inheriting it and utilizing the t-inherit-mode="extension" tag. The xpath expression adds our new button before the button element with class 'o_form_button_create', which is the 'CREATE' button in the form view. This new button will be added to all form views. Inside the <button> element, there is a <span> element with the text ‘NEW BUTTON’ that will be displayed as the button's label.

As seen in the above image, a new button has been added close to the 'CREATE' button on the form view of a quotation. It will be inserted in the same manner as all form views.
Now, to give an action to the button, <button> element has a ‘t-on-click’ attribute with the value ‘buttonClicked’ which is a JavaScript function that will be called when the button is clicked. So you need to create a JS file inside static/src/js directory(eg :static/src/js/form_button.js)
form_button.js
After creating the JS file, you can add the following code.
/** @odoo-module **/
import { patch } from "@web/core/utils/patch";
import { FormController } from "@web/views/form/form_controller";
import { useService } from "@web/core/utils/hooks";
patch(FormController.prototype, "sale_order", {
       setup(){
          this._super.apply();
          this.action = useService("action")
       },
       buttonClicked(){
           this.action.doAction({
               type: 'ir.actions.act_window',
               name: 'All Sale Orders',
               view_mode: 'form',
               views:[[false,"list"]],
               res_model: 'sale.order',
               target: 'new',
               context: "{'create' : False}",
           })
       }
});
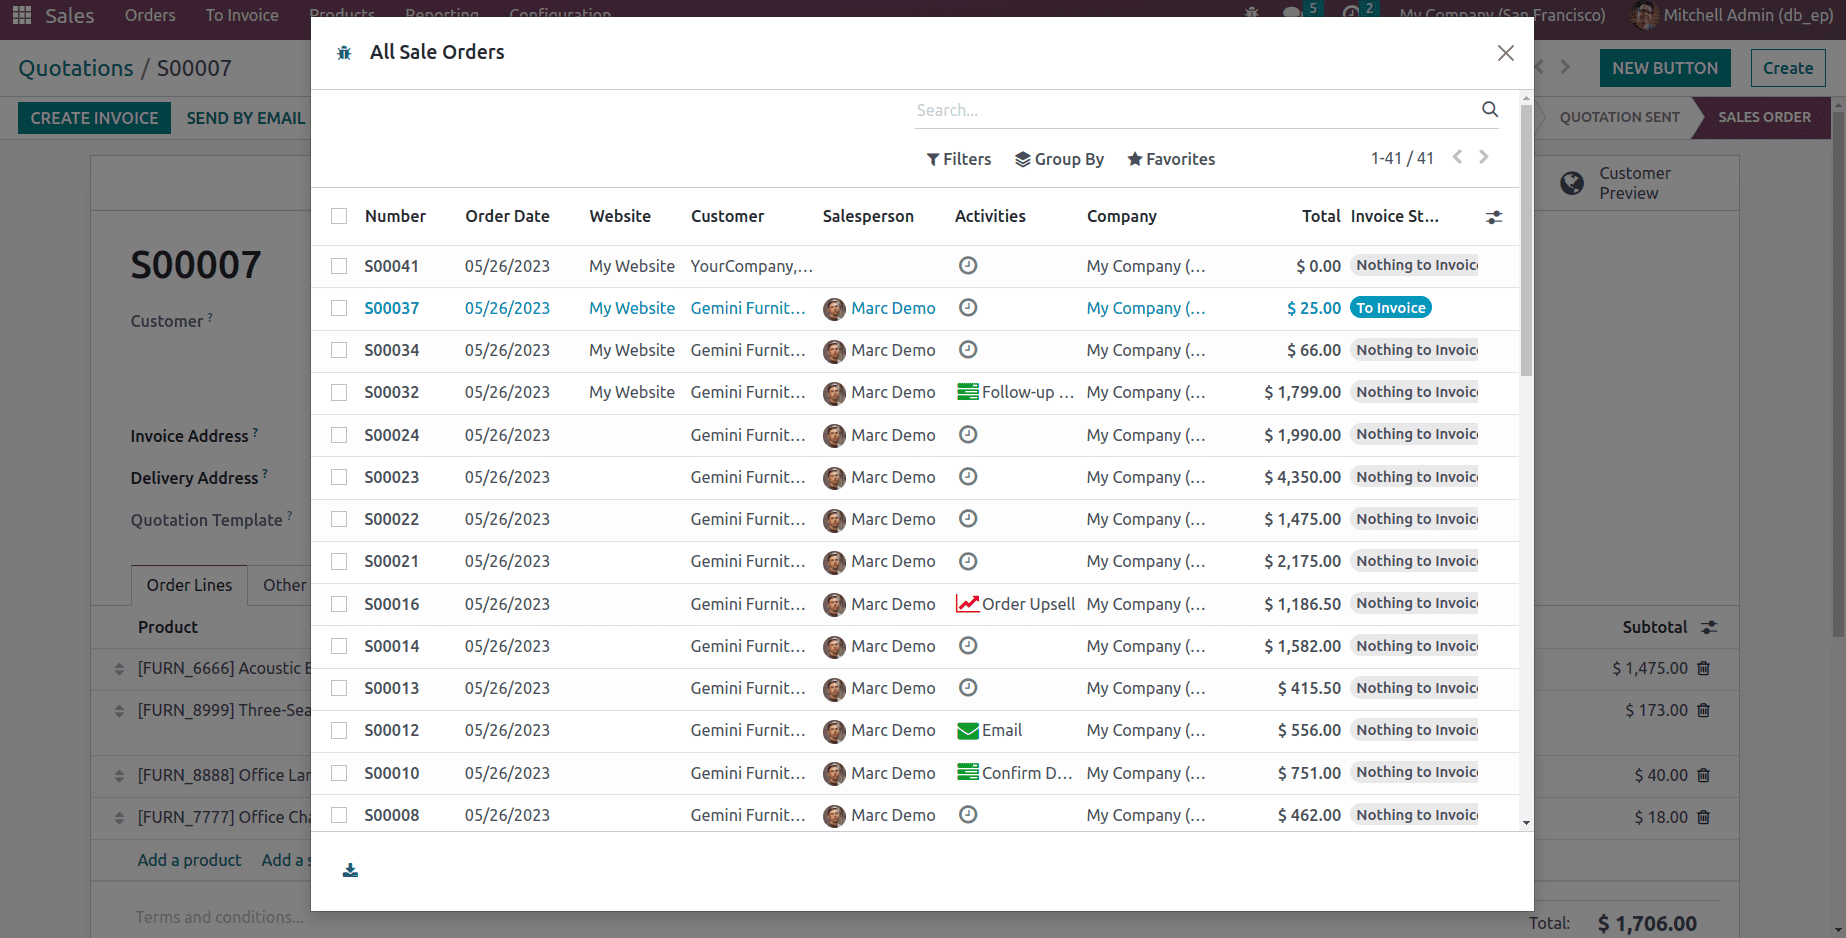
Here, the action being performed is to open a new form view of the sale.order model. It uses the patch function to extend the behavior of the FormController class. The patch function is used to extend the FormController object. Inside the setup method, this._super.apply() is called to execute the original setup method of the FormController class. The action service is retrieved using the useService function from @web/core/utils/hooks. Inside the buttonClicked method, the action.doAction function is called to perform the action. The ir.actions.act_window type indicates that a new window should be opened. The name property sets the name of the window to “All Sale Orders.” The view_mode property specifies that the view should be displayed in “form” mode. The res_model property sets the model for the view as sale.order.
As seen in the figure below, when the button is clicked, a new window displaying the entire sale order opens. Similarly, depending on your needs, you can specify various actions for button clicks. The target property specifies that the view should be opened in a new window. The context property sets the context for the view. In this case, it sets the create context variable to False.
