Odoo 16 Website Module is a unique ERP platform for creating and managing Websites, E-commerce websites, forums, and other types of online pages. Since the platform's highly flexible and user-friendly interface features allow users to develop useful and appealing websites without requiring any coding techniques.
The website has a special area for creating and managing e-commerce sites, pages, and properties using the integrational features of the Odoo E-Commerce application. The e-commerce integration features make it easier to build shopping pages and sell different items via website pages. In this blog, we are going to discover the new feature set available for the User Wishlist, Buy Now Button, and the Add to Cart option available on the Odoo e-commerce platform.to check this, open the Website Module from the Odoo 16 Package.
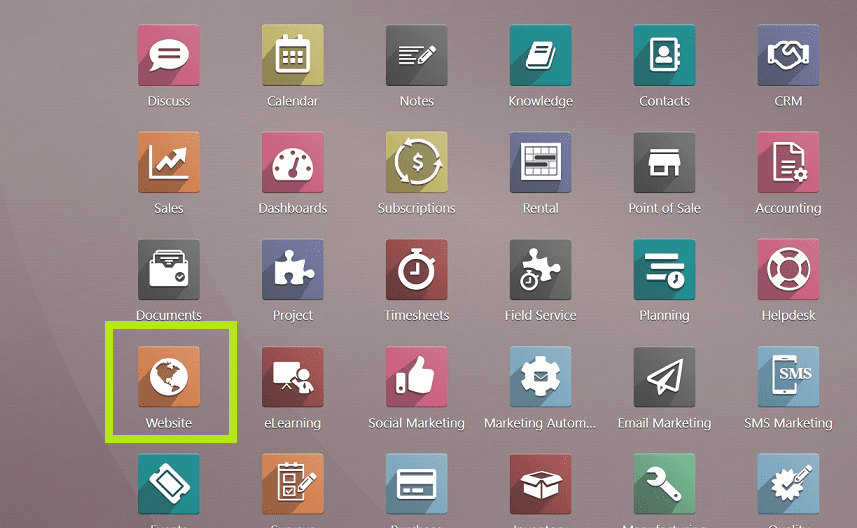
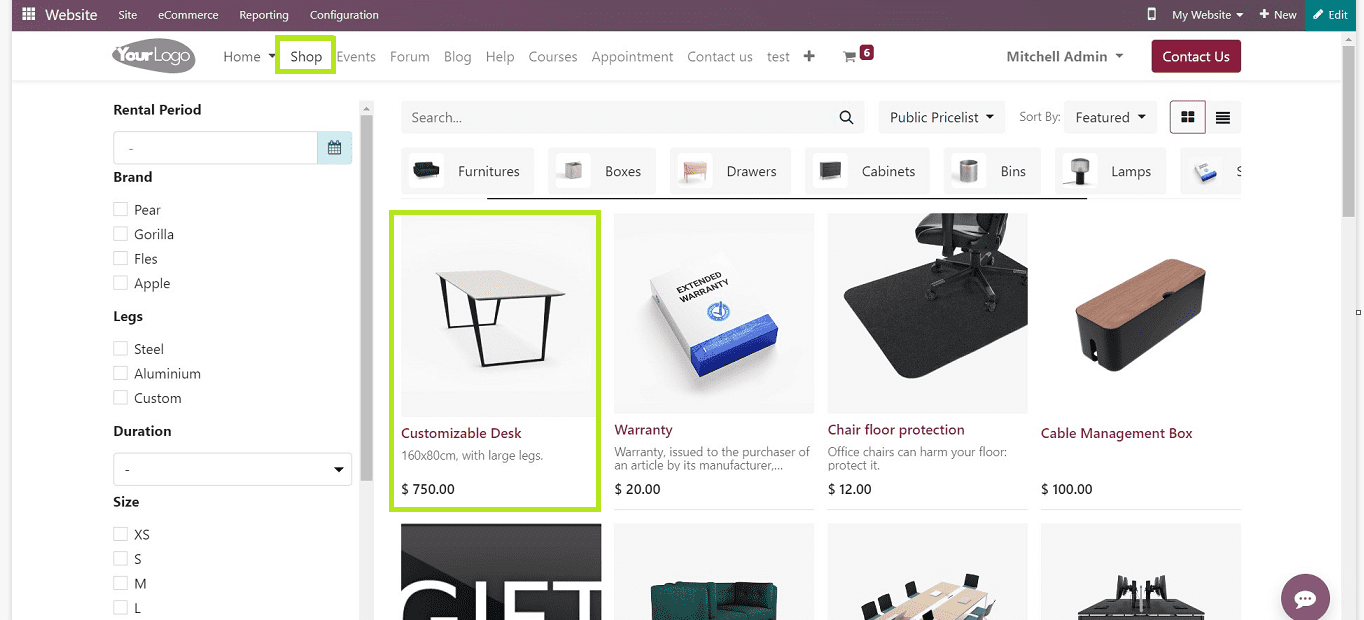
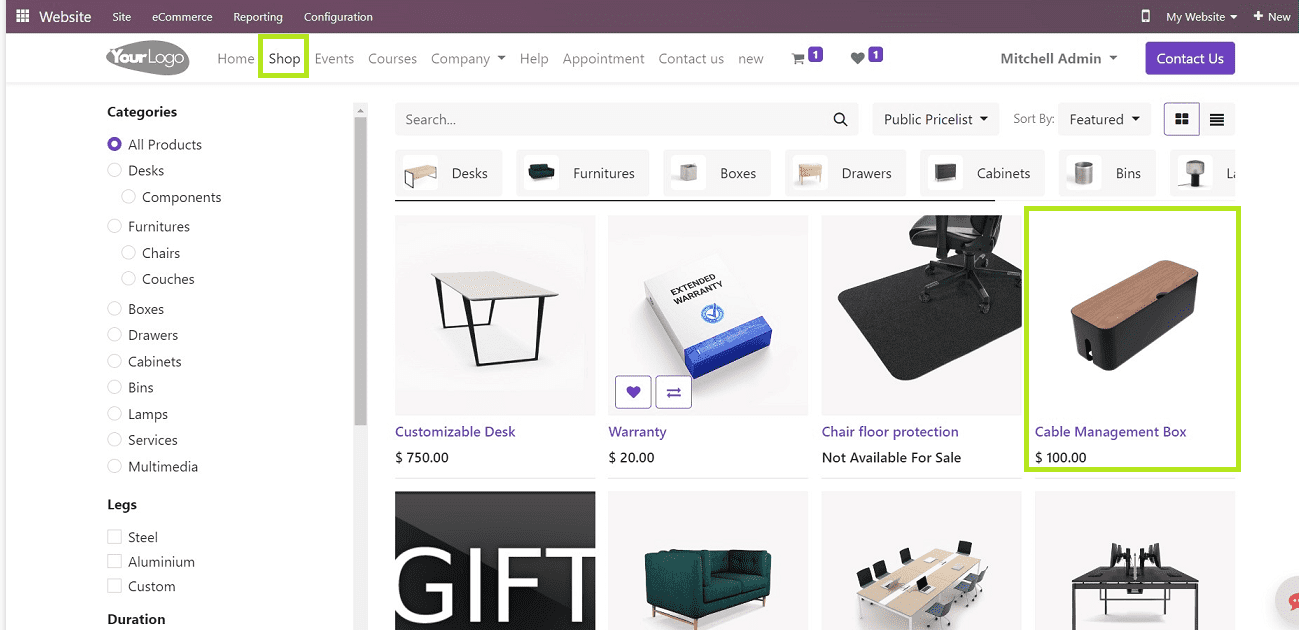
Now you can see the shopping page by selecting the” Shop” menu from the Website homepage.
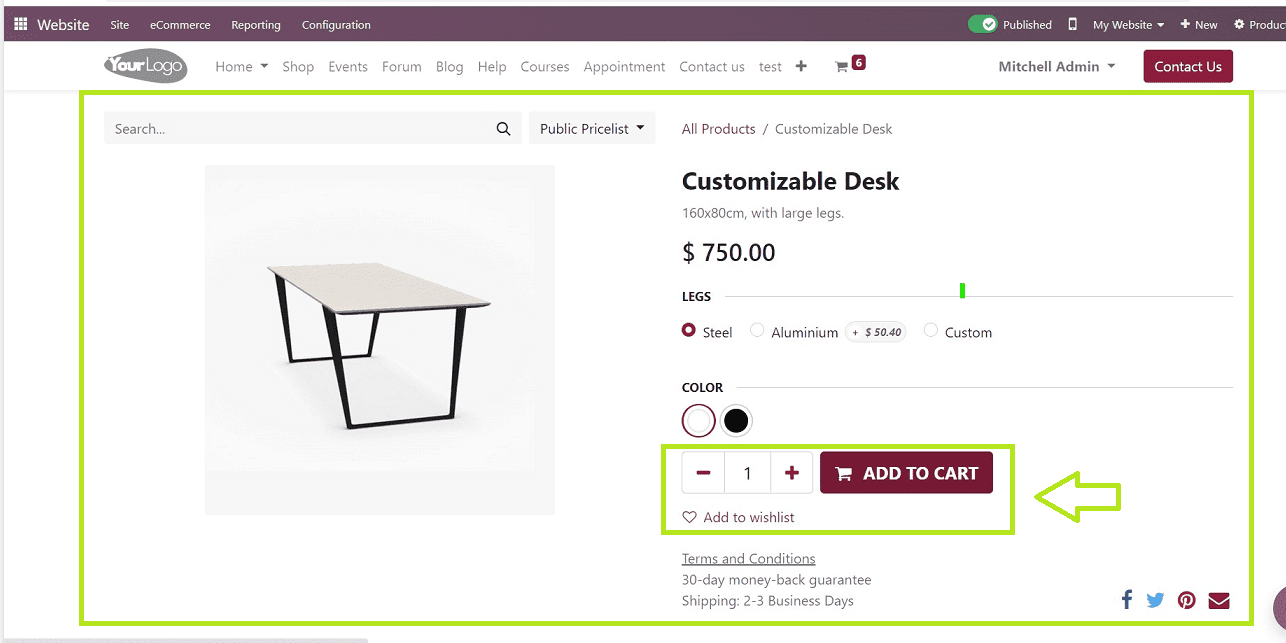
Clicking on a particular product will open the product details, “Add to Cart” button, and “Add to Wishlist” button, as illustrated in the screenshot below.
We can now go into more depth about the additional features that are available for each of the functions.
Configuring the “Wishlist” and its Features
You can configure the “Wishlist” features from the “Settings” section of the “Configuration” menu.
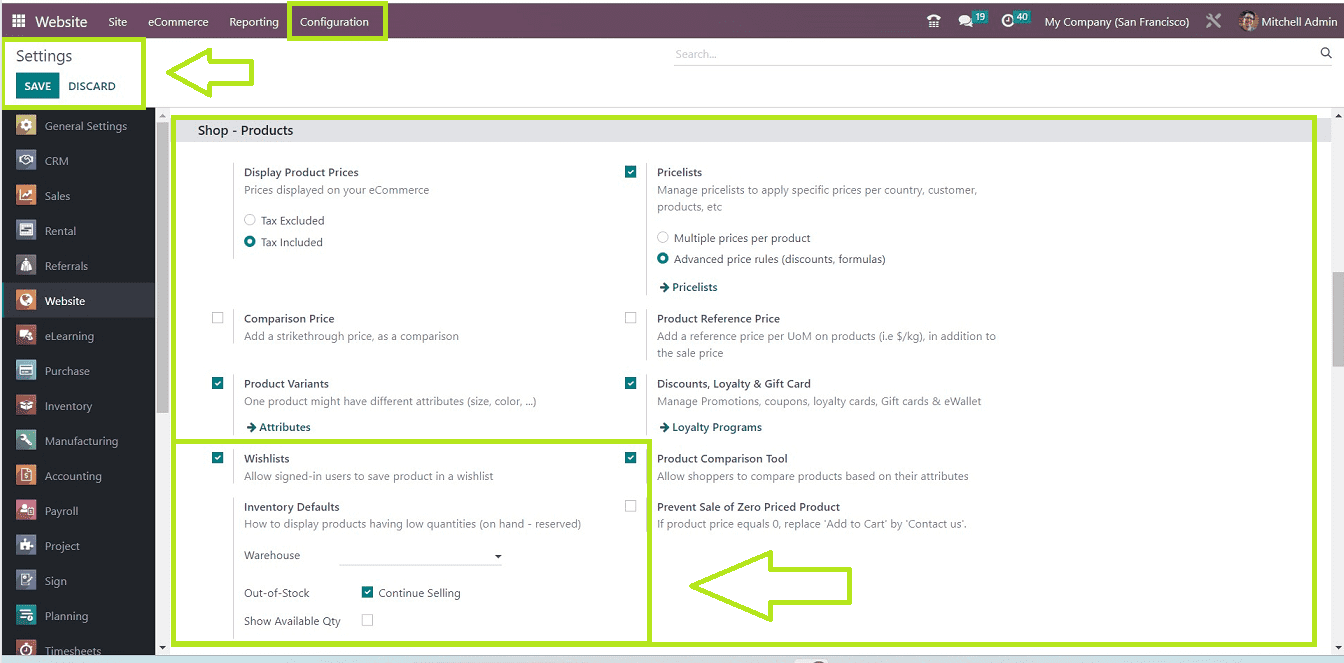
The “Settings” page contains various settings tab sections such as Website Info, Shop-Payment, Shop Checkout Process, Shop-Products, etc. To configure the Wishlist settings, go to the “Shop-Products” tab section, as shown in the above screenshot. Select the “Wishlists” option to permit users who are logged in to save items to a wishlist. The “Inventory Defaults” area helps to configure how to present items with limited supply (in stock - reserved) users can select the current warehouse in the “Warehouse” field. You can also display the available Quantity if the products are in less quantity or continue the shopping process by choosing the “Out Of -Stock” and “Show available Qty” options. While choosing the “Show available Qty” option, you can set the number of items left in the respective area. Save your details once the configuration has been completed.
Add To Wishlist Button
You can check the shopping site after configuring the wishlist function. You can see the wishlist icon denoted by a heart symbol on the product card, as illustrated in the screenshot below.
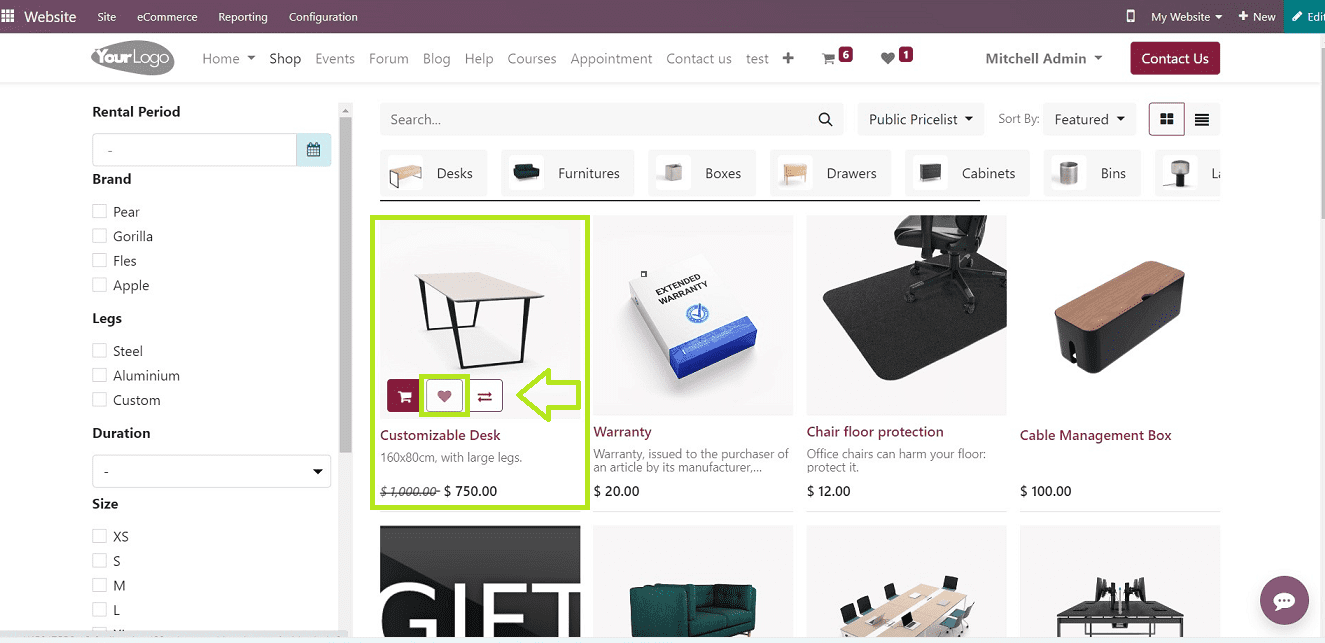
When you click the wishlist button, you will be sent to the "My Wishlist" page, where you may click the "Add to Cart" button to add the item to your shopping basket. Users can carry on shopping while keeping the item on the "wishlist" page when the "Add product to my cart but keep it in my wishlist" option has been configured.

Configuring the “Buy Now” button and its functionality
You can enable the “Buy Now” button from the “Settings” option of the “Configuration” menu.
Go to the “Shop-Checkout” tab of the “Settings” menu.
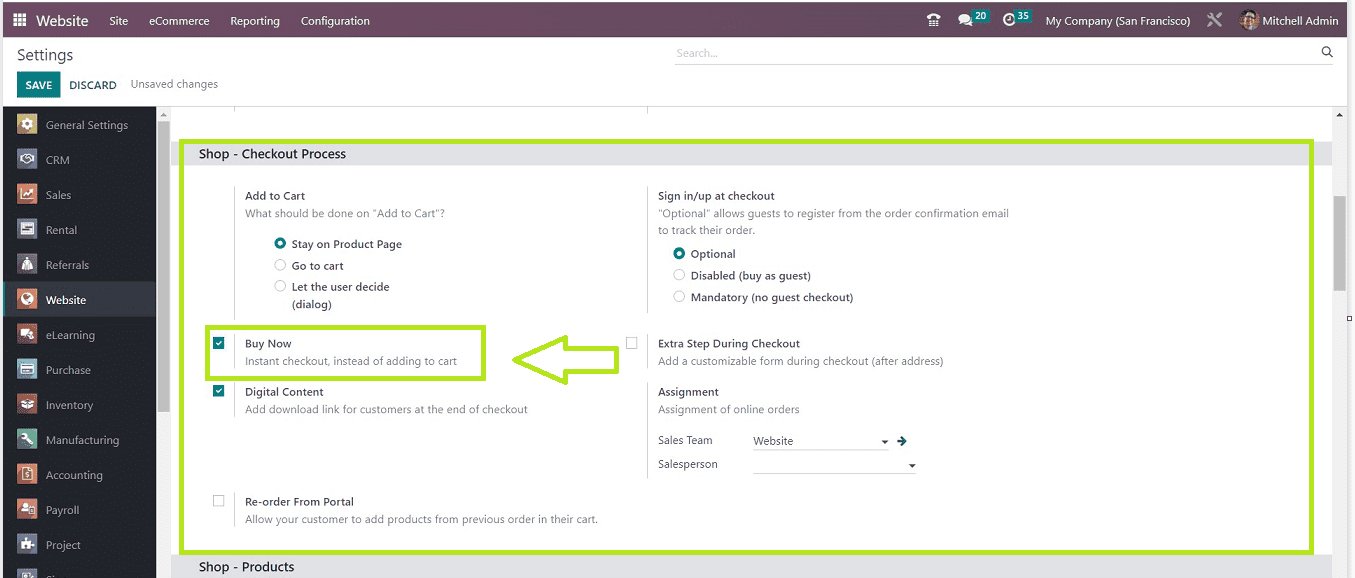
After configuring the “Buy Now” button, we can start using the button while shopping through the website. Users can purchase their preferred goods rapidly by sending them to the Checkout page.
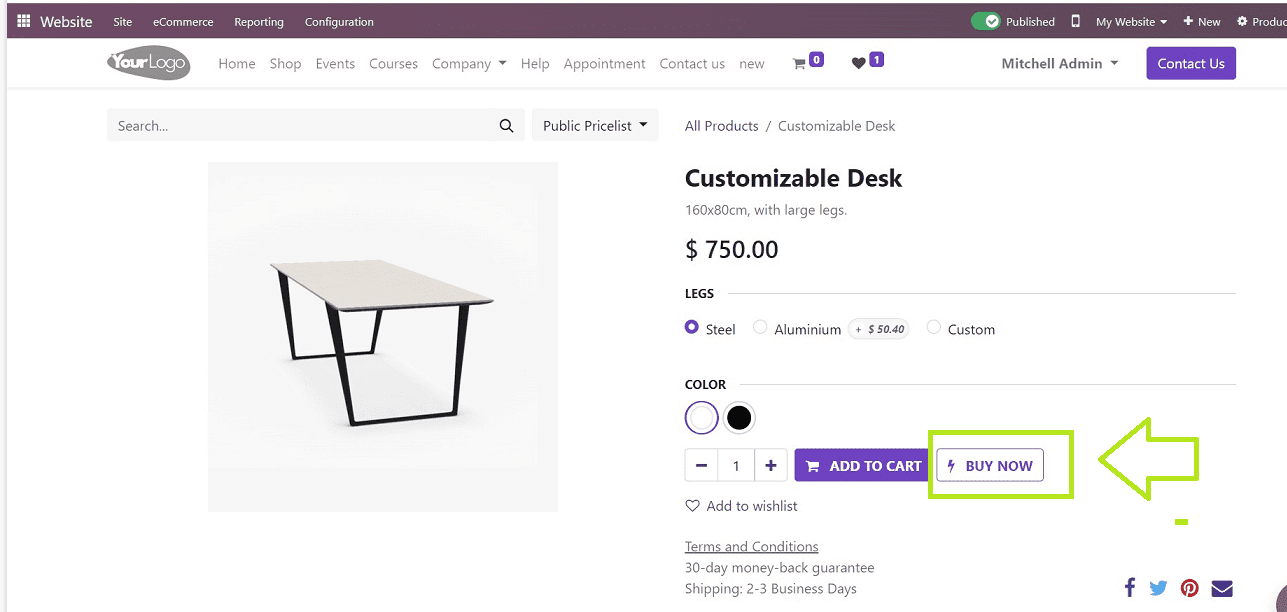
You can do the checkout procedures immediately after clicking the button without going to the review order section.
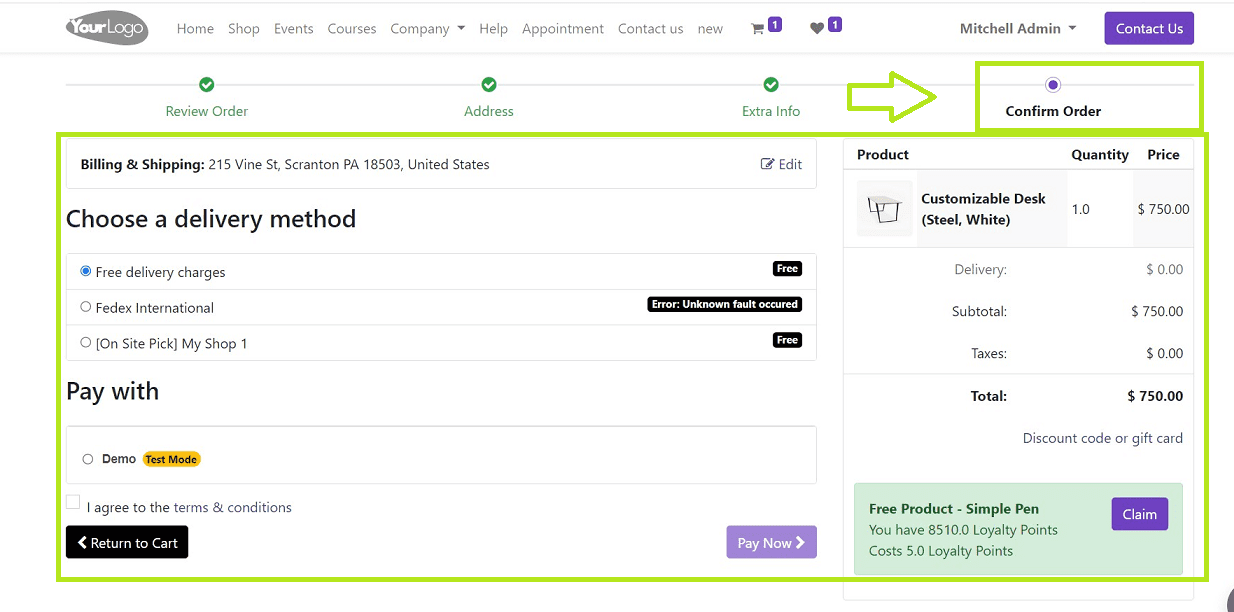
Add To Cart Features
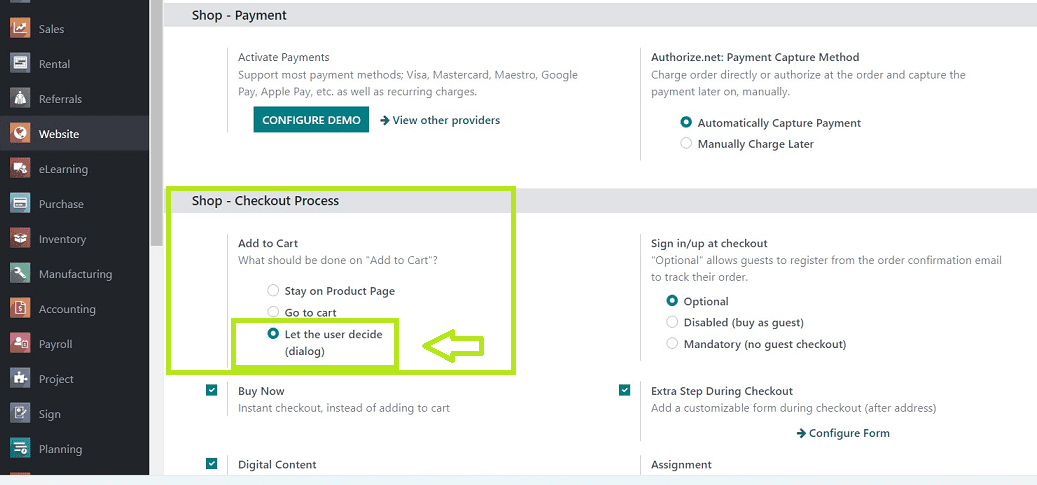
We can configure the “Add to Cart” features from the “Configuration” menu’s “Shop-Checkout Process” settings tab.
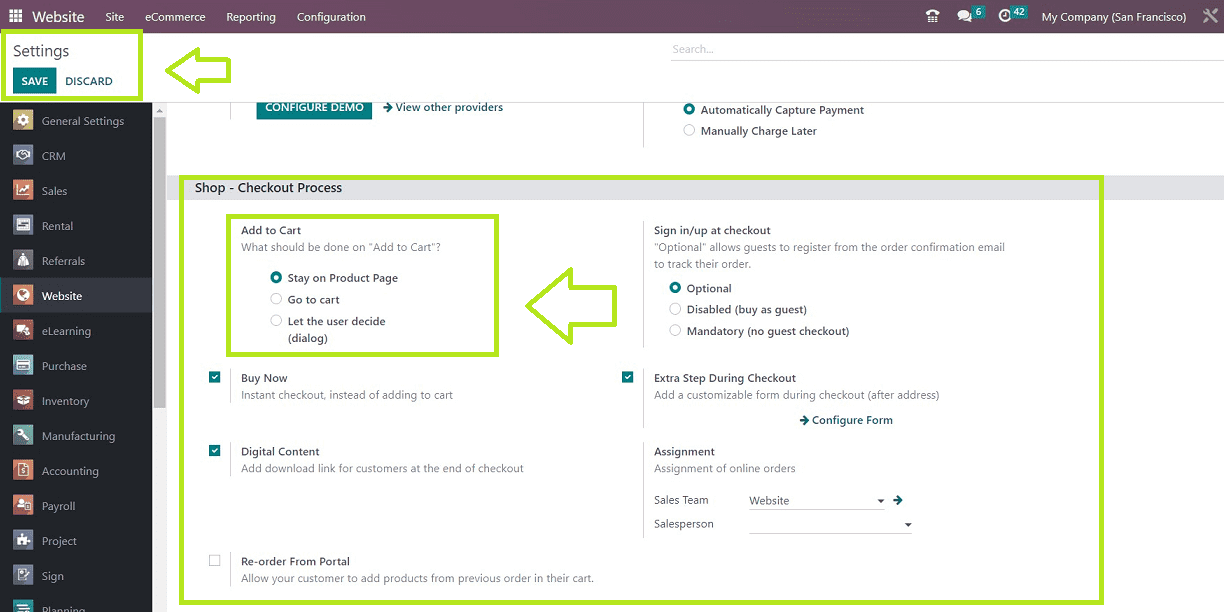
There are three possible approaches to using the "Add to Cart" feature: stay on the product page, add to cart, or let the user decide.
We can look into these three possibilities by doing some product shopping. First, use the "Shop" menu to choose a product from the website's home page.
To demonstrate the scenarios, we can shop for a "Cable Management Box" product from the “Shop” page. In order to access the shopping basket, click on the specific product, as illustrated in the image below.
Stay On the Products Page Option
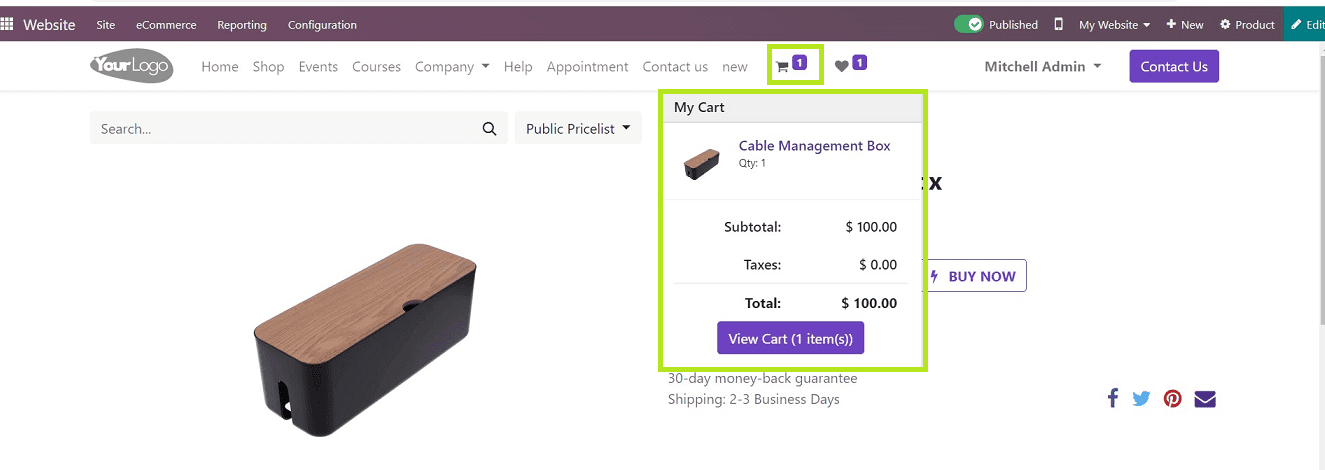
Imagine the buyer shops for an item after setting this option while making an online purchase. The item will be added to your shopping cart once you click the "Add to Cart" button, but you will remain on the product page. we can check it from the cart icon available in the website menu, as seen in the screenshot below.

Users are able to add multiple products to their cart using this method. Also, we can quickly check the cart details from the flash window available near the cart icon.
GoTo Cart Option
You can configure this settings option from the “Shop-Checkout Process” tab, as shown below.
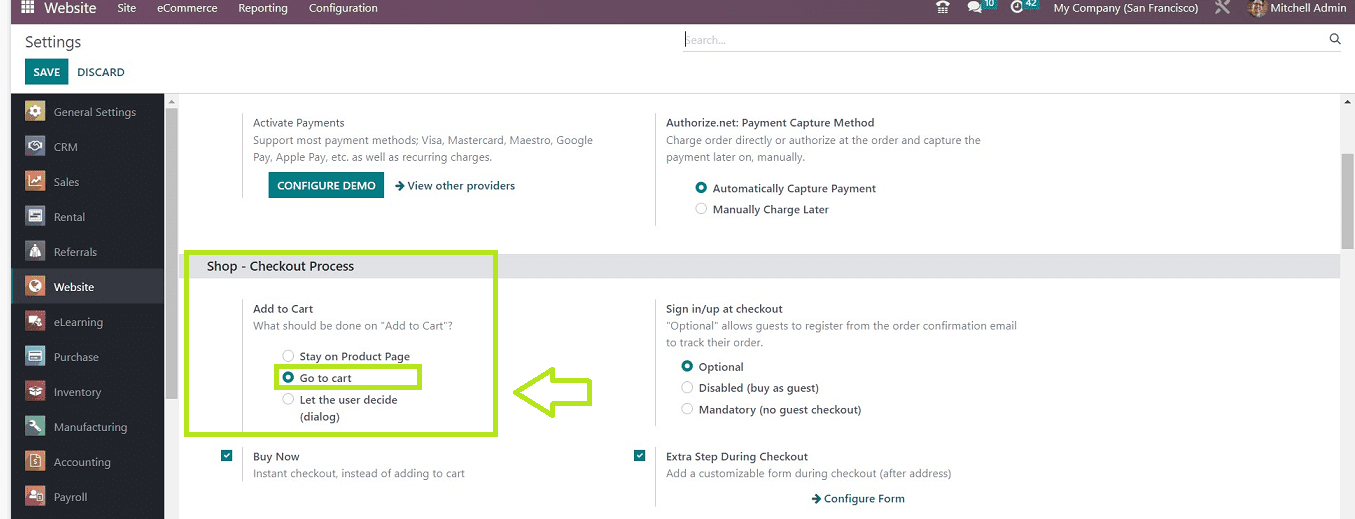
After selecting the “ Go To Cart” option, come back to the shopping page, select the product, and click the” Add to Cart” button.

The "Add to Cart" button during the shopping process will immediately take the user to the cart page seen in the picture below.
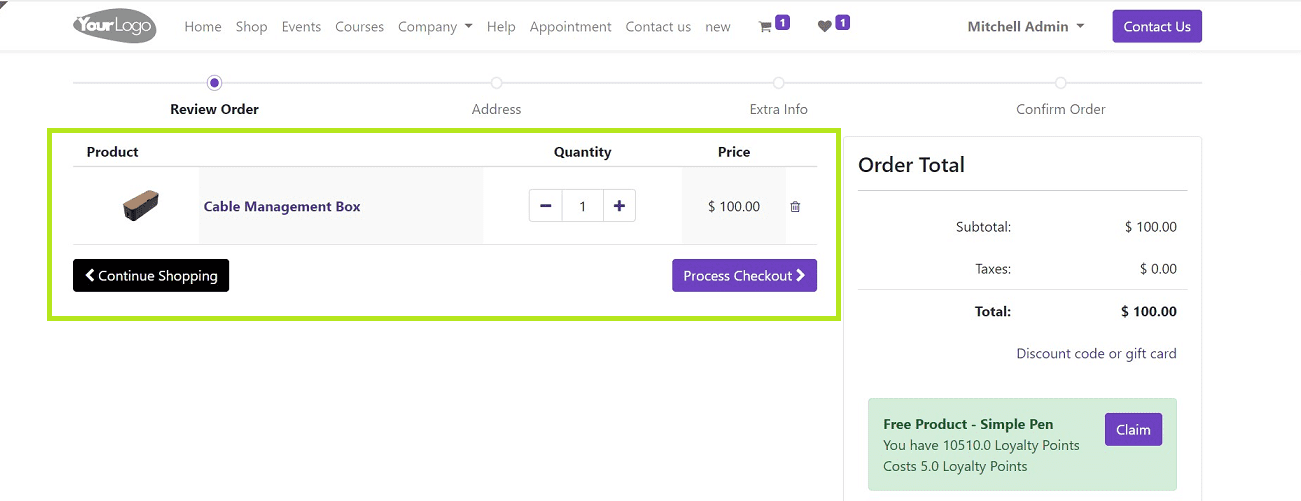
You can proceed with the shopping by using the “Continue Shopping” button or go to the next payment procedure by using the Process Checkout” button depicted in the screenshot above.
Let the user decide
Change your “Add to Cart” option from the configuration settings page to the “Let the user decide” option.
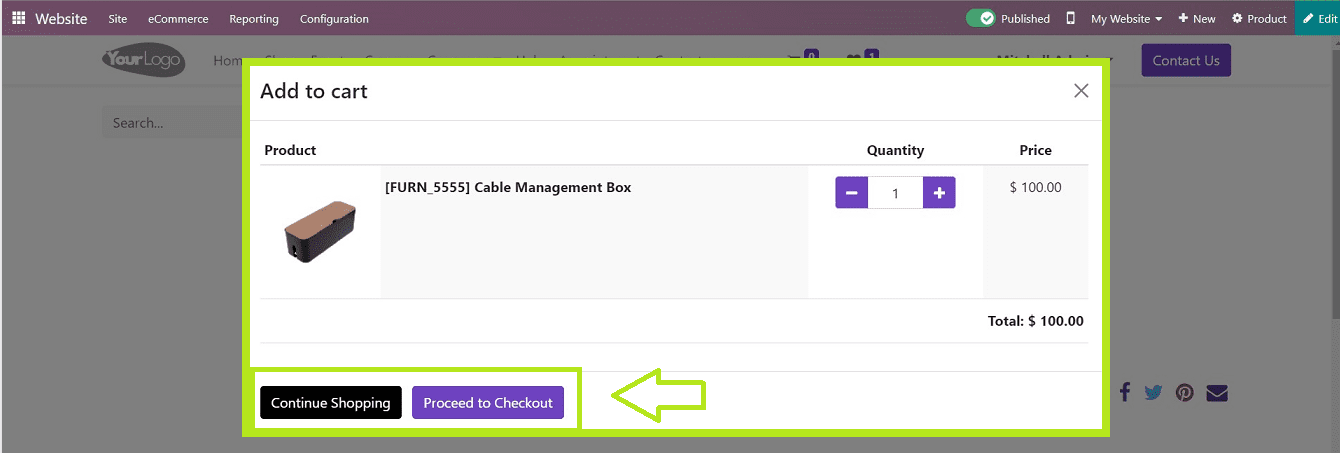
After clicking the "Add to Cart" button during a shopping process, a dialogue box will be displayed with two options: “Continue Shopping” and “Proceed to Checkout.” By selecting the necessary button shown in the below screenshot, users can choose whether to return to the shopping page or carry on with the payment procedure.
This blog post provided an extensive comprehension of the functions of the User Wishlist, Buy Now button, and Add to Cart sections found in the Shopping part of the Odoo 16 Website Module. Users can modify the settings of their websites in accordance with the many possibilities offered by the Odoo platform.