In the case of Odoo POS, we can use it more easily and with friendliness. It helps to run the app in the browser, and we can work in offline cases. In POS, Odoo 16 works with OWL concepts, and JavaScript codes use OWL concepts. It plays an important role in ensuring user-friendly interfaces for ERP. The Odoo 16 version uses a web library called Odoo Web Library (OWL). To add a button in POS, we use the OWL framework, and we need to create a new module in a custom folder.
Here, we'll talk about adding buttons to three separate POS locations. Namely the product screen. Systray and payment screen.
Added JS files and XML files to the src folder. The manifest.py
'assets': {
    	'point_of_sale.assets': [
        	'module_name/static/src/js/filename.js',
        	'module_name/static/src/xml/filename.xml',
    	],
	},
This is the method of how to add The XML and JS files in the manifest files, the XML and js files contained in the point_of_sale. Assets, In the case of odoo 15, we can add web-based content(XML files) in the web.assets_qweb assets.
Let’s see how this works.
Let us create a Clear All button on the screen, we can add a JS and XML file using the OWL Concept.
To add a button to the Product Screen, you have to add the code below into a created XML file in static > src > XML.
<?xml version="1.0" encoding="UTF-8"?>
<templates id="template" xml:space="preserve">
  <t t-name="CustomDemoButtons" owl="1">
      <div class="control-button" style="color:red">
          <i class="fa fa-eraser"> </i>
          <span> </span>
          <span>Click me</span>
      </div>
  </t>
</templates>
The JS file must be added after the button. Additionally, we must specify the module and necessary screens in the JS file by using odoo.define to define the module.
odoo.define('pos_delete_orderline.Custom', function(require) {
'use strict';
  const { Gui } = require('point_of_sale.Gui');
  const PosComponent = require('point_of_sale.PosComponent');
  const { identifyError } = require('point_of_sale.utils');
  const ProductScreen = require('point_of_sale.ProductScreen');
  const { useListener } = require("@web/core/utils/hooks");
  const Registries = require('point_of_sale.Registries');
  const PaymentScreen = require('point_of_sale.PaymentScreen');
Above mentioned code is the required screen to add a button to the Product Screen.
The full code is shown below:
odoo.define('pos_button.Custom', function(require) {
'use strict';
  const { Gui } = require('point_of_sale.Gui');
  const PosComponent = require('point_of_sale.PosComponent');
  const { identifyError } = require('point_of_sale.utils');
  const ProductScreen = require('point_of_sale.ProductScreen');
  const { useListener } = require("@web/core/utils/hooks");
  const Registries = require('point_of_sale.Registries');
  const PaymentScreen = require('point_of_sale.PaymentScreen');
  class CustomDemoButtons extends PosComponent {
      setup() {
          super.setup();
          useListener('click', this.onClick);
      }
     async onClick() {
               const { confirmed} = await
this.showPopup("ConfirmPopup", {
                      title: this.env._t('Title of the Popup?'),
                      body: this.env._t('Body of the popup'),
                  });
                 }
  }
CustomDemoButtons.template = 'CustomDemoButtons';
  ProductScreen.addControlButton({
      component: CustomDemoButtons,
      condition: function() {
          return this.env.pos;
      },
  });
  Registries.Component.add(CustomDemoButtons);
  return CustomDemoButtons;
});
In order to extend the product screen, we added a class called CustomDemoButtons and a function called onClick to the code above (). The button prompts a pop-up error notice when we click it.
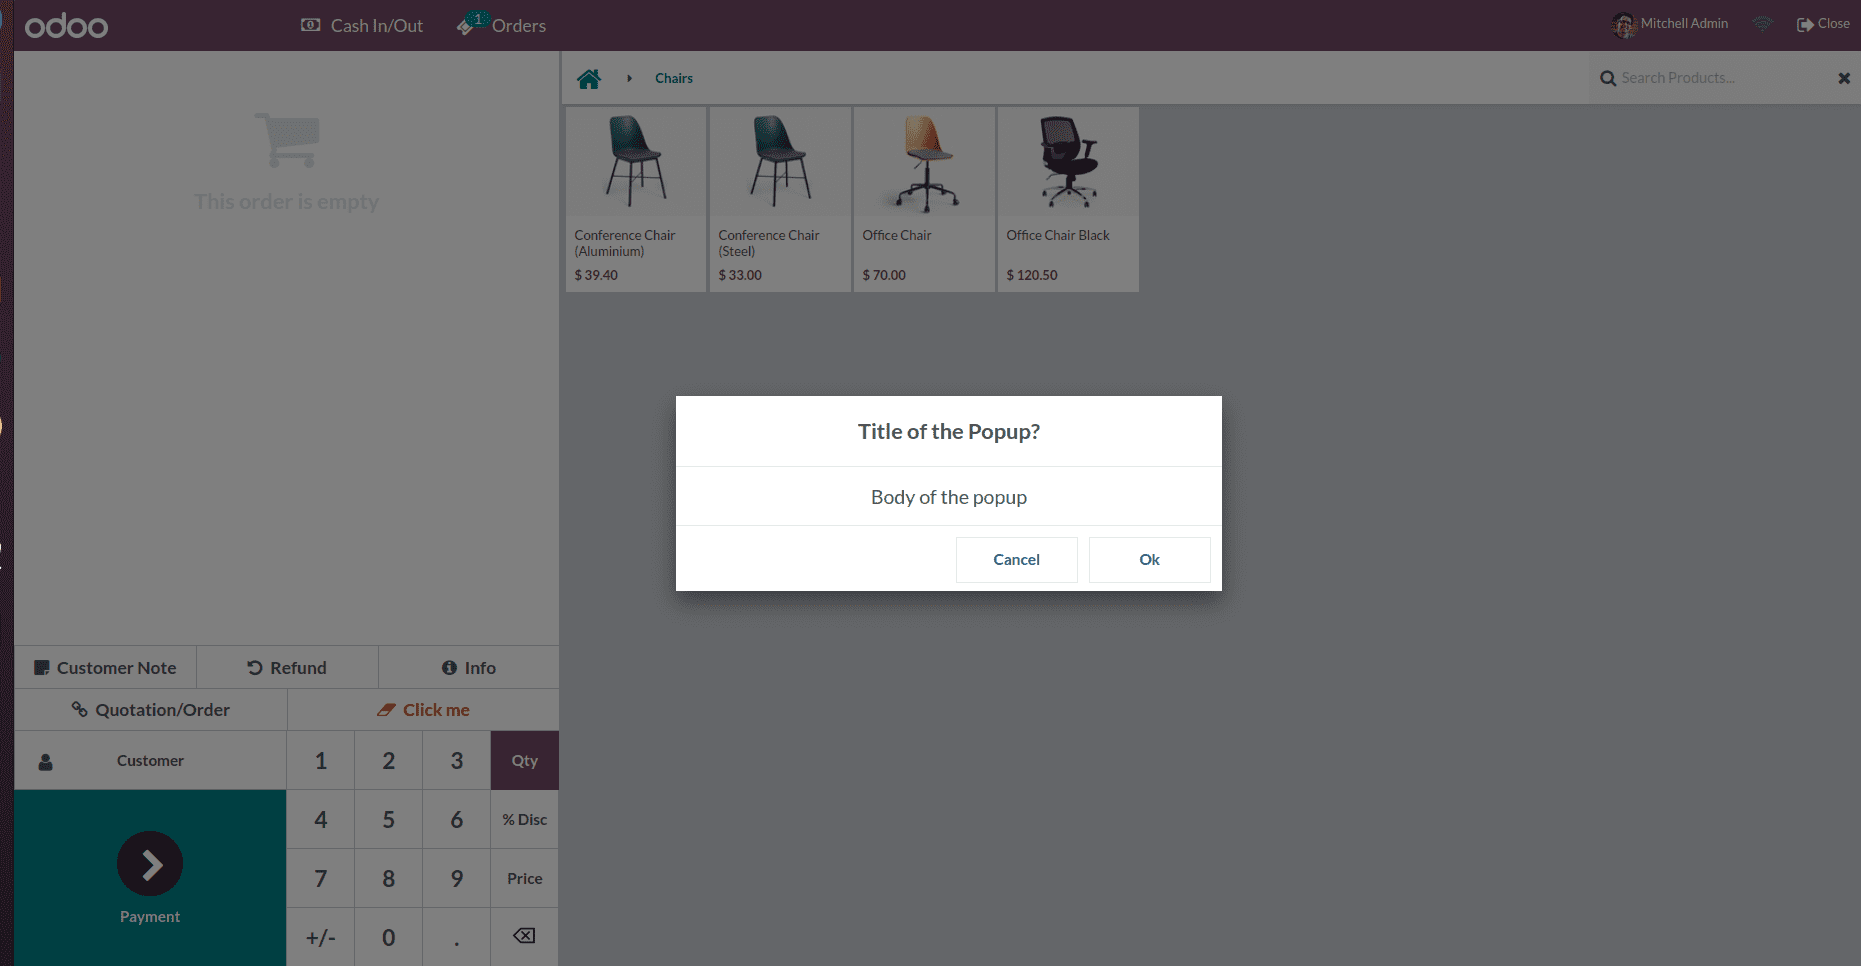
The onClick() function can be modified to fit your reasoning.
The button is added to the product screen in the following line of code. It should function properly if you follow these instructions and add the files to the manifest file appropriately. The pop-up message and operation of the unique button we added to the POS are shown in the screenshot above.
Systray:
In this section, we'll discuss adding a button to the system tray. We've already inserted the button from the XML views. The button can be added to the systray using the template to inherit the Chrome point of sale.
XML:
<?xml version="1.0" encoding="UTF-8"?>
<templates id="template" xml:space="preserve">
	<t t-name="CustomDemoButtons" owl="1">
   	<div class="ticket-button" style="color:red">
       	<div class="with-badge" t-att-badge="count">
      		 <i class="fa fa-diamond" aria-hidden="true"/>
  		 </div>
  		 <div>Click me</div>
   	</div>
   </t>
    <t t-inherit="point_of_sale.Chrome" t-inherit-mode="extension">
  	 <xpath expr="//TicketButton" position="before">
      		 <CustomDemoButtons isTicketScreenShown="isTicketScreenShown"/>
  	 </xpath>
   	 <xpath expr="//TicketButton" position="after">
  		 <CustomDemoButtons isTicketScreenShown="isTicketScreenShown" t-if="env.isMobile"/>
  	 </xpath>
   </t>
</templates>
For example, in our situation, we must add "CustomDemoButtons," the button inherited prior to the ticket button screen, in order to add the specific buttons first. We do this by creating a button with the template and adding the template name in the inherited view.
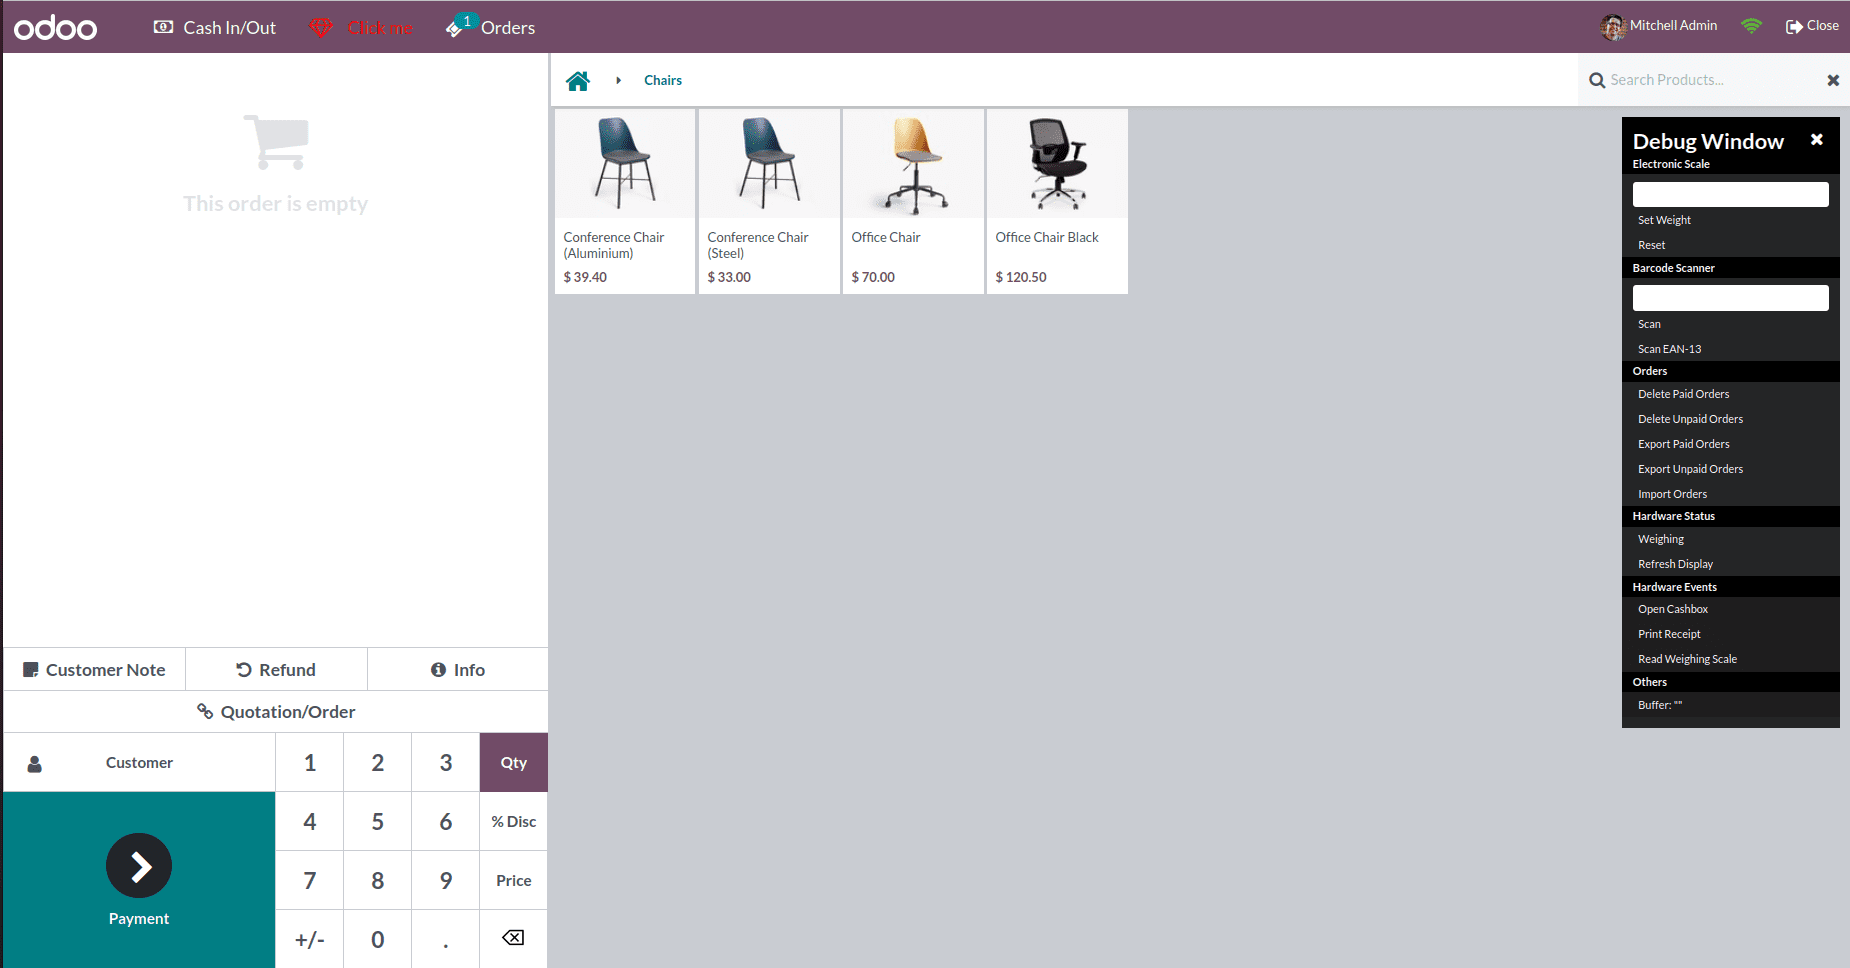
The button added in systray looks like the image below.
JS: In this CustomDemoButtons, we have declared the Chrome and extended the PosComponent
odoo.define('pos_button.CustomDemoButtons', function(require) {
'use strict';
  const { Gui } = require('point_of_sale.Gui');
  const PosComponent = require('point_of_sale.PosComponent');
  const { identifyError } = require('point_of_sale.utils');
  const ProductScreen = require('point_of_sale.ProductScreen');
  const { useListener } = require("@web/core/utils/hooks");
  const Registries = require('point_of_sale.Registries');
  const PaymentScreen = require('point_of_sale.PaymentScreen');
  const Chrome = require('point_of_sale.Chrome');
  class CustomDemoButtons extends PosComponent {
      setup() {
          super.setup();
          useListener('click', this.onClick);
      }
     async onClick() {
               const { confirmed} = await this.showPopup("ConfirmPopup", {
                      title: this.env._t('Title'),
                      body: this.env._t('Body of popup'),
                  });
      }
  }
  CustomDemoButtons.template = 'CustomDemoButtons';
  Registries.Component.add(CustomDemoButtons);
  return CustomDemoButtons;
});
When we are clicking the button, we can show a popup in the particular action

Payment Screen
XML
In the XML Template, we have to inherit the point_of_sale.PaymentScreen, after inheriting the template, we can add the buttons
<?xml version="1.0" encoding="UTF-8"?>
<templates id="template" xml:space="preserve">
  <t t-inherit="point_of_sale.PaymentScreen" t-inherit-mode="extension">
          <xpath expr="//div[hasclass('payment-controls')]" position="inside">
              <div>
                  <div id="my_button" class="button js_invoice"
                      t-on-click="IsCustomButton">
                      <i class="fa fa-spinner fa-spin"/> Click me
                  </div>
              </div>
          </xpath>
  </t>
</templates>
After creating the template we can see the button in the payment screen.
JS
odoo.define('pos_button.CustomButtonPaymentScreen', function(require) {
'use strict';
const { Gui } = require('point_of_sale.Gui');
const PosComponent = require('point_of_sale.PosComponent');
const { identifyError } = require('point_of_sale.utils');
const ProductScreen = require('point_of_sale.ProductScreen');
const { useListener } = require("@web/core/utils/hooks");
const Registries = require('point_of_sale.Registries');
const PaymentScreen = require('point_of_sale.PaymentScreen');
const Chrome = require('point_of_sale.Chrome');
const CustomButtonPaymentScreen = (PaymentScreen) =>
class extends PaymentScreen {
setup() {
super.setup();
useListener('click', this.IsCustomButton);
}
IsCustomButton() {
// click_invoice
Gui.showPopup("ConfirmPopup", {
title: this.env._t('Title'),
body: this.env._t('Welcome to OWL(body of popup)'),
});
}
};
Registries.Component.extend(PaymentScreen, CustomButtonPaymentScreen);
return CustomButtonPaymentScreen;
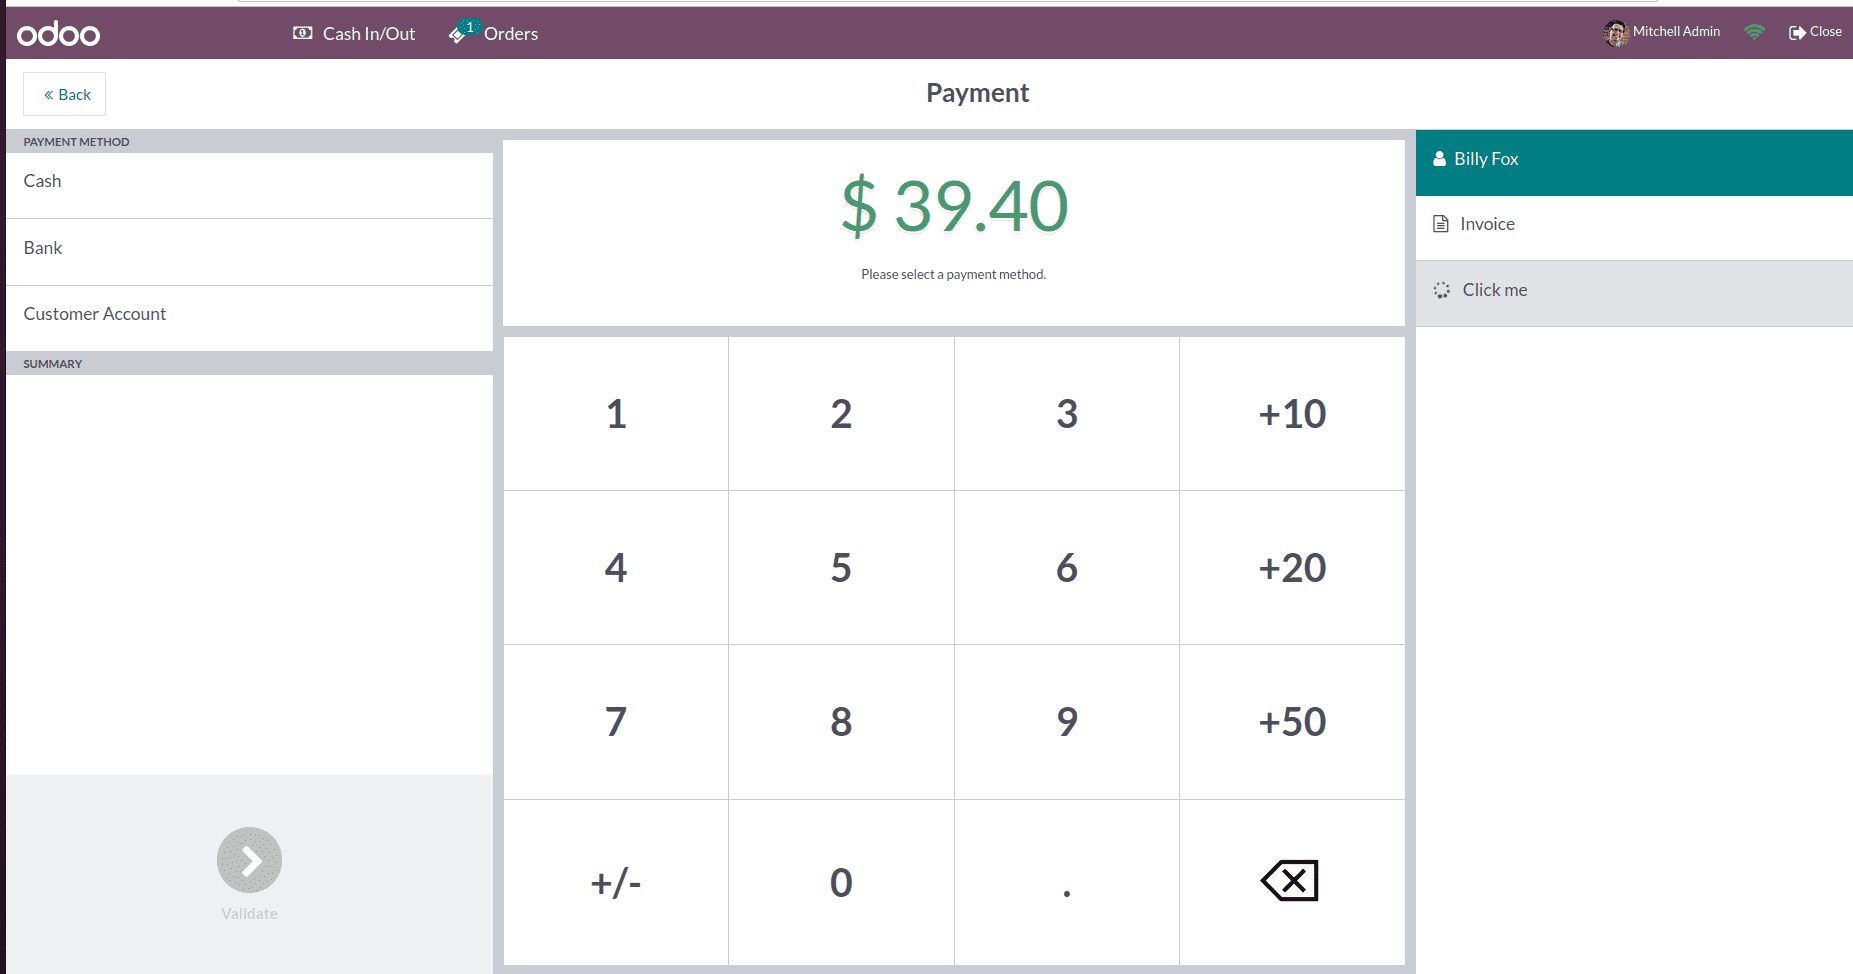
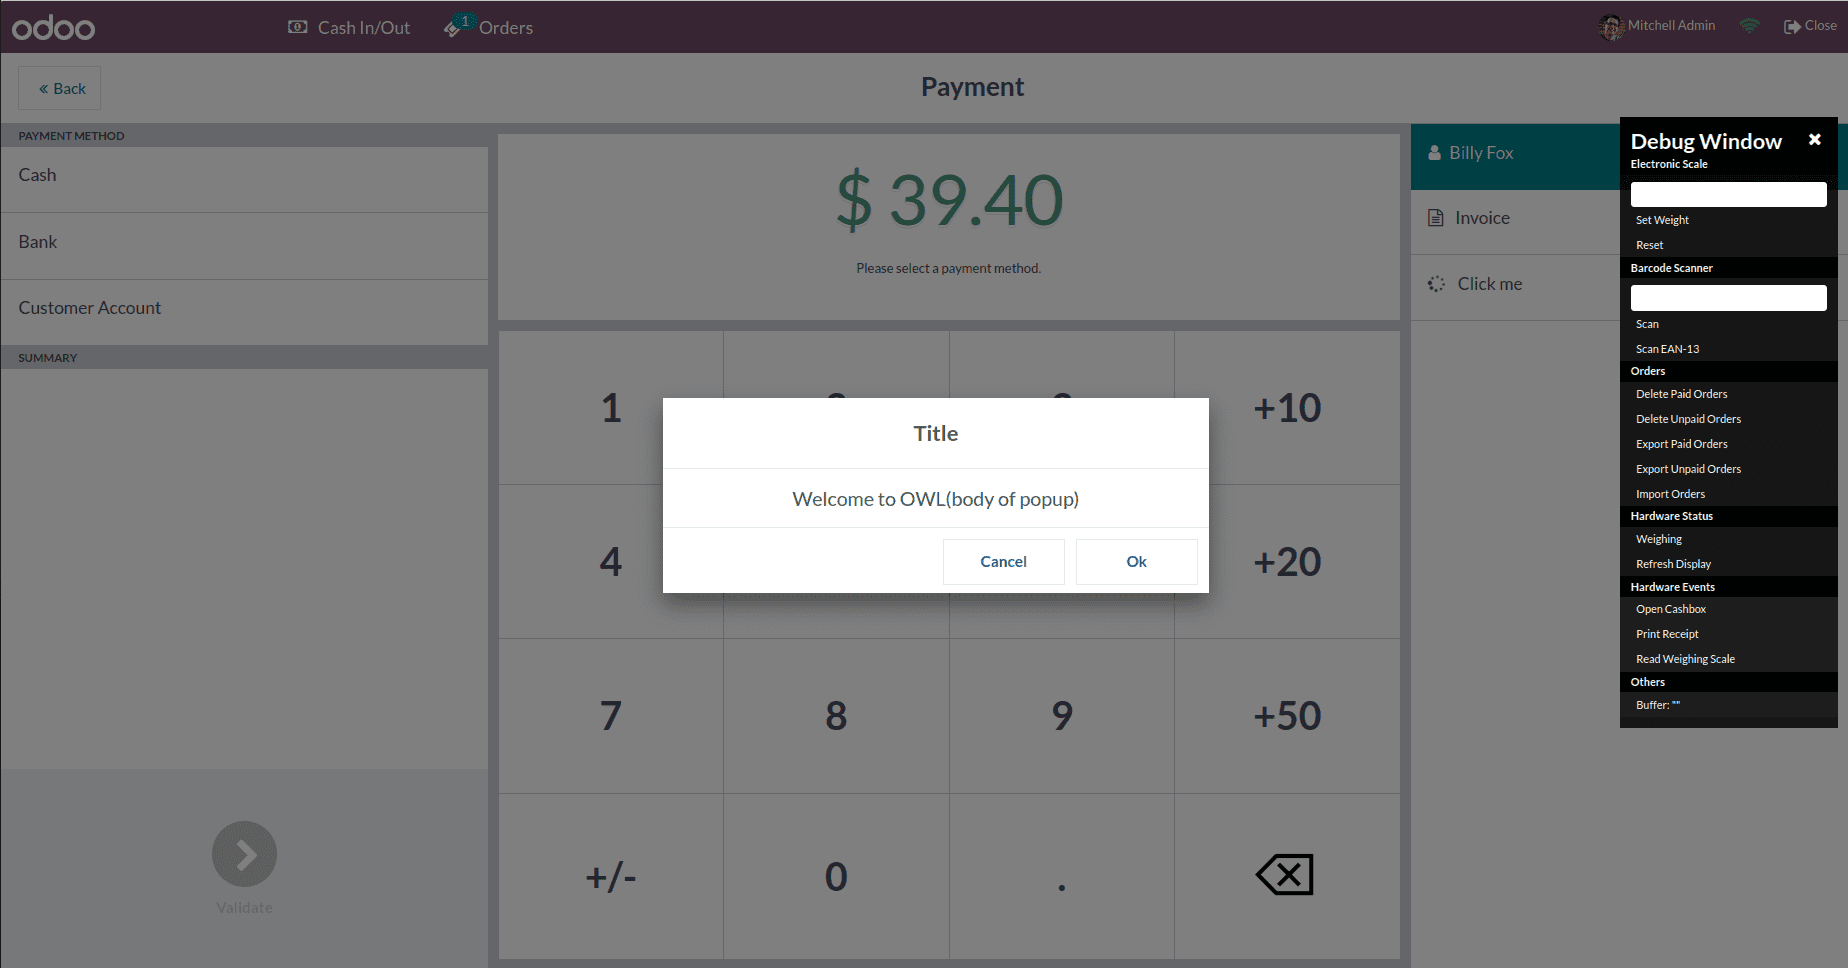
});The below image show when we click the button the popup action is generated.
This is how to add a custom button to the Product screen, Systray, and Payment screen. You can also add the button anywhere you like by choosing the location and providing the XPath. The point of sale. The assets files are loaded in the manifest files, and we can add the button using the JS and XML files.